...
- Home
- Installation and Configuration
- Current: Configuring the EmpowerID Web Server for SSL
| Div |
|---|
Home / Installation and Configuration Guide / Configuring EmpowerID / Current: Configuring the EmpowerID Web Server for SSL |
Because EmpowerID is a fully federated SSO, communication between EmpowerID and the Web Server is secure and occurs over SSL. This requires that the EmpowerID Web Server have a certificate issued by a trusted CA that matches the DNS of the server hosting the EmpowerID Web Service before any user can log in to EmpowerID from either the EmpowerID Management Console, Workflow Studio, or the EmpowerID Web application. In this topic we demonstrate how to configure the EmpowerID Web Server for SSL by adding a self-signed certificate to the EmpowerID Web site.
| Note |
|---|
Use self-signed certificates |
only |
for testing purposes or in situations where the EmpowerID server is not accessed publicly by computers outside of an internal domain. For public-facing production servers (accessed by non-domain computers), |
use a certificate issued by a widely trusted CA. |
To configure the EmpowerID Web server for SSL
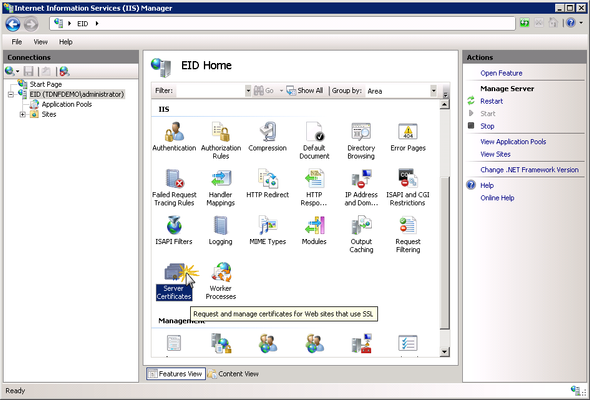
- From the EmpowerID web server, open IIS Manager.
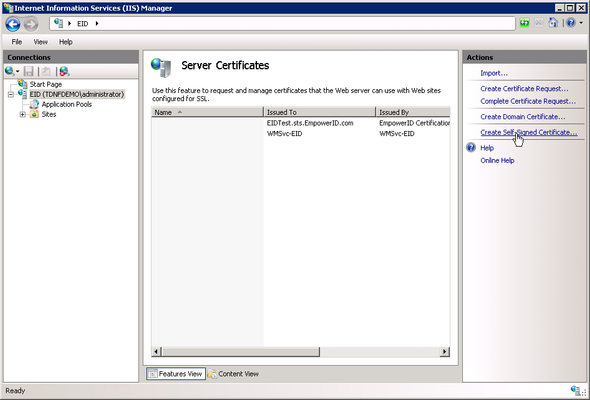
- In IIS Manager, select the EmpowerID server from the Connections pane and then double-click the Server Certificates icon under the IIS grouping in the Workspace pane.
- From the Actions pane, click Create Self-Signed Certificate.
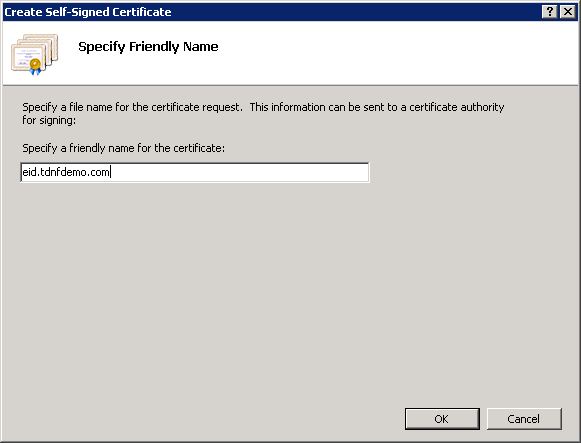
- In the Create Self-Signed Certificate window that appears, specify a friendly name for the certificate and then click OK.
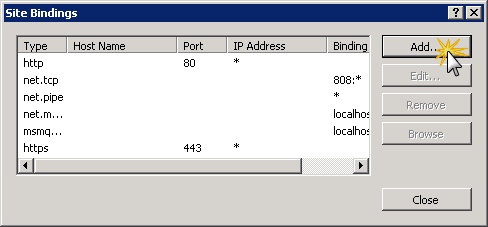
- From the Connections pane, select Default Web Site and then click Bindings in the Actions pane.

- In the Site Bindings window that appears, click the Add button.
- In the Add Site Binding window that appears, select https from the Type drop-down and then the certificate you just created from the SSL certificate drop-down so that the window looks similar to the following image.
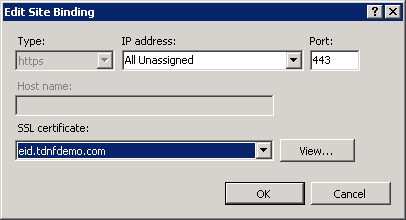
- Click OK to close the Add Site Binding window.
- Click Close to close the Site Bindings window.
| Info | ||||
|---|---|---|---|---|
| ||||