| Style | ||
|---|---|---|
| ||
...
| Info | |||||||||||||||||||||||||
|---|---|---|---|---|---|---|---|---|---|---|---|---|---|---|---|---|---|---|---|---|---|---|---|---|---|
| |||||||||||||||||||||||||
You must have a licensed corporate Office 365 account and connect it to EmpowerID. The Account Store that you connect it with must not have any spaces in the name. You must install the following modules in this order on the machine on which you configure the SSO Connection.
|
...
- After EmpowerID creates the application, click the Find Applications link in the breadcrumbs at the top of the page.
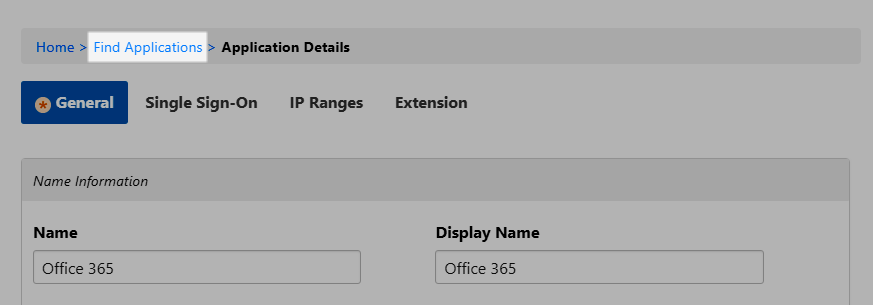
- Search for the Office 365 application you just created and click the Display Name link for it.

- This directs you to the View One page for the application. View One pages allow you to view and manage information about a particular resource object.

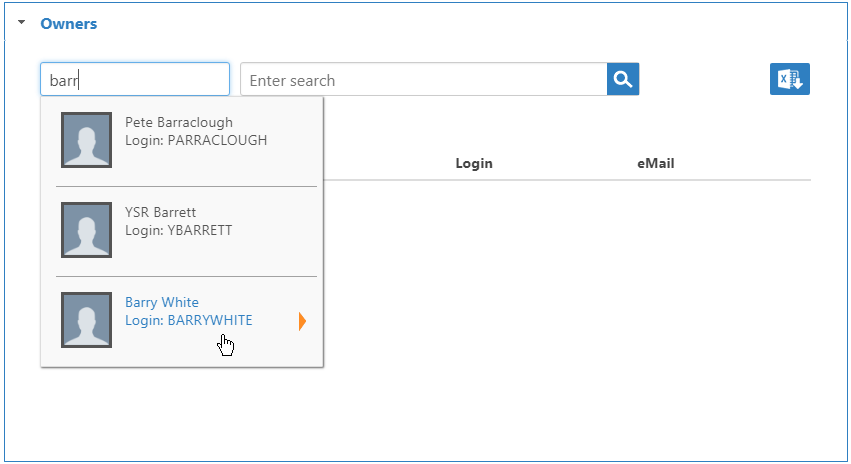
- To add owners who can manage the application, expand the Owners accordion, and in the Enter name to add field, enter a person's name and click the tile for that person.
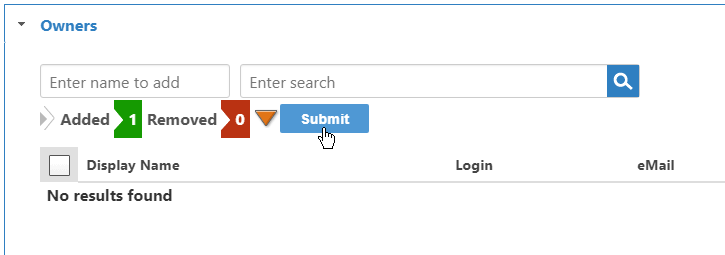
- The Added flag increments with the number of owners to add. Click Submit to add the owners to the grid.
- To ensure that all users with an Office 365 account can access the application, expand the Who Has Access To Application accordion and do the following:
- Drop down the Assignee Type and select Business Role and Location.
- Click the Add (+) button on the Assignee grid.

This opens the Grant Access dialog. Use this dialog to select the Business Role and Location for which you are granting access as well as the Access Level you are granting it.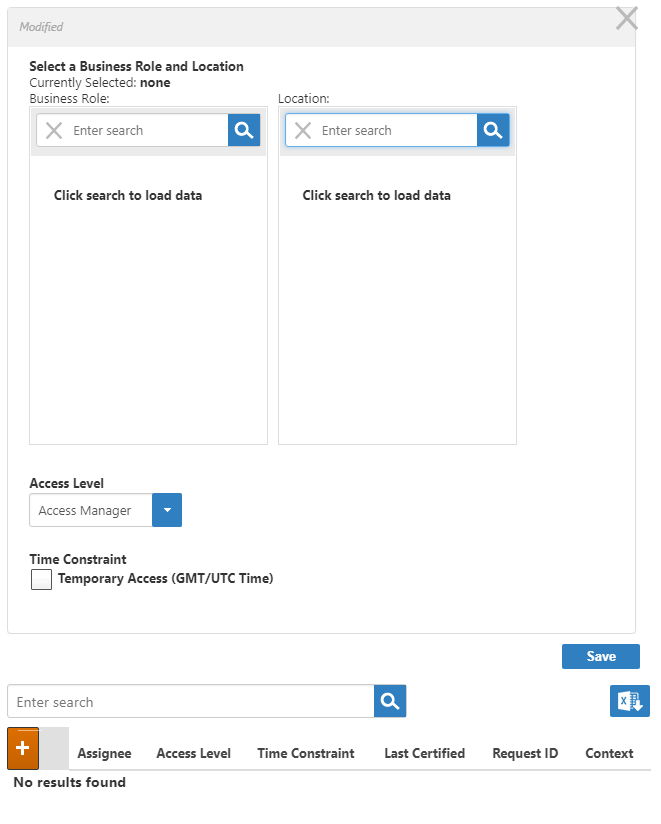
- In the Business Role pane of the Grant Access dialog, search for and select Any Role.
- In the Location pane of the Grant Access dialog, search for and select Anywhere.
- Select Viewer from the Access Level drop-down.
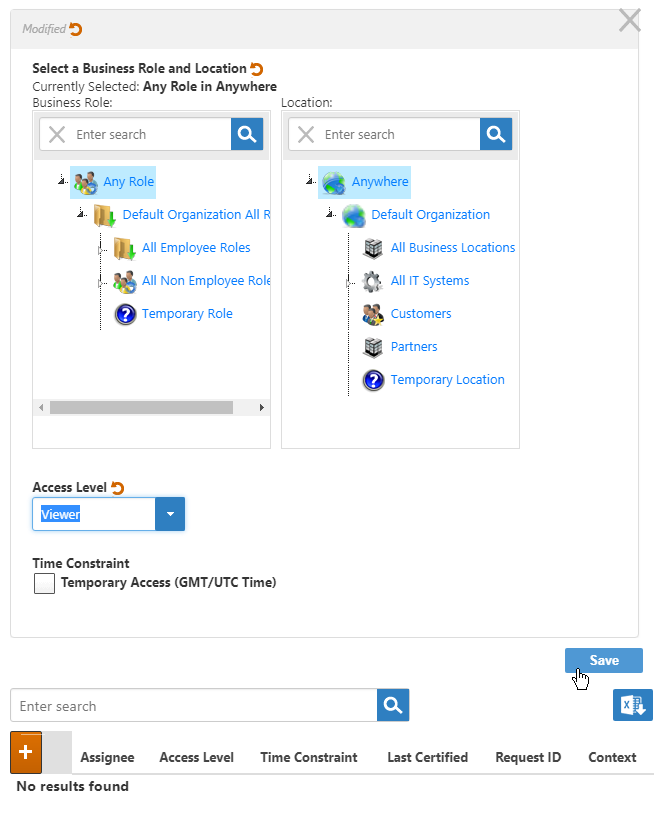
- Click Save.
Next, set the Public DNS for your server to match the domain name you are federating in Office 365 as described below. If the two already match you can skip ahead to Configuring a Trusted Endpoint for the SSL certificate used in your EmpowerID deployment.
To configure an EmpowerID server with a DNS Alias
This is an optional step that is only required when the DNS for your server and the domain name you registered in Office 365 are not the same. These values must match for SSL endpoints to function correctly. By setting a DNS, you are directing the EmpowerID services to ignore the machine's FQDN and use the Public DNS in its place.
- In the Navigation Sidebar, expand Admin, then EmpowerID Servers and Settings and click EmpowerID Servers.
- From the EmpowerID Server Details page, click the EmpowerID Servers tab and search for the server whose role you want to set.
- Click the Edit button for that server.
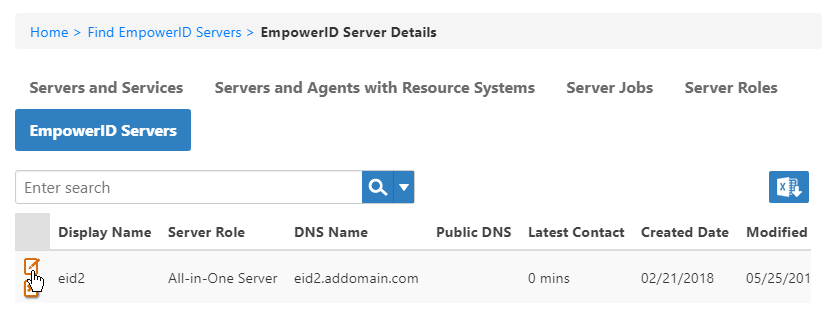
In the dialog that appears, enter the DNS Alias in the PublicDns field and click Save.
Info The value entered here must be found in the SSL Certificate (i.e., Subject Name, SAN Cert, etc.).
- Restart the EmpowerID services on that server.
To export the EmpowerID Certificate in base64-encoding format
- From the server with your certificate, open Manage computer certificates.
- Expand the Certificates - Local Computer node, then Personal, and click Certificates.
- Right-click the certificate you are using in your EmpowerID deployment and select All Tasks, then Export from the context menu.

- In the Certificate Export Wizard that appears, click Next.
- Select No, do not export the private key and click Next.

- Select Base-64 encoded X.509 (.CER) and click Next.

- Select an export location, naming the exported certificate and click Next.
- Click Finish to complete the export.
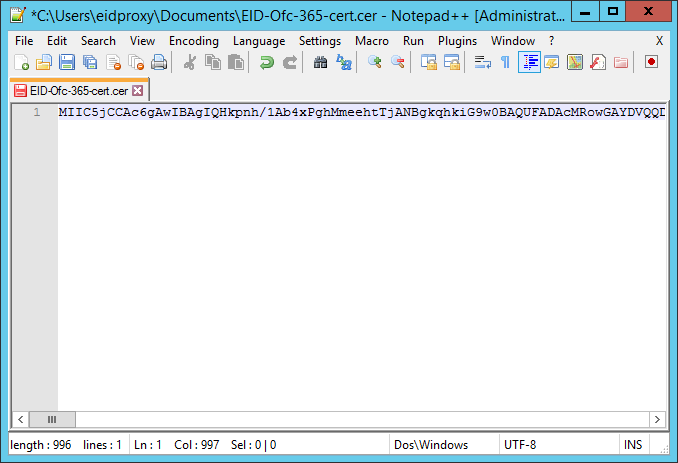
- Open the exported certificate in a text editor and remove the first and last lines:
----BEGIN CERTIFICATE----
----END CERTIFICATE----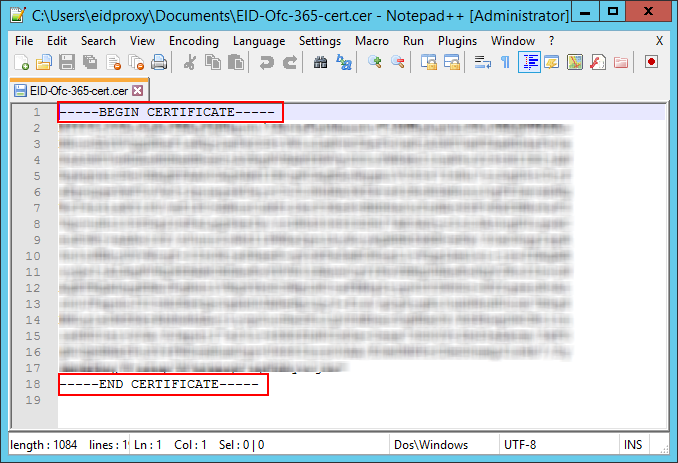
- Remove all spaces and line breaks so that the certificate appears on one line.
Next, establish trust between Office 365 and EmpowerID as described below.
To establish trust between Office 365 and EmpowerID
To connect to Microsoft Online, from the Start menu, open the Microsoft Azure Active Directory Module for Windows PowerShell command window and enter this command:
Code Block language powershell Connect-MsolService
- In the Sign in to your account window that appears, enter the email address of a global administrator of your Office 365 account and click Next, then enter the password and click Sign In.

Once you have connected, run the following command to set the ImmutableID on all Office 365 accounts that have the domain specified in the command. Be sure to replace YourDomainName with your domain name, e.g. empowersso.com.
Note This command is only necessary if the account was created in Office 365.Do not run this command if you are using DirSync.Code Block language powershell Get-MsolUser -DomainName YourDomainName | where {$_.ImmutableId -eq $null -OR $_.ImmutableId -eq ''} | Set-MsolUser -ImmutableId {[guid]::NewGuid().ToString()}Tip To get all licensed users and their immutable IDs, run this command:
Code Block language powershell Get-MsolUser -all | where {$_.isLicensed -eq $true} | select-object userprincipalname, immutableidNext, set the following variables at the PowerShell prompt for your domain, the federation endpoints and the signing certificate. The following example shows what the values for the variables looked like for our configuration. You need to replace the values with those specific to your environment. For example, the name of our domain is "empowersso.com," so the value of $dom and $FederationBrandName is "empowersso.com."
Code Block language powershell $dom = "empowersso.com" $FederationBrandName = "empowersso.com" $IssuerUri = "https://sso.empowersso.com/EmpowerIDWebIdPWSFederation/365/Office365" $ActiveLogOnUri = "https://sso.empowersso.com/EmpowerIDWebServices/Office365ActiveSTS.svc" $mex = "https://sso.empowersso.com/EmpowerIDWebServices/Office365ActiveSTS.svc/mex" $LogOffUri = "https://sso.empowersso.com/EmpowerIDWebIdPWSFederation/365/Office365" $PassiveLogOnUri = "https://sso.empowersso.com/EmpowerIDWebIdPWSFederation/365/Office365" $cert = "MIIC5jCCAc6gAw..............QKgUSV0rciLpDOYiqAwbP6D"
Info The values for the ActiveLogOnUri, LogOffUri, and PassiveLogOnUri are the same and point to the Issuer you set up when you created the WS-Fed connection above. The value set for the IssuerURI does not need to be a resolvable DNS; however, it does need to be unique in Office 365 as an IssuerURI cannot be used for more than one connection/tenant . Also, when setting the value for the certificate, be sure to pass in the string without any line breaks, using Base-64 encoding.
Note If you received a DefaultDomainUnsetException error when running the above PowerShell cmdlet, you need to specify the domain as the default domain. To fix the error run the below cmdlet. Additionally, you will need to run the cmdlet each time you add a tenant to set the default domain for those tenants. Be sure to replace "littleblueberry.onmicrosoft.com" with the fully qualified domain name your Office 365 account was given by Microsoft when first created.
Code Block language powershell set-msoldomain -name littleblueberry.onmicrosoft.com -IsDefault
Use the cmdlet below to set the Federation Authentication Mode to WS-Fed for the Office 365 domain. Enter the cmdlet as one line.
Code Block language powershell Set-MsolDomainAuthentication -DomainName $dom -FederationBrandName $dom -Authentication Federated -PassiveLogOnUri $PassiveLogOnUri -SigningCertificate $cert -IssuerUri $IssuerUri -ActiveLogOnUri $ActiveLogOnUri -MetadataExchangeUri $mex -LogOffUri $LogOffUri
Info If necessary, you can revert the domain from federated to managed by using the following PowerShell cmdlet.
Code Block language powershell Set-MsolDomainAuthentication -DomainName $dom -Authentication Managed
Use the following cmdlet to update the Office 365 Domain with the federation settings. Enter the cmdlet as one line.
Code Block language powershell Set-MsolDomainFederationSettings -DomainName $dom -FederationBrandName $dom -IssuerUri $IssuerUri -LogOffUri $LogOffUri -PassiveLogOnUri $PassiveLogOnUri -ActiveLogOnUri $ActiveLogOnUri -MetadataExchangeUri $mex -SigningCertificate $cert
Run the following cmdlet to verify your settings:
Code Block language powershell MSOnlineExtended\Get-MsolDomainFederationSettings
Run the following cmdlet to retrieve the Open Authorization (OAuth) configuration settings currently in use in your organization:
Code Block language powershell Get-CsOAuthConfiguration
Run the following cmdlet to enable Modern Authentication:
Code Block language powershell Set-CsOAuthConfiguration -ClientAdalAuthOverride Allowed
Run the following cmdlet to close your session:
Code Block language powershell Get-PSSession|Remove-PSSession
| Info |
|---|
If you are using Skype for Business, please see the Configuring Skype for Business Online topic for instructions. |
To test the Office 365 SSO Connection
- From your Web browser navigate to the login for Office 365 and enter your username.
- Click the Password field. A message appears stating that Office 365 is redirecting you to your organization's sign-in page.
- Log in to the EmpowerID Web application as you normally would. The username is the same as that used for accessing Office 365.
- EmpowerID verifies your identity and redirects you to Office 365.
...