If you have user and group data you want to manage in EmpowerID, but that data is in an application that is not connected to EmpowerID—and for which you do not want to create a connector—you can do so by creating a "tracking-only" account store to represent that application in EmpowerID and then import the data from that application to the tracking-only account store in delimited flat file format.
EmpowerID provides three workflows for each aspect of this type of situation.
- Create Accounts from File workflow for importing user accounts
- Create Groups from File workflow for importing groups
- Create Group Accounts from File workflow for importing group memberships
When initiated, each of these workflows reads the flat file you upload and pulls from that file the necessary information to create the corresponding objects and object relationships in EmpowerID, adding those objects (user accounts and groups) and relationships (group membership) to the specified account store if they don't already exist in the account store. If EmpowerID finds that the account store already has an account or a group or a group membership that matches one or more records in the flat file, it ignores that particular record or records. This ensures that duplicate accounts, groups and group memberships are not created.
| Info |
|---|
Once the user and group data has been added to the account store you create for the application, you can manage and audit it as you would any other type of user and group information. The only difference is that changes you make to those accounts and groups in EmpowerID are not reflected in the source application. Thus, to keep data changes in sync, any changes you make in EmpowerID need to be made in the application. |
This topic demonstrates how to import users and groups from file to EmpowerID.
| Info | ||
|---|---|---|
| ||
1. Create a "tracking-only" account store in EmpowerID for the application containing the user and group data. This type of account store is internal to EmpowerID and is where EmpowerID places the user accounts and groups you import. This allows you to manage those accounts and groups from the representation of the application. For information on creating a tracking-only account store, see Creating Tracking-Only Applications. 2. Have the user and group data you want to import in three separate delimited files:
Each file must have a certain number of fields that correspond to the EmpowerID object you are creating. These fields, listed by EmpowerID object type, are as follows: User Account: Name, Logon Name, Friendly Name Group: Name, Logon Name, Friendly Name Group Membership: Account Logon Name, Group Logon Name These fields do not have to be named as such in the flat file. They must, however, be able to map to those fields in EmpowerID. Besides these fields, the flat files can have any number of additional fields. If a corresponding field exists in EmpowerID, map them when importing. If the fields do not have a corresponding field in EmpowerID, ignore them. This is all demonstrated below. |
To import user accounts
- In the Navigation Sidebar, expand Applications and click Manage Applications.
- In Application Manager, search for the "tracking-only" application for which you want to import user accounts, click the record returned for the application and then click the Edit action in the Actions pane.
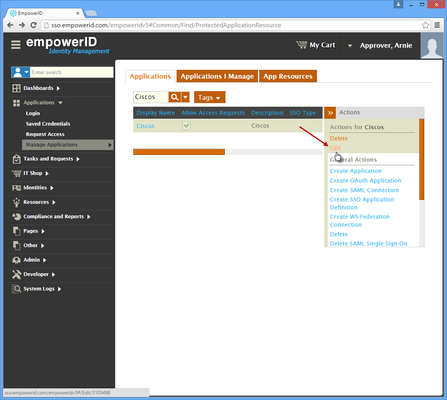
This opens the Edit page for the application. Among other things, this page allows you to add users and groups to the application.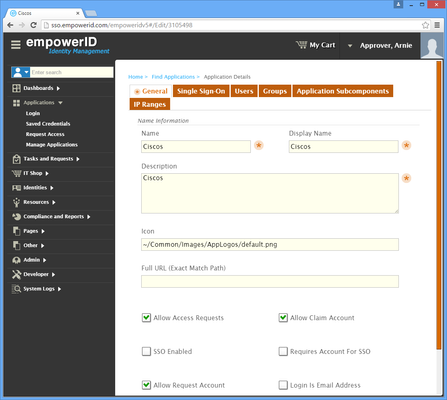
From the Edit page, click the Users tab and then click the Import Users From CSV link located at the top of the page.
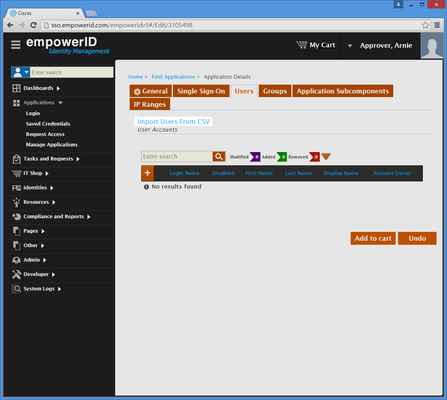
This initiates the Create Accounts From File workflow.
Tip The field headers for this information in the flat file can be named anything, as long as you map them to the corresponding fields in EmpowerID.
- In the workflow form, type the field delimiter for the flat file in the Delimiter field. Comma is the default.
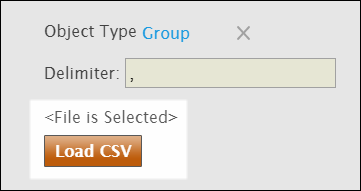
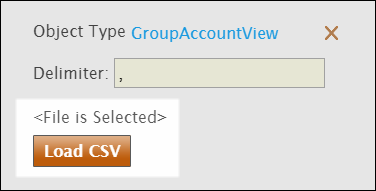
- Click Choose File and select the file with the user accounts you wish to import. Once you have selected a file, the Choose File button is replaced with "file selected" text and the Load CSV button becomes active.
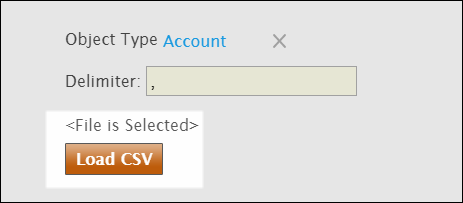
- Click the Load CSV button.
The form updates to display the data in the flat file. The column headers are shown in the text above the drop-downs, while the records are shown in the grid.
Map each of the required fields from the imported data to the appropriate EmpowerID account field. To do so, type the name of the required field in the drop-down below your related headers and then click the field to select it. For accounts, these fields are Name, LogonName, and FriendlyName.
In our example, we have imported data with the account logon name listed under the Logon header. As this header does not match the Logon Name field for the component in EmpowerID, we need to map it before submitting the workflow.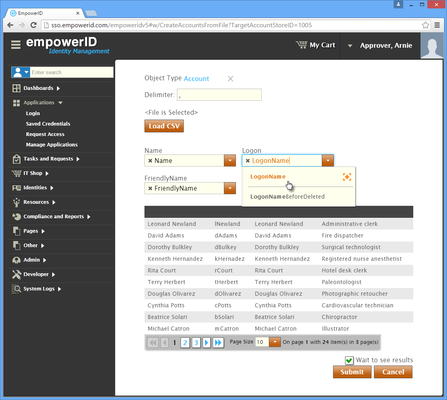
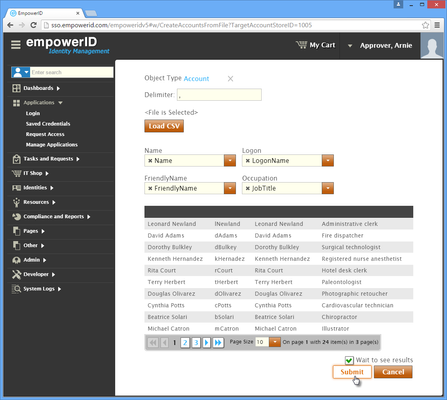
Info If the column headers in your flat file already match the required fields, you do not need to map them as the workflow does it for you. Additionally, if a field in the flat file does not have a corresponding account field in EmpowerID, the workflow ignores them. For example, in our imported data, each user has an occupation (see the above image). As EmpowerID does not provide an Occupation field for accounts, that field is marked with the Ignore flag.
- Once you have completed your mapping, click Submit.
- After EmpowerID imports the users, return to Edit page for the application and click the Users tab to verify that the users are added to the application.

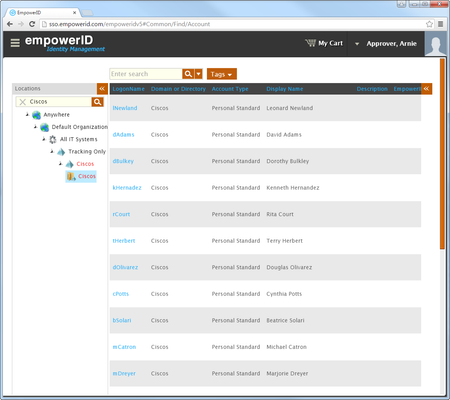
- As mentioned above, you can manage the imported user accounts as you would any other accounts. You can search for them, update them and delete them in EmpowerID. For example, from the Navigation Sidebar, expand Identities and click User Accounts.
- In the Locations pane of Account Manager, type the name of the tracking-only application in the search field and then click the node for the application and verify that all of the user accounts you just imported are listed.
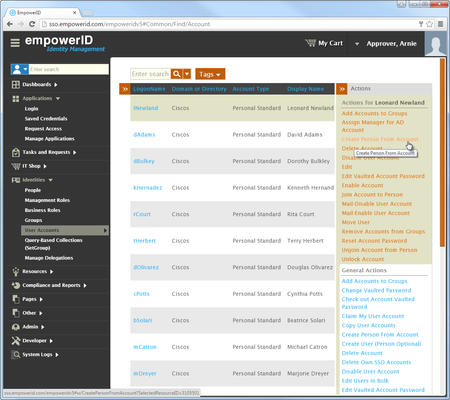
- Click a record to select it. You should see a list of possible actions that you can perform against the account in the Actions pane. For example, if you click the Create Person from Account action, EmpowerID creates an EmpowerID Person and links that person to the account.
You will then be able to see the linked person in the account record, as shown by the EmpowerID Logon field in the Account Details page, as shown by the below image. The account shown in the image is one of the accounts we imported in our example and executed the Create Person from Account action (workflow) against.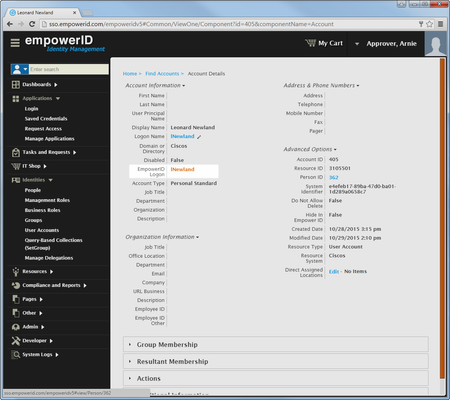
If you click the EmpowerID Logon field, EmpowerID directs you to the View page for the person. This page allows you to view information about that person and manage that information as needed.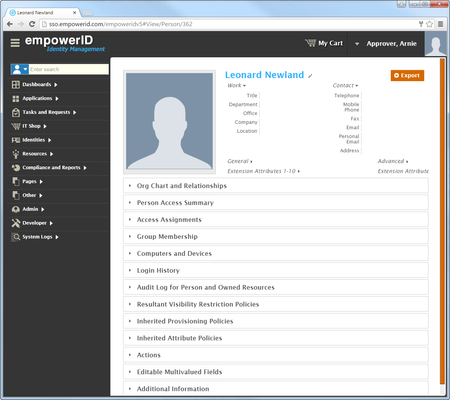
For example, expanding the Editable Multivalued Fields accordion allows you to view any user accounts owned by the person. For this person, we can see that the user account belongs to the tracking-only account store we created for the application.
To import groups
- In the Navigation Sidebar, expand Applications and click Manage Applications.
- Search for the "tracking-only" application for which you want to import groups, click the record returned for the application and then click the Edit action in the Actions pane.
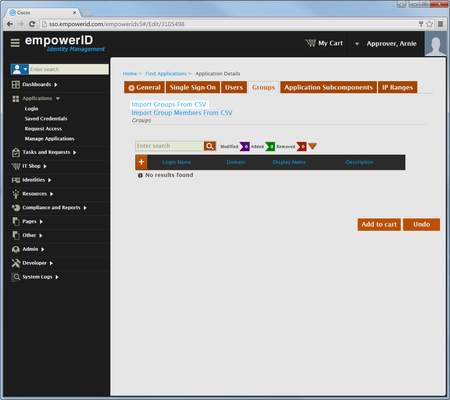
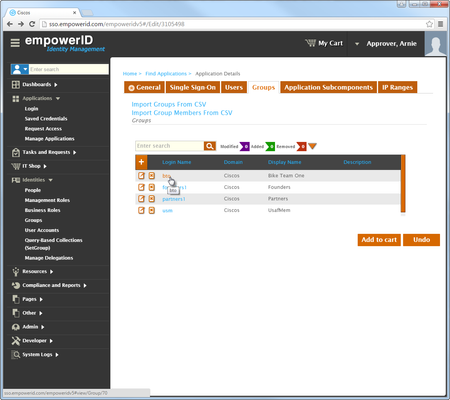
This opens the Edit page for the application. Among other things, this page allows you to add users and groups to the application. From the Edit page, click the Groups tab and then click the Import Groups From CSV link located at the top of the page.
This initiates the Create Groups From File workflow.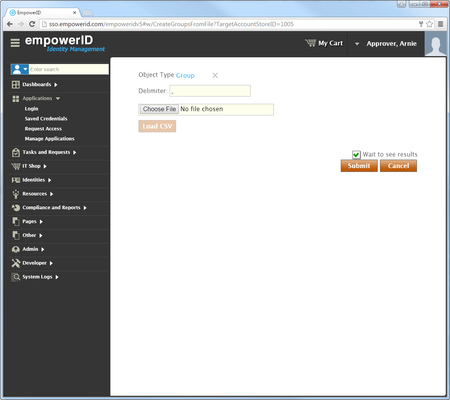
Tip The field headers for this information in the flat file can be named anything as long as you map those field headers to the corresponding fields in EmpowerID.
- In the workflow form, type the field delimiter for the flat file in the Delimiter field. Comma is the default.
- Click Choose File and select the file with the groups you wish to import. Once you have selected a file, the Choose File button is replaced with "file selected" text and the Load CSV button becomes active.
- Click the Load CSV button.
The form updates to display the data in the flat file. The column headers are shown in the text above the drop-downs, while the records are shown in the grid.
- Map each of the required fields from the imported data to the appropriate EmpowerID account field. To do so, type the name of the required field in the drop-down and then click the field to select it. For groups, these fields are Name, LogonName, and FriendlyName.
In our example, we have imported data with the group logon name listed under the Logon header. As this header does not match the LogonName field for the group component in EmpowerID, we need to map it before submitting the workflow.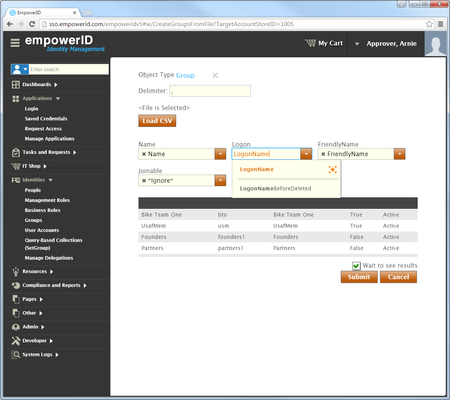
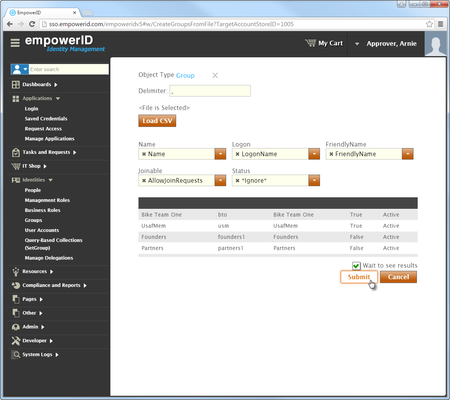
Map any additional fields from the flat file, if any, to their corresponding EmpowerID fields. In our example, we have a flat file field named Joinable. That field maps to the AllowJoinRequests field in EmpowerID. Note that this field is a boolean, with true representing true and false representing false. When importing a boolean fields, be sure the data in your file reads true and false and not yes and no or an error will occur.
Info If the column headers in your flat file already match the required fields, you do not need to map them as the workflow does it for you. Additionally, if a field in the flat file does not have a corresponding group field in EmpowerID, the workflow ignores them. For example, in our imported data, each group has a status (see the above image). As EmpowerID does not provide an Status field for groups, that field is marked with the Ignore flag.
- Once you have completed your mapping, click Submit.
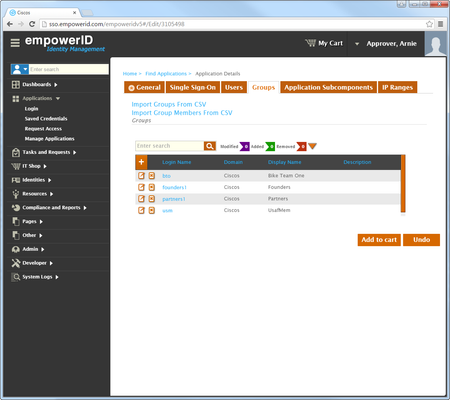
- After EmpowerID imports the users, return to Edit page for the application and click the Groups tab once again. You should see that the groups have been added to the application.
To import group memberships
- In the Navigation Sidebar, expand Applications and click Manage Applications.
- Search for the "tracking-only" application for which you want to import group memberships, click the record returned for the application and then click the Edit action in the Actions pane.
This opens the Edit page for the application. Among other things, this page allows you to add users and groups to the application. - From the Edit page, click the Groups tab and then click the Import Group Members From CSV link located at the top of the page.
This initiates the Create Group Accounts From File workflow.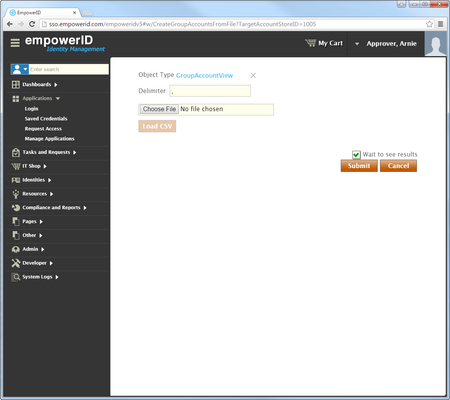
- In the workflow form, Type the field delimiter for the flat file in the Delimiter field. Comma is the default.
- Click Choose File and select the file with the user information you wish to import. Once you have selected a file, the Choose File button is replaced with the Load CSV button.
- Click the Load CSV button.
The form updates to display the data in the flat file. The column headers are shown in the text above the drop-downs, while the records are shown in the grid.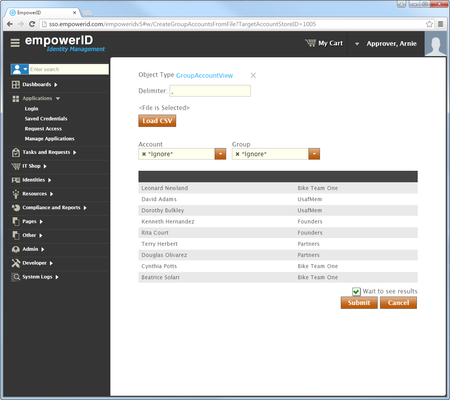
Map each of the required fields from the imported data to the appropriate EmpowerID account field. To do so, type the name of the required field in the drop-down and then click the field to select it. For group memberships, these fields are Account_LogonName for the user account, and Group_LogonName for the group.
In our example, we have imported data with the account logon name listed under the Account header and the group logon name under the Group header. As these headers do not match the required fields, we need to map them before submitting the workflow.
Info If the column headers in your flat file already match the required fields, you do not need to map them as the workflow does it for you.
- Once you have completed your mapping, click Submit.

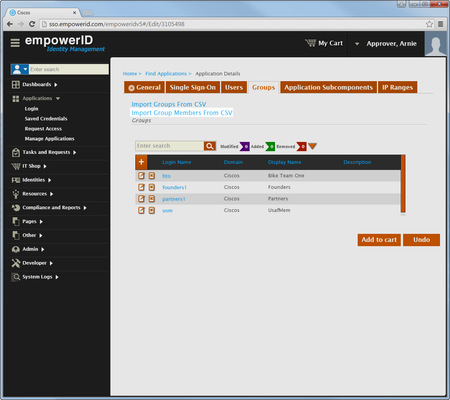
- After EmpowerID imports the group memberships, click the Groups tab on the Application Edit page and then click one of the group records.
This directs you to the View page for the group. This page allows you to view and manage the group as needed.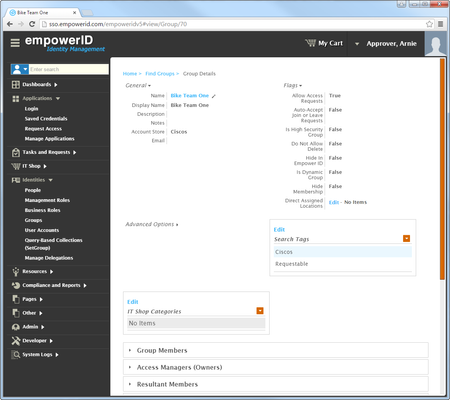
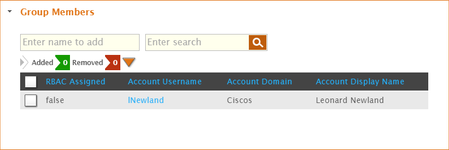
- Expand the Group Members accordion. You should any accounts you just added to the group appear as member records.
| Info | ||||
|---|---|---|---|---|
| ||||
| Div | ||||||||||||||||||||||||
|---|---|---|---|---|---|---|---|---|---|---|---|---|---|---|---|---|---|---|---|---|---|---|---|---|
| ||||||||||||||||||||||||
|