| Insert excerpt |
|---|
| Google Apps |
|---|
| Google Apps |
|---|
| nopanel | true |
|---|
|
| Insert excerpt |
|---|
| Amazon Web Services |
|---|
| Amazon Web Services |
|---|
| nopanel | true |
|---|
|
EmpowerID Box connector allows organizations to bring the user and group data in their Box system to EmpowerID, where it can be managed and synchronized with data in any connected back-end user directories. Once connected, you can manage this data from EmpowerID in the following ways:
- Account Management
- Inventory Box user accounts
- Create, Update and Delete Box user accounts
- Enable and Disable Box user accounts
- Group Management
- Inventory Box groups
- Inventory Box group memberships
- Create and Delete Box groups
- Add and Remove members to and from Box groups
- Attribute Flow
Users in Box are inventoried as accounts in EmpowerID. The below table shows the attribute mappings of Box user attributes to EmpowerID Person attributes.
| Div |
|---|
|
| Box Attribute | Box Table | Corresponding EmpowerID Attribute | Description |
|---|
| name | User | Name | Name of the user | | FirstName | User | FirstName | First name of the user | | LastName | User | LastName | Last Name of the user | | DisplayName | user | FriendlyName | Display name of the user | | login | User | Login | Login of the user | | status | User | Active | Specifies whether the user is active | | CompanyName | User | Company | Company name of the user | | Description | User | Description | Description of the user | | Language | User | PreferredLanguage | Language of the user | | Job_title | User | Title | Title of the user | | Phone | User | Telephone | Phone number of the user |
|
Additionally, EmpowerID provides Provisioning policies or Resource Entitlements that allow you to automatically provision Box accounts for any person within your organization based on your policy requirements.
| Info |
|---|
|
In order to connect EmpowerID to Box, the following prerequisites need to be met: - Your organization must have an enterprise Box account.
- You must supply the credentials for the Box administrator account. EmpowerID uses this account as a connection proxy to manage Box on your behalf.
|
| Insert excerpt |
|---|
| Active Directory |
|---|
| Active Directory |
|---|
| nopanel | true |
|---|
|
This topic demonstrates how to connect EmpowerID to Box and is divided into the following activities:
| Anchor |
|---|
| registerempowerid |
|---|
| registerempowerid |
|---|
|
To register EmpowerID as an application in Box
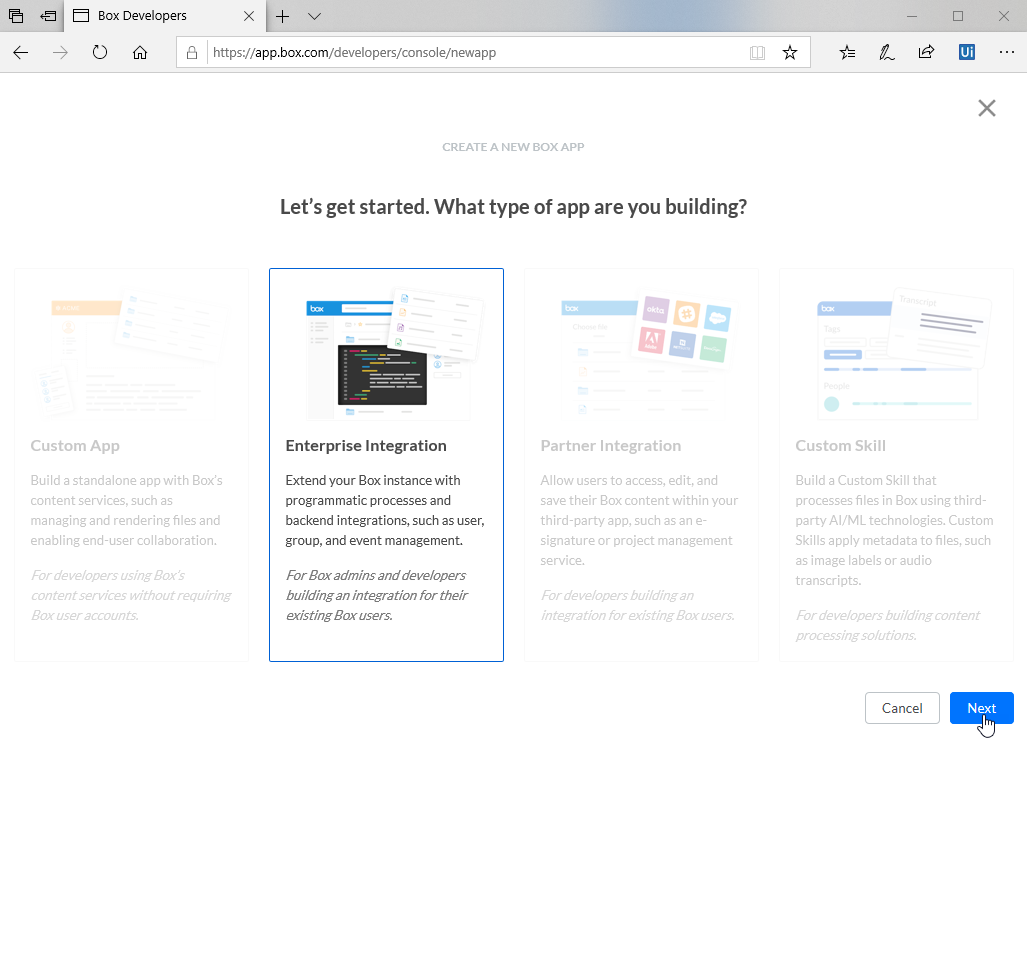
- Login in https://app.box.com/developers/console.
- Click Dev Console and then click Create New App.
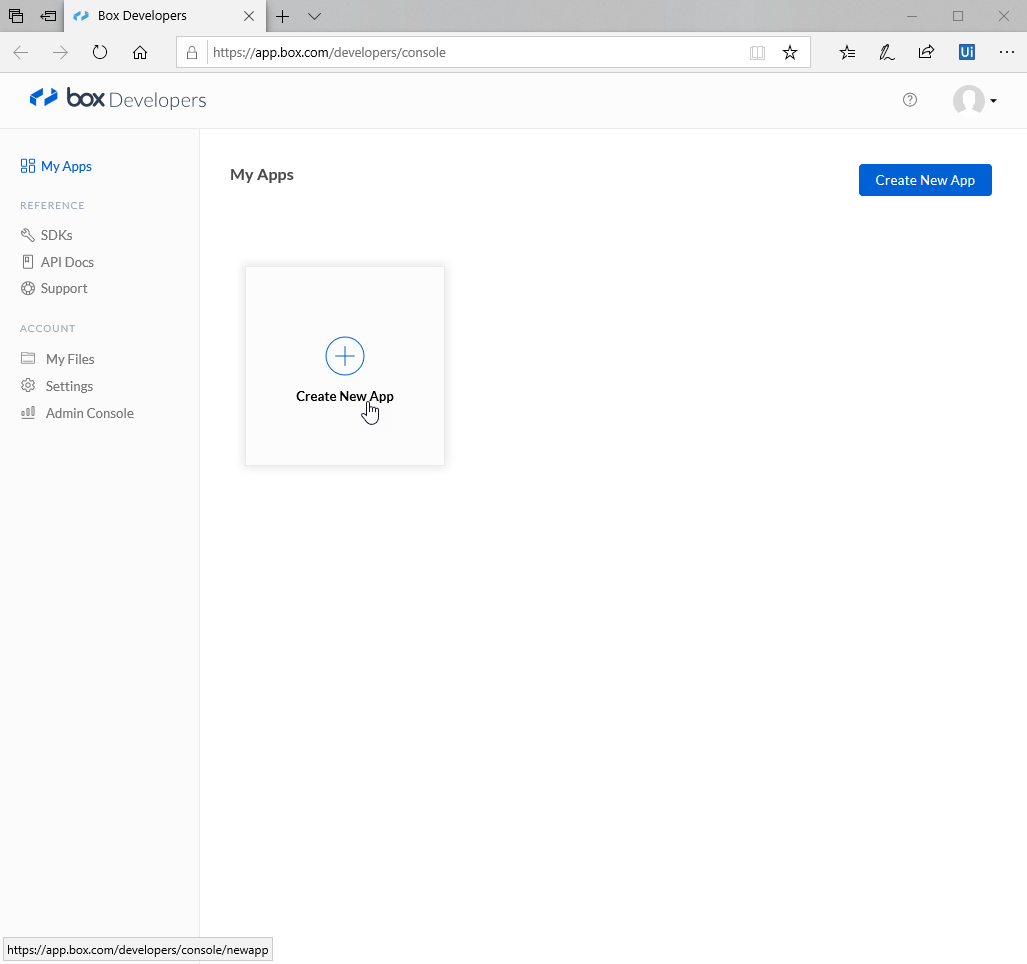
- Select Enterprise Integration and click Next.
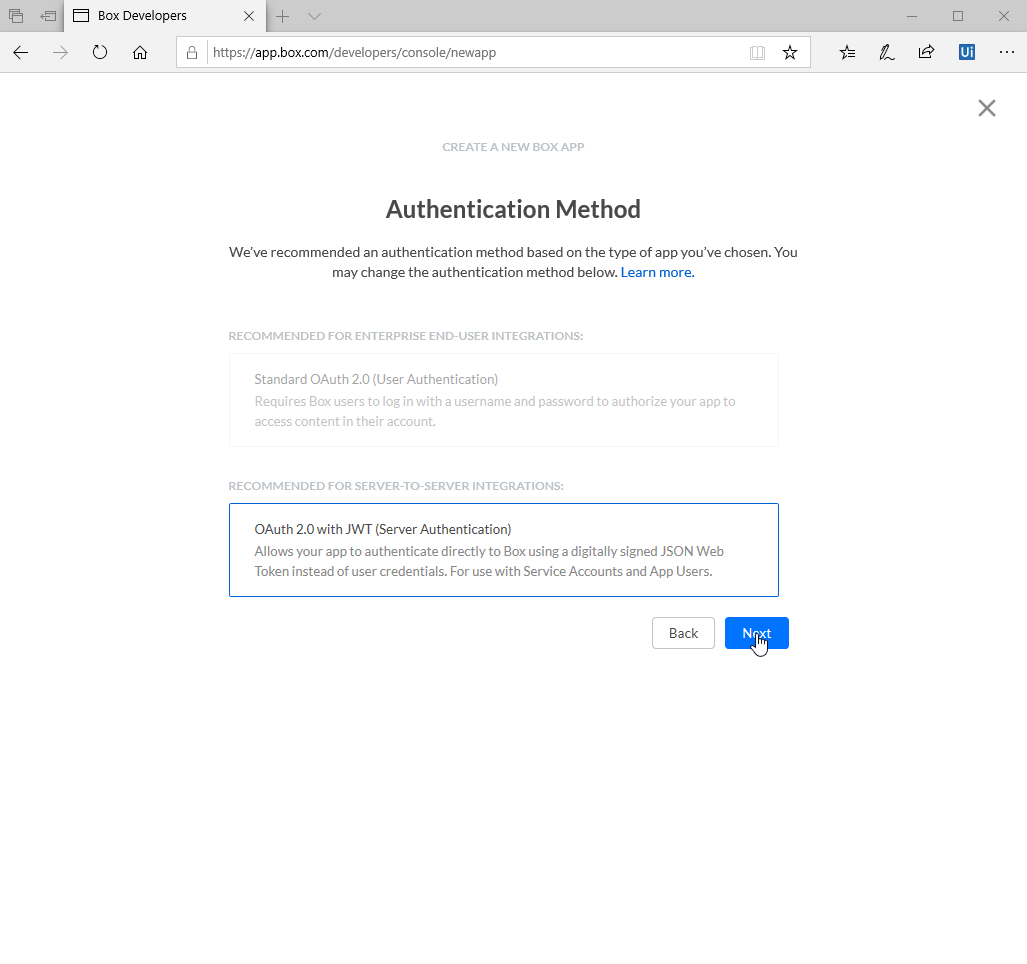
- On the Authentication Method page, select OAuth 2.0 with JWT (Server Authentication) and then click Next.
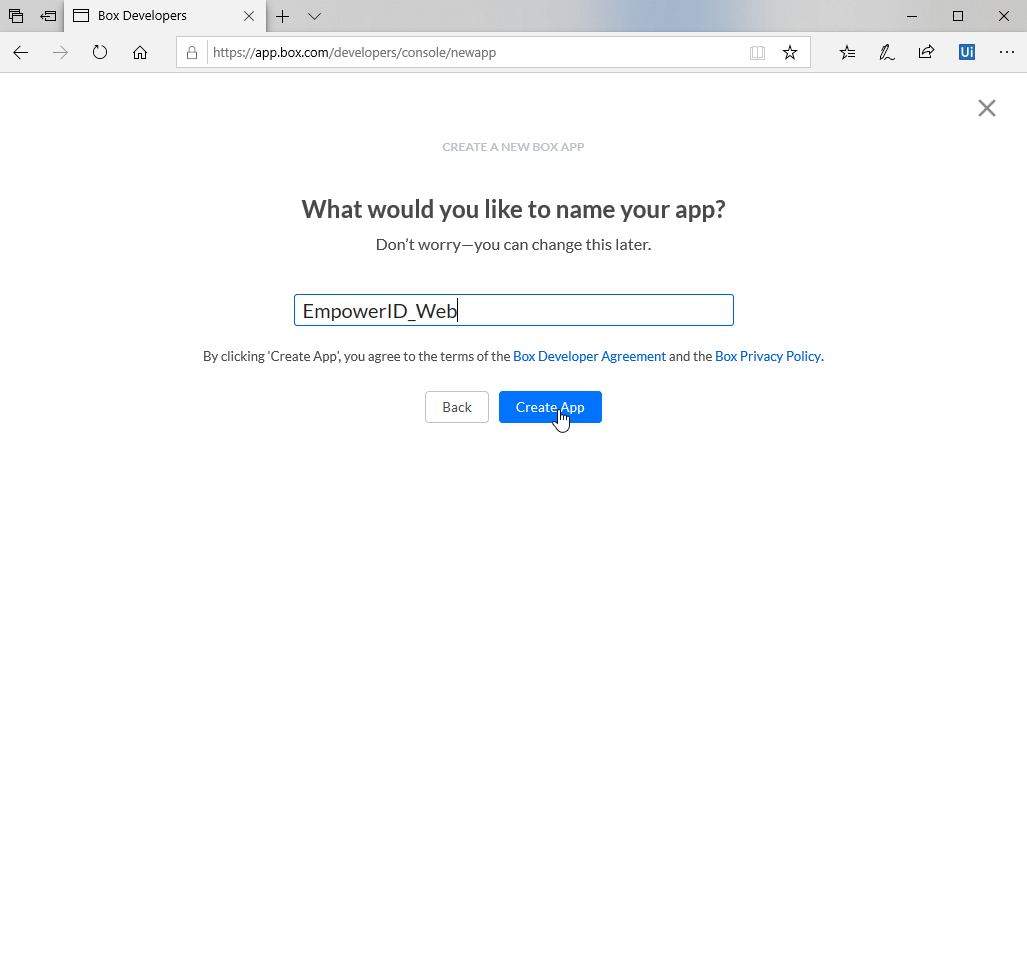
- Name the app and then click Create App.
Box creates the app and generates developer token.
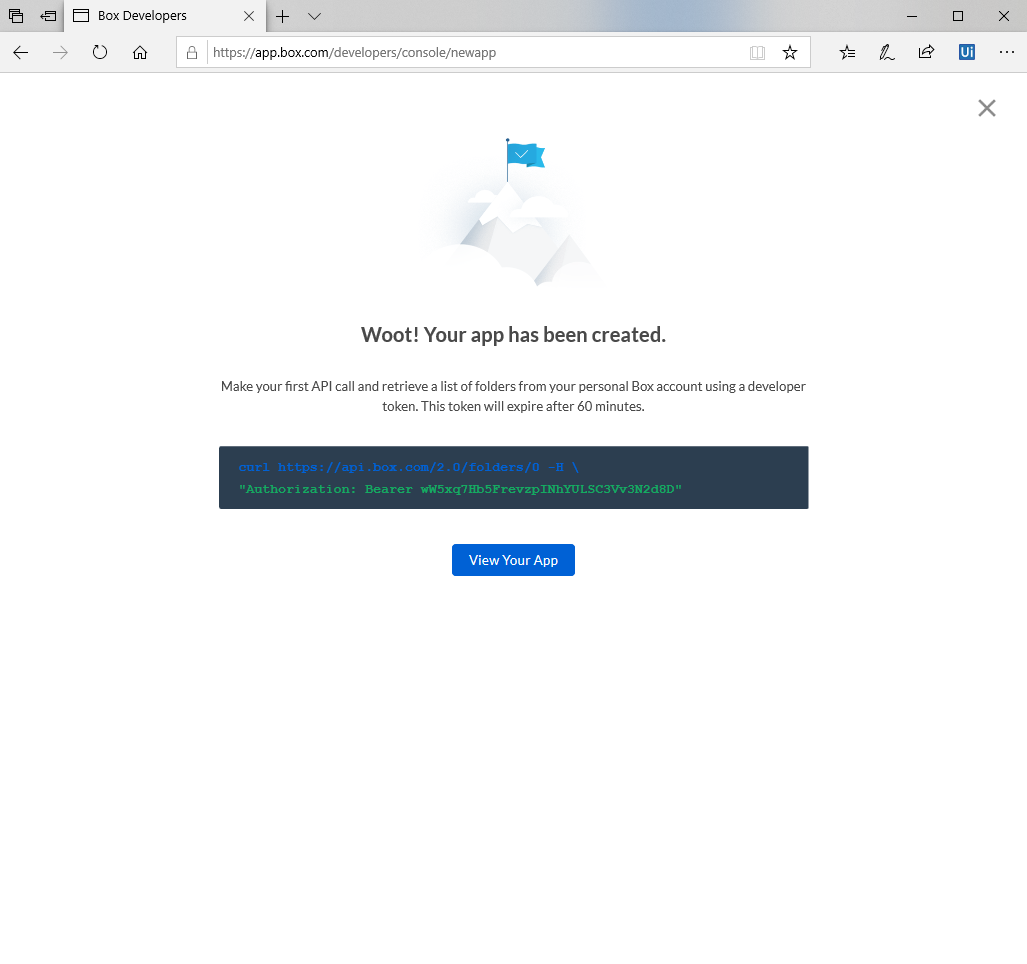
Click View Your App.
This directs you to the Configuration page.
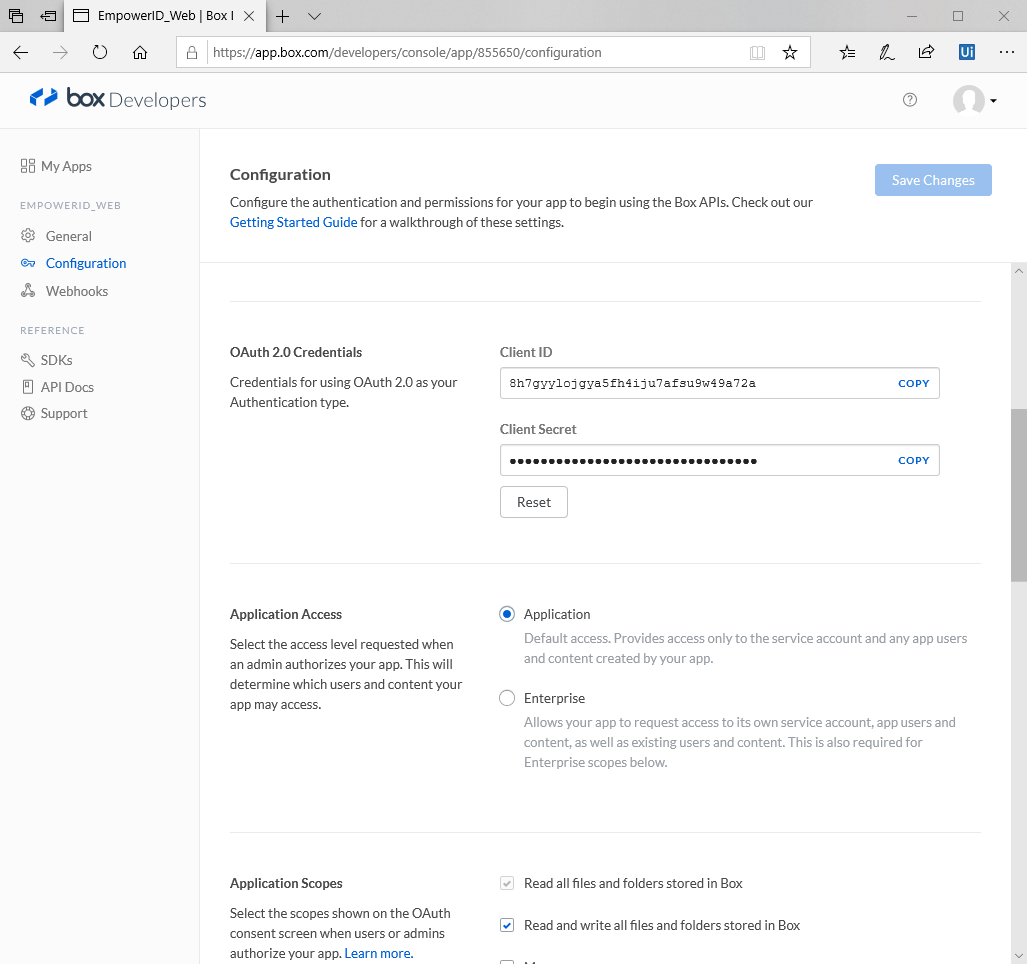
- Under Application Access, select Enterprise.

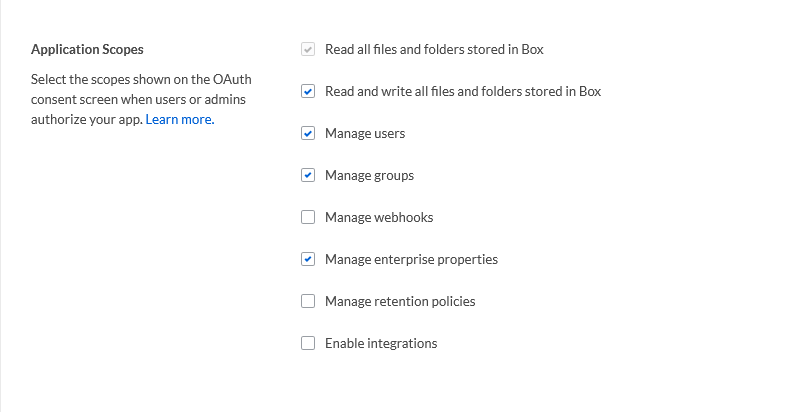
- Under Application Scopes, select the options shown below.
- Under Advanced Features, select Perform Action as Users and Generate User Access Tokens.
Under Add and Manage Public Keys, click Generate a Public/Private Keypair.
| Info |
|---|
When you click Generate a Public/Private Keypair, Box will send a Verification code to the mobile number linked to the account. To use this feature, Two-factor authentication must be enabled on Box. |
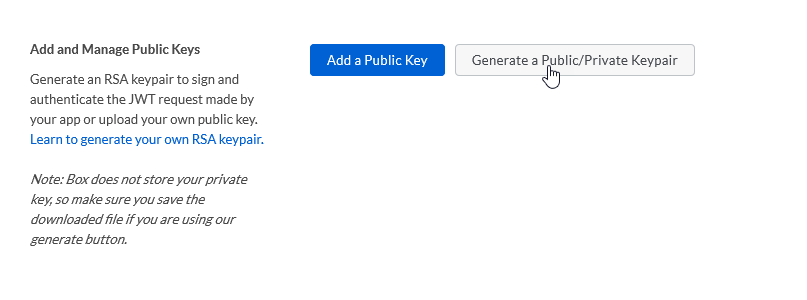
- Enter the code sent to your mobile number.
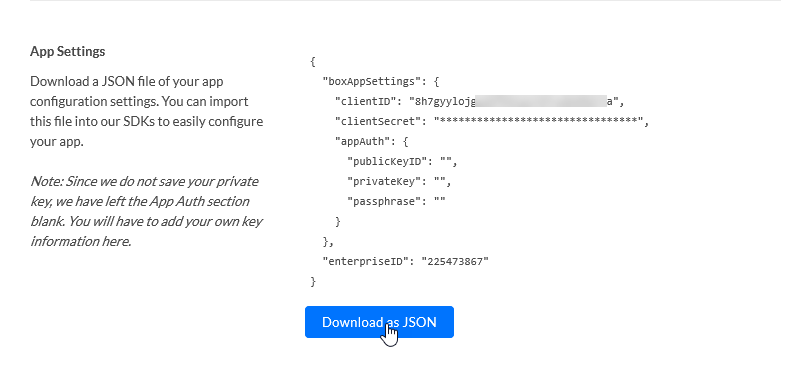
- Back on the Configuration page, under App Settings, click Download as JSON.
- Save your changes and then point your browser to https://app.box.com.
- Select Admin Console from sidebar.
- Select Enterprise Settings and then click the Apps tab.
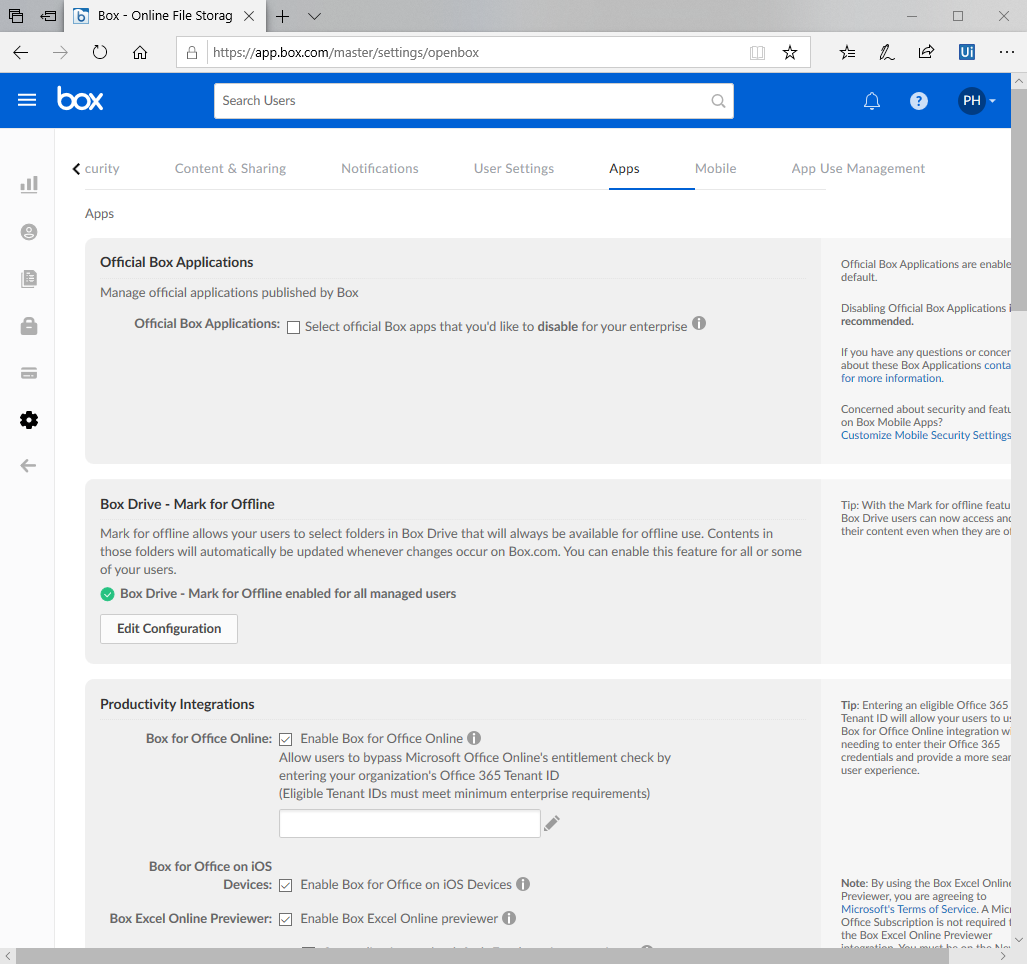
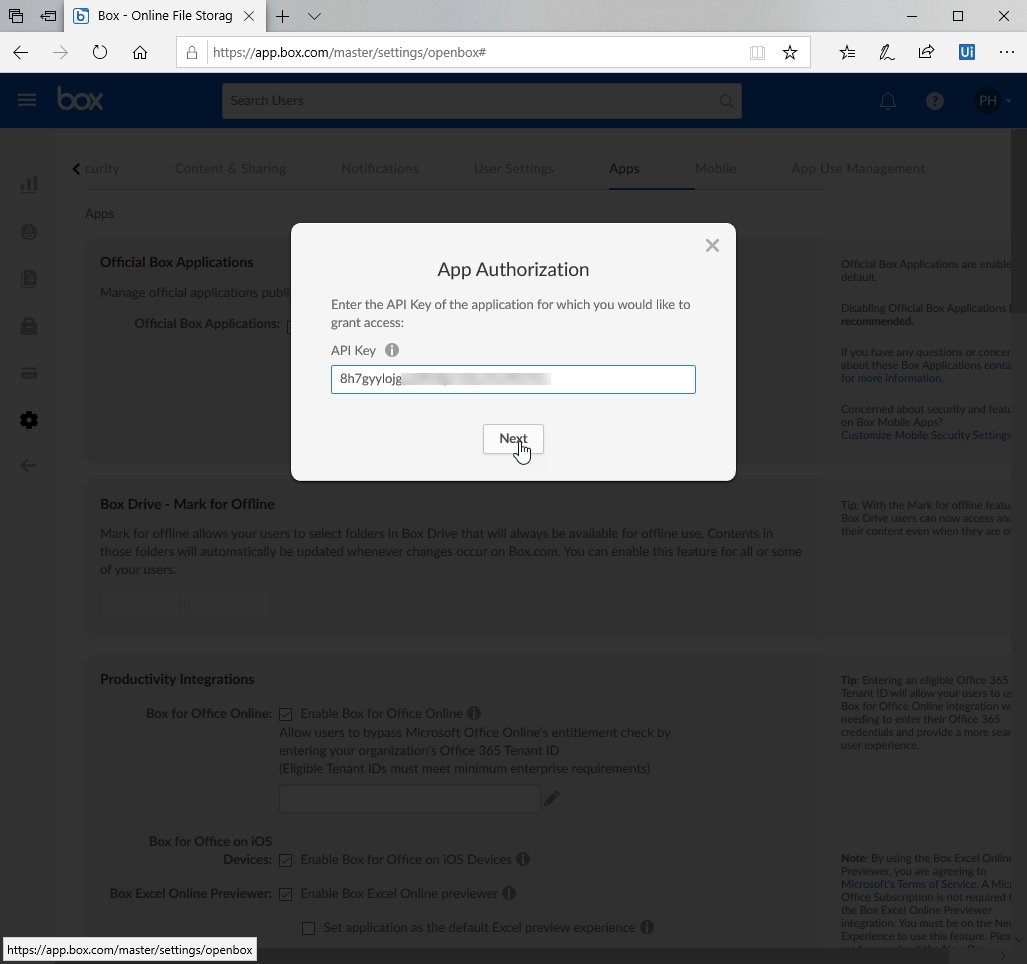
- Under Custom Applications, click Authorize New App.
- Copy the value for the ClientID of the application from the JSON file you downloaded above.
- Paste the ClientID in the API Key field of the App Authorization dialog and then click Next.
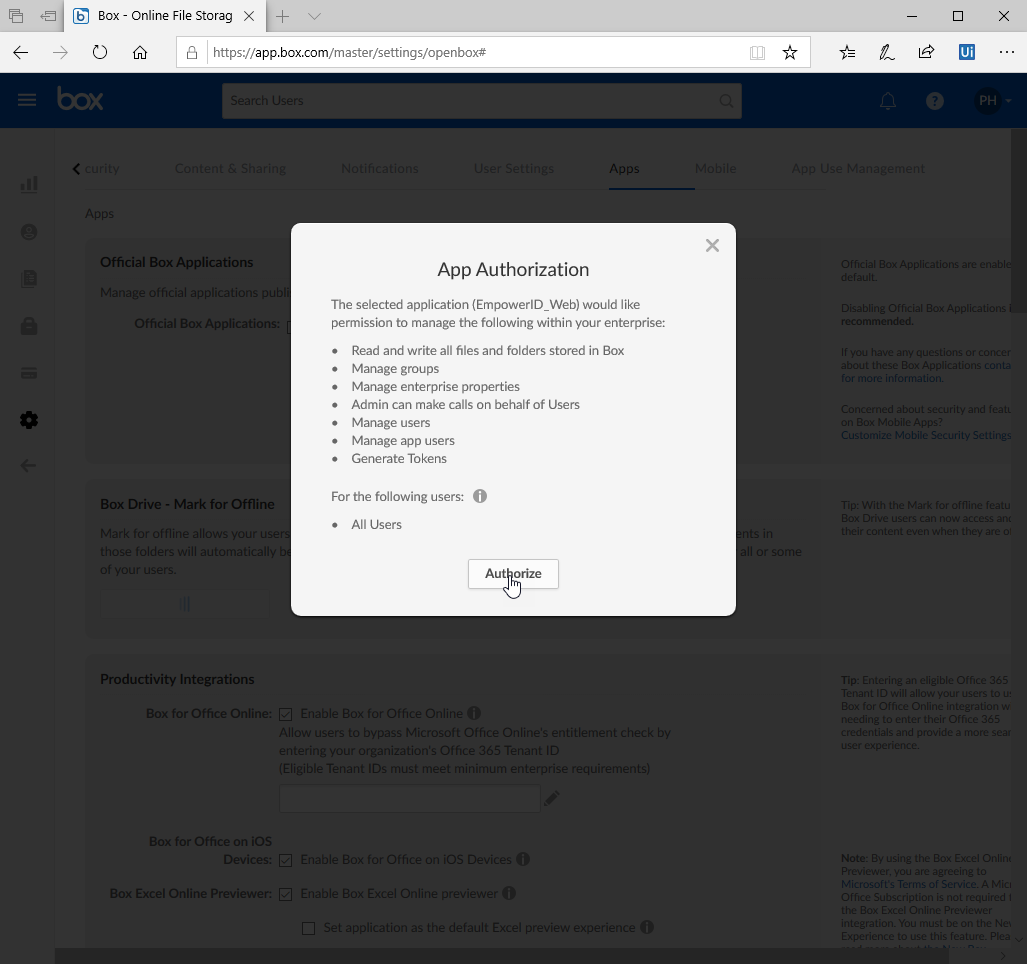
- Click Authorize.
After registering EmpowerID in Box, the next step is to create a Box account store in EmpowerID.
| Anchor |
|---|
| boxaccountstore |
|---|
| boxaccountstore |
|---|
|
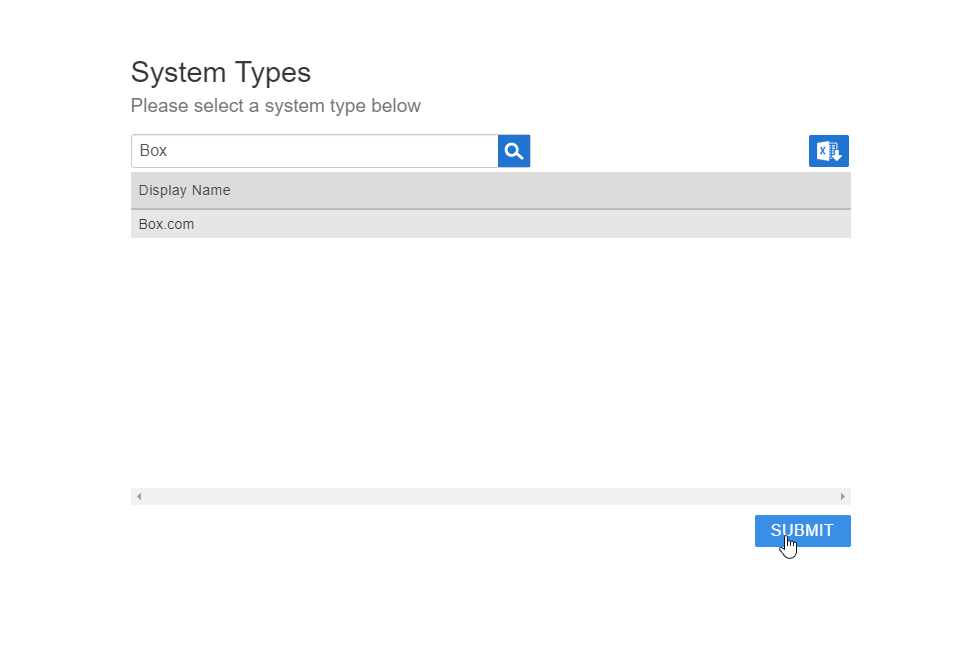
To create a Box account store in EmpowerID
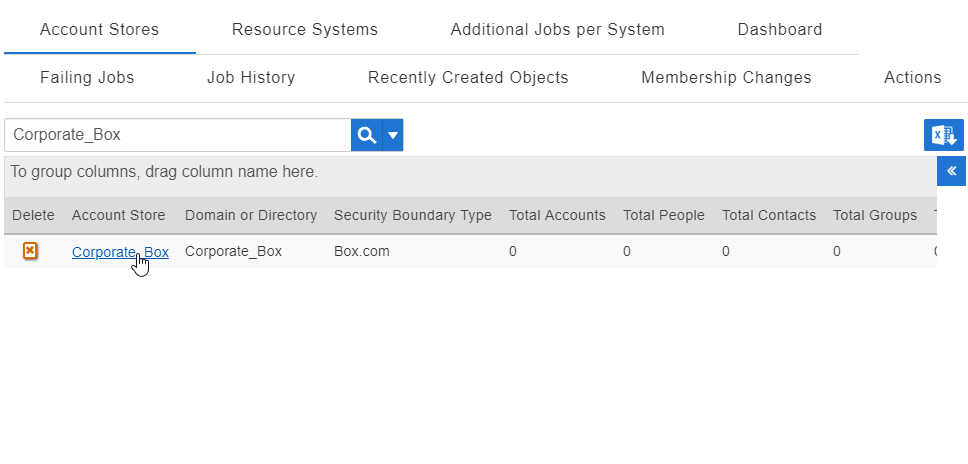
- From the navigation sidebar of the EmpowerID Web interface, expand Admin > Applications and Directories and then click Account Stores and Systems.
- On the Account Stores page, click Create Account Store.
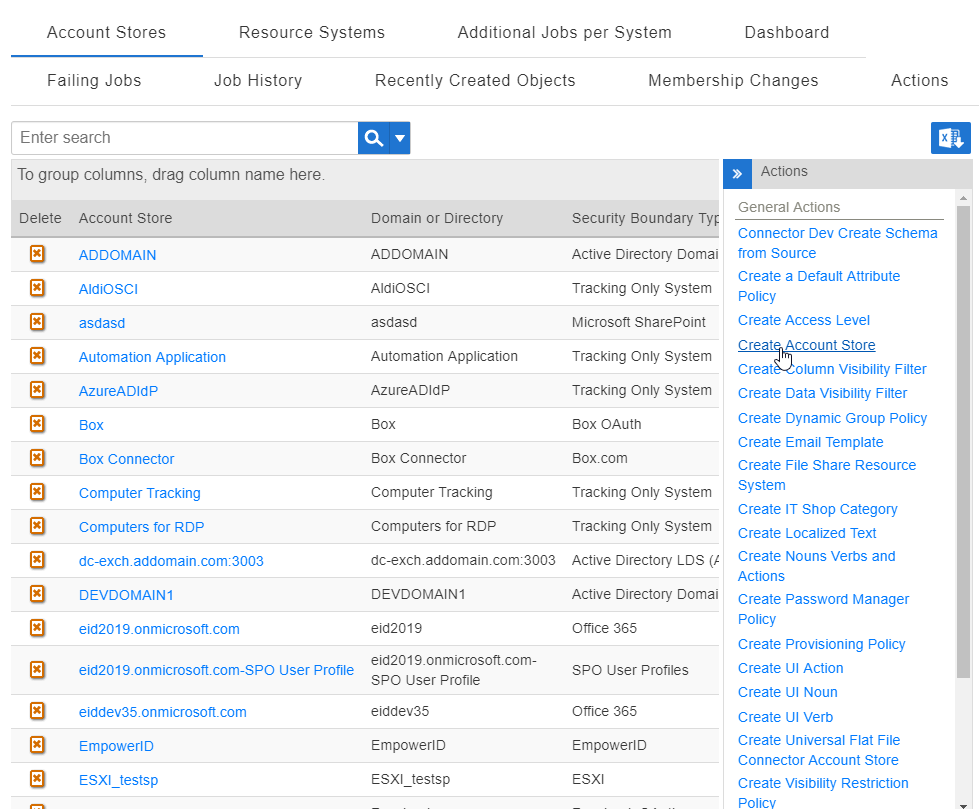
- Under System Types, search for Box.
- Click Box.com to select the type and then click Submit.
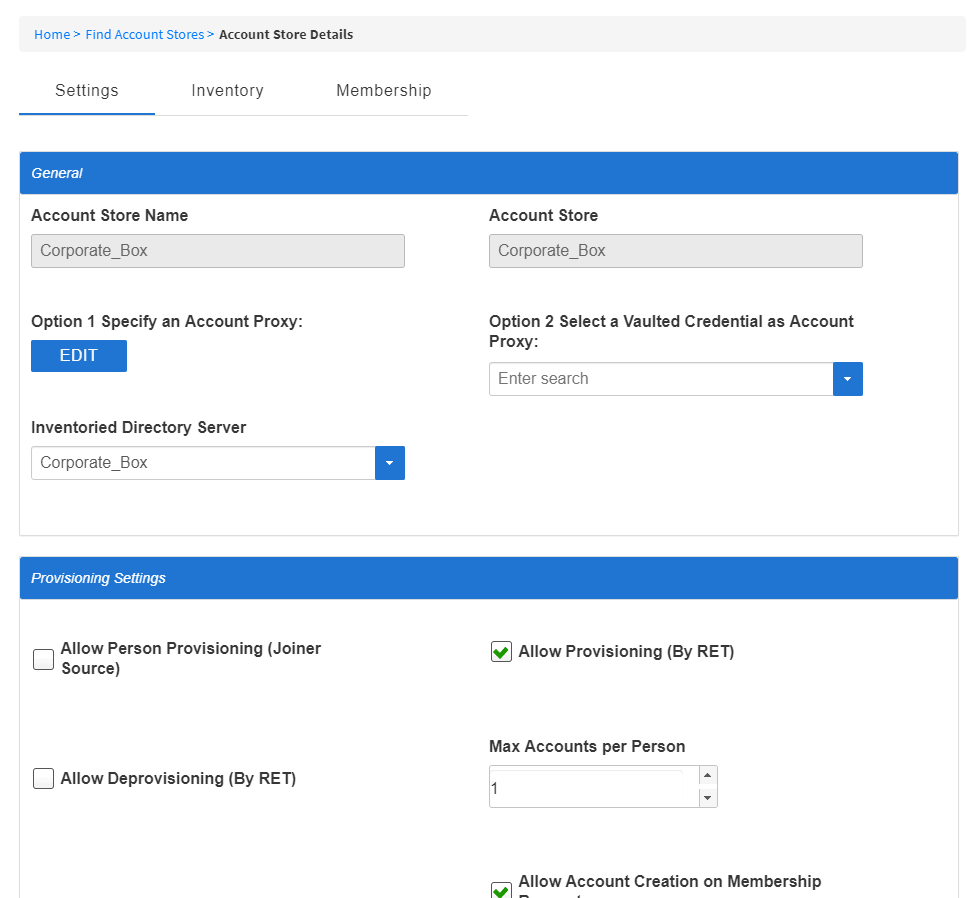
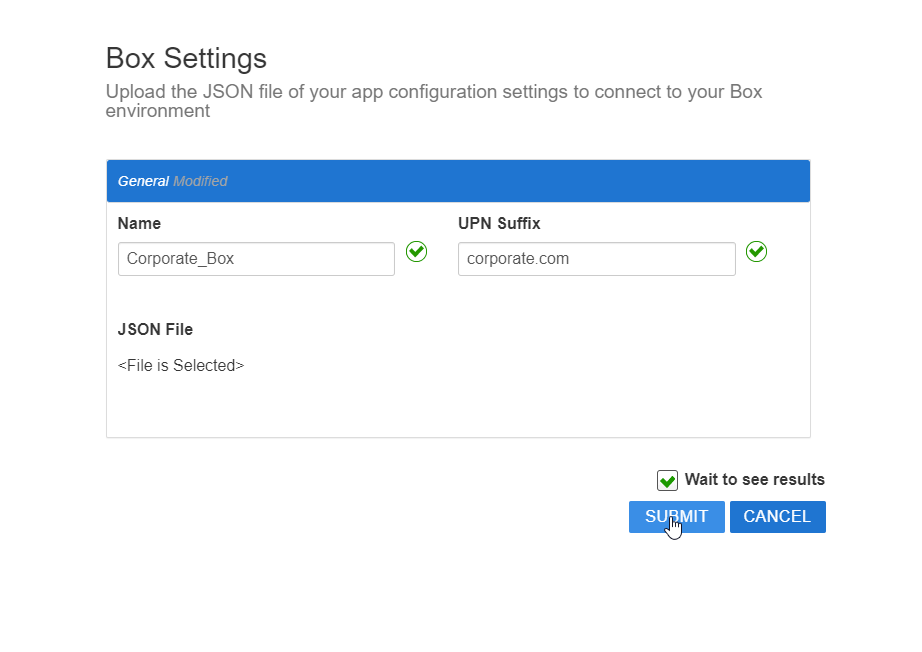
- On the Box Settings page that appears, do the following:
- Enter a Name in the Name field.
- Enter a UPN Suffix in the UPN Suffix field.
- Click Choose File and upload the application JSON file you downloaded from Box.
- Click Submit.
| Anchor |
|---|
| attributeflow |
|---|
| attributeflow |
|---|
|
To configure Attribute Flow rules
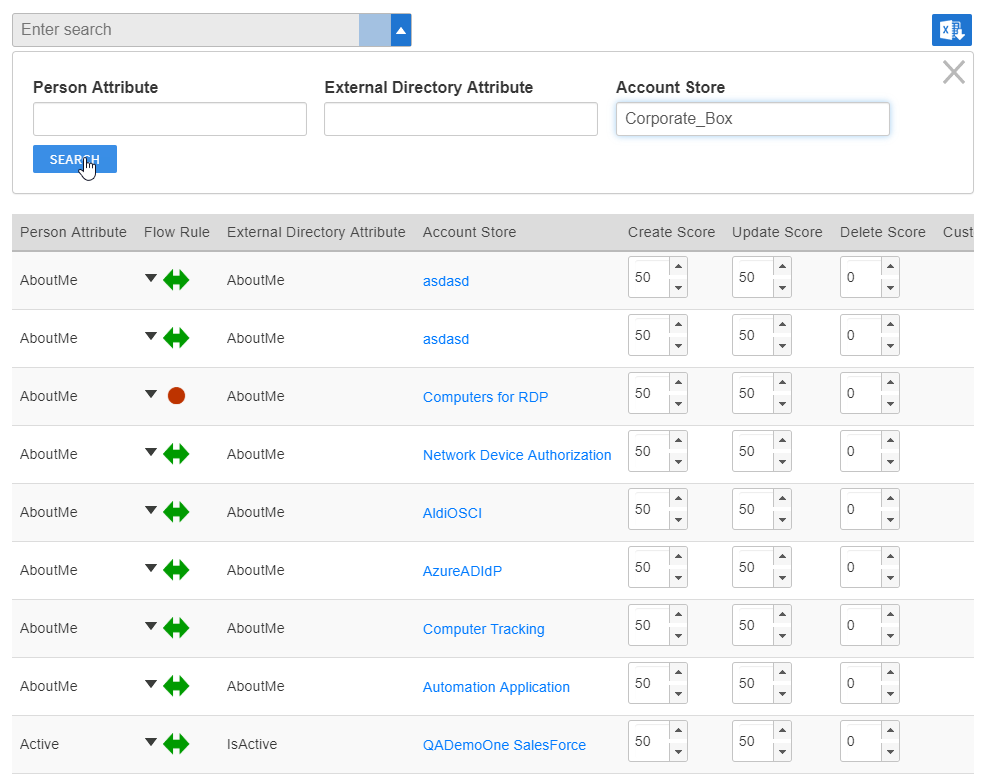
- From the navigation sidebar, expand Admin > Applications and Directories and click Attribute Flow Rules.
From the Attribute Flow Rules page, click the Advanced Search drop-down button, enter the name of the Box account store and then click Search to filter the rules shown in the grid.
| Info |
|---|
The attributes from the EmpowerID Person object are displayed in the left column with the corresponding attributes from the account store displayed in the right column. |
To change the flow for an attribute, click the Attribute Flow drop-down located between the Person Attribute column and the External Directory Attribute column, and select the desired flow direction from the context menu.
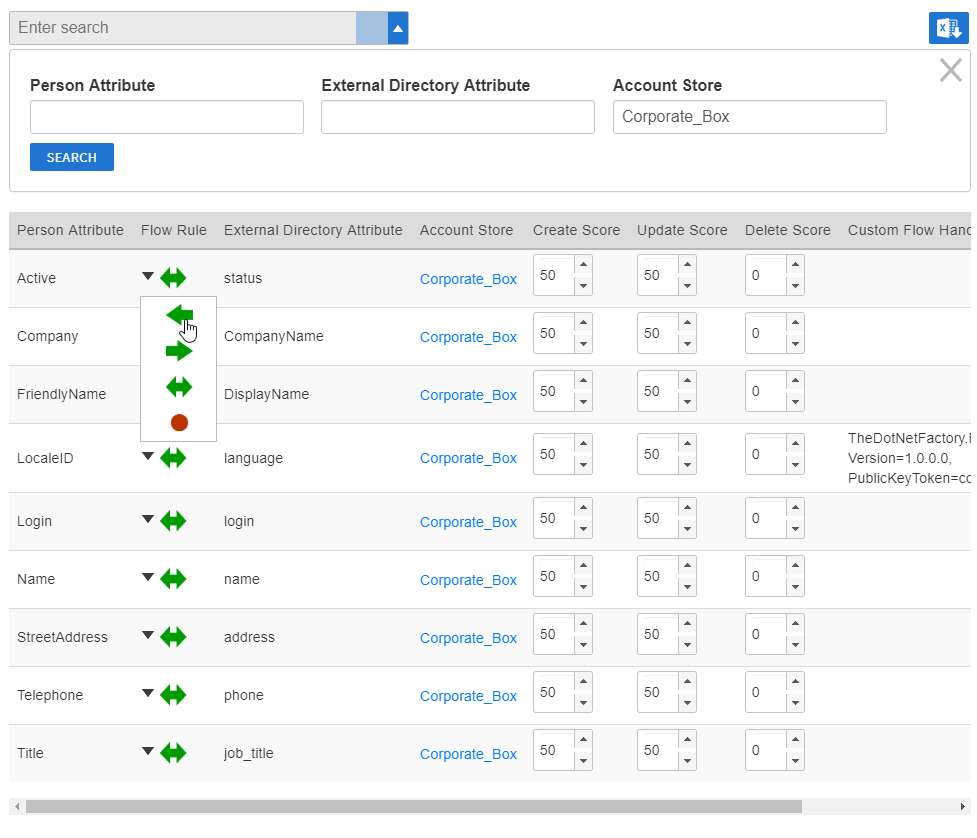
To change the score for any of the available CRUD operations (Create, Update and Delete), enter the new score in the appropriate field. By default, scores are weighted evenly, which means that a change to an attribute originating in one connected external directory has the same authority as a change to an attribute occurring in another connected external directory.
| Info |
|---|
EmpowerID only considers scores for attribute CRUD operations when multiple account stores with the same user records are connected to EmpowerID, such as would be the case if an HR System and Box were being inventoried by EmpowerID. |
Now that the attribute flow has been set, the next steps includes turning on and monitoring inventory.
To enable the Account Inbox permanent workflow
- From the Navigation Sidebar of the EmpowerID Web interface, expand Admin > EmpowerID Servers and Settings and click Permanent Workflows.
- From the Permanent Workflows page, click the Display Name link for Account Inbox.
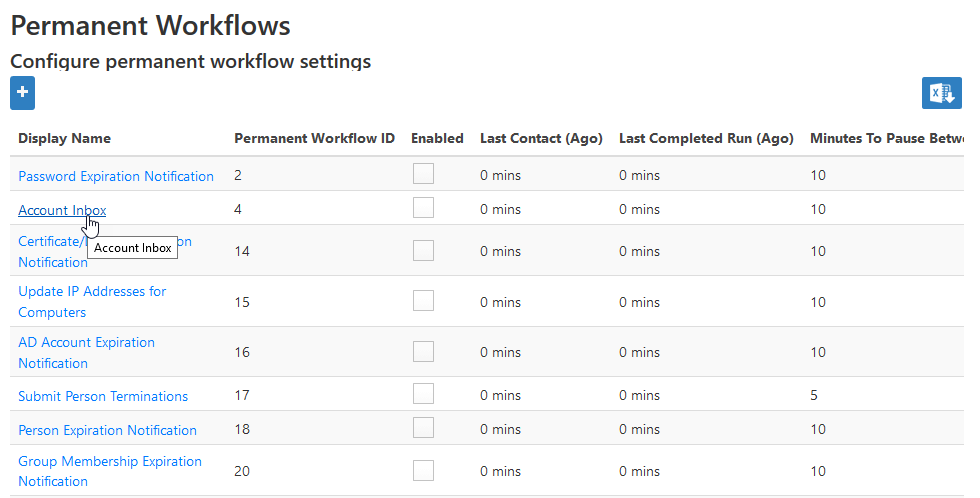
- From the View One page for the workflow that appears, click the edit link for the workflow.
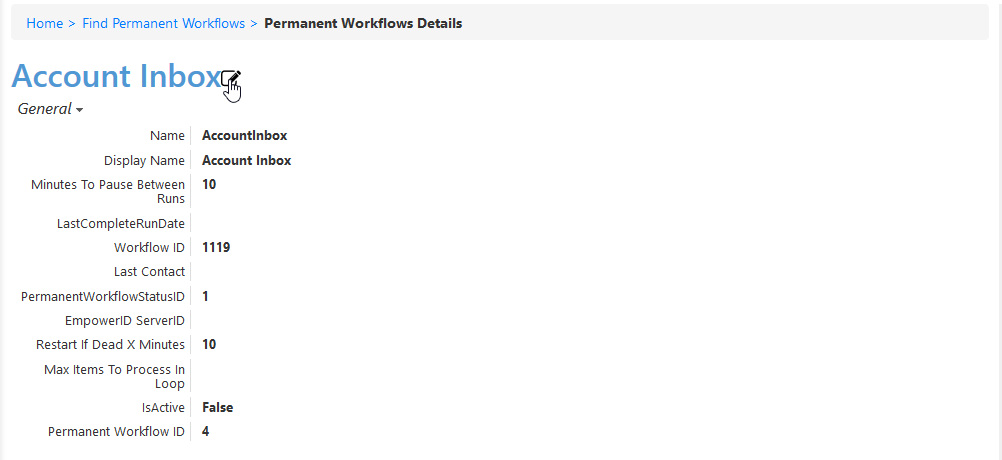
- From the Permanent Workflow Details form that appears, select Enabled and then click Save. Based on the default settings applied to the workflow, EmpowerID will process 1000 of the user accounts in the Account Inbox every ten minutes, provisioning Person objects from those user accounts and joining them together based on the Join and Provision rules applied to the account store.

| Anchor |
|---|
| monitorinventory |
|---|
| monitorinventory |
|---|
|
To monitor inventory
- From Navigation Sidebar, expand System Logs > Policy Inbox Logs and click Account Inbox.
The Account Inbox page appears. This page provides tabbed views of all information related to processing new user accounts discovered in a connected account store during inventory. An explanation of these tabs follows.
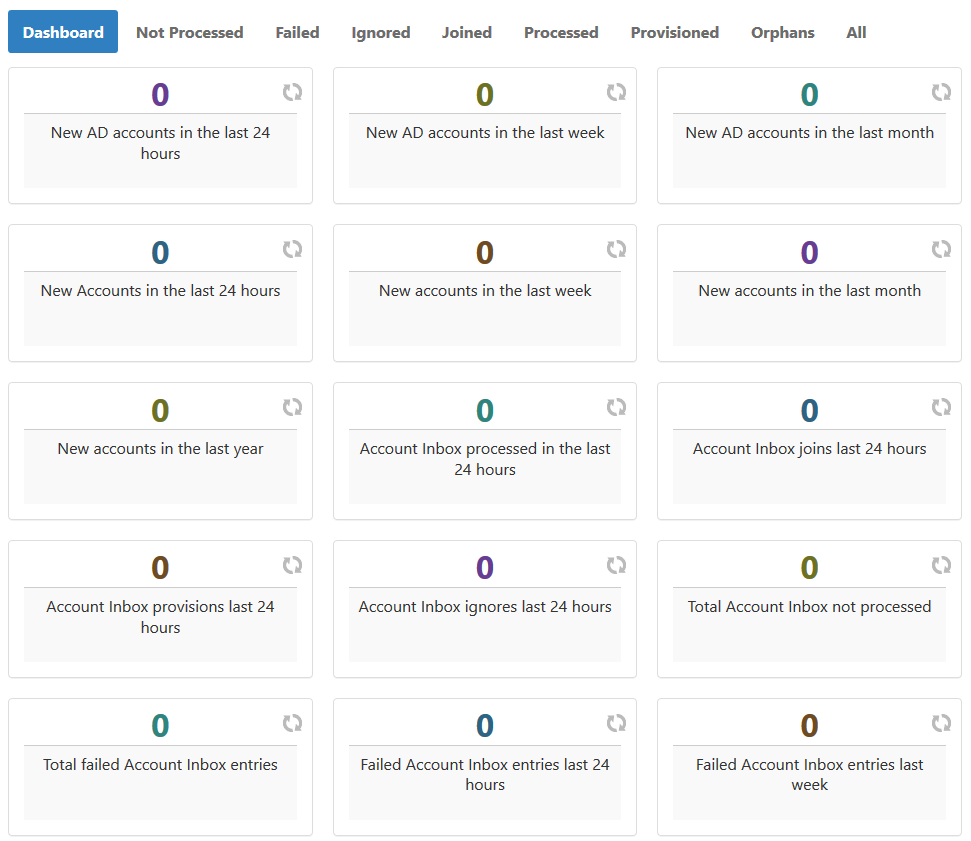
- Dashboard - This tab provides a quick summary of account inbox activity.
- Not Processed - This tab displays a grid view of all inventoried user accounts not yet used to provision a new EmpowerID Person or joined to an existing Person. Any accounts that fail to meet the Join and Provision rules are displayed here as well.
- Failed - This tab displays a grid view of any account joining or provisioning failures.
- Ignored - This tab displays a grid view of all accounts ignored by the account inbox. Accounts are ignored if they do not qualify as user accounts.
- Joined - This tab displays a grid view of all accounts joined to an EmpowerID Person. Joins occur based on the Join rules applied to the account store.
- Processed - This tab displays a grid view of all accounts that have been used to either provision a new EmpowerID Person or joined to an existing EmpowerID Person.
- Provisioned - This tab displays a grid view of all accounts that have been used to provision an EmpowerID Person. Provisioning occurs based on the Provision rules applied to the account store.
- Orphans - This tab displays a grid view of all user accounts without an EmpowerID Person.
- All - This tab displays a grid view of all user accounts and the status of those accounts in relation to the Account Inbox.