...
...
...
In Configuration Manager, select the Account Stores node and then click the Add New button above the grid.
...
In the Add New Security Boundary window that opens, select Linux from the Security Boundary drop-down and then click OK.
...
On the navbar, expand Admin > Applications and Directories and then click Account Stores and Systems.
On the Account Stores page, click Create Account Store.
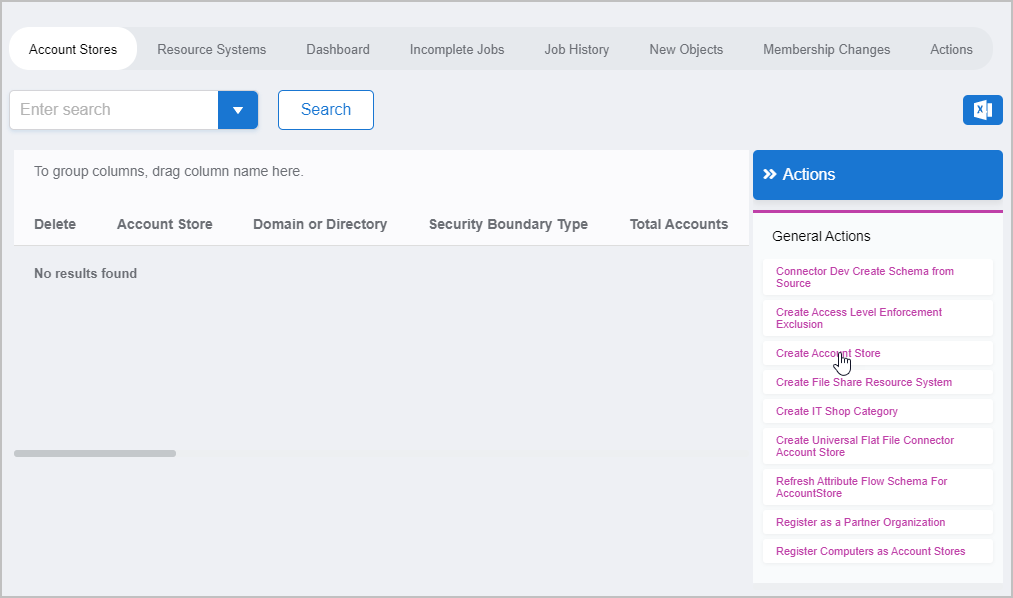
Under System Types, search for Linux and then click Linux to select the system type .
Click Submit.
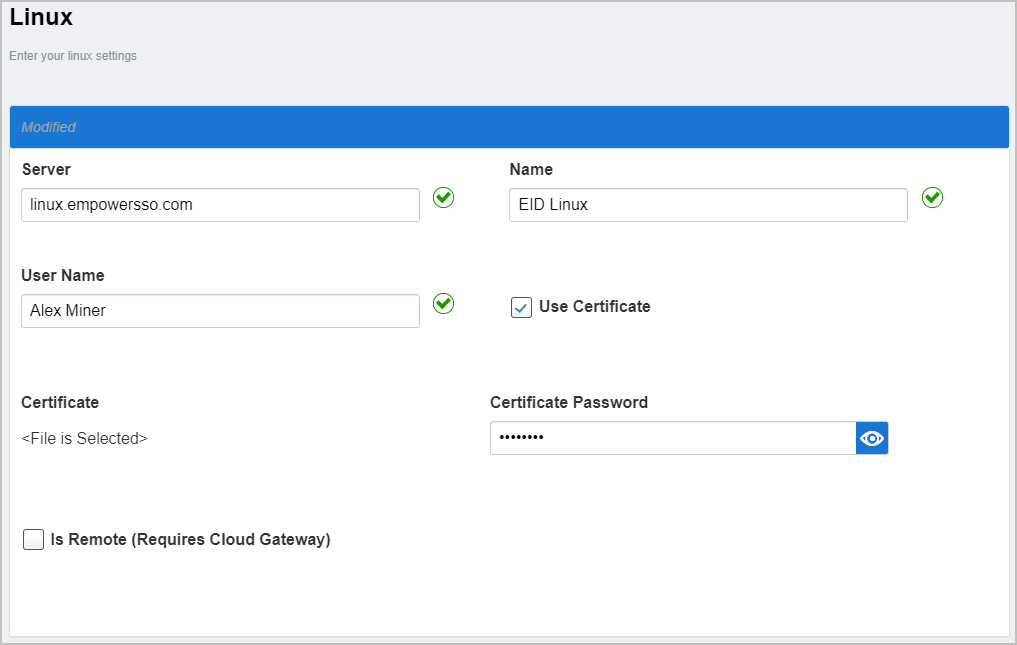
This opens the Linux form, which is where you enter the information needed to connect EmpowerID to the system.

Enter the following information in the Linux form:
Server — Enter the IP address or the FQDN for the server
Name — Enter a name for the account store
User Name — Enter the user name for the account EmpowerID should use to connect to the Linux server. This account should be a super user.
...
...
To configure the Linux account store
...
| title | General Pane |
|---|
This pane is used to set general configuration information for the Account Store.
...
Connection Account - This is the proxy account you specified EmpowerID use to connect to and inventory the Linux server.
...
Maximum Accounts per Person - This specifies the maximum number of user accounts from this domain that an EmpowerID Person can have linked to them.
...
Icon - This is the image icon that represents this account store in the EmpowerID user interfaces.
...
Enable Pass-Through Authentication - This allows domain authentication to be used for logging in to EmpowerID. Unless Simple Search is enabled, the domain\username format needs to be used.
...
Enable Simple Username Search for Pass-Through Authentication - Simple search works in conjunction with pass-through authentication to allow users to log in without specifying a domain name. When this is enabled, EmpowerID first checks to see if the user name entered exists within its metadirectory and if so attempts to authenticate as that user. If a matching logon name exists but the login fails, EmpowerID then searches through all Accounts Stores where simple username search is enabled to find the correct user name and password combination. To enable this function, click the Enable Simple Username Search button to the left of the line and toggle it so that the green check is visible.
...
Allow Password Sync - Enables or disables the synchronization of password changes to user accounts in the domain based on password changes for the owning person object or another account owned by the person. This setting does not prevent password changes by users running the reset user account password workflows. To enable this function, click the Allow Password Sync button to the left of the line and toggle it so that the green check is visible.
...
Allow Person Provisioning - Allows or disallows EmpowerID Persons to be created from the user records discovered during inventory.
...
| title | Inventory Pane |
|---|
This pane is used to enable or disable inventory of the account store as well as to set the run schedule for the EmpowerID Inventory Job.
...
Enable Inventory - This allows EmpowerID to inventory the Account Store. The Inventory Job must be enabled for inventory to occur. This is discussed further in the below section.
...
Allow Automatic Person Provision on Inventory - This allows EmpowerID to provision EmpowerID people for new accounts discovered during the inventory process if they meet the Provision Rule specified by theCustom_Account_InventoryInboxGetAccountsToProvision SQL stored procedure. This setting is discussed further in the below section.
...
Allow Automatic Person Join on Inventory - This allows EmpowerID to join newly discovered accounts to people during the inventory process if they meet the Join Rule as specified by theCustom_Account_InventoryInboxJoinBulk SQL stored procedure. This setting is discussed further in the below section.
...
RBAC-Assign Initial Group Membership On First Inventory - This setting pertains to Active Directory account stores only.
...
Re-Inventory - Enabling this option re-inventories all changes.
...
| title | Group Membership Reconciliation Pane |
|---|
This pane is used to enable or disable and schedule group membership reconciliation for the domain. When this function is enabled, EmpowerID dynamically manages the membership of the account store's groups, adding and removing users to and from groups based upon policy-based assignment rules.
...
Enable this Functionality - Enables and disables group membership reconciliation on the Account Store.
From the General pane of the Account Store Details screen, enable each desired feature by toggling the icon to the right of each feature from a red sphere to a green check box. For example, if you want EmpowerID to provision an EmpowerID Person for each Linux user, toggle the red sphere to the right of Allow Person Provisioning to a green check box.
In the Inventory pane of the Account Store Details screen for the account store, toggle the icon to the right of the Allow Automatic Person Provision On Inventory setting from a red sphere to a green check box if you enabled Allow Person Provisioning in the General pane and you want EmpowerID to automatically create a linked EmpowerID Person object for each new, unique Linux user discovered during the inventory process.
If you are allowing automatic person provision on inventory, Click the Edit button to the right of Business Role for New Inventory Provision and select an appropriate Business Role for each new Person provisioned during inventory.
Click OK to close the Business Role Selector.
If you are allowing automatic person provision on inventory, Click the Edit button to the right of Location For New Inventory Provision and select an appropriate Location for each Person EmpowerID provisions during inventory.
Click OK to close the Location Selector.
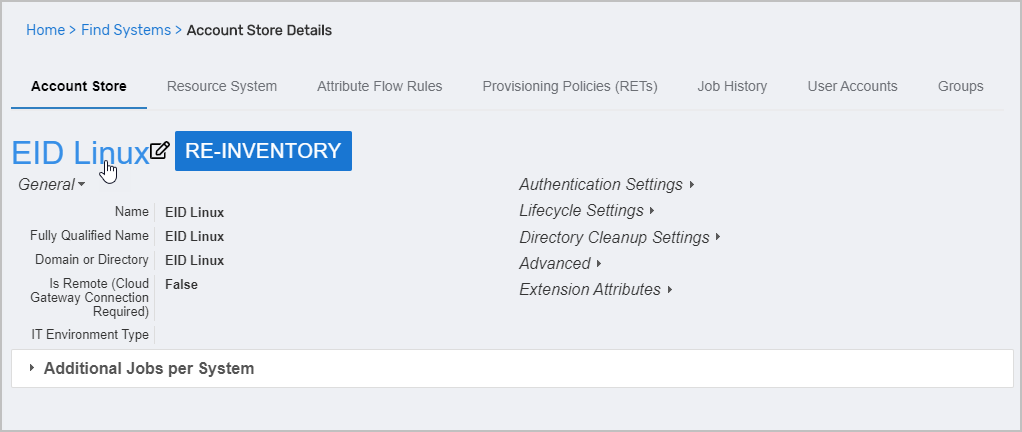
The last step is to enable inventory. To do so, toggle the red sphere to the left of Enable Inventory so that it becomes a green check box.
After several minutes, refresh the account store data by pressing the Refresh Data button located a the top of the Account Store Details screen. You should see that EmpowerID has inventoried the user and groups in your Linux server and provisioned the requisite number of EmpowerID Persons for those accounts (if you selected the provisioning options discussed above).
...
| icon | false |
|---|
...
above user account.
Use Certificate — If you want to use certificate authentication, select this option (check it). Doing so hides the Password field and displays the Certificate and Certificate Password fields.
Certificate — Click Choose File and then browse to and select the appropriate certificate.
Certificate Password — Enter the certificate password.
Is Remote (Requires Cloud Gateway) — This setting appears for account stores with local directories, such as Active Directory, LDAP, SAP, etc. When enabled, this tells EmpowerID to use the Cloud Gateway Connection for that account store. The Cloud Gateway Connection must be installed on an on-premise machine. For installation information, please see Installing the EmpowerID Cloud Gateway Client.
Click Submit to create the account store.
EmpowerID creates the account store and the associated resource system. The next step is to configure the attribute flow between the account store and EmpowerID.
| Insert excerpt | ||||||
|---|---|---|---|---|---|---|
|
To configure account store settings
On the Account Store and Resource System page, click the Account Store tab and then click the pencil icon to put the account store in edit mode.
This opens the edit page for the Linux account store. This page allows you to specify the account proxy used to connect EmpowerID to your Linux system as well as how you want EmpowerID to handle the user information it discovers in the Linux system during inventory. Settings that can be edited are described in the table below the image.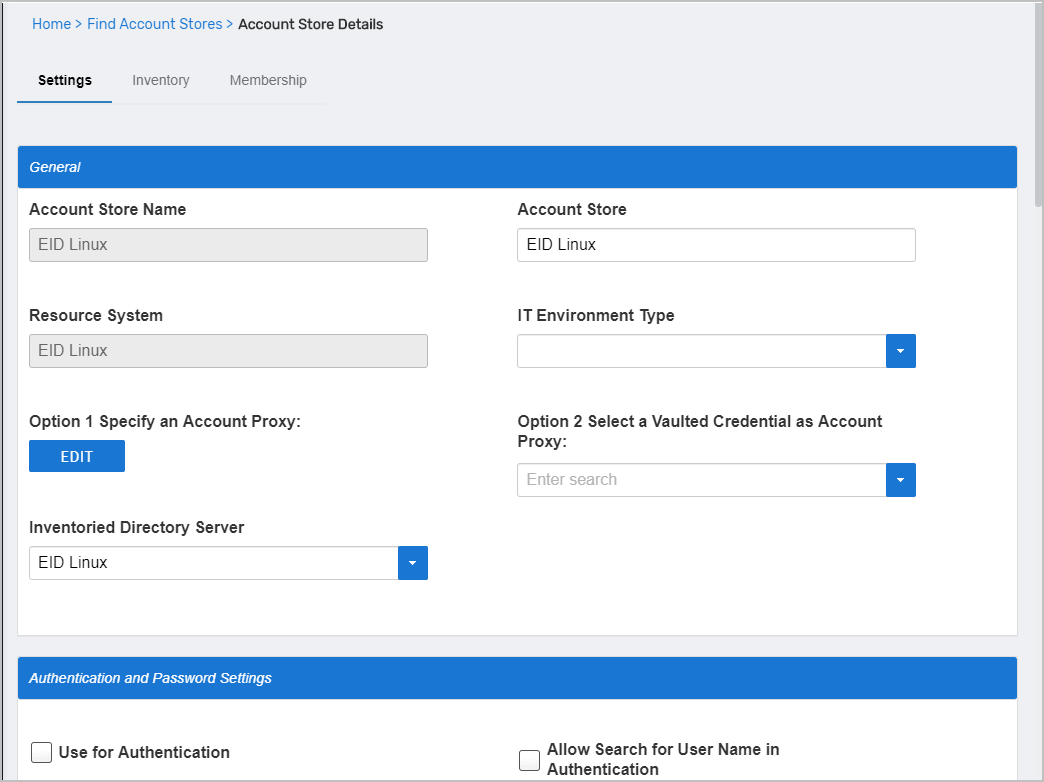
Insert excerpt IL:Linux Account Store Settings IL:Linux Account Store Settings nopanel true Edit the account store as needed and then click Save to save your changes.
Next, enable the Account Inbox permanent workflow to allow the Account Inbox to provision or join the user accounts in Domino to EmpowerID Persons as demonstrated below.
| Tip |
|---|
EmpowerID recommends using the Account Inbox for provisioning and joining. |
| Insert excerpt | ||||||
|---|---|---|---|---|---|---|
|
| Insert excerpt | ||||||
|---|---|---|---|---|---|---|
|
| Div | ||||||||||||||
|---|---|---|---|---|---|---|---|---|---|---|---|---|---|---|
| ||||||||||||||
IN THIS ARTICLE
|