If you have Microsoft SharePoint and are running the User Profile service, you can configure EmpowerID to synchronize the user profile properties in your SharePoint with the corresponding EmpowerID Person attributes for each SharePoint user with an EmpowerID Person identity. In this way, if a user changes a property for one of their attributes, that change can be brought into EmpowerID and pushed to any of your connected account stores, such as Active Directory. The number of SharePoint profile properties that EmpowerID can synchronize with and the naming convention used shown in the below table.
...
| Info |
|---|
The User Profile Service Application must be started in your SharePoint farm for EmpowerID Profile Sync to function correctly. |
You determine how changes made to these properties in SharePoint affect EmpowerID by the settings you apply to the attribute flow rules for your SharePoint system. These rules are visually configured for each profile property and are always relative to the relationship between a user profile property in SharePoint and the corresponding EmpowerID Person attribute. In addition to setting attribute flow rules, you create a Resource Entitlement (RET) for a SharePoint User Profile and apply that policy to your SharePoint users in EmpowerID.
This topic explains how to enable profile sync for SharePoint.
| Info |
|---|
In this example, we create a SharePoint User Profile Resource Entitlement and apply that entitlement to the Any Role Anywhere Business Role and Location. In this way, profile sync happens for anyone within the organization. You can be more selective in your RET application if desired, drilling down to specific Business Roles and Location, groups, Management Roles, and SetGroups. |
To create a SharePoint User Profile Resource Entitlement
...
| Rw ui tabs macro | ||||||||||
|---|---|---|---|---|---|---|---|---|---|---|
Insert excerpt | | IL:BRL_RET | IL:BRL_RET | nopanel | true
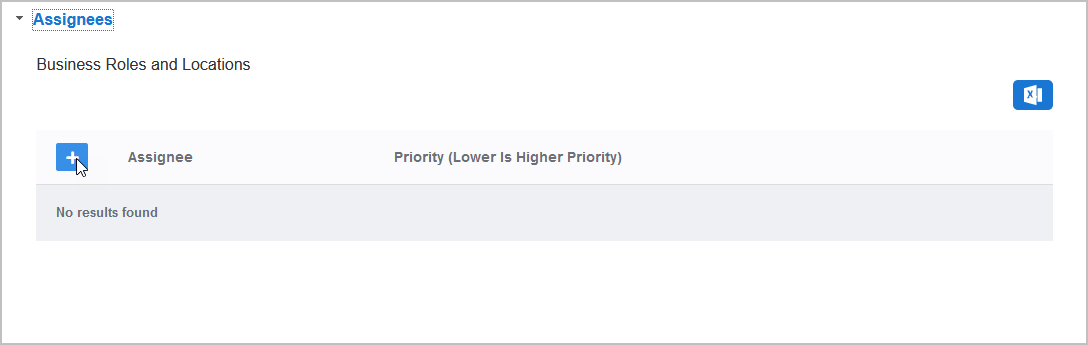
For Business Role, click the Add button in the Business Roles and Locations grid.
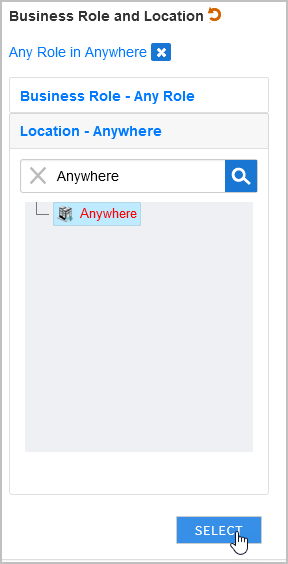
In the Add Entry pane that appears, click Select a Role and Location to open the Business Role and Location selector.

Search for the appropriate Business Role and then click the node for that role to select it.

Click Location.
Search for the appropriate Location and then click the node for that location to select it.

Click Select to select the Business Role and Location combination.
Enter a number to specify the priority for the RET policy in the Priority field. This value is used to determine the priority of the RET if the user qualifies for the same RET via another assignment, such as being a member of a group that has the same policy. The lower the number, the higher the priority.
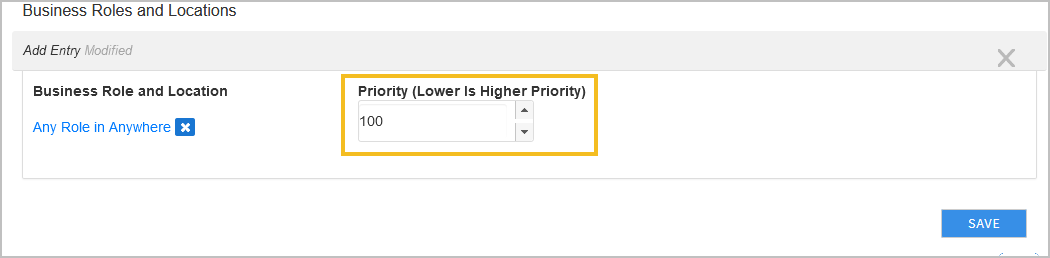
Click Save.
Repeat for as many Business Role and Location combinations as needed.
When done assigning the policy click Save in the main form.
| Insert excerpt | ||||||
|---|---|---|---|---|---|---|
|
...