...
...
...
...
...
...
...
...
...
...
...
...
...
...
...
...
...
...
...
...
...
...
...
...
...
...
...
...
...
...
...
...
...
...
...
...
...
...
...
...
...
...
...
...
...
...
...
...
...
...
...
...
...
...
...
...
...
...
...
...
...
...
...
...
...
...
...
...
...
...
...
...
...
...
...
...
...
...
...
...
...
...
...
...
...
...
...
...
...
...
...
...
...
...
...
...
...
...
...
...
...
...
...
...
...
...
...
...
...
...
...
...
...
...
...
...
...
...
...
...
...
...
...
...
...
...
...
...
...
...
...
...
...
...
...
...
...
...
...
...
...
...
...
...
...
...
...
...
...
...
...
...
...
...
...
...
...
...
...
...
...
...
...
...
...
...
...
...
...
...
...
...
...
...
...
...
...
...
...
...
...
...
...
...
...
...
...
...
...
...
...
...
...
...
...
...
...
...
...
...
...
...
...
...
...
...
...
...
...
...
...
...
...
...
...
...
...
...
...
...
...
...
...
...
...
...
...
...
...
...
...
...
...
...
...
...
...
...
...
...
...
...
...
...
...
...
...
...
...
...
...
...
...
...
...
...
...
...
...
...
...
...
...
...
...
...
...
...
...
...
...
...
...
...
...
...
...
...
...
...
...
...
...
...
...
...
...
...
...
...
...
...
...
...
...
...
...
...
...
...
...
...
...
...
...
...
...
...
...
Welcome to EmpowerID! Your organization has implemented EmpowerID to help you keep your user information secure and manage your access to its IT resources. This topic will help become more familiar with EmpowerID so that you can quickly get about your business, accomplishing what you need to do as efficiently as possible. If you are a new user, this topic is the place to begin as it shows you the basics of using EmpowerID from your first login. Once you understand the basics, you can select any topics that are relevant to you and your organizational situation.
...
...
| import | https://docs.empowerid.com/docs.css |
|---|
What is EmpowerID?
EmpowerID is an Identity and Access Management platform that makes it easy for organizations to securely manage their IT resources.
How Do I Start?
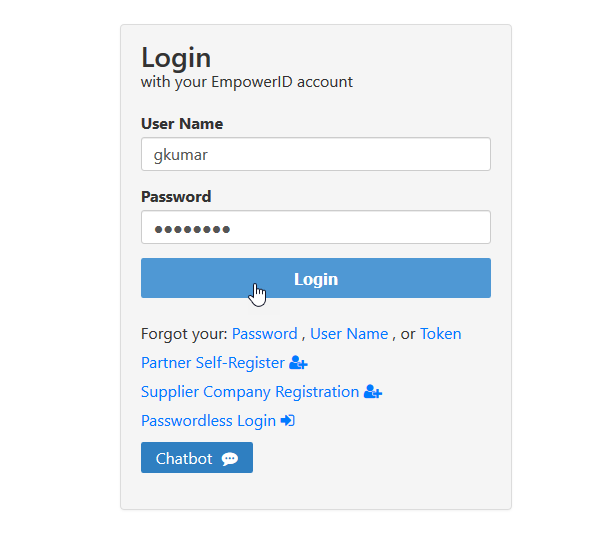
To get started with EmpowerID, you open your browser and go to the login page for your organization. The URL for this page should look something like https://eid.yourorganization.com/ui, where "eid" represents the name of your organization's EmpowerID server. The page you see should look something like the below image. In the image, there is only one login option, the default EmpowerID login. Depending on how your organization has configured the page, you may have more login options and the page may be themed differently.
Once you reach the page, do the following:
- Enter your credentials and click Login. If you are logging in with your EmpowerID account, you do not need to include your organization's UPN suffix (i.e., @yourorganization.com).
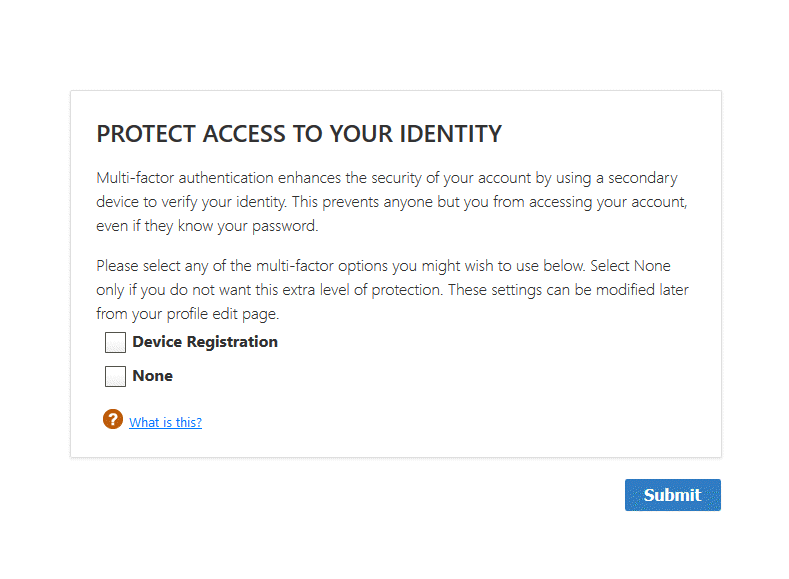
After logging in, you may be directed to a number of different pages before gaining access to your organization's portal. These pages can included the following: - Multi-Factor Authentication page — This page appears if your organization has set up Multi-factor authentication (MFA). Multi-factor
...
- authentication enhances the security of your account by using a secondary method to verify your identity. Depending on how your organization has set up MFA, you may be required to pick from one or more secondary methods or have the option to select none.
In the below image, MFA is limited to Device Registration and is optional.
Tip For more information on MFA and EmpowerID, see Multi-Factor
...
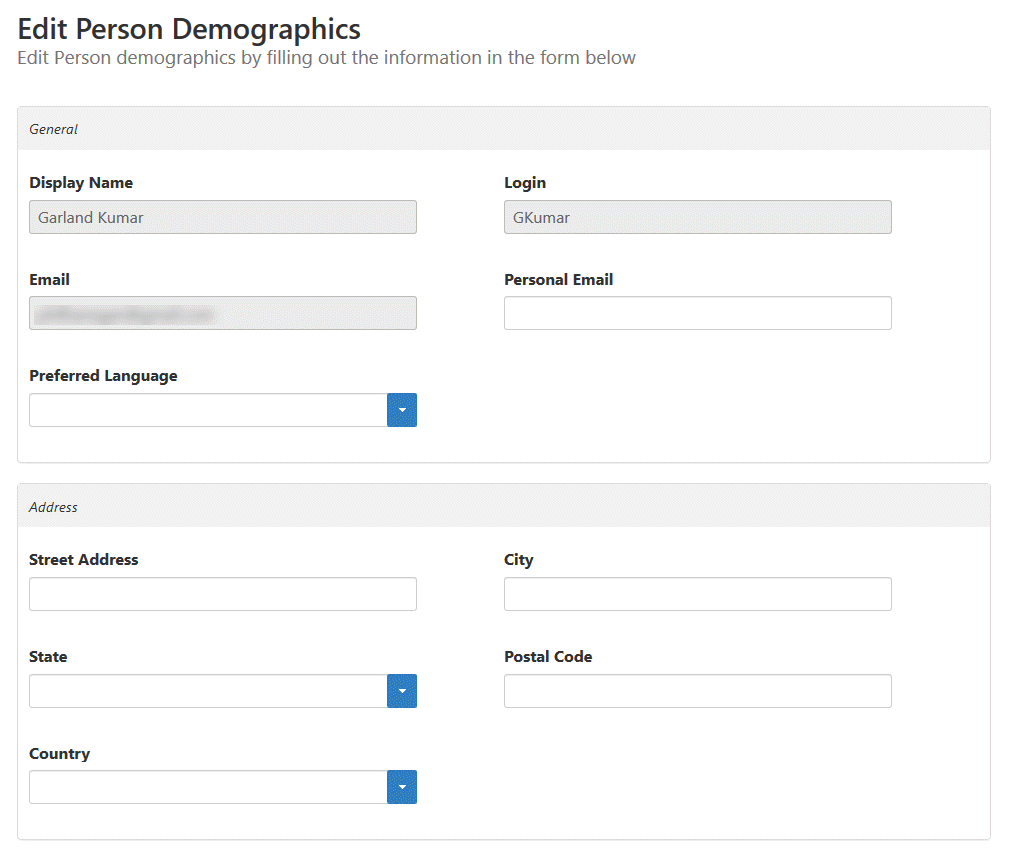
Edit Person Demographics page — This page gives you the opportunity to provide personal information about yourself, such as your personal email or mobile phone number.
| Info |
|---|
If you are directed to this page, you need to provide your personal email address, your mobile phone number and the name of your mobile phone provider before you can proceed. |
...
Password Reset Center
...
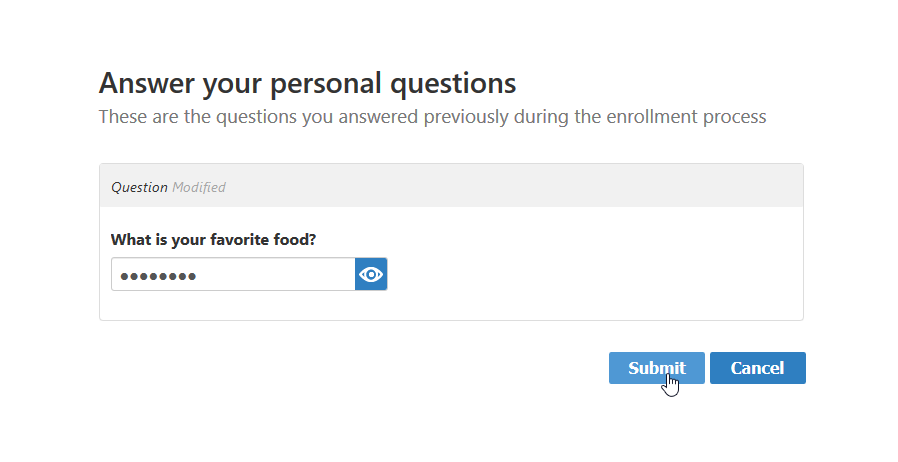
page — This page contains a series of password challenge questions that you answer in order to identity yourself to EmpowerID in the event you forget your password and need to reset it.
Info If you are not directed to the enrollment page, this means your organization does not allow you to reset your password. If that is the case, the first page you will see is your personal home page.
Tip The below image shows the enrollment page with its default configuration. The page you see may be themed differently and present you with different question and answer options.
Answer the questions presented to you and then click Submit.Tip You provide your own question and answer for the Custom Question.
After enrolling for password self-service reset (if that is your organization's policy), EmpowerID directs you to the home page that your organization has set for you. In the below image, that page is your personal dashboard. This dashboard allows you to quickly view panes of the most pertinent information about your activity within EmpowerID. An explanation of the dashboard panes follows the image.- My Open Tasks — In EmpowerID, tasks represent pieces of work that can be performed by an authorized user against an IT resource, and open tasks are those pieces of work that have been initiated, but not yet completed. If you are a user authorized to complete an open task, it appears in this dashboard pane.
- My Tasks by Status — This pane provides a pie chart view of your tasks, with those tasks showing as open, rejected and approved.
- My Requests by Status — In EmpowerID, requests represent actions that you have initiated against a resources for which you do not have the necessary access to complete. When this is the case, EmpowerID sends your request to other people with the ability to approve (or reject) your request. This pane provides a pie chart view of your reuests, with those requests showing as open, rejected and approved.
- My Last 10 Login Failures — This pane displays the last 10 attempts to login that failed. This allows you to keep track of any login failures and may help you spot attempts by another user to fraudulently use your account.
- My Recent Activities — This pane displays a list of all tasks you have performed on the site.
- My SSO Apps By # of Logins — In EmpowerID, SSO Apps are Web applications that require you to authenticate, but do not support federated SSO (single sign-on). In these cases, EmpowerID provides the ability for you to still SSO to those applications through its browser extension. If you have accounts that EmpowerID knows about in these types of applications, your login activity to those applications (from EmpowerID) appears in this pane.
What is the purpose of the other elements I see?
Beyond your personal dashboard, you should see a number of elements common to each page. These elements are as follows:
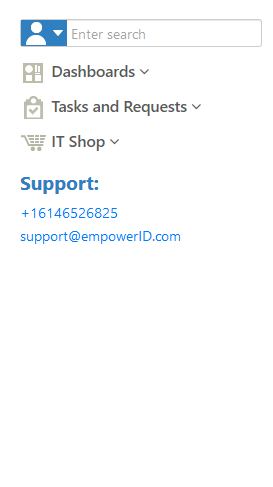
- Navigation Sidebar — The Navigation Sidebar is how you
...
- move through the pages of the EmpowerID Web site and search for people and other types of resources. The amount of resources for which you can search and the number of pages available to you differ according to the amount of access your organization has given you.
- Language and Profile Menu Items — These allow you to set your personal language preference, view and edit aspects of your profile,
...
- change your password and log out of EmpowerID.
After logging in, what can I do?
As a default user of EmpowerID, your organization has given you the ability to do a few certain things. These are as follows:
| Tip |
|---|
The below capabilities represent the default given to standard users. Depending on your role within your organization, you may be able to see and do more or less. |
- Search for and view basic information about the other people in your organization
- Change your password
- Edit your profile information
- Reset a forgotten password
- View the status of your tasks and requests
Anchor search search
How do I search for other people?
| search | |
| search |
On every page of the EmpowerID Web application, you will see a Global Search control. This control contains two elements, a filter and a text field. The filter allows you to limit searches to particular resource types, such as people or shared folders. The text field provides a place for you to input the specific resource for which you are looking. For example, if you want to search for a person named "Megan Allen" you select person from the filter and then type "Megan Allen" in the text field. If your organization has a person named "Megan Allen" and you have access to view her then you will see a tile for her. Clicking the tile takes you to a page where you can view information about
...
the person.
| Info |
|---|
By default, the Person search filter is selected. This filter is shown in the above image. |
Anchor changepassword changepassword
How do I change my password?
| changepassword | |
| changepassword |
If at any time you wish to change your password, you can do so by clicking your display name and selecting the Change Password menu item.
Type your current password in the Change Password field, your new password in the New Password and Confirm Password fields and click Submit.
| Anchor | ||||
|---|---|---|---|---|
|
You can view your profile by clicking your display name and selecting the View Profile menu item.
This directs your browser to your View Self page. This page contains your basic profile information and a number of expandable accordions with information specific to your person.
To edit your profile information, click the Edit link directly underneath the image placeholder. Edit links have the Pencil icon.
| Tip |
|---|
As an alternative, you can bypass your View Self page and go directly to your Edit page for your profile from the navigation sidebar by expanding IT Shop |
...
, clicking Workflows |
...
and |
...
then clicking the Edit Your Profile Information button. |
This opens the Edit One page for your person. This page contains tabs with fields of information about your person.
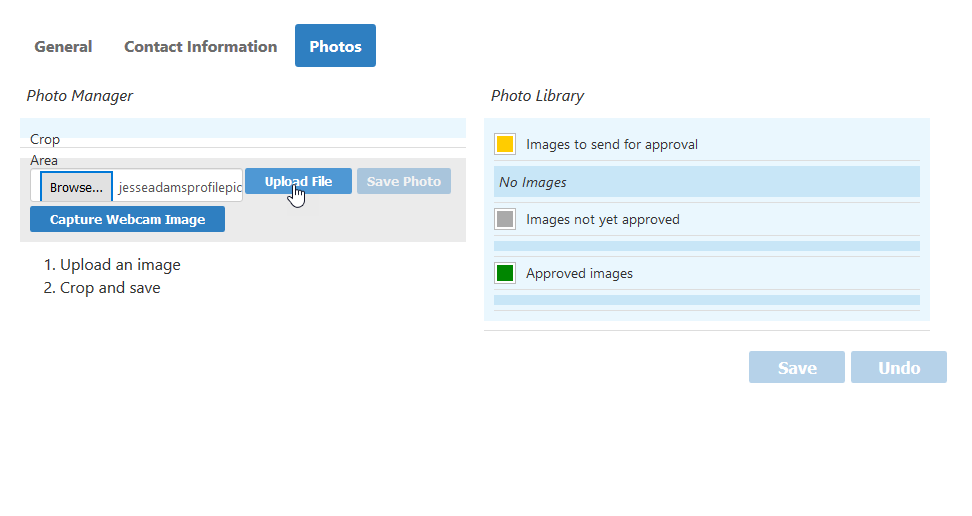
To make an edit, select the tab(s) that contains the field(s) you want to edit, add your changes and click Save. For example, if you want to add a photo, you select the Photos tab. The tab provides a Photo Manager that allows you to capture a webcam image or upload a photo.
To upload a photo, do the following:
- Click the Browse button and then search for and select an image file on your machine.
- Click Upload File.
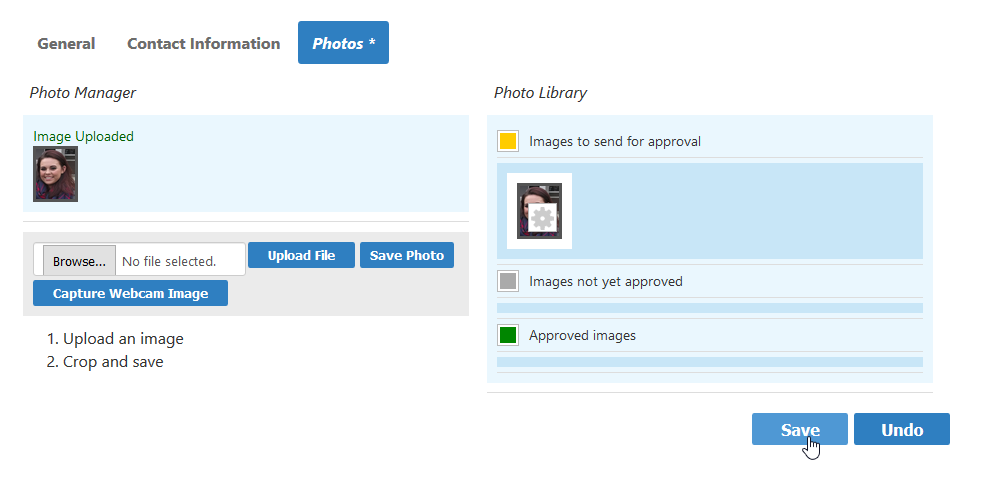
- Click Save.
You should see a message stating that the task was sent for approval. Once approved the photo will appear on all pages related to your person. People will be able to see your photo on those pages.
| Anchor | ||||
|---|---|---|---|---|
|
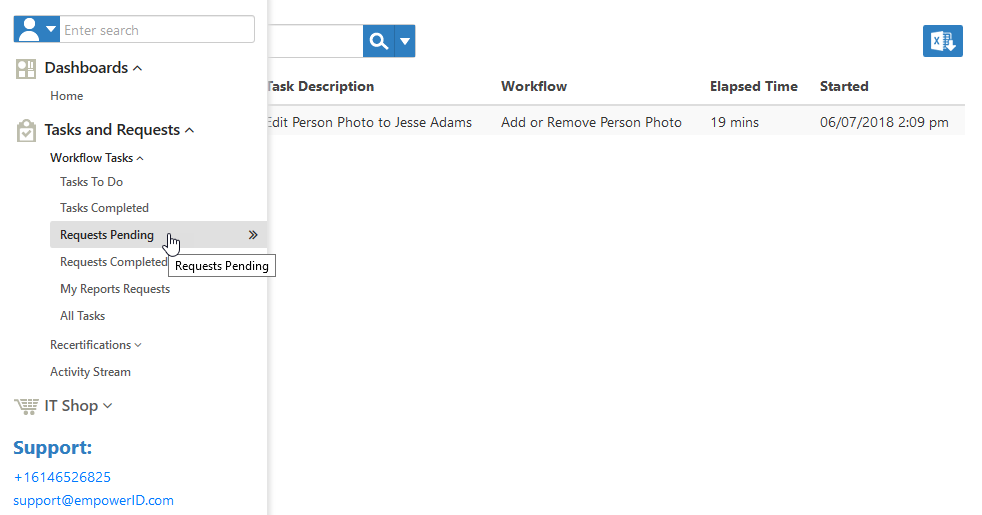
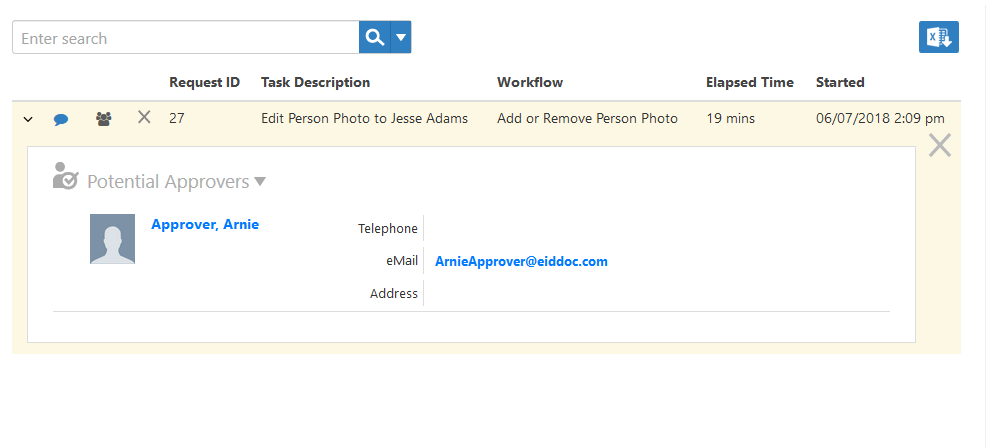
Any time you request access to a resource, make a change to your profile or perform another task for which your manager or an administrator needs to approve, that task is sent to those people. You can view the status of your request, as well as who can approve it on the Requests Pending page. To go to the page, do the following:
- From the
...
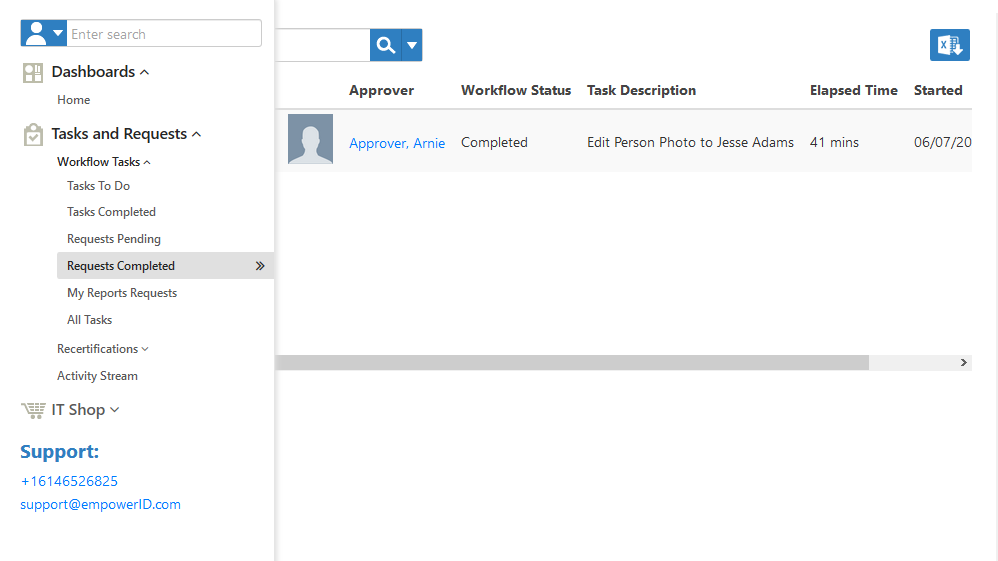
- navigation sidebar, expand Task and Requests > Workflow Tasks and click Requests Pending.
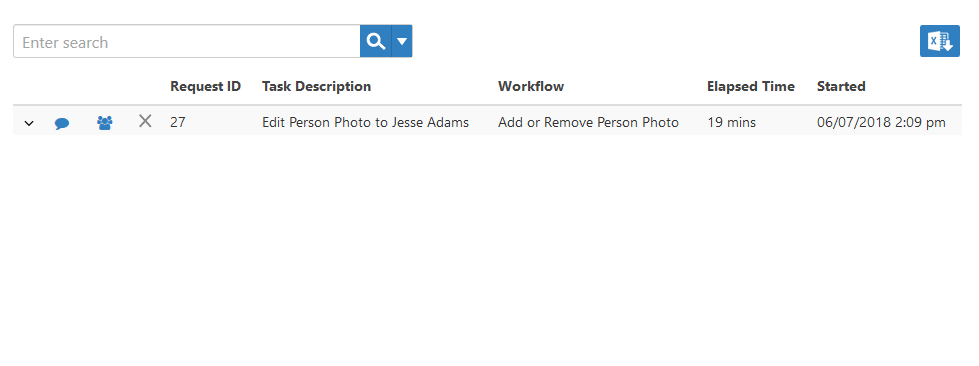
You should see your requests (if any) in the grid below the Search field. The grid allows you to view the task, the workflow you initiated, the elapsed time and when you submitted the request. To view who can approve a request, click the users icon beside it.
You should see a list of potential approvers.
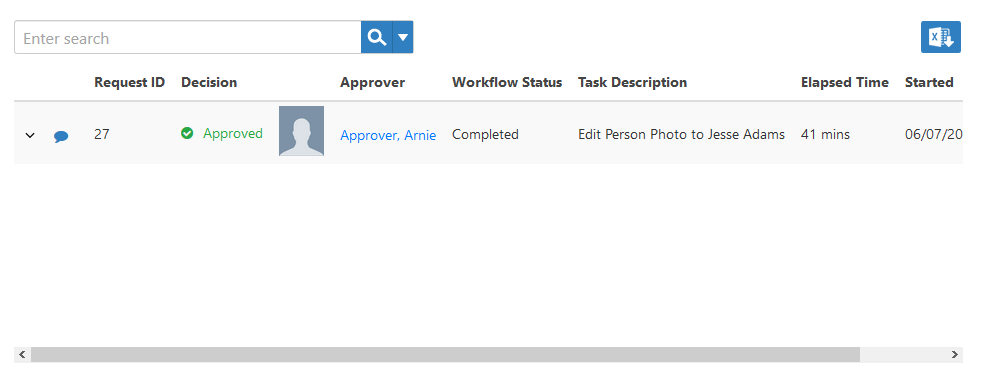
If a request is approved or rejected, you will see it on the Requests Completed page. You can view this page by expanding Tasks and Requests > Workflow Tasks and clicking Request Completed.
You should see any completed requests in the grid below the search field. You can see the decision that was made about the request, who made it as well as the status of the workflow.Tip You may need to log out and then log back in to see some approvals take effect. For example, if you uploaded a photo and it was approved, you will see it on your next login.
Anchor resetforgottenpassword resetforgottenpassword
How do I reset a forgotten password?
| resetforgottenpassword | |
| resetforgottenpassword |
If you have enrolled for password self-service reset as described above and have forgotten your password, you can reset it by clicking the Password link on the login page.
| Info |
|---|
Resetting a forgotten password requires that you have either an email address or mobile phone that is registered in EmpowerID. This is necessary as EmpowerID sends you a one-time password as an intermediate step. You enter the one-time password to authenticate and then reset the password. |
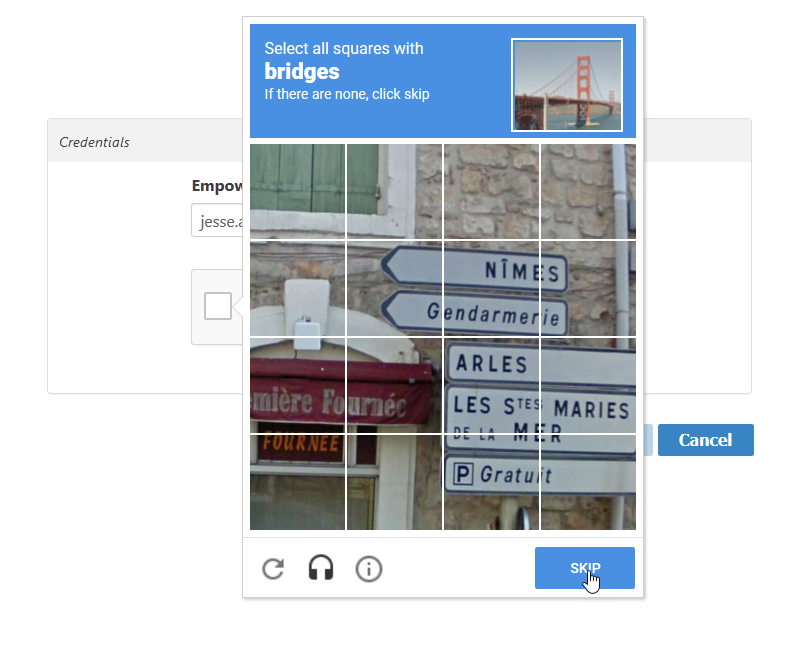
Doing so directs you to the Password Reset Center, where you enter your EmpowerID login or email and validate you're a human by passing the reCAPTCHA.
To reset your password do the following:
- Enter your EmpowerID login or email.
- Check I'm not a robot and then pass the reCAPTCHA challenge.
- Click Submit.
- Answer the personal challenge questions you created when enrolling for password self-service reset.
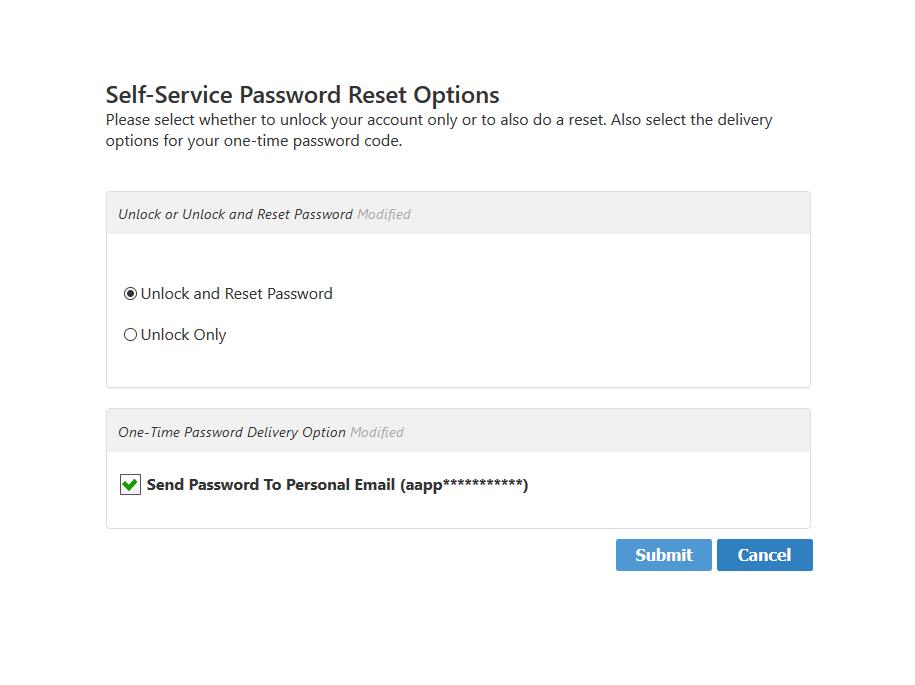
- After answering your personal challenge questions, select Unlock and Reset Password and specify the one-time password delivery method.
- Click Submit.
- Retrieve
...
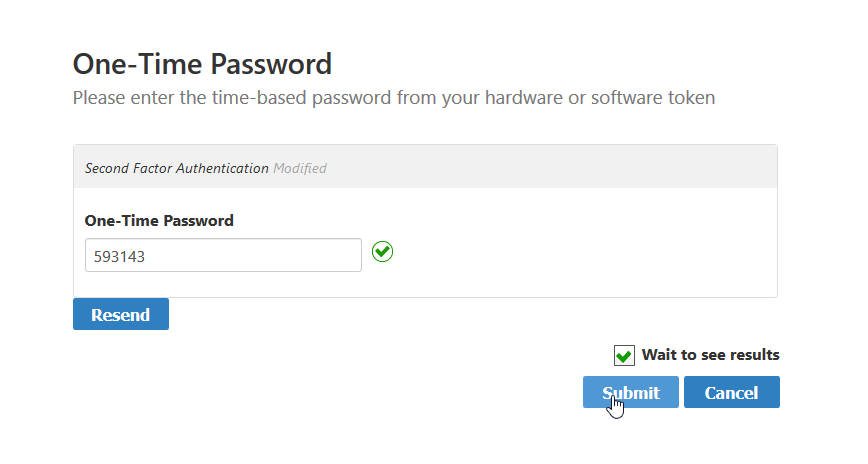
- the one-time password that EmpowerID sends to your specified delivery method.
- Enter the one-time password in the One-Time Password field and then click Submit.
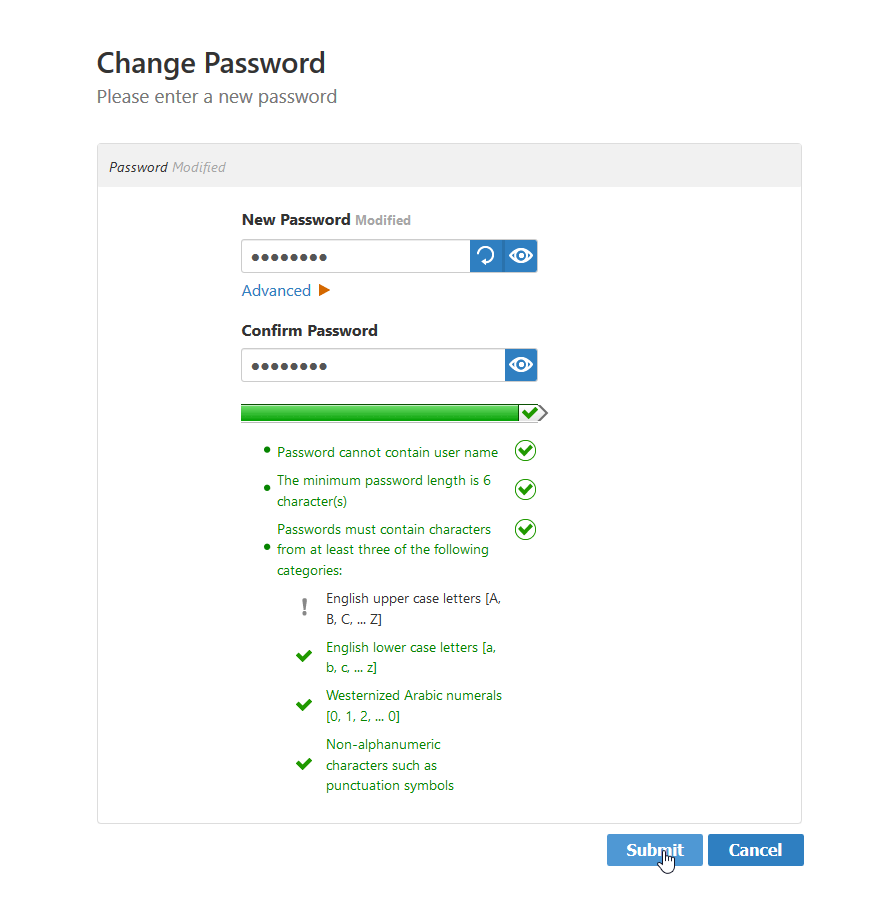
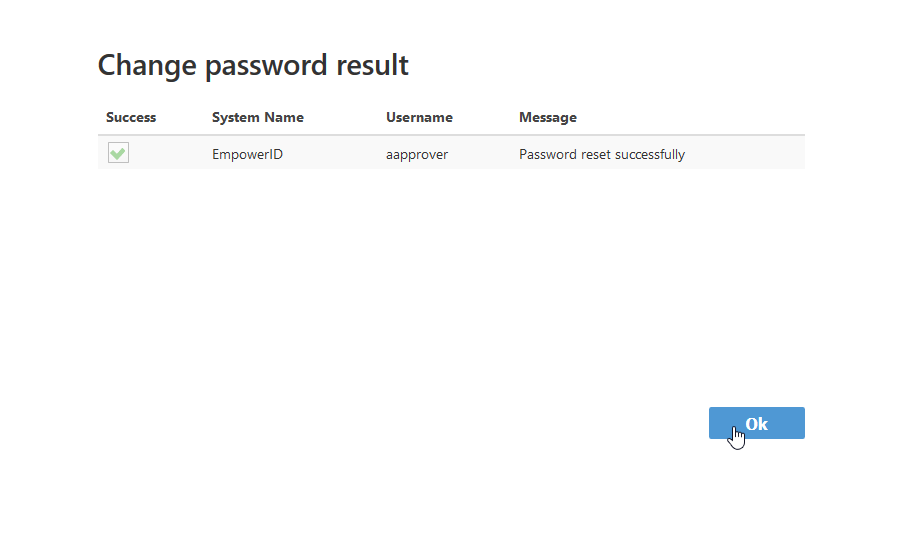
- Enter the new password in the New Password and Confirm Password fields and then click Submit.
- Click OK to close the Change password result message.
...
| style | float: left; position: fixed; top: 10px; padding: 5px; |
|---|---|
| id | toc |
| class | topicTOC |
| Div | ||||||||
|---|---|---|---|---|---|---|---|---|
| ||||||||
|
| Div | ||
|---|---|---|
| ||
On this page |
...

