The EmpowerID SSO framework allows you to federate EmpowerID with Office 365 without requiring you to set up Active Directory Federation Service (ADFS) or DirSync. In this scenario, the EmpowerID Security Token Service (STS) replaces ADFS, making EmpowerID the identity provider for your organization's Office 365 services.
| Note |
|---|
If Windows Azure AD Module for Windows PowerShell and Microsoft Online (MSOL) Sign-In Assistant are already installed on your EmpowerID server, you must remove them before installing the newer versions. |
| Info | |||||||||||||||||||||||||||||
|---|---|---|---|---|---|---|---|---|---|---|---|---|---|---|---|---|---|---|---|---|---|---|---|---|---|---|---|---|---|
| |||||||||||||||||||||||||||||
You must have a licensed corporate Office 365 account and connect it to EmpowerID. The Account Store that you connect it with must not have any spaces in the name. You must install the following modules in this order on the machine on which you configure the SSO Connection.
|
| Span | ||
|---|---|---|
| ||
|
To create a WS-Federation Connection
| HTML Comment |
|---|
REMOVE THIS PROCEDURE WHEN EID-14450 IS FIXED and uncomment the WS-Fed steps on the Single Sign-On tab below. |
This opens the Application Details form, which contains tabs and fields for creating the application.
On the General tab,
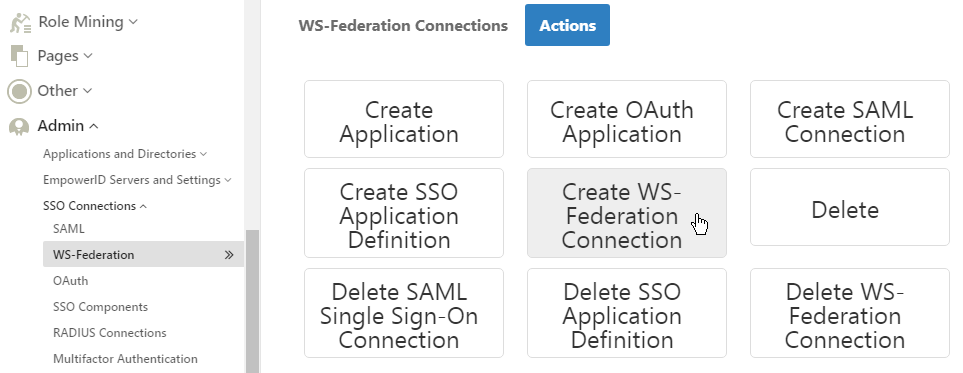
- In the navigation sidebar of the EmpowerID Web interface, expand Admin, then SSO Connections, and click WS-Federation.
- Click the Actions tab, and then click the Create WS-Federation Connection button.
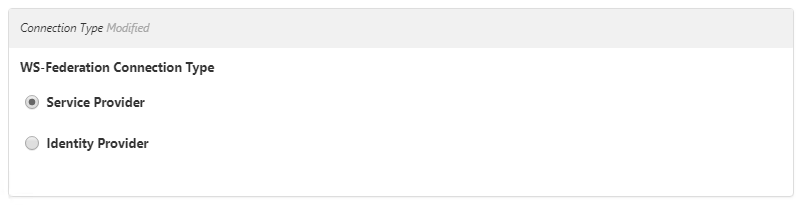
- On the General tab of the Connection Details screen that appears, under WS-Federation Connection Type, select Service Provider.
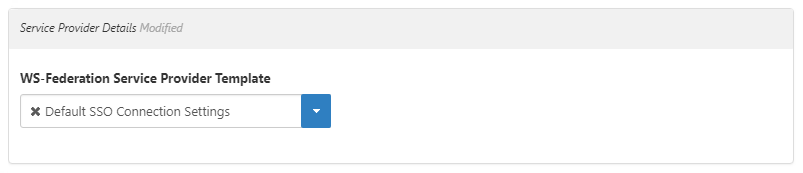
- In the Service Provider Details section that appears, drop down the click WS-Federation Service Provider Template and select Default SSO Connection Settings.
In the General Details section,
enterdo the following:
Enter a name and description in the Name, Display Name, and Description fields.

InInfo The name of the connection cannot contain any spaces.
Leave the Reply To Address
, Realm
, and Relying Party initiated login? fields empty and cleared.

- In the Tile Information ADFS-Like Token Details section, for the Tile Image URL, leave the path intact and change GenericLogo.png to office-365.png.
In the Initiating URL field, enter this URL, changing empowersso.com to your domain:
Code Block - Leave Is ADFS Token and Is ADFS Email Claim Identity cleared.
In the Issuer field, enter
https://
sso.
empoweriam.com
In the Logout URL field, enter this URL:
Code Block https://login.microsoftonline.com/logout.srf
In the Account Information section, drop down the Select existing Account Directory and select your Office 365 account store.Note If you have a space in the name of the account store, you need to remove it in the EmpowerID Management Console before federating.
- In the Relying Party Trust section, in the Trust Identifier URI field, enter urn:federation:MicrosoftOnline. Drop down the Signing Certificate field, select the one supplied with your installation, and click Save.

To create an SSO application for Office 365
/WebIdPWSFederation/365/EDDocsOffice365
replacingsso.empoweriam.comwith the FQDN of your EmpowerID front-end server, and replacingEDDocsOffice365with the name of your SSO Connection.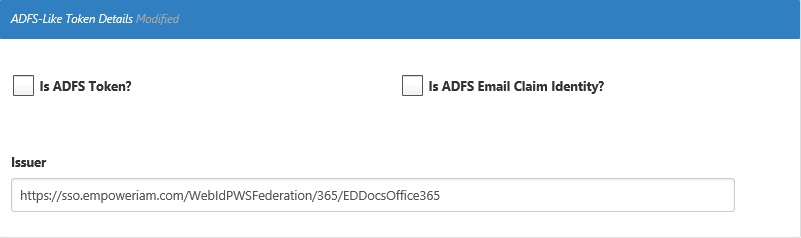
In the Tile Information section, for the Tile Image URL, leave the path intact and change Genric-1.png to office-365.png. This places the Office 365 logo on the login tile for the connection.
In the Initiating URL field, enter the below URL, changing empoweriam.com to your domain.
https://login.microsoftonline.com/login.srf?wa=wsignin1.0&whr=empoweriam.comUnder Single Logout Configuration, enter the following URL in the Logout URL field.
https://login.microsoftonline.com/logout.srfIn the Account Information section, click Select existing Account Directory and then select your Office 365 account store.

- In the Relying Party Trust section, in the Trust Identifier URI field, enter
urn:federation:MicrosoftOnline. - Click in the Signing Certificate field, press Enter, and select your signing certificate.

- Click Save.
Next, create an SSO application for Office 365.
To create an SSO application for Office 365
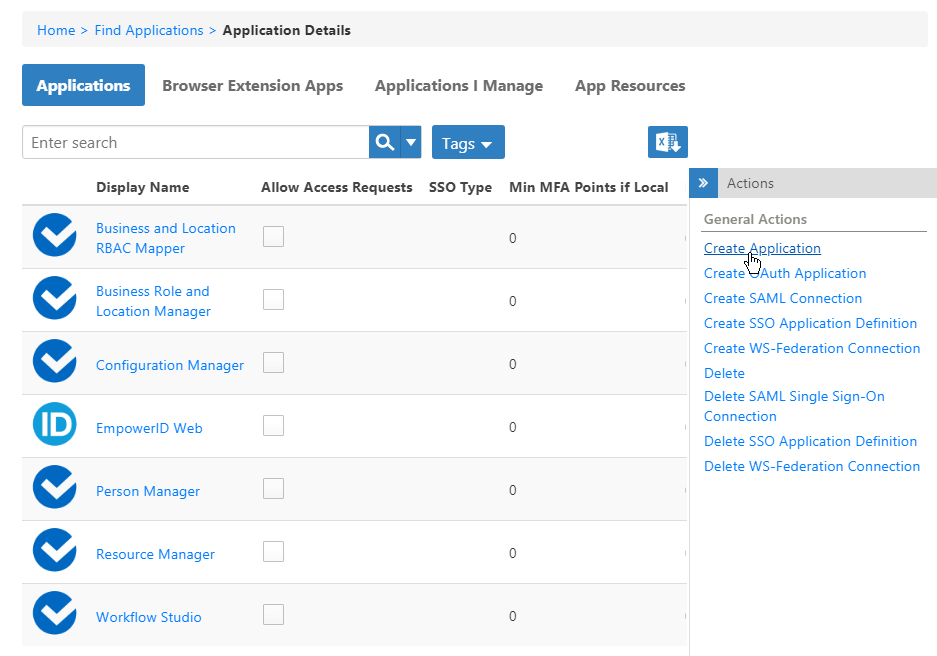
- In the navigation sidebar, expand Applications and click Manage Applications.
- From the Actions pane of the Applications page, click Create Application.
This opens the Application Details form, which contains tabs and fields for creating the application.
- On the General tab, configure these options for the application:
- Name, Display Name and Description — Enter Office 365.
- Icon — Leave the path intact, but change the file name from Genric-1.png to office-365.png.
This displays EmpowerID's Office 365 image to users in their EmpowerID Personal Applications page. - Full URL (Exact Match Path) — Leave this field blank as it is not used for Office 365.Allow Access Requests
- — Leave this option selected to allow users to Base URL for HTTP Module — Leave this field blank as it is not used for Office 365.
- Allow Access Requests — Leave this option selected to allow users to request or claim accounts in the application in the IT Shop.
- Allow Claim Account — Leave this option selected to allow users to claim an account in the application from the IT Shop.
- Allow Request Account — Leave this option (and Allow Access Requests) selected to allow users to request an account in the application.
- Login Is Email Address (Receive OTP to Claim) — Select this option (required for Office 365) to pass identity assertions to the application when logging in from EmpowerID and to send a one-time password to users claiming an account.
- Make me the Application Owner — Select this to own the application. Application owners can manage the application and approve or deny access requests.
- Configure Advanced Claim and Request Account Options — Only select this option if you have custom pages and workflows configured for processing access requests and managing any accounts linked to the application's EmpowerID account directory. Additional fields appear when you select it.

- Is Fulfillment Group Centric — This option is ignored unless the application is tracking only.
- Fulfillment Workflow — Leave this option blank as it is only used for tracking-only applications.

On the Single Sign-On tab, click do the following:
Click Single Sign-On Connection Type and select WS-Federation.
Click in the WS-Fed Connection field,
press Enter, and click the tile for the Office 365 connection created earlier
.


HTML Comment RE-ADD THIS PROCEDURE WHEN EID-14450 IS FIXED and delete the WS-Fed procedure above.
- select Create a New WS-Fed Connection
- In the WS-Federation Connection Information section that appears, do the following:
- Select Default SSO Connection Settings from the WSFederation Application Template drop-down.
- Type Office365 in the Display Name field.
- Type a description for the connection in the Description field.
- In the Issuer field, type the value that best represents the issuer of your Office 365 WS-Fed connection, such as empowerid:mydomain.office365, substituting mydomain with your domain.
- Type https://sso.empoweriam.com/EmpowerIDWebIdPWSFederation/Go365/Office365 in the Initiating URL field, where sso.empoweriam.com is the FQDN or DNS alias of your EmpowerID Web server and Office365 is the display name of the WS-Fed connection.
- Type your domain in the Home Realm field.
- In the Relying Party Trust section of the form, do the following:
- Type urn:federation:MicrosoftOnline in the Absolute Uri field.
- Select the certificate used to sign assertions from the Signing Certificate drop-down.
On the Users tab, click Select existing Account Directory and select your Office365 Office 365 Account Store.
Info EmpowerID uses this directory to map your Office 365 users with their corresponding EmpowerID Persons. You must add this Account Store to EmpowerID to have it appear in the drop-down.


- Click Add to cart, click .
- Click the shopping cart that flashes icon at the top of the page, and in the Cart dialog that appears, enter a reason for creating the application and then click Submit.


To configure access for the application
- After EmpowerID creates the application, click the Find Applications link in the breadcrumbs at the top of the page.
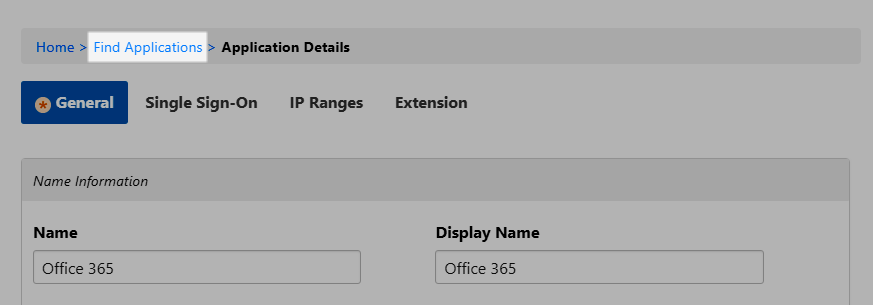
- Search for the Office 365 application you just created and click the Display Name link for it.


- This directs you to the View One page for the application. View One pages allow you to view and manage information about a particular resource object.


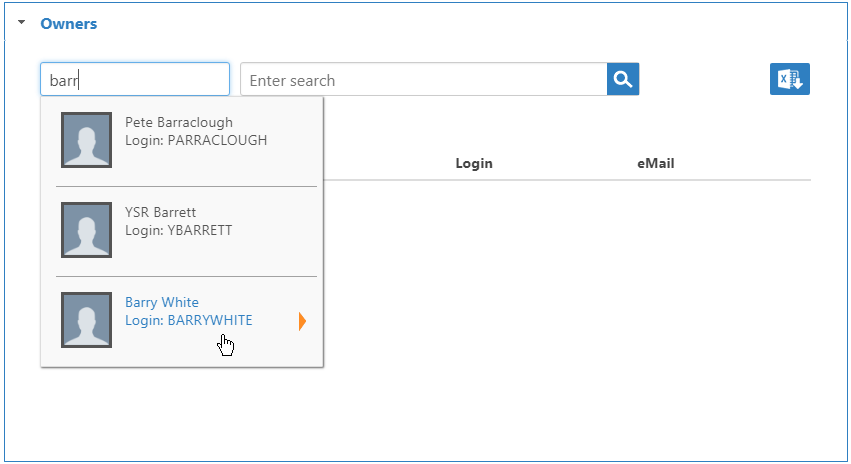
- To add owners who can manage the application, expand the Owners accordion, and in the Enter name to add field, enter a person's name and click the tile for that person.
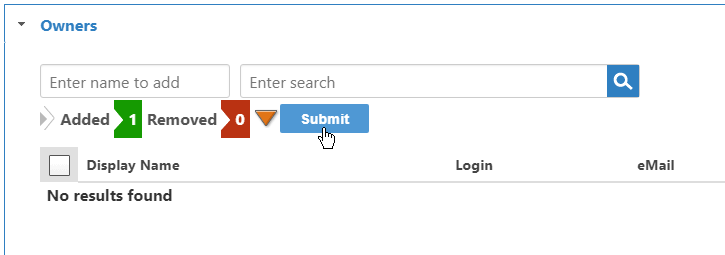
- The Added flag increments with the number of owners to add. Click Submit to add the owners to the grid.
- To ensure that all users with an Office 365 account can access the application, expand the Who Has Access To Application accordion and do the following:
- Drop down the Assignee Type and select Business Role and Location.
- Click the Add (+) button on the Assignee grid.


This opens the Grant Access dialog. Use this dialog to select the Business Role and Location for which you are granting access as well as the Access Level you are granting it.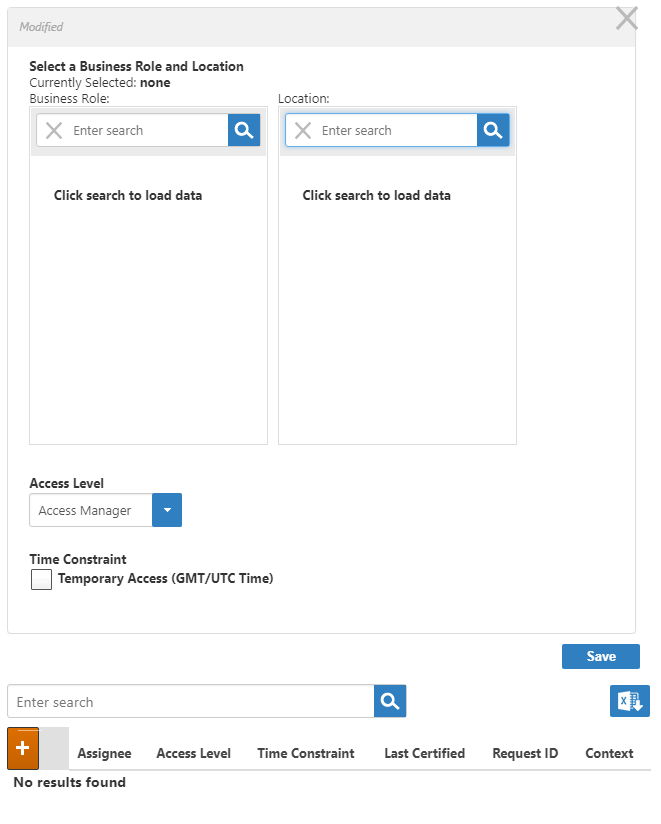
- In the Business Role pane of the Grant Access dialog, search for and select Any Role.
- In the Location pane of the Grant Access dialog, search for and select Anywhere.
- Select Viewer from the Access Level drop-down.
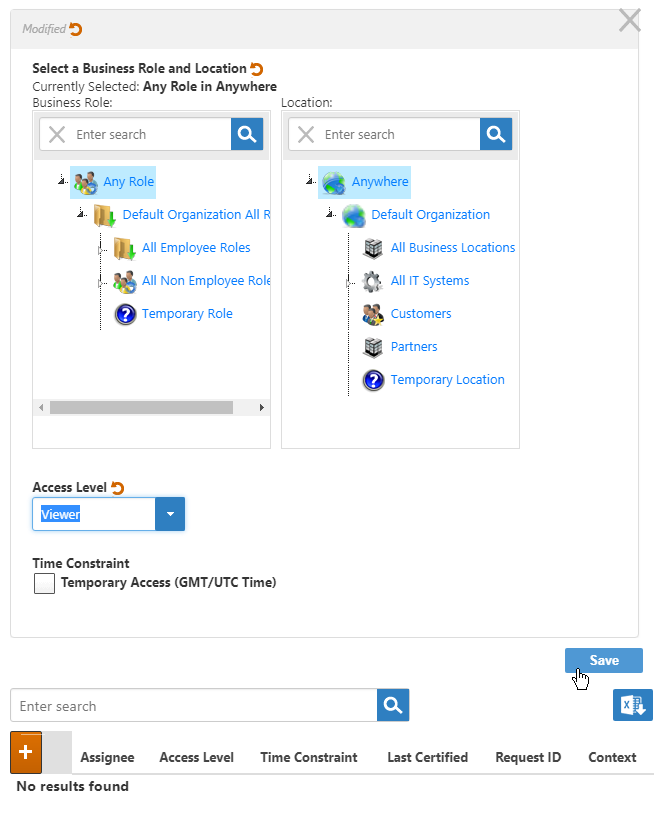
- Click Save.
Next, set the Public DNS for your server to match the domain name you are federating in Office 365 as described below. If the two already match you can skip ahead to Configuring a Trusted Endpoint for the SSL certificate used in your EmpowerID deployment.
To configure an EmpowerID server with a DNS Alias
This is an optional step that is only required when the DNS for your server and the domain name you registered in Office 365 are not the same. These values must match for SSL endpoints to function correctly. By setting a DNS, you are directing the EmpowerID services to ignore the machine's FQDN and use the Public DNS in its place.
- In the Navigation Sidebarnavigation sidebar, expand Admin, then EmpowerID Servers and Settings and click EmpowerID Servers.
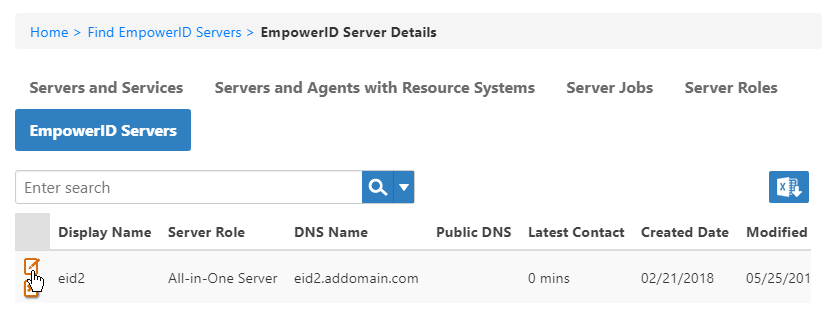
- From the EmpowerID Server Details page, click the EmpowerID Servers tab and search for the server whose role you want to set.
- Click the Edit button for that server.
In the dialog that appears, enter the DNS Alias in the PublicDns field and click Save.
Info The value entered here must be found in the SSL Certificate (i.e., Subject Name, SAN Cert, etc.).
- Restart the EmpowerID services on that server.
To export the EmpowerID Certificate in base64-encoding format
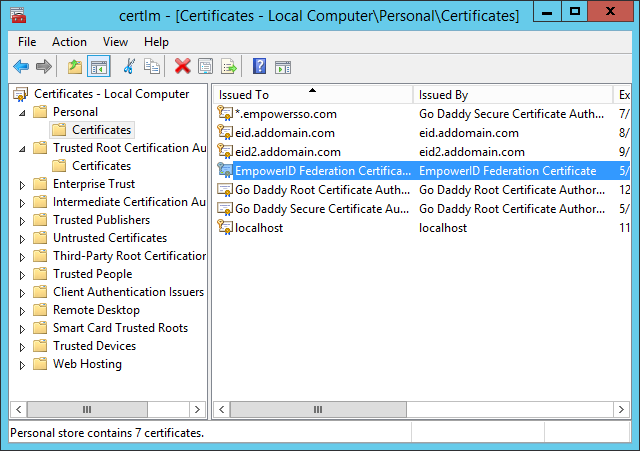
- From the server with your federation certificate, open Manage computer certificates.
- Expand the Certificates - Local Computer node, then Personal, and click Certificates.
- Rightbrowse to the C:\Program Files\TheDotNetFactory\EmpowerID\Programs\System Certificates folder and locate your federation certificate.
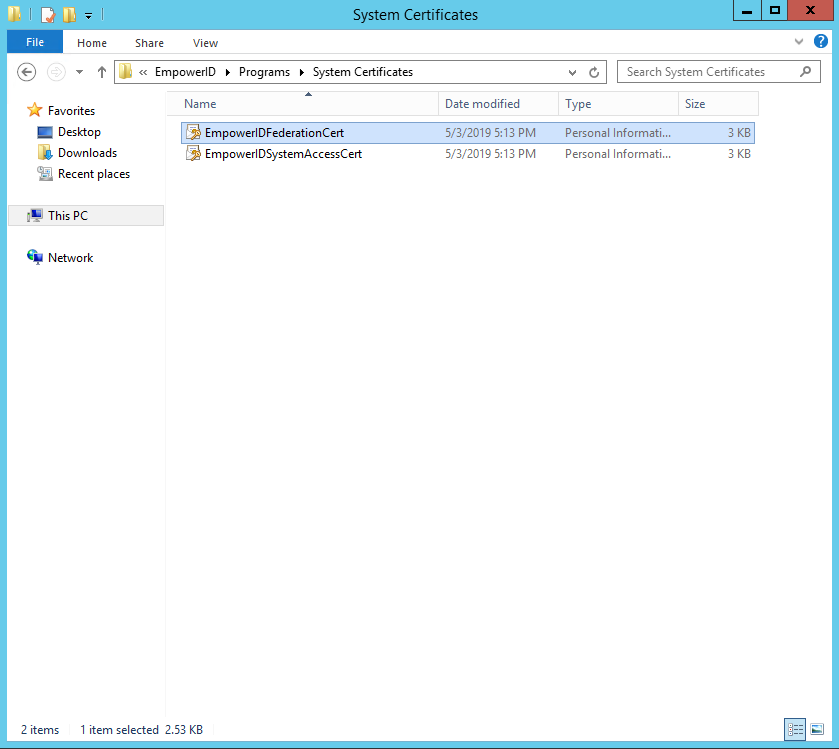
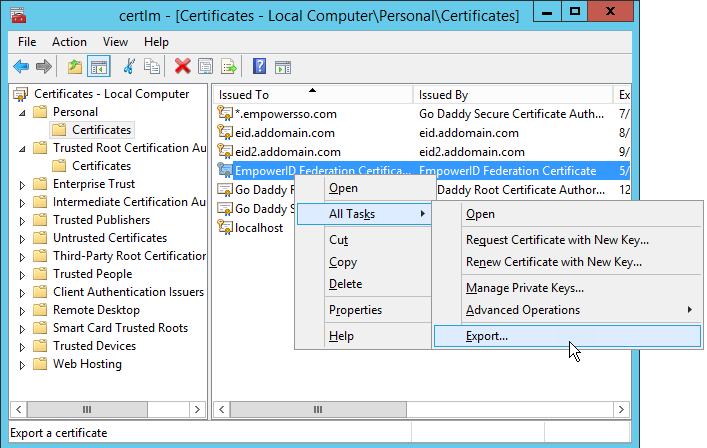
- Next, right-click the certificate you are using in your EmpowerID deployment and select All Tasks, then Export from the context menu.

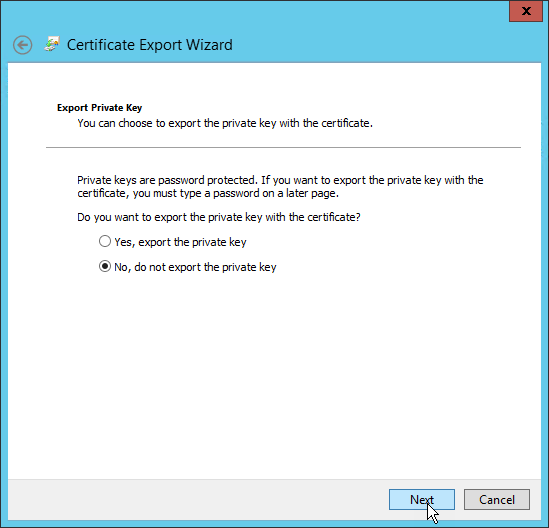
- In the Certificate Export Wizard that appears, click Next. Select No, do not export the private key and click Next.
- Select an export location, naming the exported certificate and click Next.
- Click Finish to complete the export. Open the exported certificate in a text editor and remove the first and last lines:

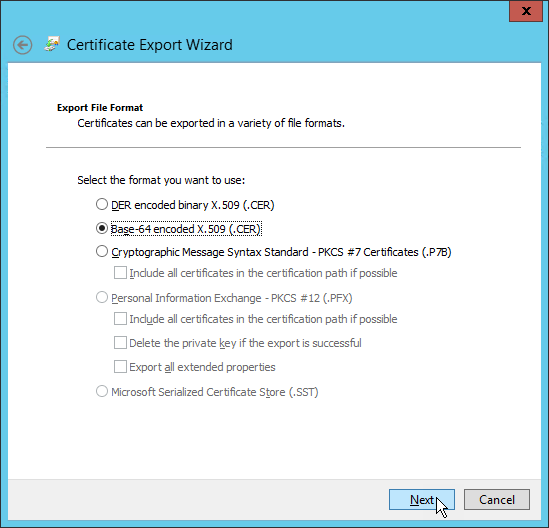
Select Base-64 encoded X.509 (.CER) and click Next.

----BEGIN CERTIFICATE----
----END CERTIFICATE----
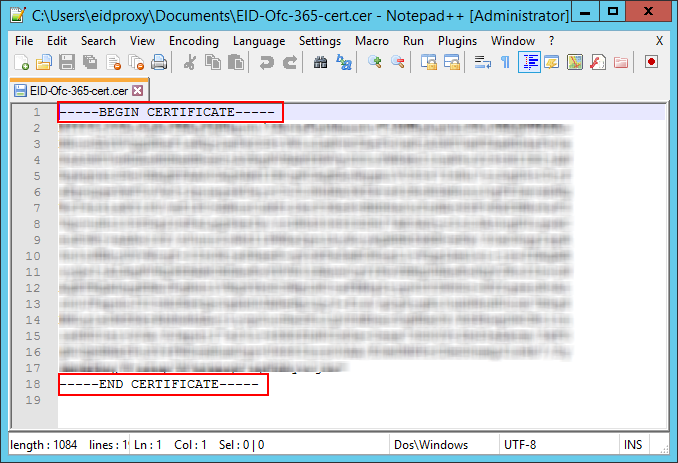
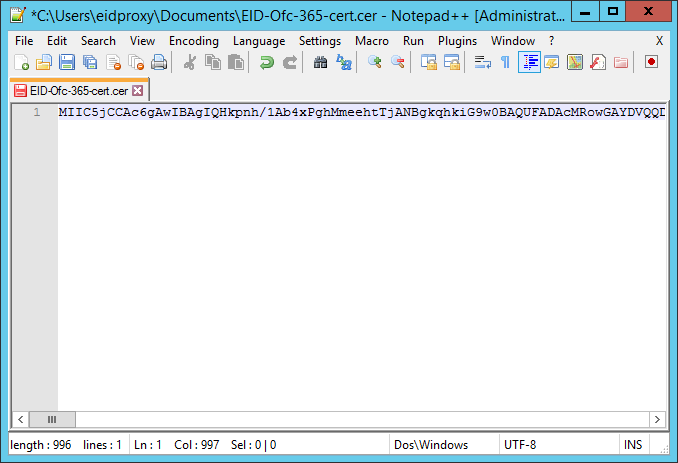
Remove all spaces and line breaks so that the certificate appears on one line.
Next, establish trust between Office 365 and EmpowerID as described below.
To establish trust between Office 365 and EmpowerID
- To connect to Microsoft Online, from the Start menu, open the Microsoft Azure Active Directory Module for Windows PowerShell command window and enter this command:
Code Block language powershell 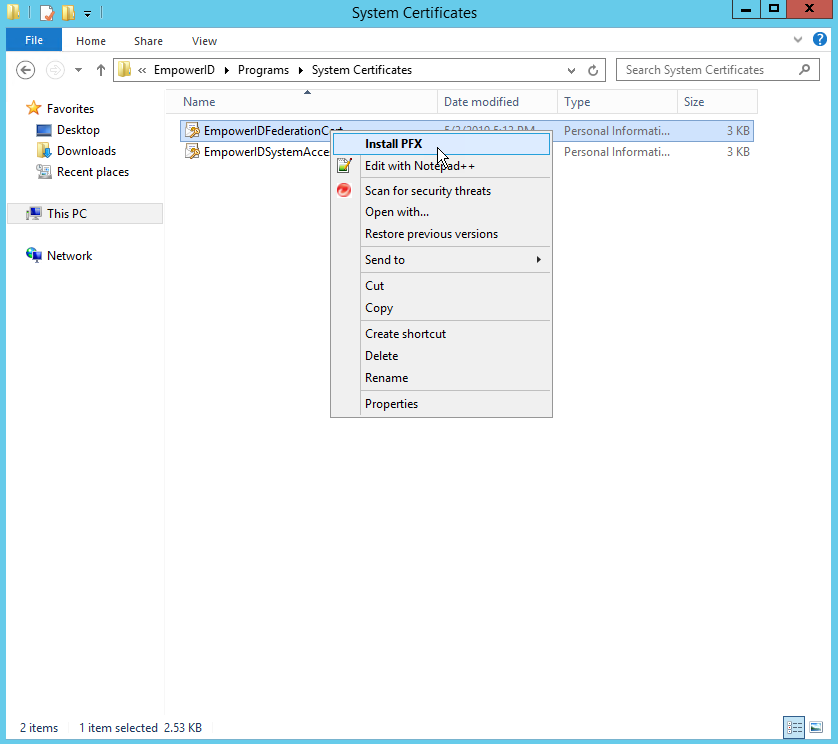
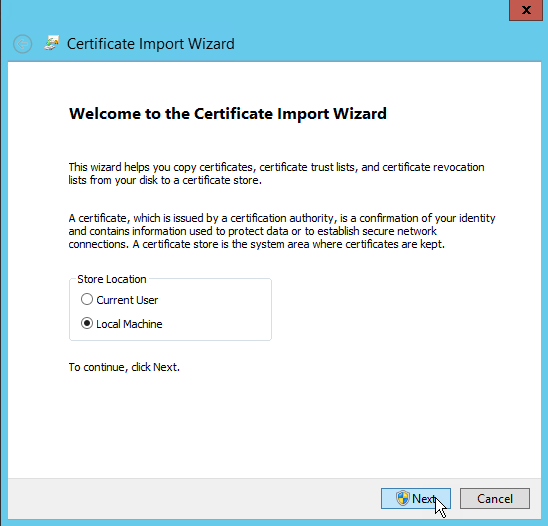
- Select Local Machine and click Next.
- Click Next.
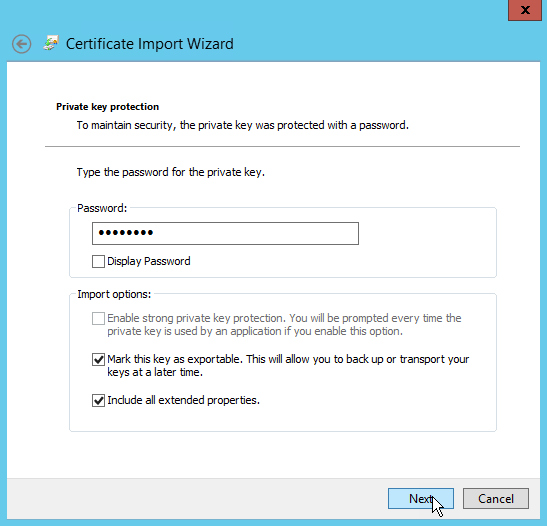
- Enter the password for the private key, select Mark this key as exportable and click Next.
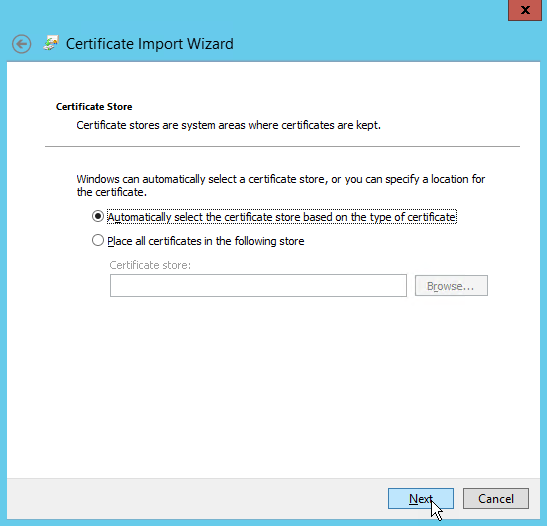
- Select the Automatically select the certificate store based on the type of certificate option then click Next.
- Click Finish.
- From MMC, open the Certificates snap-in for the Local Computer and locate the federation certificate in the Personal Store.
- Right-click the certificate and select All Tasks, then Export from the context menu.
- In the Certificate Export Wizard that appears, click Next.
- Select No, do not export the private key and click Next.
- Select Base-64 encoded X.509 (.CER) and click Next.
- Select an export location, naming the exported certificate and click Next.
- Click Finish to complete the export.
- Open the exported certificate in a text editor and remove the first and last lines:
----BEGIN CERTIFICATE----
----END CERTIFICATE---- - Remove all spaces and line breaks so that the certificate appears on one line.
Next, establish trust between Office 365 and EmpowerID as described below.
To establish trust between Office 365 and EmpowerID
To connect to Microsoft Online, run the following command in PowerShell.
Code Block language powershell Connect-MsolService
- In the Sign in to your account window that appears, enter the email address of a global administrator of administrator of your Office 365 account and click Next, then enter the password and click Sign In.

Once you have connected, run the following command to set the ImmutableID on all Office 365 accounts that have the domain specified in the command. Be sure to replace YourDomainName with the domain name that you own, e.g. mydomain.com.
and click Next, then enter the password and click Sign In.Note You cannot federate the default domain, e.g., domain.onmicrosoft.com, Microsoft created for your organization when you registered for an Office 365 account. You must add one or more other domains to your Office 365 account

Once you have connected, run the following command to set the ImmutableID on all Office 365 accounts that have the domain specified in the command. Be sure to replace YourDomainName with your domain name, e.g. empowersso.com, such as mydomain.com, and allow Microsoft to verify that you own those domains. After Microsoft verifies your ownership, you can federate it with EmpowerID.
Note This command is only necessary if the account was created in Office 365.DoDo not runthisthe command if you are using DirSync.Code Block language powershell Get-MsolUser -DomainName YourDomainName | where {$_.ImmutableId -eq $null -OR $_.ImmutableId -eq ''} | Set-MsolUser -ImmutableId {[guid]::NewGuid().ToString()}Tip To get all licensed users and their immutable IDs, run this command:run
Code Block language powershell Get-MsolUser -all | where {$_.isLicensed -eq $true} | select-object userprincipalname, immutableidNext, set the following variables at the PowerShell prompt for your domain, the federation endpoints and the signing certificate. The following example shows what the values for the variables looked like for our configuration. You need to replace
Replace the values with those specific to your environment. For example, the name of our domain is "empowerssomydomain.com," so the value of $dom and $FederationBrandName is "empowerssomydomain.com."," and the name of our connection in EmpowerID is "O365EDU".
Run each line of code separately in PowerShell.Code Block language powershell $dom = "empowerssomydomain.com" $FederationBrandName = "empowerssomydomain.com" $IssuerUri $ActiveLogOnUri = "https://sso.empowersso.com/EmpowerIDWebIdPWSFederation/365/Office365EmpowerIDWebServices/Office365ActiveSTS.svc" $ActiveLogOnUri $mex = "https://sso.empowersso.com/EmpowerIDWebServices/Office365ActiveSTS.svc/mex" $mex$IssuerUri = "https://sso.empowersso.com/EmpowerIDWebServicesWebIdPWSFederation/Office365ActiveSTS.svc365/mexO365EDU" $LogOffUri = "https://sso.empowersso.com/EmpowerIDWebIdPWSFederationWebIdPWSFederation/365/Office365O365EDU" $PassiveLogOnUri = "https://sso.empowersso.com/EmpowerIDWebIdPWSFederationWebIdPWSFederation/365/Office365O365EDU"" $cert = "MIIC5jCCAc6gAw..............QKgUSV0rciLpDOYiqAwbP6D"
Info The values for the ActiveLogOnUriIssuerUri, LogOffUri, and PassiveLogOnUri are the same and point to the Issuer you set up when you created the WS-Fed connection above. set up when you created the WS-Fed connection above:
https://<FQDN-Of-Your-EmpowerID-Font-End-Server>/WebIdPWSFederation/365/<Name-Of-Your-SSO-Connection>
The value set for the IssuerURI does not need to be a resolvable DNS; however, it does need to be unique in Office 365 as an . An IssuerURI cannot be used for more than one connection /tenant . Also, when or tenant.
The values for the ActiveLogOnUri and mex variables contain the name of your SSO Connection followed by ActiveSTS.svc and ActiveSTS.svc/mex, respectively.
When setting the value for the certificate, be sure to pass in the string without any line breaks, using Base-64 encoding.Note If you received a DefaultDomainUnsetException error when running the above PowerShell cmdlet, you need to specify the domain as the default domain. To fix the error run the below cmdlet. Additionally, you will need to run the cmdlet each time you add a tenant to set the default domain for those tenants. Be sure to replace "littleblueberry.onmicrosoftmydomain.com" with the fully qualified domain name your Office 365 account was given by Microsoft when first created.
Code Block language powershell set-msoldomain -name littleblueberry.onmicrosoftmydomain.com -IsDefault
Use the cmdlet below to set the Federation Authentication Mode to WS-Fed for the Office 365 domain. Enter the cmdlet as one line.
Code Block language powershell Set-MsolDomainAuthentication -DomainName $dom -FederationBrandName $dom -Authentication Federated -PassiveLogOnUri $PassiveLogOnUri -SigningCertificate $cert -IssuerUri $IssuerUri -ActiveLogOnUri $ActiveLogOnUri -MetadataExchangeUri $mex -LogOffUri $LogOffUri
Info If necessary, you can revert the domain from federated to managed by using the following PowerShell cmdlet.
Code Block language powershell Set-MsolDomainAuthentication -DomainName $dom -Authentication Managed
Use the following cmdlet to update the your Office 365 Domain with the federation settings. Enter the cmdlet as one line.
Code Block language powershell Set-MsolDomainFederationSettings -DomainName $dom -FederationBrandName $dom -IssuerUri $IssuerUri -LogOffUri $LogOffUri -PassiveLogOnUri $PassiveLogOnUri -ActiveLogOnUri $ActiveLogOnUri -MetadataExchangeUri $mex -SigningCertificate $cert
Run the following cmdlet to verify your settings:.
Run the following cmdlet to retrieve the Open Authorization (OAuth) configuration settings currently in use in your organization:Code Block language powershell MSOnlineExtended\Get-MsolDomainFederationSettings
Run the following cmdlet to enable Modern Authentication:Code Block language powershell Get-CsOAuthConfiguration
Run the following cmdlet to close your session:Code Block language powershell Set-CsOAuthConfiguration -ClientAdalAuthOverride Allowed-DomainName $dom
You should see the federation settings you entered above reflected in the output.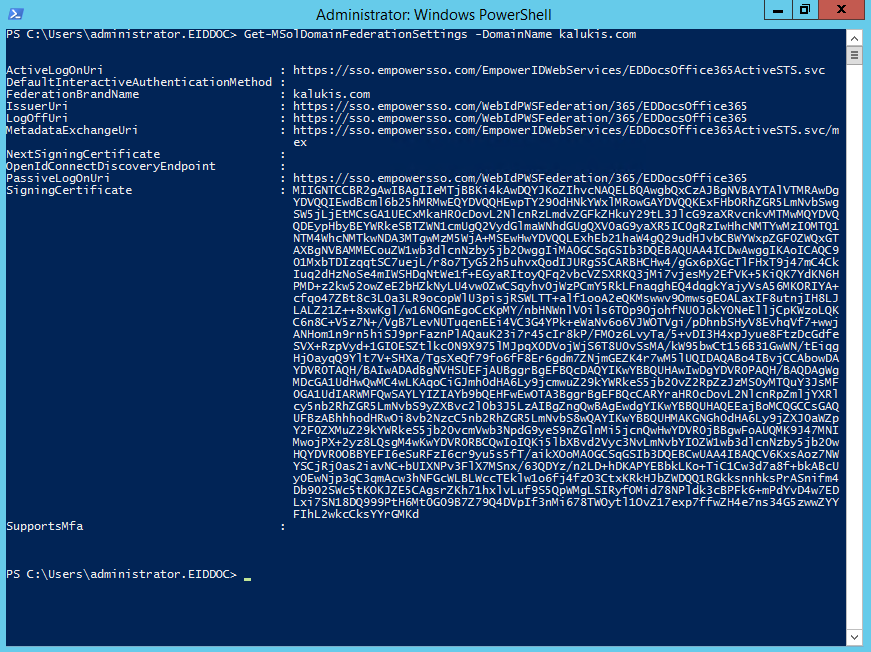
Close your session by running the following cmdlet.
Code Block language powershell Get-PSSession|Remove-PSSession
| Info |
|---|
If you are using Skype for Business, please see the Configuring Skype for Business Online topic for instructions. If you are using Exchange Online, please see Configuring Exchange Online for Modern Authentication. |
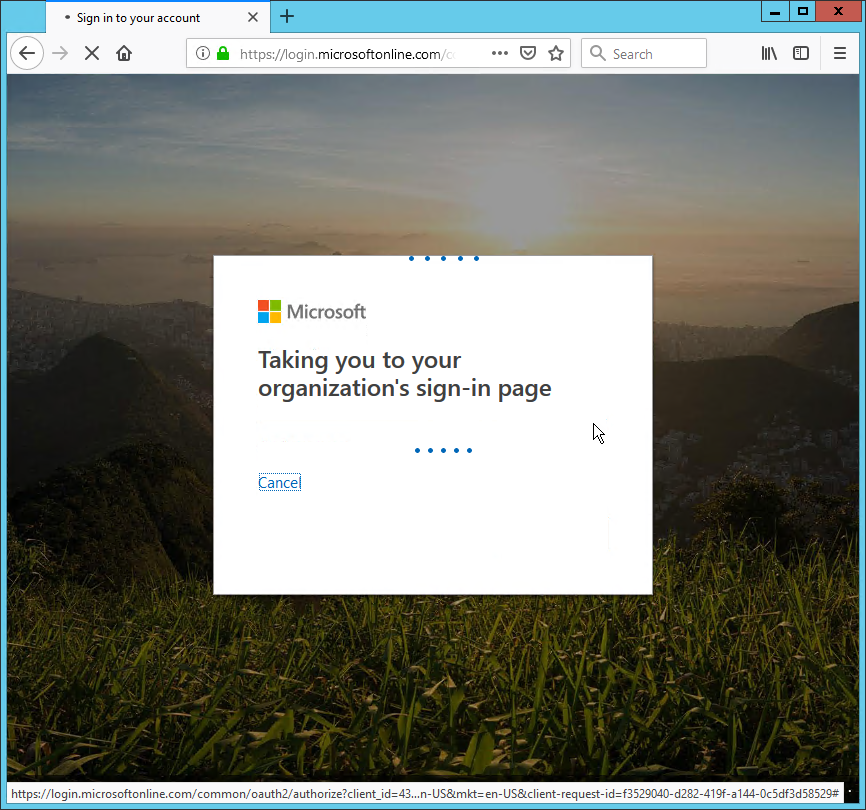
To test the Office 365 SSO Connection
- From your Web browser navigate to the login for Office 365 and enter your username.
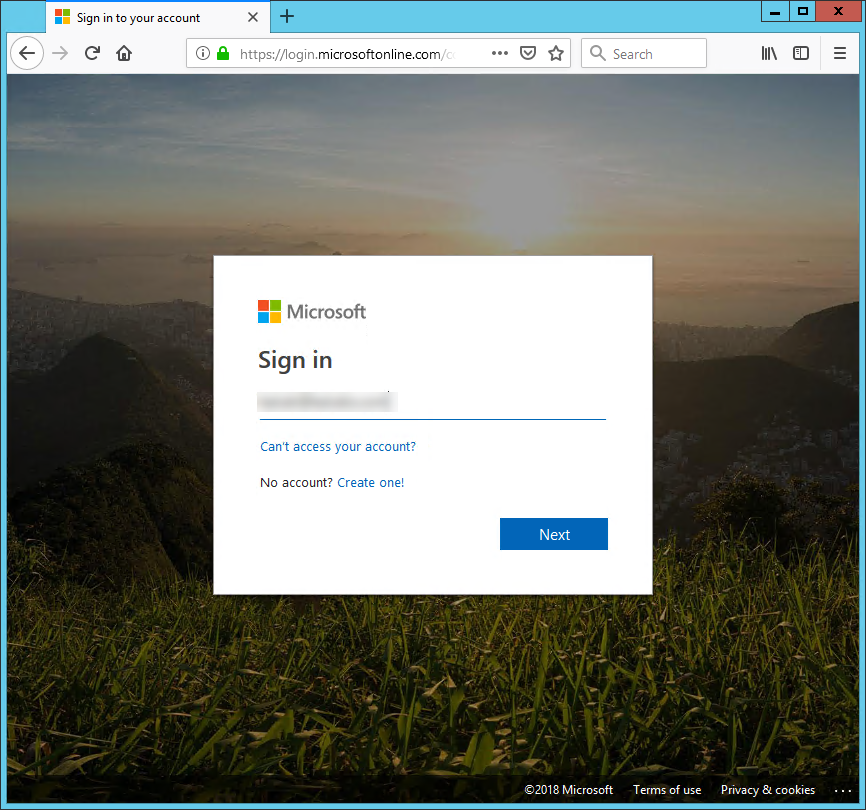
- Click the Password fieldNext. A message appears should appear stating that Office 365 is redirecting you to your organization's sign-in page.
Log in to the EmpowerID Web application as you normally would. The username is the same as that used for accessing Office 365.
Info If you have yet to claim an account, EmpowerID will direct you to register the account to your person.
- EmpowerID verifies your identity and redirects you back to Office 365.
| Div | ||||||||||||||||||||||
|---|---|---|---|---|---|---|---|---|---|---|---|---|---|---|---|---|---|---|---|---|---|---|
| ||||||||||||||||||||||
|