If you are a resource owner (known as an "Access Manager" in EmpowerID) or another user delegated the ability to manage resources, you can view and manage the access assignments to those resources from the Resources I Manage page of the IT Shop. For example, if you are a group owner, you can add and remove people to and from the group as needed, as well as grant them additional levels of access.
| Info | ||
|---|---|---|
| ||
In order to manage access to the resources you manage from the IT Shop, you need to have access to the following EmpowerID resources:
If you do not have access to these resources, you can request them from the IT Shop if your organization has made them requestable. If they are not in the IT Shop, you will need to speak with your manager. |
...
- From the Navigation Sidebar, expand IT Shop and click Resources I Manage.
- From the Resources I Manage page, search for the resource that you want to give another user access to and then click the Who Has Access link for that resource.
This opens the Access pane. This pane shows you who currently has access to the resource and the type of access they have. At a minimum, you can see your access.
The Access pane is comprised of the following components:- Assignee Type Drop-down- This allows you to filter the results returned to the pane by EmpowerID actor type.
- Search Field - Allows you to search for a specific assignee with current access.
- Assignee Grid - Displays the assignees who currently have access to the resources and provides the functionality for adding and removing assignees.
- Select the appropriate actor type for the access assignment from the Assignee Type drop-down. In this example, we are granting access to another person, so we are selecting Person.
- From the Assignee Grid, click the Add (+) button.
- In the Grant Access pane that appears, type the name of the person to whom you want to grant access and then click the tile for that person.
- In the Grant Access pane, type the Access Level you want to grant the person and then click the tile for that Access Level.
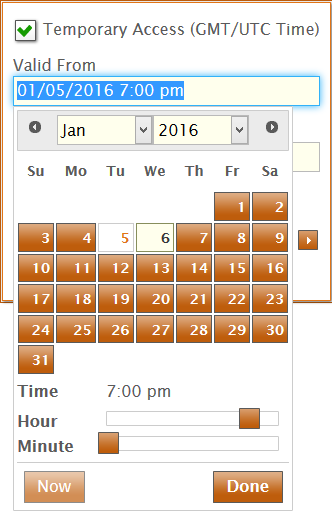
- If the access is to be temporary, select Temporary Access. When this option is selected, you set the date and time ranges by clicking the Valid From and Valid To fields and picking the appropriate values from the Calendar.
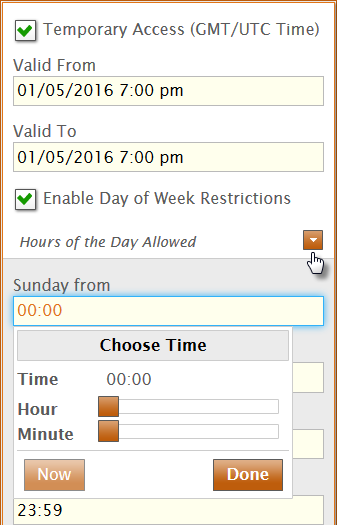
- Additionally, you can restrict the access to certain days and hours of the week by clicking the Hours of the Day Allowed drop-down button and setting the restrictions in the from and to fields for each day.
- Click Save.
- Repeat for each additional access assignment you want to make.
- When you have finished adding access assignments for the resource, click the Shopping Cart located at the top of the page, type a reason for the request in the cart dialog and then click Submit.
The new access assignment appears in the Assignee Grid.
...


