...
- In EmpowerID, create a new WS-Federation Connection, i.e. Adfs.
- The Reply To Address should point to your ADFS WS-Federation Passive Protocol URL, i.e. https://empowersso.com/adfs/ls/.
In the ADFS-Like Token Details, check select Is ADFS Token? and specify the full URL to the current WS-Federation Connection endpoint (the one you’re creating now) as the Issuer, i.e. https://sso.empowersso.com/WebIdPWsFederation/Login/Adfs.

Populate the rest of the WS-Federation Connection form similar to as shown below including selecting a Signing Certifcate and click Save to create the Adfs Ws-Federation Connection.
Info Please note that in some instances of ADFS, the Trust Identifier URI may be your ADFS WS-Federation Passive Protocol URL, i.e. https://empowersso.com/adfs/ls instead of the https://empowersso.com/adfs/services/trust.

- Recycle IIS and proceed to the next steps in ADFS.
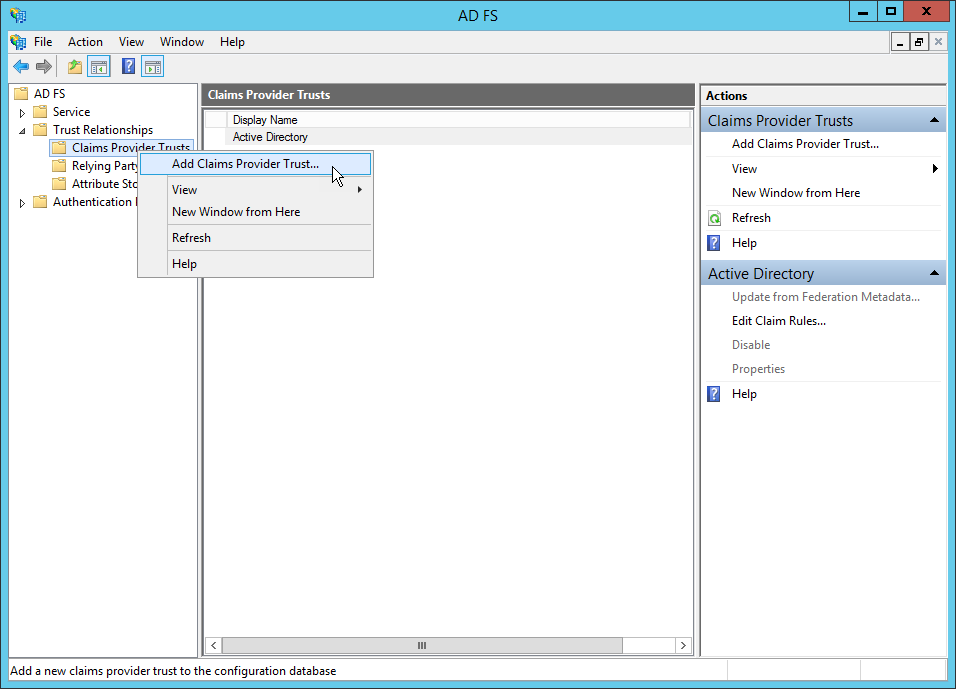
- In ADFS, right-click on the Claims Provider Trusts node and from the context menu, select Add Claims Provider Trust.
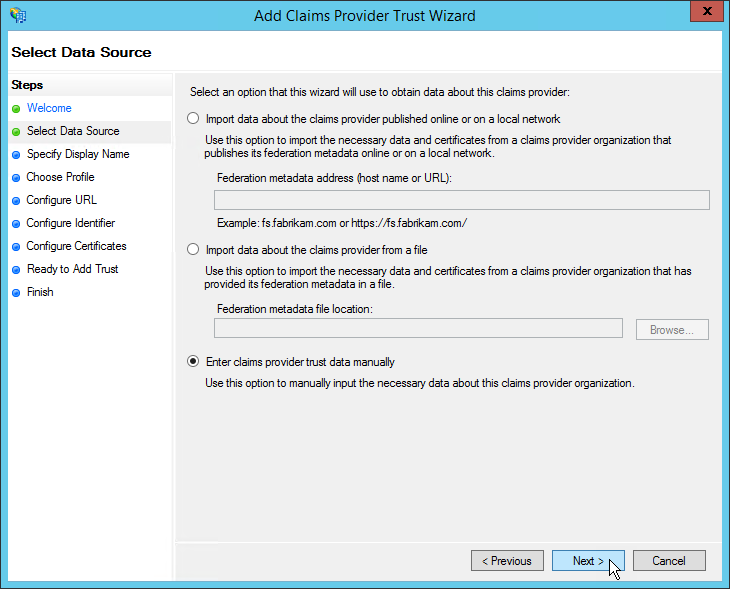
- In the Add Claims Provider Trust Wizard that appears, click Start, select Enter claims provider trust data manually and then click Next to continue.
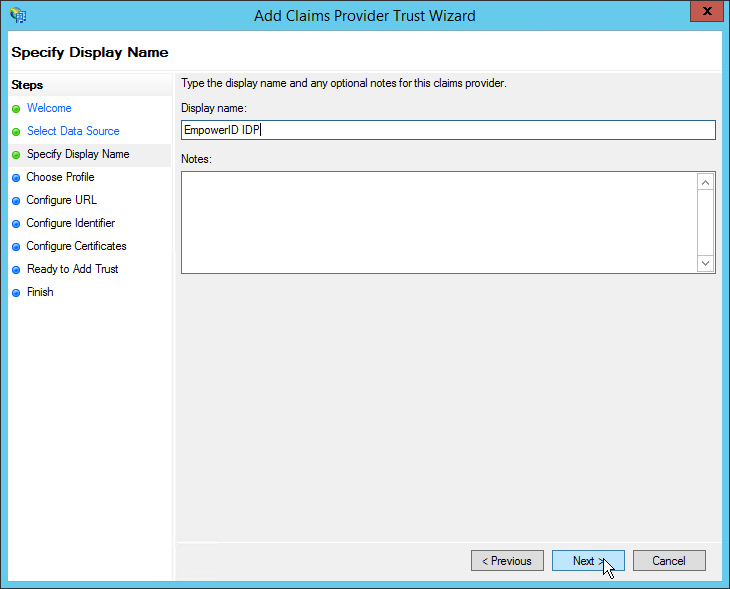
- Enter a display name for the EmpowerID trust relationship, such as EmpowerID IDP, and click Next to continue.
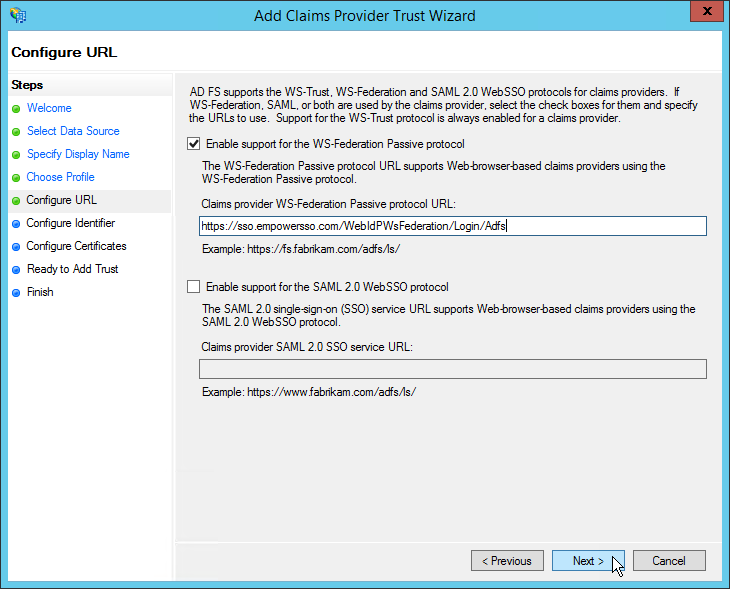
- Under Configure URL, in the Claims provider WS-Federation Passive URL field, enter the URL of the EmpowerID WS-Federation Passove endpoint, such as https://sso.empowersso.com/WebIdPWsFederation/Login/Adfs, and then click Next to continue.
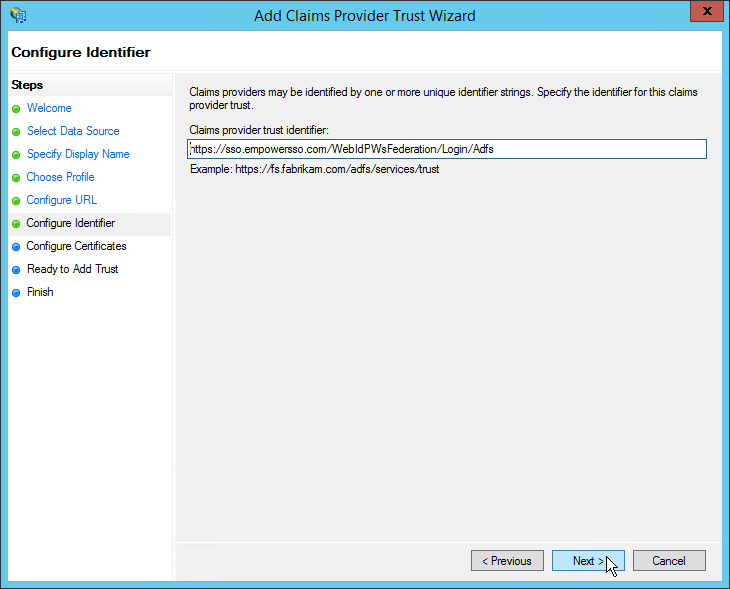
- Leave the Claims provider trust identifier field unchanged (or if it is empty specify the EmpowerID WS-Federation Passive endpoint, such as https://sso.empowersso.com/WebIdPWsFederation/Login/Adfs, and click Next to continue.
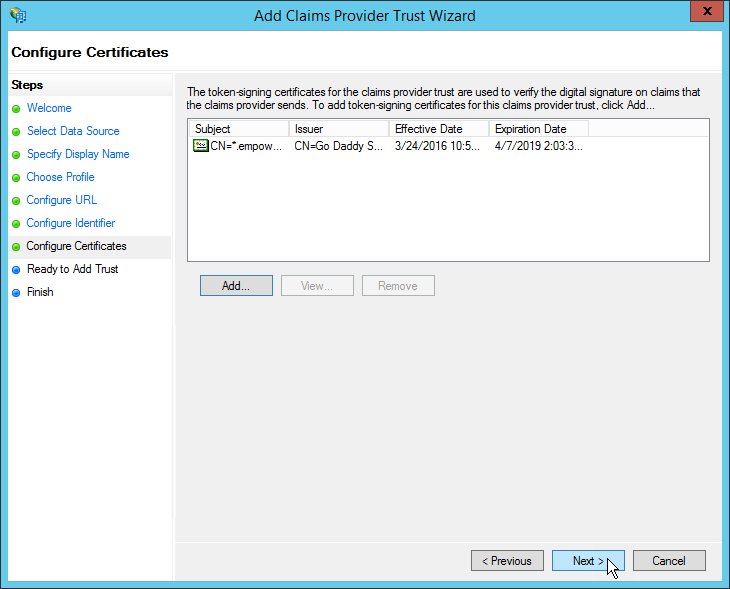
- Export the Public Key of the Certificate associated with the ADFS WS-Federation Connection created in EmpowerID and import the certificate in to ADFS using the Add button.
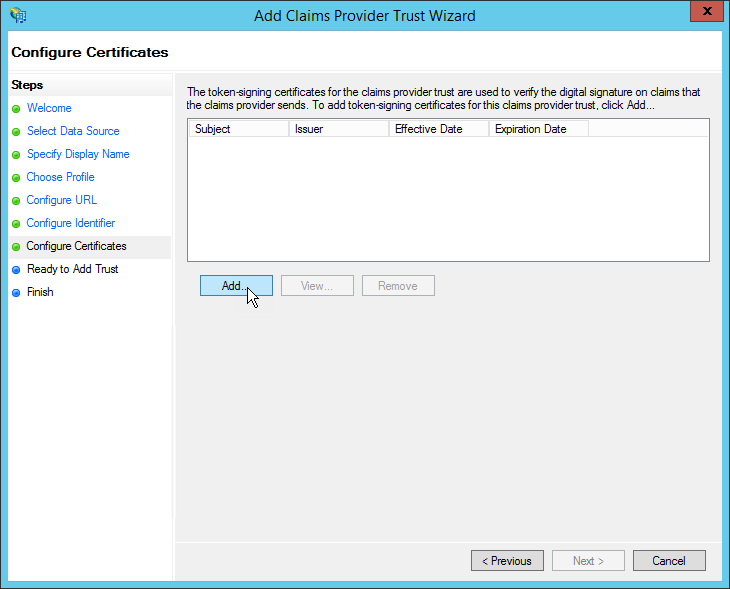
- Browse for the certificate and then click Next through the wizard to complete the setup.
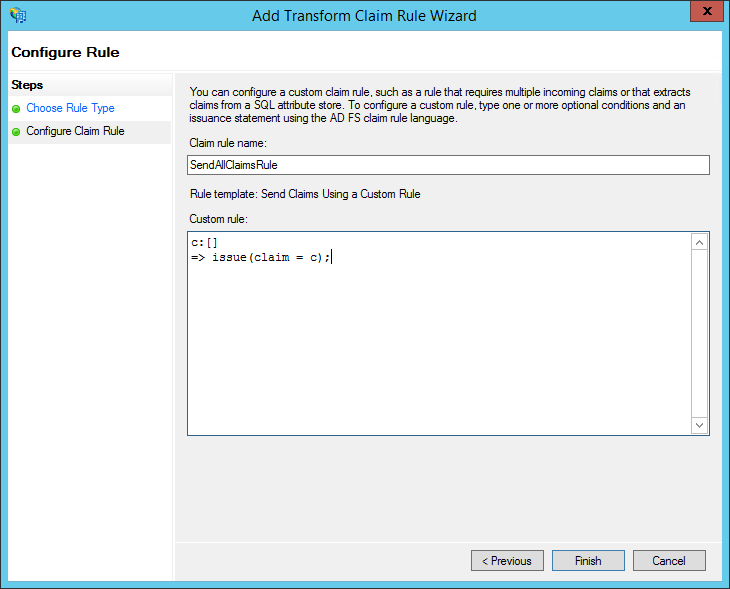
- In the Edit Claim Rules window that appears, click Add Rule to add rules to passthrough or transform claims.
- To passthrough all Claims, select Custom Rule and in the custom role textbox, add c:[] => issue(claim=c); This rule forwards all claims received from EmpowerID to ADFS Relying Parties.
 {style
 Click Finish.
Info You may create claim rules to transform EmpowerID claims to those appropriate to ADFS Relying Parties as necessary.
...