| Div |
|---|
Home / Installation and Configuration Guide / Connecting to Directory Systems / Local Windows Servers / Current: Configuring Windows Management Instrumentation |
Configuring Windows Management Instrumentation
Microsoft's Windows Management Instrumentation (WMI) are conditions that consolidate the management of devices in a Microsoft Windows Network. Implementing WMI enables you to manage local and remote Microsoft Windows computers from a central server. EmpowerID uses WMI to manage windows services, application pools and file shares. This document provides instructions on how to configure WMI for use with EmpowerID.
| Info | |||||||||||||
|---|---|---|---|---|---|---|---|---|---|---|---|---|---|
Use the following PowerShell script to configure all of the WMI and DCOM permissions needed for EmpowerID's Local Windows Account Store connector. Install the below module before executing the script -
Change the $userName value in the script to the desired user account logonname
|
Perform these procedures on any Microsoft Windows Servers that you wish to use to manage local users and groups.To assign Distributed Component Object Model (DCOM) permission
- Open Dcomcnfg.exe.
- From the Console Root tree, navigate to Component Service > Computers > My Computer.
- Right-click My Computer and select Properties from the context menu.
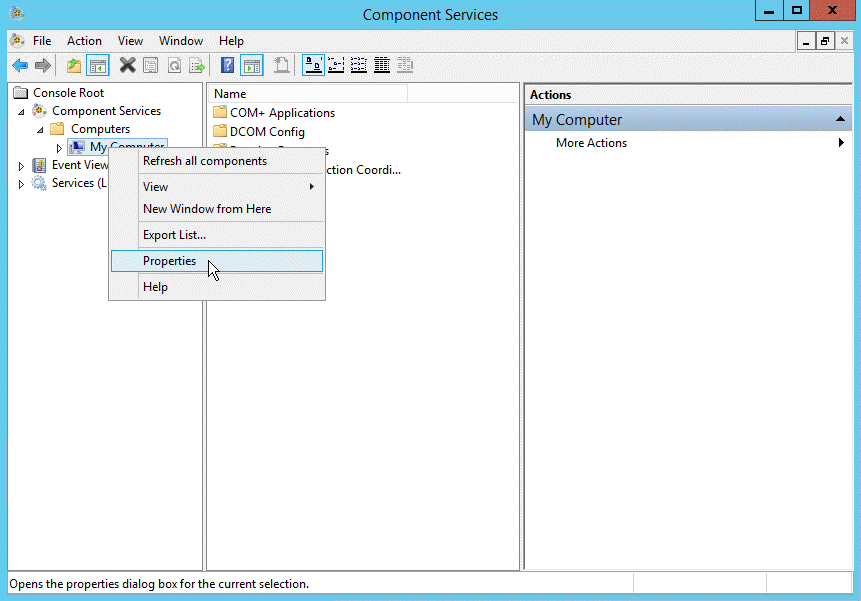
- From the My Computer Properties window that opens, click the COM Security tab.
- In the Access Permissions pane, click Edit Limits.
- From the Access Permission window that appears, ensure the Everyone user group has Local Access and Remote Access permissions.
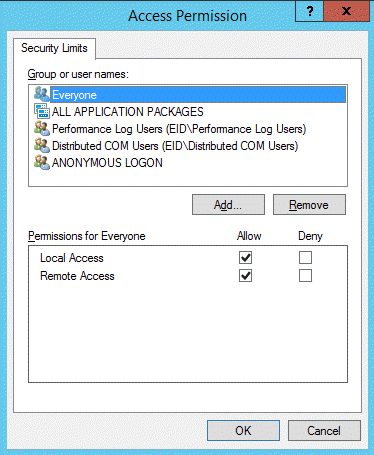
- Close the Access Permission window.
- Back in the My Computer Properties window, click Edit Limit in the Launch and Activation Permissions pane.
- From the Launch and Activation Permission window that appears, ensure the Everyone user group has both the Local Launch and Local Activation permissions.
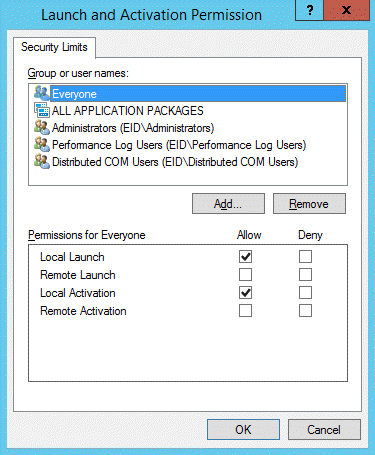
- Close the Launch and Activation Permission window and then close the My Computer Properties window.
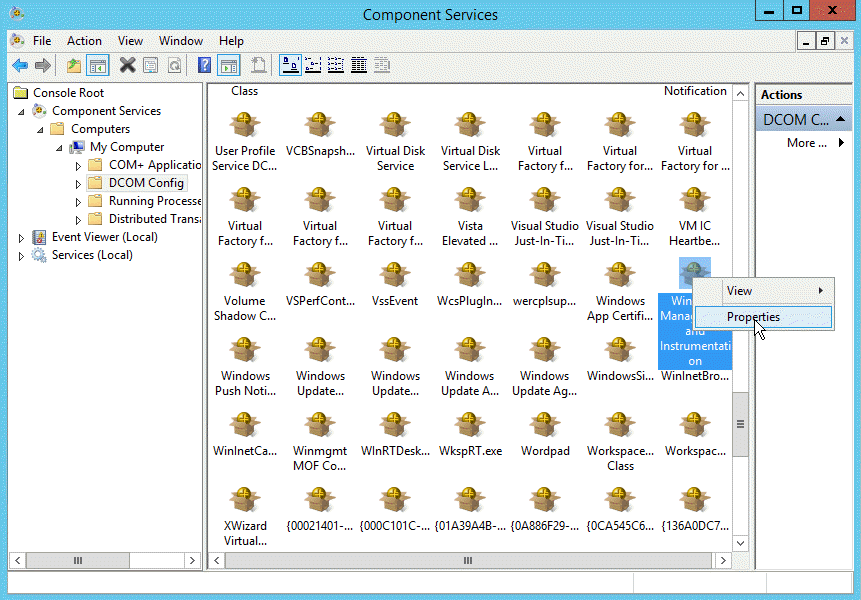
- Back in Component Services (Dcomcnfg.exe), expand My Computer and click the DCOM Config node.
Right-click Windows Management and Instrumentation and click Properties.
- From the Windows Management and Instrumentation Properties window that appears, click the Security tab.
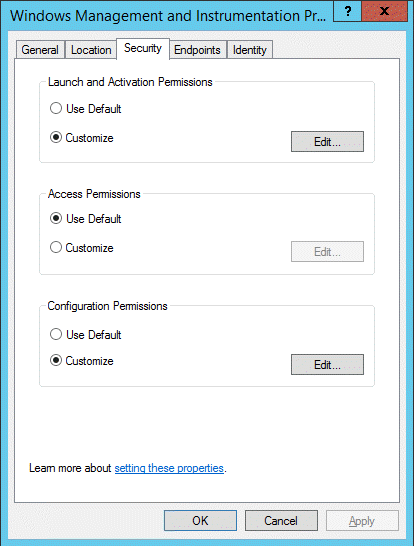
- From the Launch and Activation Permissions pane, click the Edit button.
- From the Launch and Activation Permissions window that appears, ensure that the proxy account on the local machine has Local Launch, Remote Launch, Local Activation and Remote Activation permissions allowed.
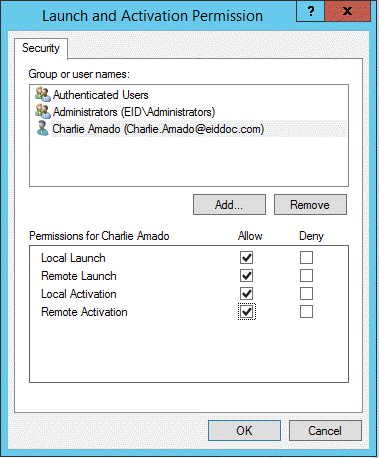
- Click OK to close the Launch and Activation Permission window.
- Back in the Security tab of the Windows Management and Instrumentation Properties window, ensure that Use Default is selected for Access Permissions.
- From the Security tab of the Windows Management and Instrumentation Properties window, click the Edit button in the Configuration Permissions pane.
- In the Change Configuration Permission window that appears, ensure that the proxy account on the local machine has Full Control , and Readand Special permissions allowed.
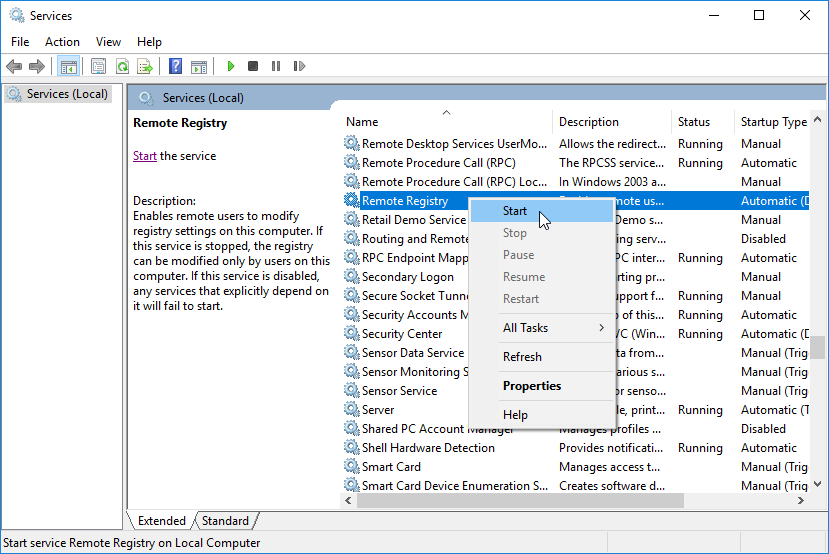
To automatically start the Remote Registry service
This procedure is necessary for Windows 10.
- From the Start menu, open Services.msc.
- Scroll down to Remote Registry and double-click it.
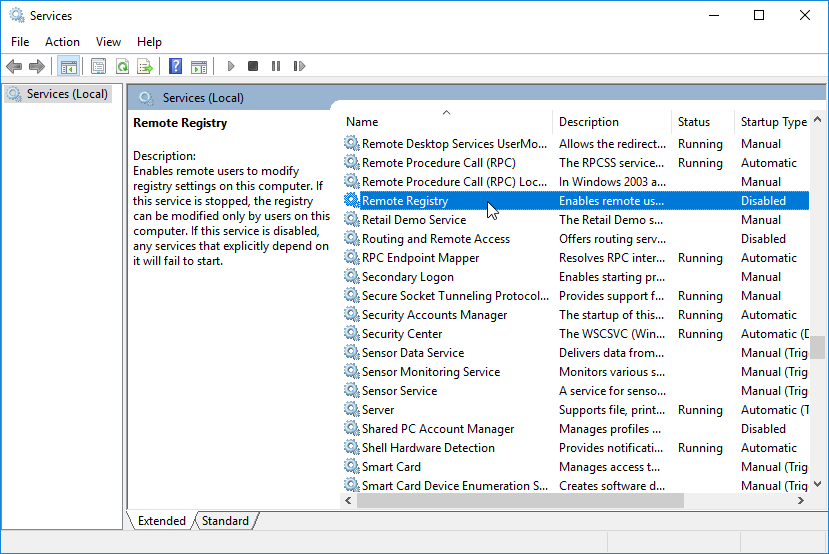
- In the Remote Registry Properties dialog that appears, change the Startup type value from Disabled to Automatic (Delayed Start).
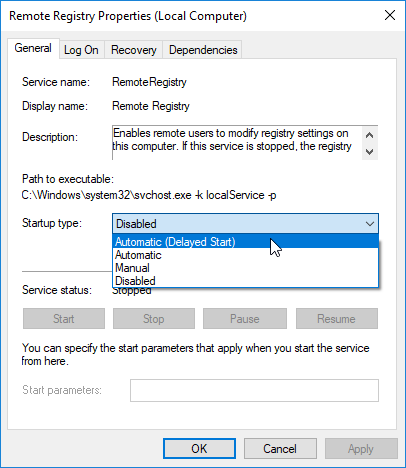
- Click OK, then back in Services, right-click the Remote Registry service and select Start.
- From the Start menu, open a command prompt as administrator and click Yes to allow the app to make changes.
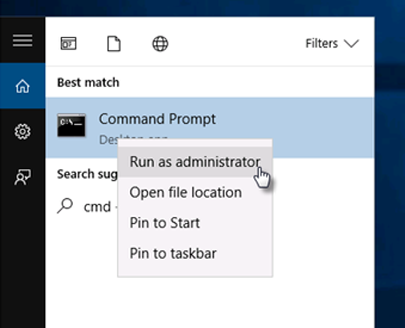
- At the command prompt that appears, type:
winrm quickconfigand when asked whether to make the changes, typey. - Confirm your settings using the Connectivity Tester.
To assign permission for the user to the WMI namespace
- From the Start menu, open WmiMgmt.msc.
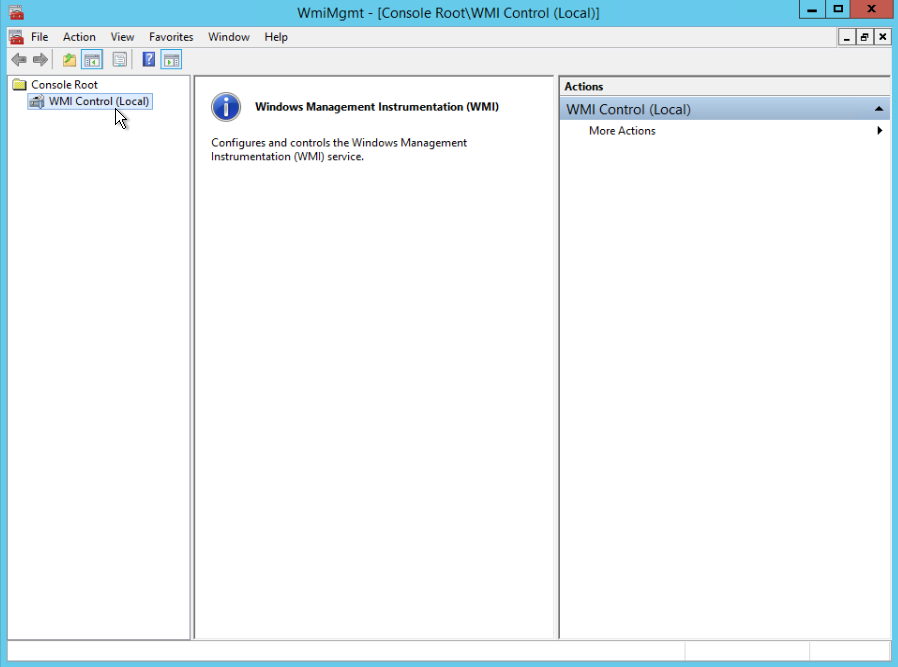
- Right-click WMI Control and select Properties.
- On the Security tab, select Root and click the Security button.
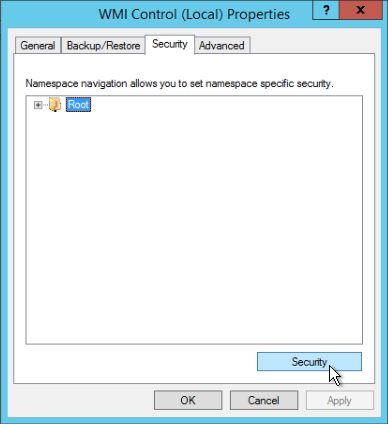
- Ensure that the Authenticated Users group has Execute Methods, Provider RightWrite, and Enable Account allowed.
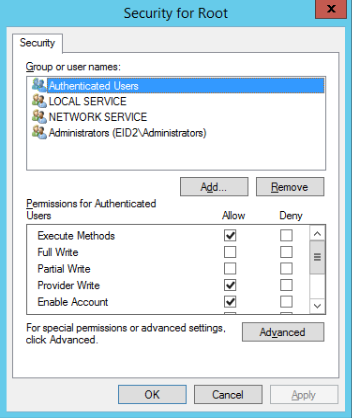
- Ensure that the Administrators group has all permissions.
To verify WMI impersonation rights
- From the Start menu, type Run.
- In the Run dialog that appears, type
gpedit.mscand click OK. - Under Local Computer Policy, expand Computer Configuration, then Windows Settings.
- Expand Security Settings, then Local Policies, and click User Rights Assignment.
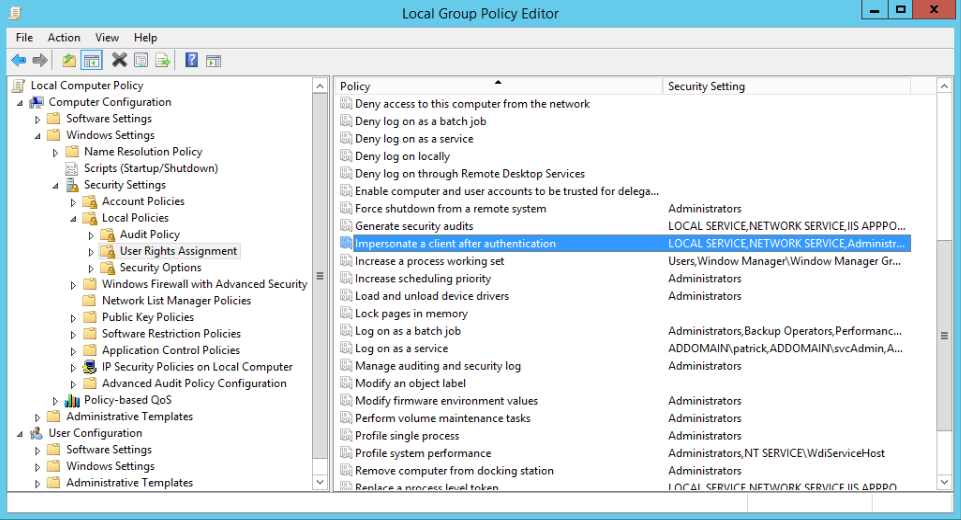
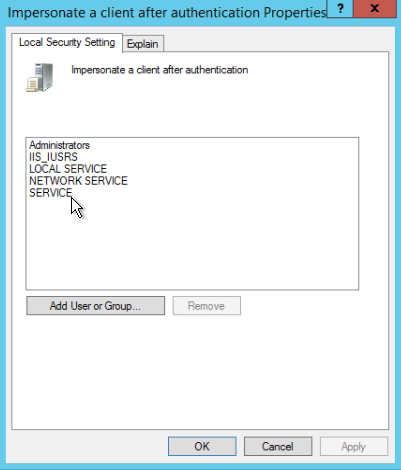
- Double-click Impersonate a client after authentication and verify that the Service account is granted rights.
Additional Steps for Users on Microsoft Windows XP Only
| Info |
|---|
Users who are operating the Windows XP OS must complete additional steps. The following link points to a support topic by Microsoft on how to set security in Windows XP Professional that is installed in a Workgroup. |
| Info | ||||
|---|---|---|---|---|
| ||||
| Div | ||||||||||||||||||||||||
|---|---|---|---|---|---|---|---|---|---|---|---|---|---|---|---|---|---|---|---|---|---|---|---|---|
| ||||||||||||||||||||||||
|