Versions Compared
Key
- This line was added.
- This line was removed.
- Formatting was changed.
EmpowerID provides two extensions, Credential Provider (for Windows 7 and earlier) and Credential Provider V2 (for Windows 8 and above) in 32-bit and 64-bit versions that allow organizations to plug in to EmpowerID's Password Manager functionality for customizing the Windows logon experience beyond that supplied by the standard Windows Credential Provider tool. Credential Provider is a DLL that Windows loads and executes during the booting process to provide the Windows Security screen or user icons that users see when initially logging into, locking, or unlocking a computer. These native tools provide the functionality that allows workstation users to authenticate themselves by submitting correct username and password combinations.
The Problem
Credential Provider is a helpful— for users who remember their password. But what happens when they forget their password and cannot log into or unlock their machines? With the native Credential Provider they cannot progress any further without administrative or help desk intervention. These users are locked out of their systems, their productivity is lost, and the business costs associated with password recovery increase.
The Solution
The EmpowerID Credential Provider extensions solve this problem by extending the password recovery functionality of the EmpowerID Password Manager to the Credential Provider screen. Users who have enrolled themselves in the Password Recovery Service can reset their passwords by clicking the Click here to Reset Password link and supplying the answers to their password reset questions.

This topic describes how to deploy the EmpowerID Credential Provider extension in your environment and is divided into the following activities:
Installing the EmpowerID Credential Provider
Testing the EmpowerID Credential Provider
Configuring default Settings using GPO
Deploy Desktop Client using GPO
| Info |
|---|
Installing the EmpowerID Password Extension adds the following Operating System-dependent registry values to the Microsoft Hive.
|
| Warning |
|---|
Installing the EmpowerID Password Extension utility on a computer where any other third-party extension is installed will disable that third-party extension. When you install the EmpowerID Password Extension utility, the previous extension will be enabled. |
Prerequisites
Due to best practices for Web security, EmpowerID by default blocks loading any page in an X-Frame. This causes a blank page to show on the desktop client when running the Password Recovery Center workflow. To allow the Password Recovery Center workflow to load on each end-user machine, you must edit the web.config to override this default behavior on each EmpowerID Web and Application server.
From Windows Explorer, navigate to the EmpowerID.Web.SiteRoot folder, located in a default installation at "
C:\\Program Files\TheDotNetFactory\EmpowerID\Web Sites\EmpowerID.Web.SiteRoot".From the folder, open the web.config file in any text editor and comment out the following line:
<add name="X-Frame-Options" value="SAMEORIGIN" />.Directly below the commented out line, add the following line:
<add name="X-Frame-Options" value="allow-from https://YourEmpowerIDWebSite.com/" />. Be sure to change "YourEmpowerIDWebSite.com" to the URL for your EmpowerID portal.
To install the EmpowerID Credential Provider extension
Locate the MSI for the credential provider version you received from EmpowerID and double-click it to open the Setup wizard.
Click Next to continue the installation.

Accept the terms of the License Agreement and click Next.

Click Install.

Wait several moments for EmpowerID to install the Credential Provider.

Once the installation completes, click Finish to close the Setup wizard.
Open Registry Editor and navigate to HKEY_LOCAL_MACHINE\SOFTWARE\TheDotNetFactory\EmpowerIDCredentialProvider and set the values for the EmpowerIDLoginTileButtonText and EmpowerIDLoginTileButtonURL. These keys are used to set the following information:
EmpowerIDLoginTileButtonText - This is the text that displays to the user below the password box. The default value is “Click here for password reset”. Changing the value of this entry is optional.
EmpowerIDLoginTileButtonURL - This is the URL value that points to the server hosting the EmpowerID or AD Self-Service Suite Recovery Center. The URL should be in the following format:
https://FQDNOfYourEmpowerIDServer/EmpowerID/RecoveryCenter or https://FQDNOfYourEmpowerIDServer/UI/RecoveryCenter ( if your version starts with 6.*)
https://servername/ADSelfService/GINA/question.aspx (for AD Self-Service suite only).
Testing the EmpowerID Credential Provider extension
Lock a machine on which the EmpowerID Credential Provider is installed.
Return to the sign-in screen for the computer and click Sign-in options.

Click the EmpowerID button and enter your EmpowerID credentials. You should be logged in.
Lock the machine again and then return to the sign-in screen.
Click Click here to Reset Password.

This opens the Recovery Center on the machine.
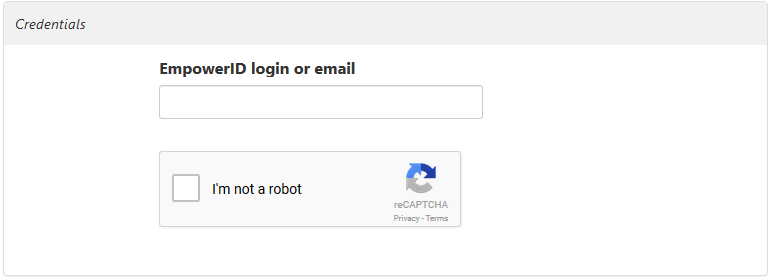
Enter your login or email address and check I'm not a robot.
Click Submit.
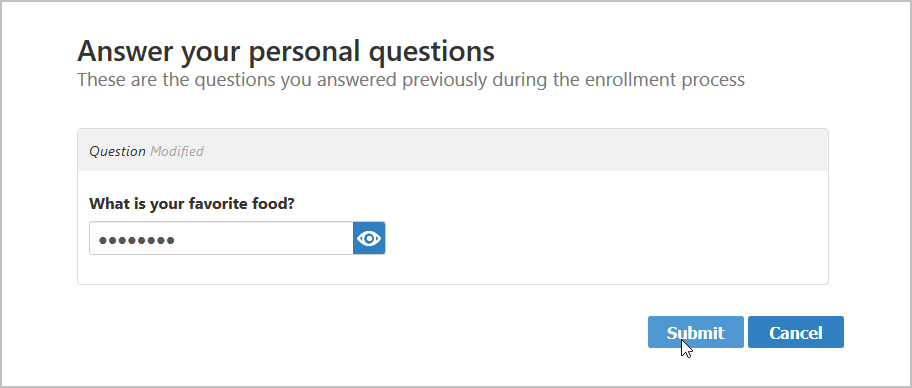
Answer your personal questions and click Submit.

Type a new password in the New Password and Confirm Password fields and then click Submit.
Click OK to close the Change Password Result.
Log in to the machine with the new password.
Configuring default settings using
Group Policy Objects (GPO
)and ADM files
The Credential Provider default settings may be configured to match your desired settings prior to installation. Your PCs will then automatically receive the correct settings via Group Policy administrative templates. (For information on GPO deployment see the "Deploying the Windows desktop client using GPO" section below.)
Copy the administrative template file(s) (CredentialProviderForEmpowerIDPasswordManager.adm) to the inf directory in the SystemRoot (such as, C:\Windows\inf) folder on your Windows Domain Controller.
You will need to determine what the best approach is for your environment and whether you want to use an existing GPO or create a new GPO. Open the desired GPO in the Group Policy Management Editor.
Expand the Computer Configuration node and the Policies node.
Right-click the Administrative Templates folder and select Add/Remove Templates from the context menu.
Click the Add button in the Add/Remove Templates dialog.
On the Policy Templates file selection, select the desired .adm file and click Open.
Click Close on the Add/Remove Templates dialog.
Expand the Administrative Templates folder and locate the EmpowerID folder. (Depending on the OS, you may also need to expand the Classic Administrative Templates folder as well.)
Expand the EmpowerID folder and select the PasswordManager folder. Each of the settings listed here can be configured by enabling them and entering the desired values. (See the details on the keys above for more information.)
Deploying the Windows desktop client using GPO
Group Policy deployment can be used to install the Password Manager for Windows client. If you are deploying through GPO, the best practice recommendation would be to create a separate GPO for each msi type based on OS and processor type. WMI filters can be used to do this and documentation on WMI filters can be found at http://technet.microsoft.com. It is also recommended that you test your GPO before doing a full deployment.
Copy the .msi file to a network share that is accessible to all workstations where you wish to install the Windows Desktop Client. Be sure this network share is configured to ensure that Everyone has only Read access to the folder and that Domain Admins have Full Control, Change, and Read access to the folder.
Create a new GPO object for the deployment or select an existing GPO object to use.
Open the desired GPO in the Group Policy Management Editor.
Expand the Computer Configuration folder, expand the Policies folder, expand the Software Settings folder, right-click the folder Software installation, and select New > Package.
In the Open dialog search for and select the .msi (Be sure to use the network path and not the local path.).
Click Open.
Select the deployment method and click OK.
Verify and configure the properties of the installation if needed.
| Insert excerpt | ||||||
|---|---|---|---|---|---|---|
|
| Div | ||||||||||||||
|---|---|---|---|---|---|---|---|---|---|---|---|---|---|---|
| ||||||||||||||
IN THIS ARTICLE
|