| Divstyle |
|---|
|
Home / User Provisioning and Identity Lifecycle / Provisioning Policies / Current: Creating Provisioning Policies for Microsoft Dynamics Users| import | https://docs.empowerid.com/docs.css |
|---|
|
|
In EmpowerID, Provisioning policies, also known as "Resource Entitlements" or "RETs," are policies that can be created to automate the provisioning, moving, disabling and de-provisioning of resources to users based on their meeting certain qualifying criteria, such as belonging to a specific group, Management Role, Business Role and Location, or Query-Based Collection. Once a policy is created and enabled, EmpowerID continuously evaluates the policy to determine who should and should not have the resource as specified by the conditions of the policy.
Dynamics AX (DAX) has two types of users, Active Directory users and Claims users. By default, DAX provisions all users as Claims Users. Thus, to create both types of users through RET policies, EmpowerID recommends you create a RET policy for both. The difference between these two types of policies is demonstrated below.
This topic demonstrates how to create a RET policy that provisions Microsoft Dynamics AX (DAX) users.
| Info |
|---|
|
- EmpowerID must first be connected to DAX. For details, see Connecting to Microsoft Dynamics AX.
- RET provisioning and RET deprovisioning must be enabled on the DAX account store.
|
...
- From the View page for the DAX RET, return to the Policy Details form by clicking the Edit link for the policy located at the top of the page.
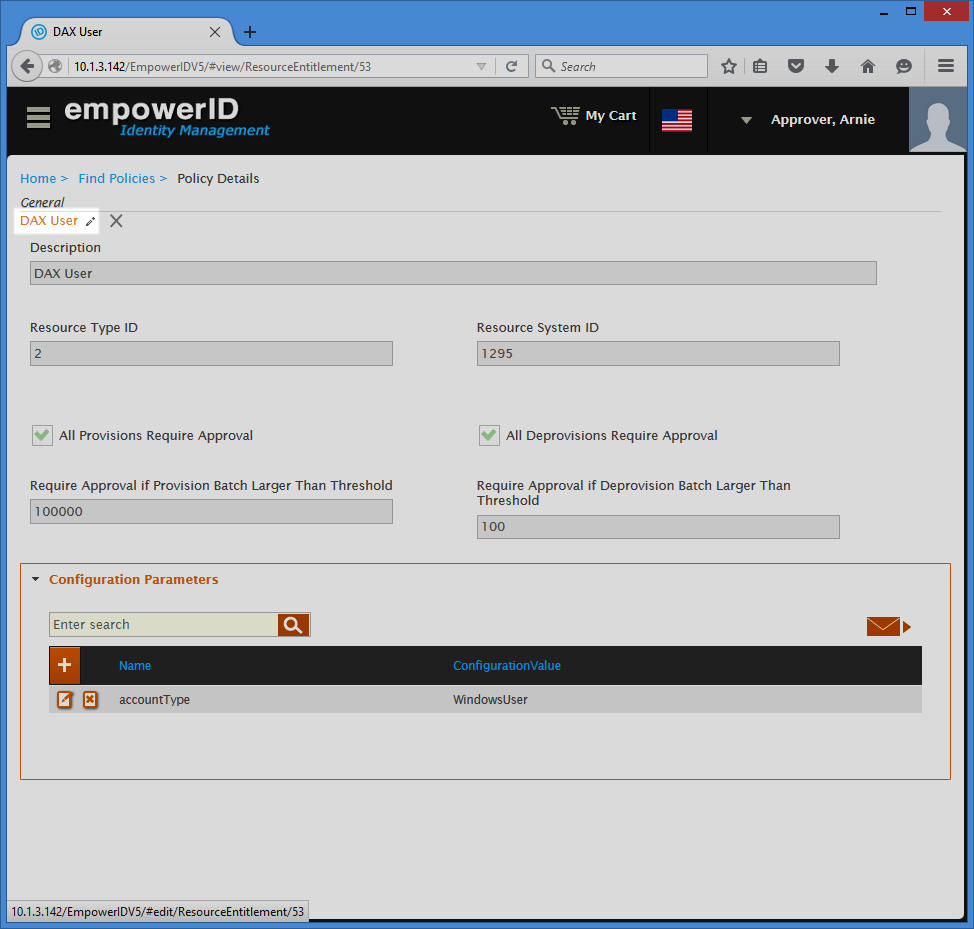
- From the Policy Details form, scroll to the Policy Assigned To section and click the Add (+) button underneath the specific target type to which you want to assign the RET. In our example, we are assigning the policy to the Intern in Corporate Business Role and Location so we are clicking the Add (+) button in the Business Role and Locations pane of the section.
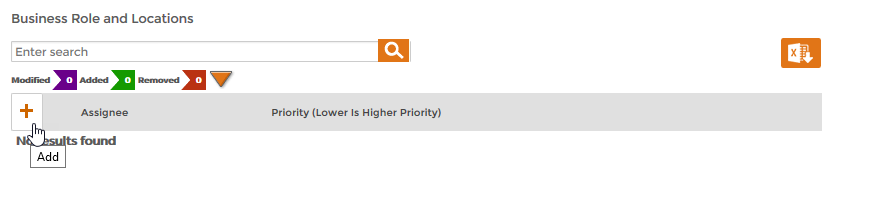
This opens the Add Entry pane, which is where you select the specific actor you want to assign the policy to. Because we are assigning the policy to a Business Role and Location, the Add Entry pane is contextualized for that actor type.

- From the Add Entry pane, click the Select a Role and Location link. In the Business Role and Location selector that appears, do the following:
- Search for and select the Business Role to which you want to assign the policy. In our example, we are assigning the policy to the Intern Business Role, so we have selected Intern.

- Click the Location tab and then search for and select the Location. In our example, we want the policy to be applied to all Interns in or below the Corporate location, so we have selected Corporate.
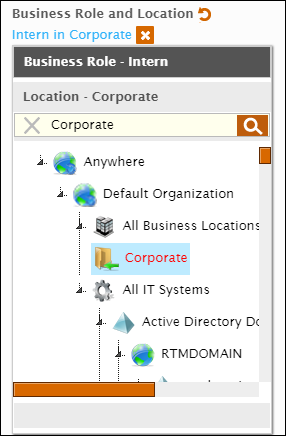
- Click Select to close the Business Role and Location selector.
- Type a number to specify the priority for the RET policy in the Priority field. This value is used to determine the priority of the RET if the user qualifies for the same RET by virtue of another assignment, such as being a member of a group that has the same policy.
- Click Save.

- Back in the main form, click Save.
If you selected Approve All Provisions, you must manually approve each item in the Resource Entitlement Inbox before EmpowerID will provision the DAX accounts. This is demonstrated in the next section.
To approve the resource entitlements
- In the Navigation Sidebar, expand System Logs and click RET Inbox.
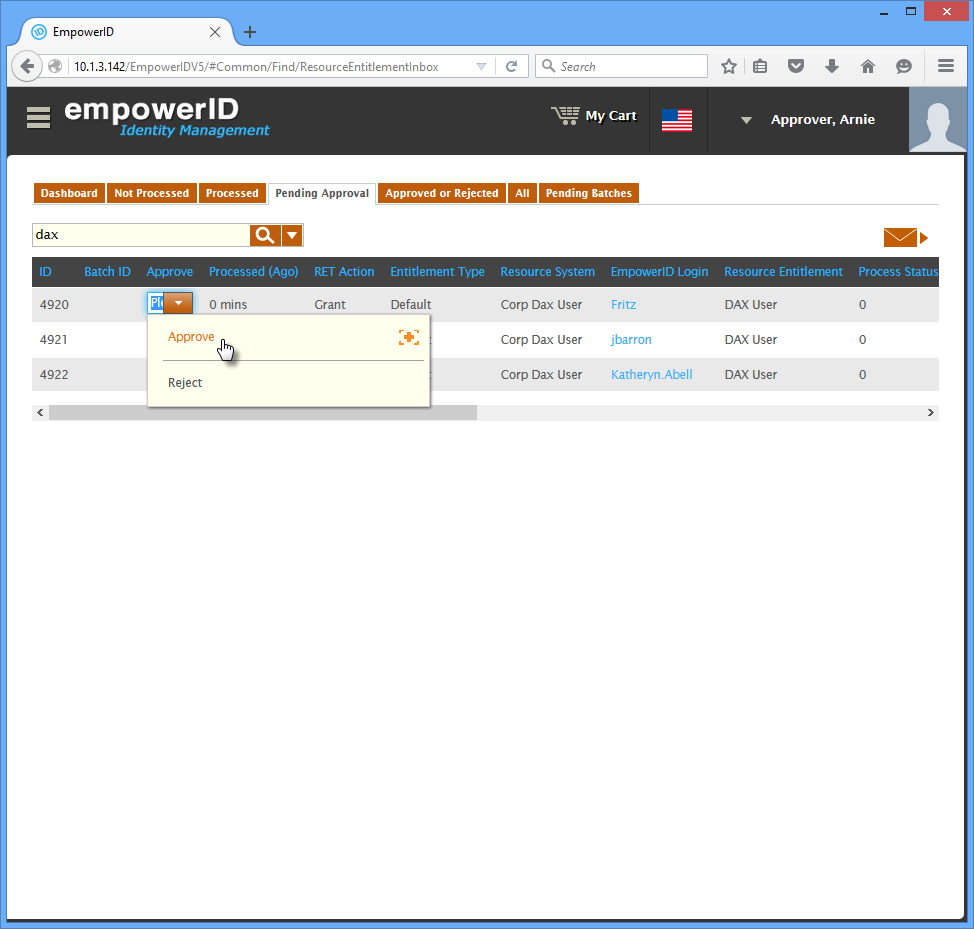
- Click the Pending Approval tab. You should see a record for each RET that needs to be approved.
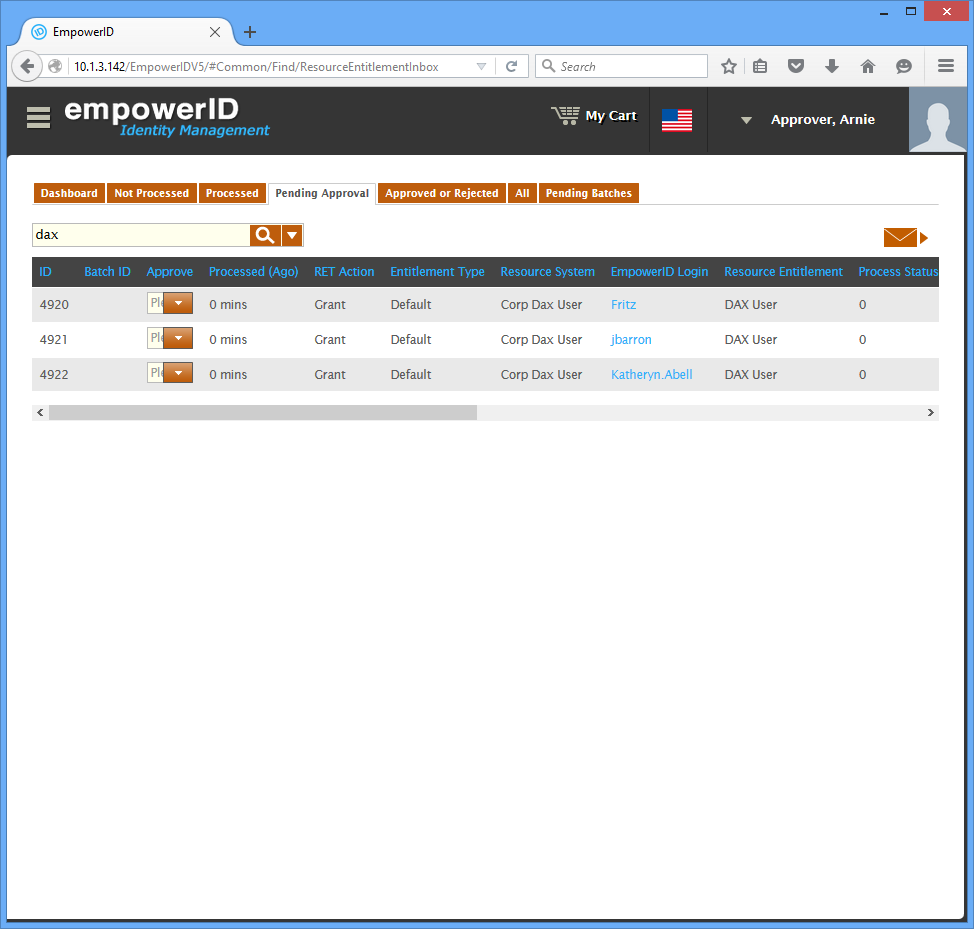
- To approve the RETs, click the Approve drop-down for each RET and select Approve from the menu.

- Click the shopping cart icon at the top of the page, then type a reason for the approval in the cart dialog and then click Submit.
| Tip |
|---|
After the RET Inbox has provisioned the DAX user accounts, you can view and manage those accounts as you would any other user accounts. |
| Info |
|---|
| icon | false |
|---|
| title | Related Content |
|---|
|
|
...