| Style | ||
|---|---|---|
| ||
| Div | ||
|---|---|---|
| ||
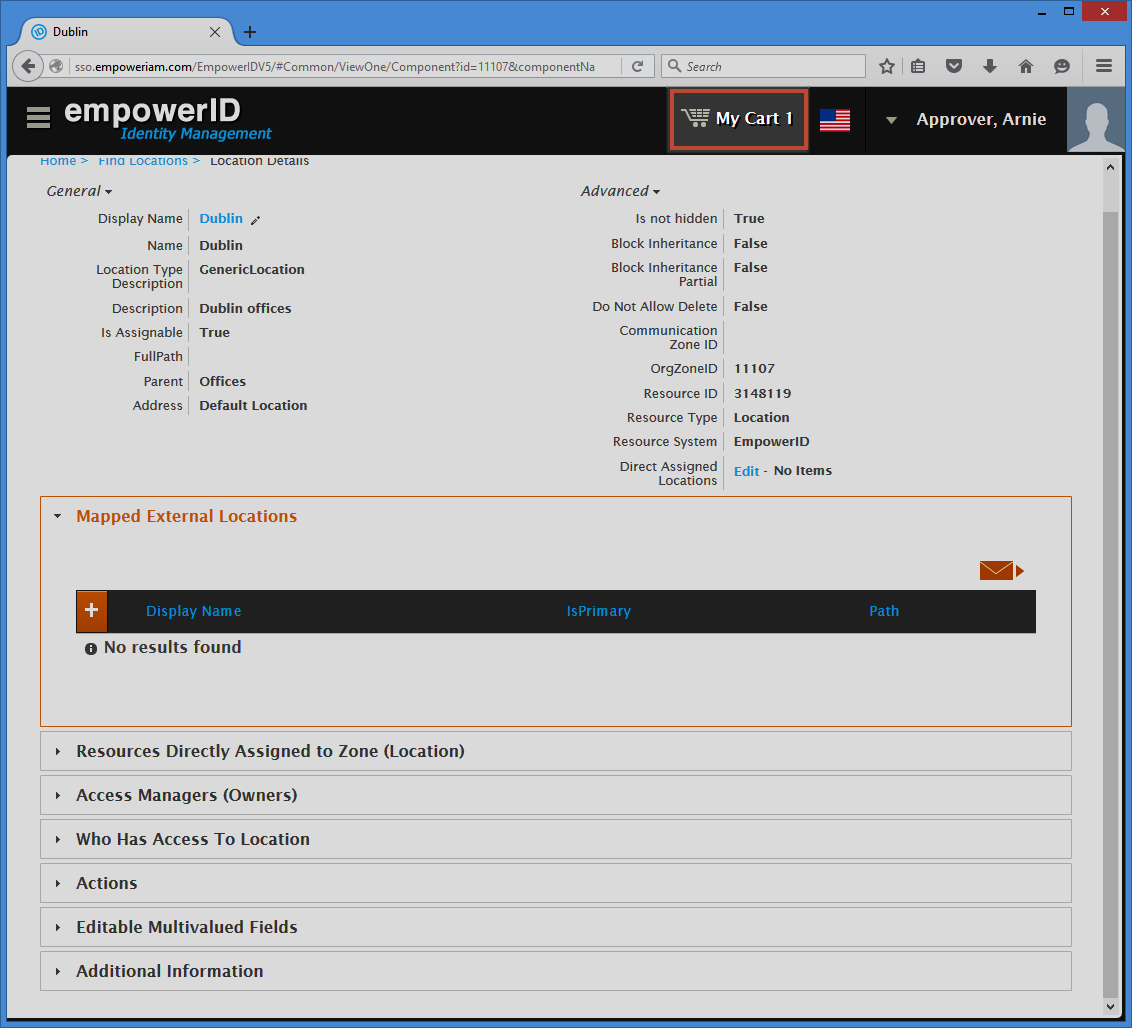
Home / Authorization RBAC/ABAC / Business Roles and Locations / Current: Mapping EmpowerID Locations to External Locations |
...
- From the Navigation Sidebar of the EmpowerID Web interface, expand Identities and click Business Roles and Locations.
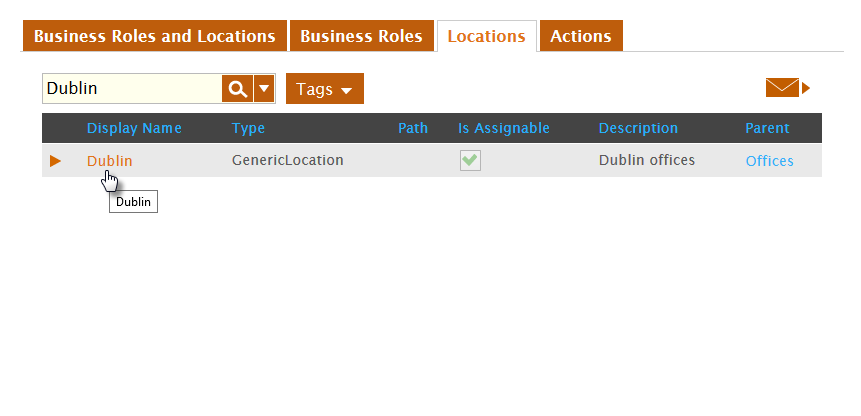
- From the Business Roles and Locations management page, click the Locations tab and search for the EmpowerID Location to map.
- From the grid, click the Display Name link for the location.

This directs you to the View One page for the location. View One pages allow you to view details about an object in EmpowerID and make changes to those objects as needed.
From the View One page for the EmpowerID Location, click the Mapped External Locations accordion to expand it.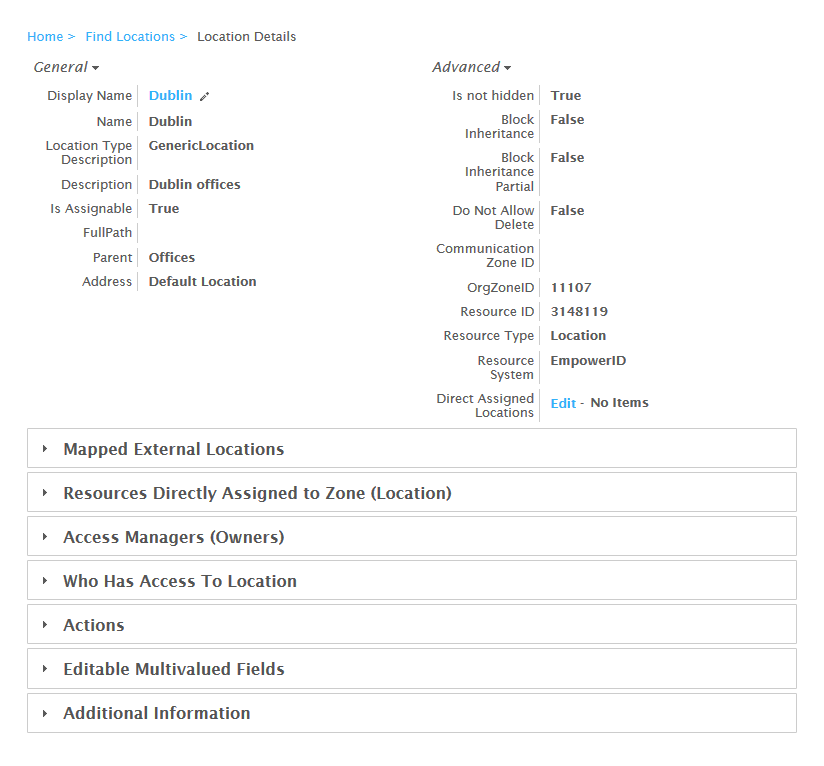

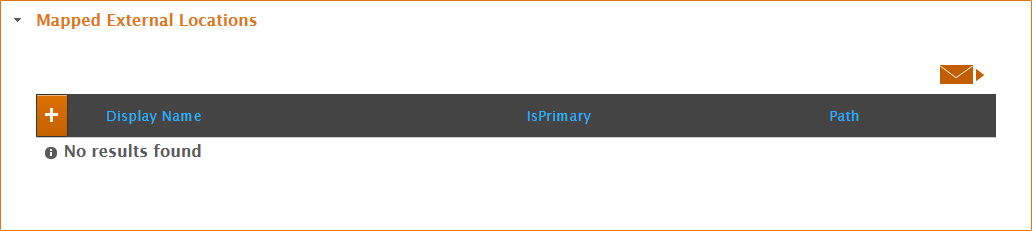
If any mappings exist for the location, they appear in the Mapped External Locations grid. In our example, no mappings exist.
- Click the Add (+) button and in the Mapped Locations dialog that appears, do the following:
- Select Is Primary if the mapping is to be the primary mapping.
- Below Select an External Location, click the Select an External Location link.
- In the Location Selector that appears, search for and select the appropriate external location and then click Save to close the Location Selector.
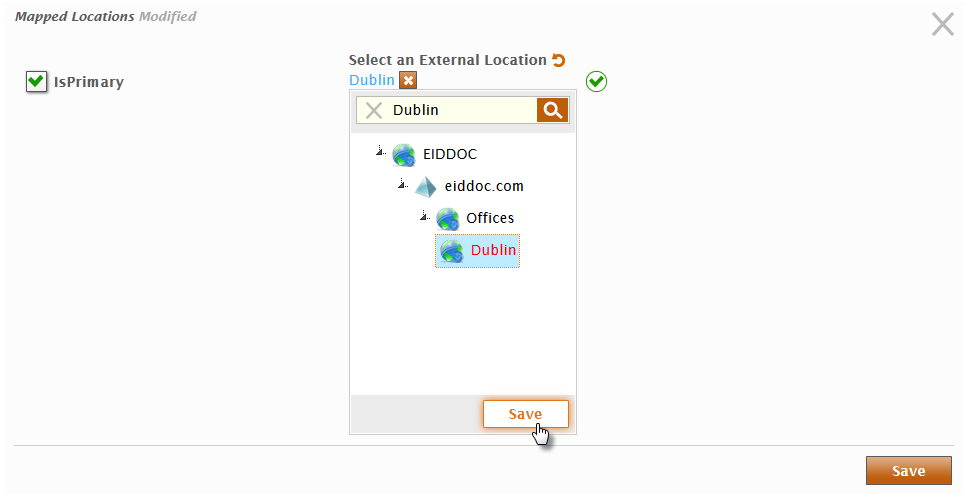
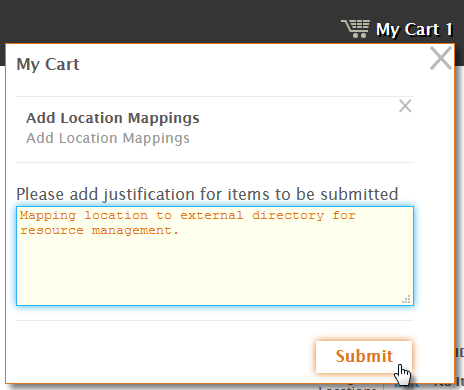
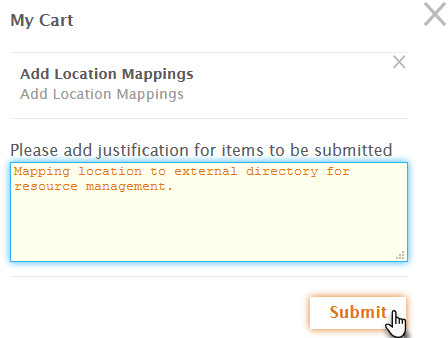
- In the main Mapped Locations dialog, click Save .This adds the Mapping to the Shopping Cart.
to add the mapping to your shopping cart.
- Click the Shopping Cart icon, type a reason for the mapping the cart dialog, and click Submit.
The new mapping appears in the Mapped External Locations accordion.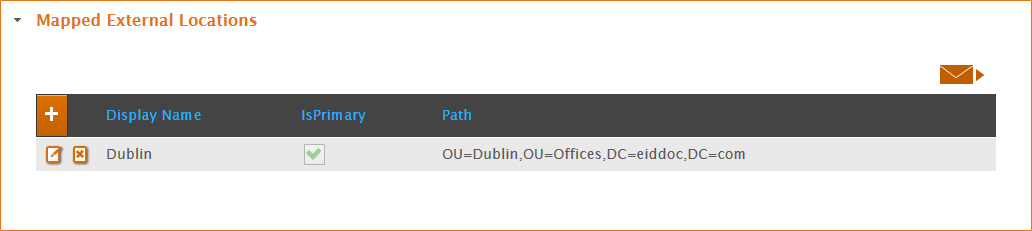
...