| Div |
|---|
Home / Installation and Configuration Guide / Configuring EmpowerID / Connecting to Directory Systems / SharePoint / Current: Working with SharePoint Web Parts |
Working with SharePoint Web Parts
In an environment with Microsoft SharePoint you can install, deploy and configure EmpowerID SharePoint Web Parts to make SharePoint Site and SharePoint Group management functions available to a SharePoint Web Part page.
This topic describes how to work with SharePoint Web parts in EmpowerID.
| Info | ||
|---|---|---|
| ||
You must configure EmpowerID as a claims-based authentication provider for your SharePoint farm and convert an existing SharePoint site collection from Windows Authentication to Claims-based authentication before performing the following steps. Please see Federating SharePoint With EmpowerID for instructions. |
To install EmpowerID Web Parts for SharePoint
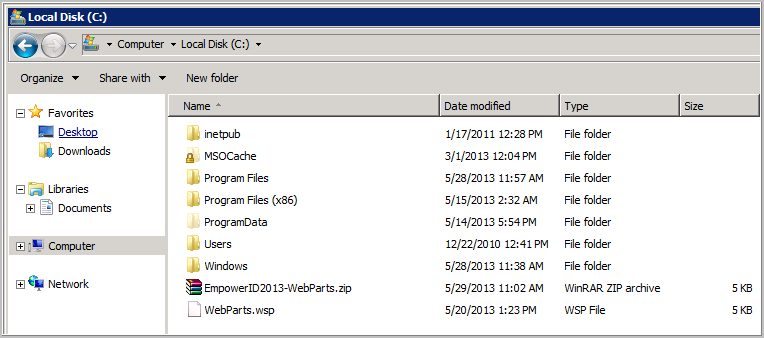
- Unzip EmpowerID2013-WebParts.zip and place the WebParts.wsp file into the root of C:\ on your SharePoint server.
Open the SharePoint 2010 Management Shell and execute the below command.
Code Block language powershell theme Emacs add-spsolution C:\WebParts.wsp
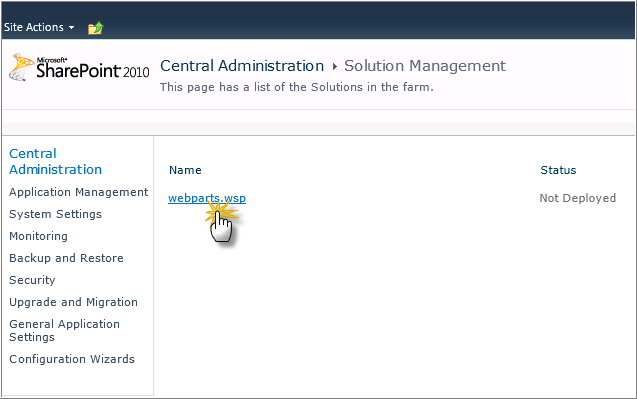
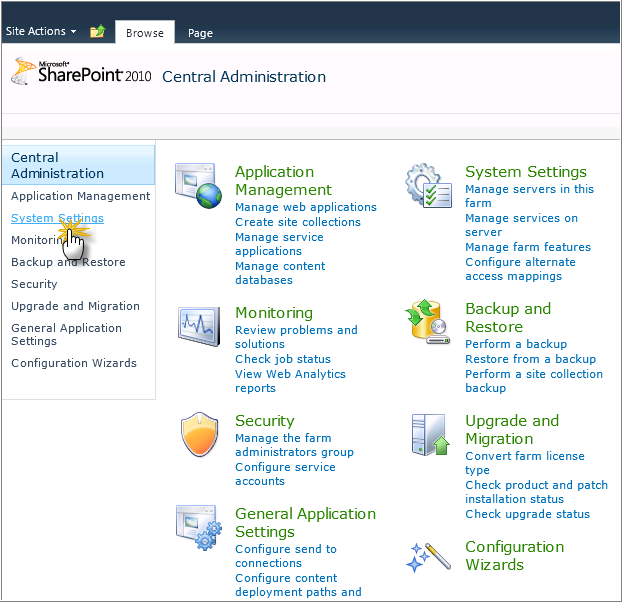
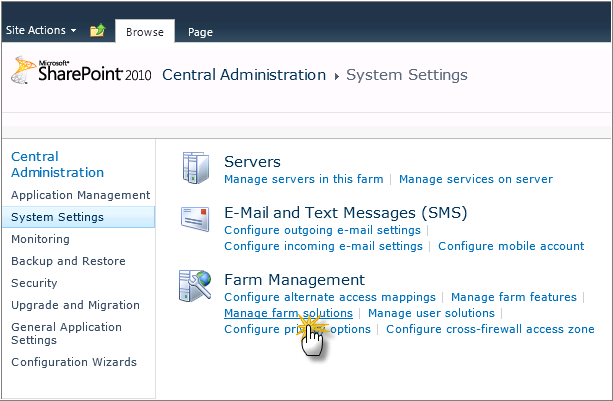
- Open SharePoint Central Administration and click System Settings.

- Underneath the Farm Management section, click Manage Farm Solutions.

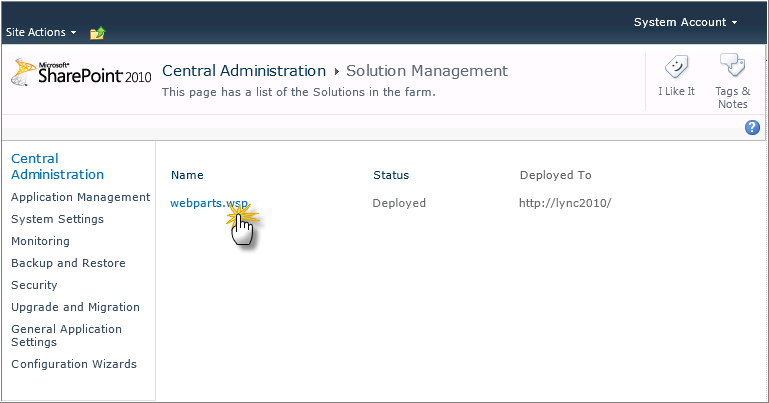
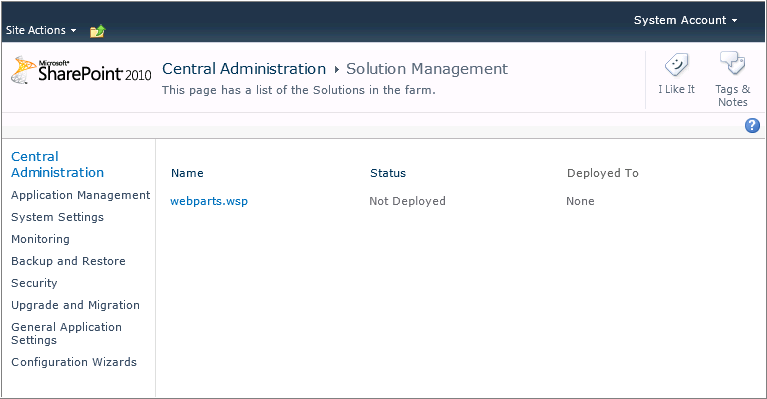
- On the Solution Management page, click webparts.wsp.
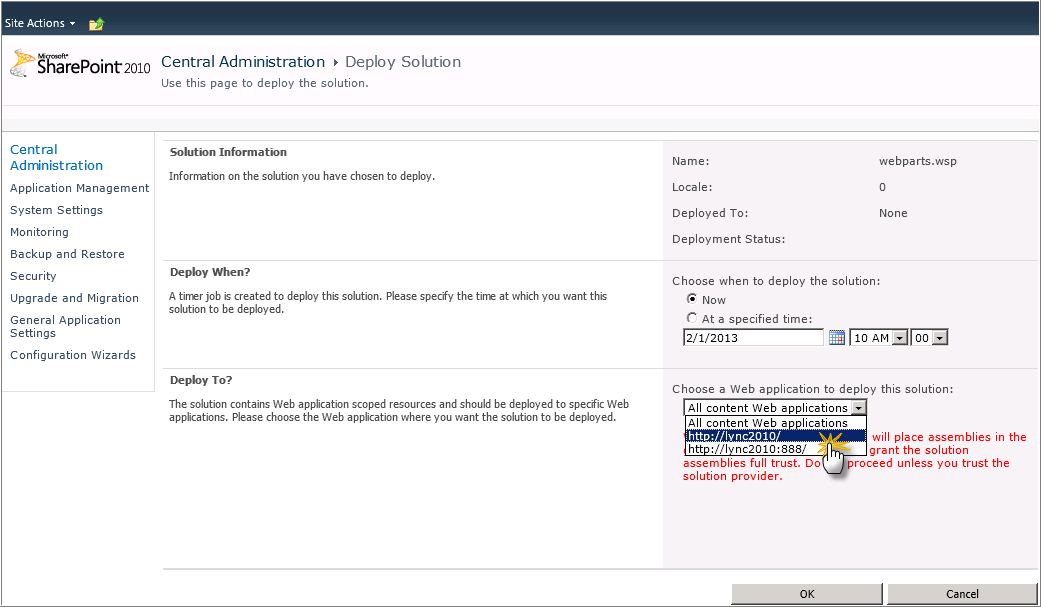
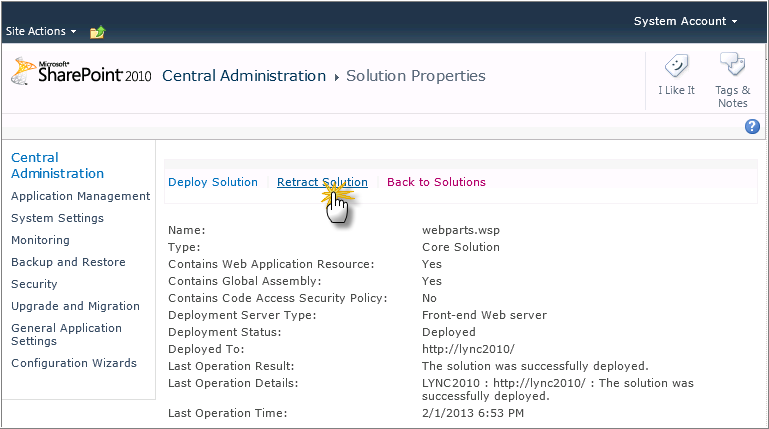
- On the Solution Properties page, click Deploy Solution.

- On the Deploy Solution page, under Deploy When?, click to select Now. Under Deploy To?, choose your desired SharePoint Web application and click OK.
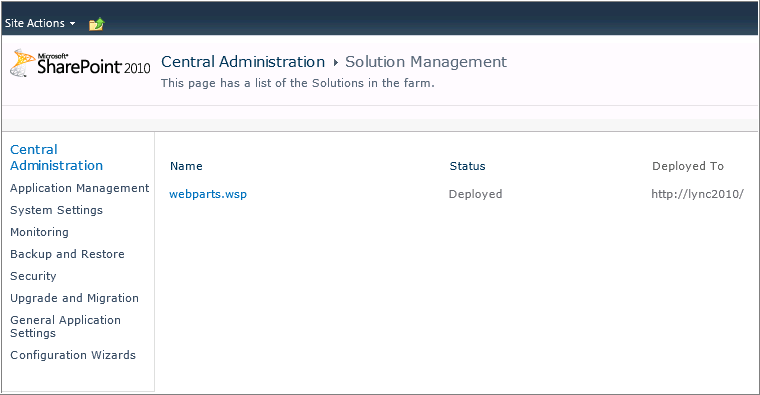
- The Solution Management page displays, indicating the status of the solution and the SharePoint web application to which it deployed.
To activate EmpowerID Web Parts as a Site Collection Feature
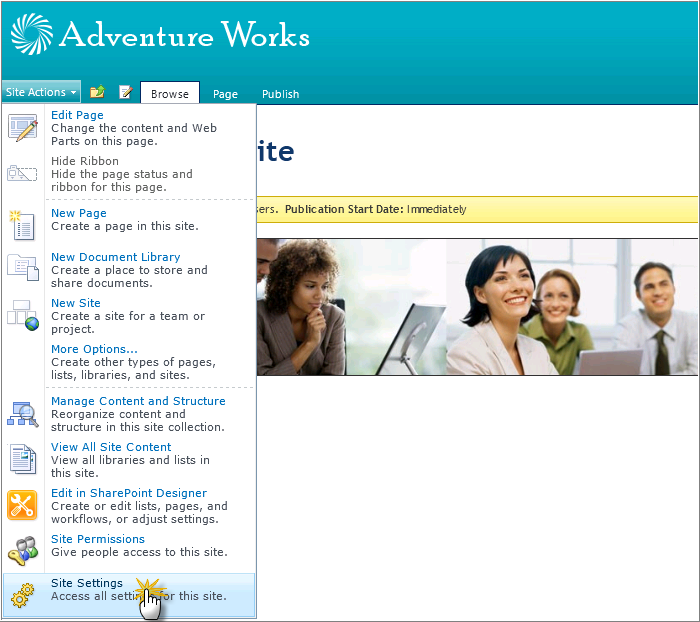
- Navigate to the SharePoint site collection, click Site Actions and then click Site Settings.

- Underneath the Site Collection Administration section, click Site collection features.
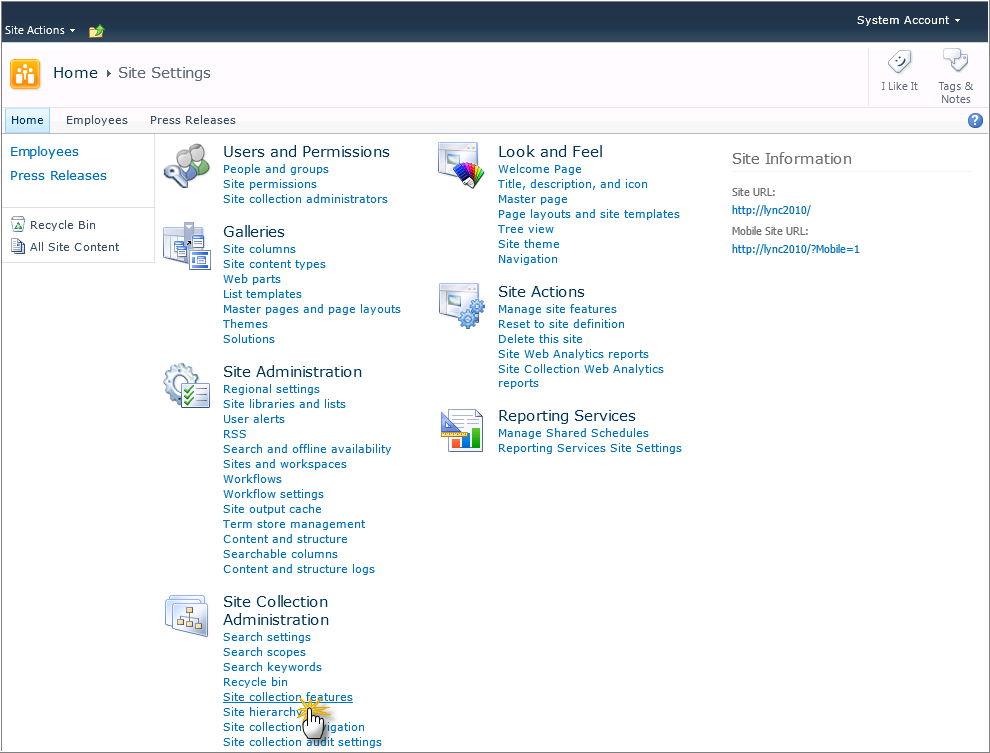
- Scroll through the list of Features and click the Activate button for EmpowerID Web Parts.

- The EmpowerID Web Parts are now Activated for your chosen Site Collection.
To deploy EmpowerID Web Parts to a SharePoint site
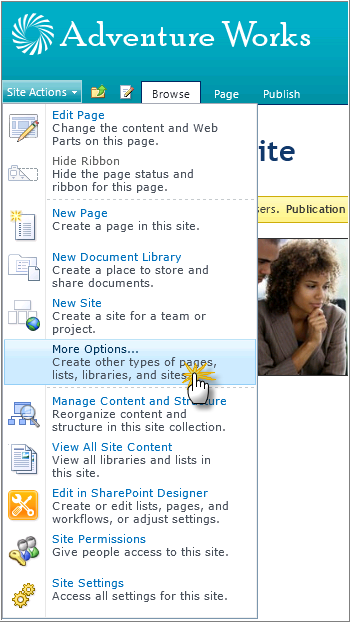
- Navigate to the SharePoint site collection, click Site Actions and then click More Options.
- If you have Microsoft Silverlight installed, on the Create Page click Web Part Page and then click the Create button. If you do not have Microsoft Silverlight installed, on the Create Page under the Pages and Sites section, click the Web Part Page link.
(with Microsoft Silverlight)
(without Microsoft Silverlight)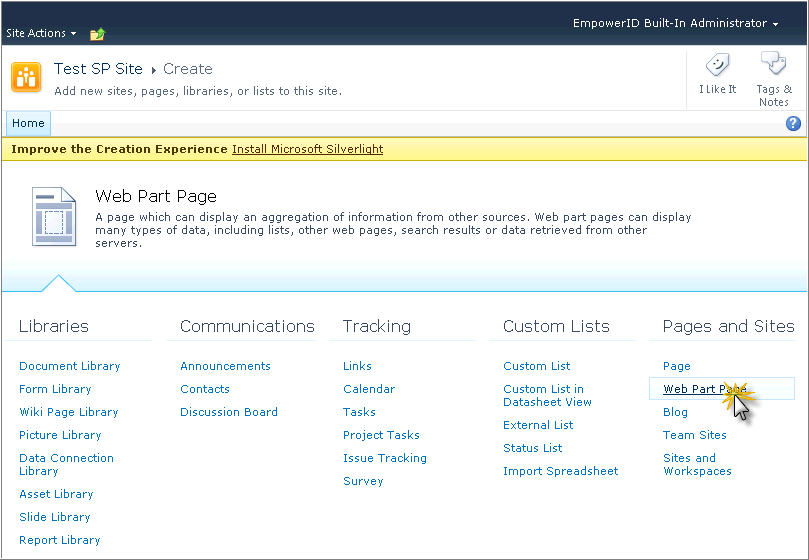
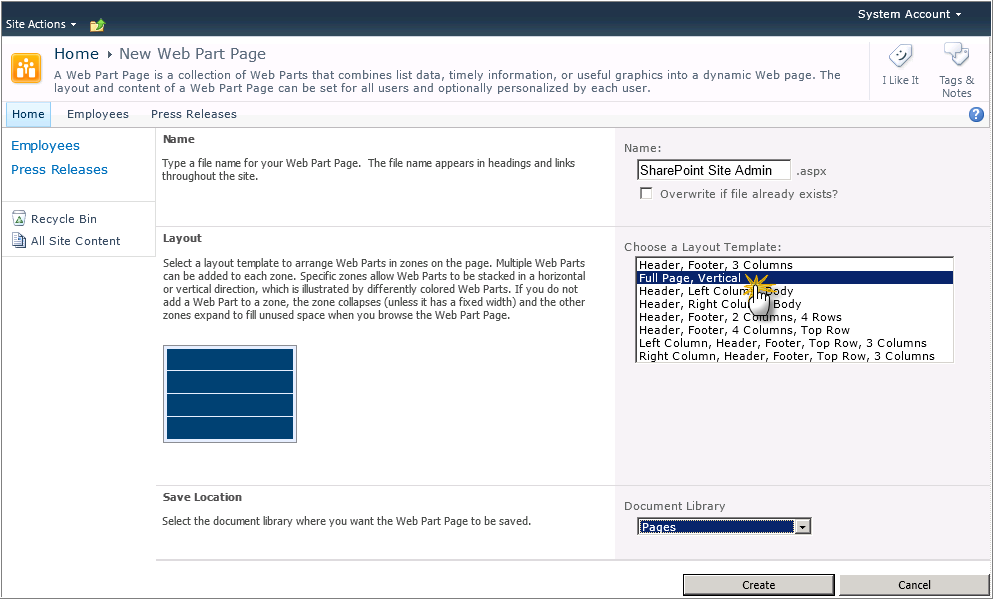
- On the New Web Part Page under the Name section, type in a name for the Web Part page. Under Choose a Layout Template, click Full Page, Vertical. Choose a target Document Library and click Create.
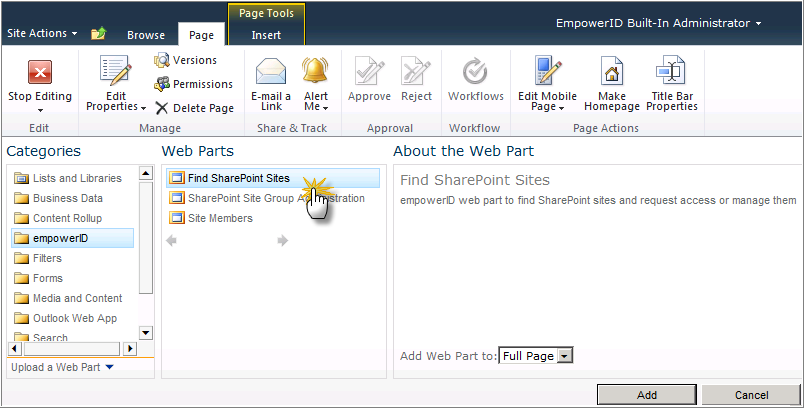
- Click Add a Web Part. Under Categories, click empowerID. Under Web Parts, click Find SharePoint Sites or SharePoint Site Group Administration or Site Members and then click Add.
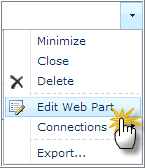
- Click the down arrow at the top right of the EmpowerID Web Part, then click Edit Web Part.
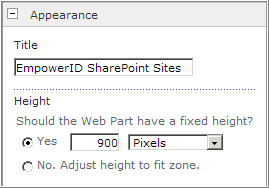
- Under the Appearance section, adjust the Height value as needed and click OK. The Height value controls how tall the EmpowerID Web Part will appear on the page.
Click the Page ribbon > Stop Editing and confirm the selected EmpowerID Web Part appears on the Web Part Page.
Info You can only place one EmpowerID Web Part on a SharePoint Web Part Page. Create an additional SharePoint Web Part Page for each EmpowerID Web Part.
To uninstall the EmpowerID Web Parts for SharePoint
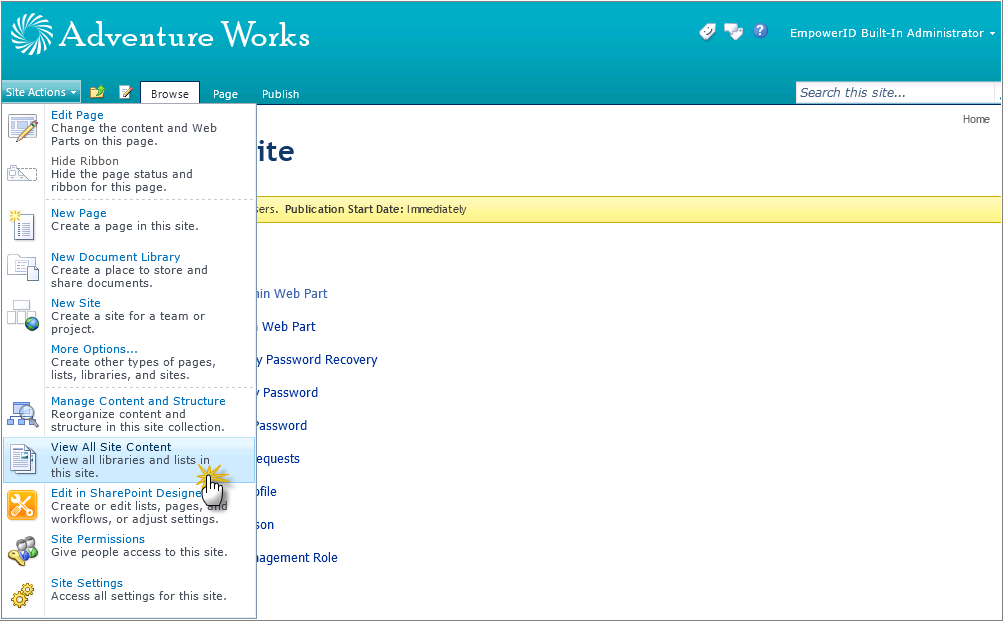
- Navigate to the SharePoint site collection, click dSite Actions and then click View All Site Content.
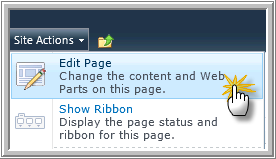
- Choose the desired Document Library. Choose the SharePoint Web Part page that contains an EmpowerID Web Part. Click Site Actions and then click Edit Page.
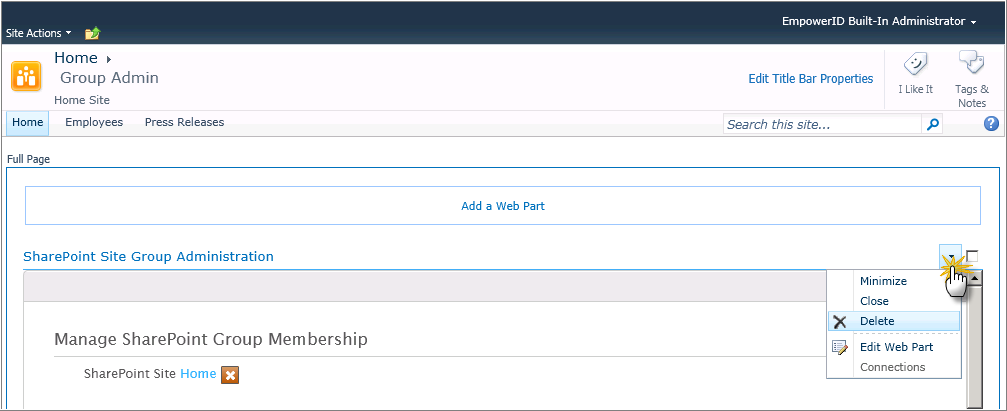
- Click the edit panel of the EmpowerID Web Part and then click Delete.
- Repeat for each EmpowerID Web Part you have added to your SharePoint Web Part pages.
- Navigate to the SharePoint site collection, click Site Actions and then click Site Settings.
- Underneath the Site Collection Administration section, click Site collection features.

- Scroll through the list of Features and click the Deactivate button for EmpowerID Web Parts.

The EmpowerID Web Parts are now Deactivated for your chosen Site Collection. - Open SharePoint Central Administration and click System Settings.
- Underneath the Farm Management section, click Manage Farm Solutions.
- On the Solution Management page, click webparts.wsp.
- On the Solution Properties page, click Retract Solution.
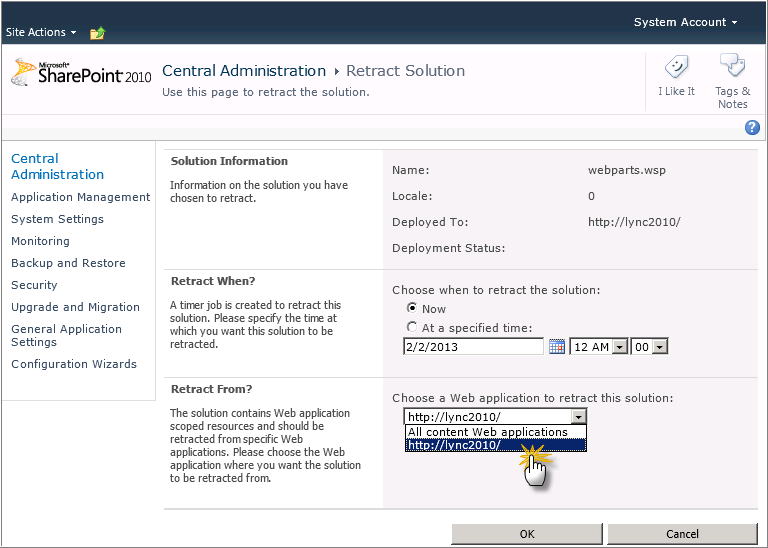
- On the Retract Solution page, under "Choose when to deploy the solution," click Now. Under "Choose a Web application to retract this solution," choose your desired SharePoint Web application and click OK.
- The Solution Management page displays to indicate the status of the solution and the SharePoint web application from which it was retracted.
Open the SharePoint 2010 Management Shell and execute the below command.
Code Block language powershell theme Emacs remove-spsolution -identity WebParts.wsp -confirm:$false
- The EmpowerID Web Parts are now completely removed from your SharePoint farm.
| Info | ||||
|---|---|---|---|---|
| ||||
| Div | ||||||||||||||||||||||
|---|---|---|---|---|---|---|---|---|---|---|---|---|---|---|---|---|---|---|---|---|---|---|
| ||||||||||||||||||||||
|