Before you connect EmpowerID to an external directory, there are a number of prerequisite steps you need to take. You only need to perform these steps the first time you connect to an external directory. These steps are as follows:
- Setting the server role for each of your EmpowerID servers — Server roles determine what EmpowerID jobs (back-end processes) and Web services are enabled on a particular server. EmpowerID categorizes server roles in the following way:
- All-in-One-Server — The server role runs all front-end Web services and back-end processes. This role is designed to be used if you have a small environment with only one EmpowerID server.
Application Server — This server role runs all back-end processes, known as Jobs in EmpowerID. By default it does not run any Web services.
Tip icon false - Default — This server role has no Jobs or Web services associated with it. When you install EmpowerID on a server, EmpowerID assigns this role to the server. This is to ensure no Jobs or Web services run on a server not designated for those Jobs or Web services. You need to change this to the appropriate role for each EmpowerID server for that server to function as intended.
Web Front-End — This server role runs all Web services. By default it does not run any back-end processes.
Tip icon false
- Reviewing the Join and Provision Rules — When you connect EmpowerID to an external directory or other identity-aware application and turn on inventory, EmpowerID evaluates the accounts in those external systems to determine whether EmpowerID People should be provisioned from those accounts. The logic that determines this is specified by the Join and Provision Rules, as well as the Join and Provision Filters in the Identity Warehouse. Thus, before turning on inventory, you should review these rules and filters and adjust them as needed.
To configure the server roles for each of your EmpowerID servers
- From the Navigation Sidebar of the EmpowerID Web interface, expand Admin > EmpowerID Servers and Settings and click EmpowerID Servers.
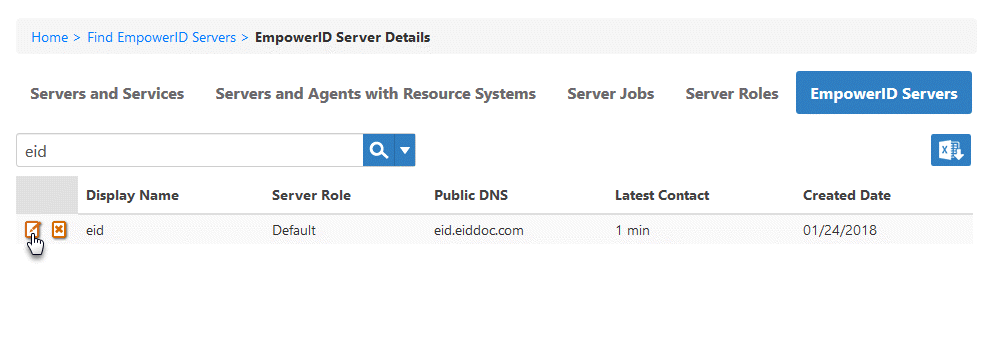
- From the EmpowerID Servers page, click the EmpowerID Servers tab and search for the server whose role you want to configure.
- Click the Edit button for that server.
- In the dialog that appears, select the appropriate role from the EmpowerID Server Role drop-down.
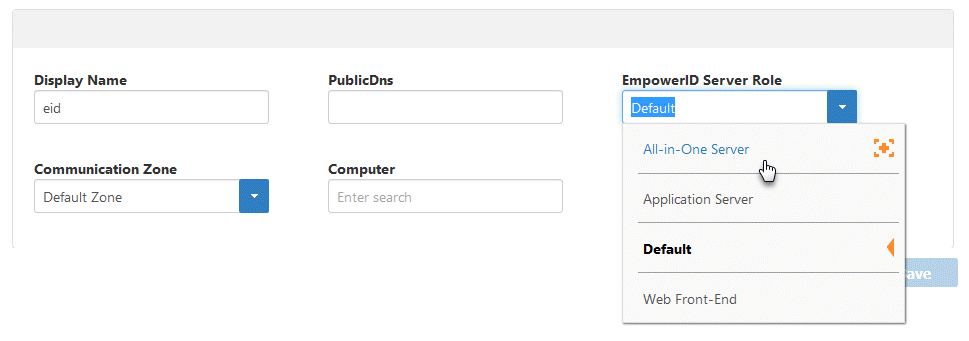
- Click Save to save the role and close the dialog.
To review the Join and Provision rules for your environment
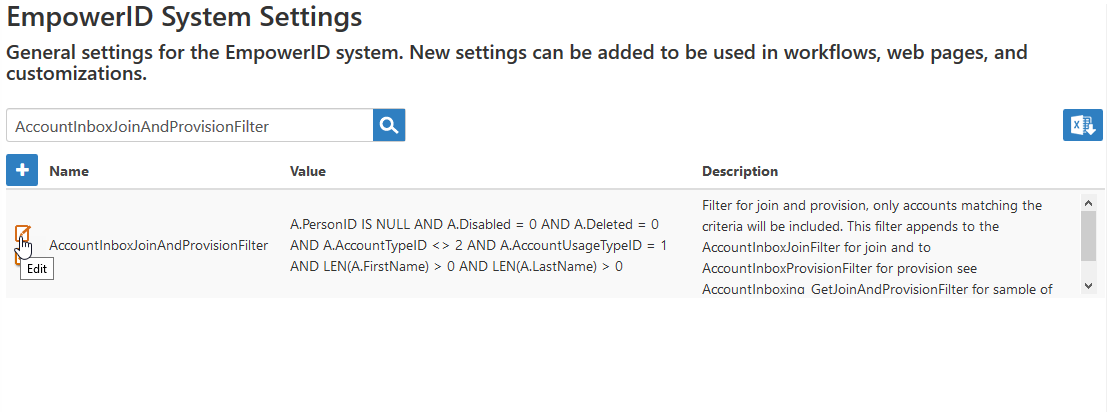
- From the navigation sidebar, expand Admin > EmpowerID Servers and Settings and click EmpowerID System Settings.
- Search for AccountInbox.
You should see a number of Account Inbox Join and Provision rules and filters, such as the AccountInboxJoinByBirthDateFirstNameLastName rule highlighted below.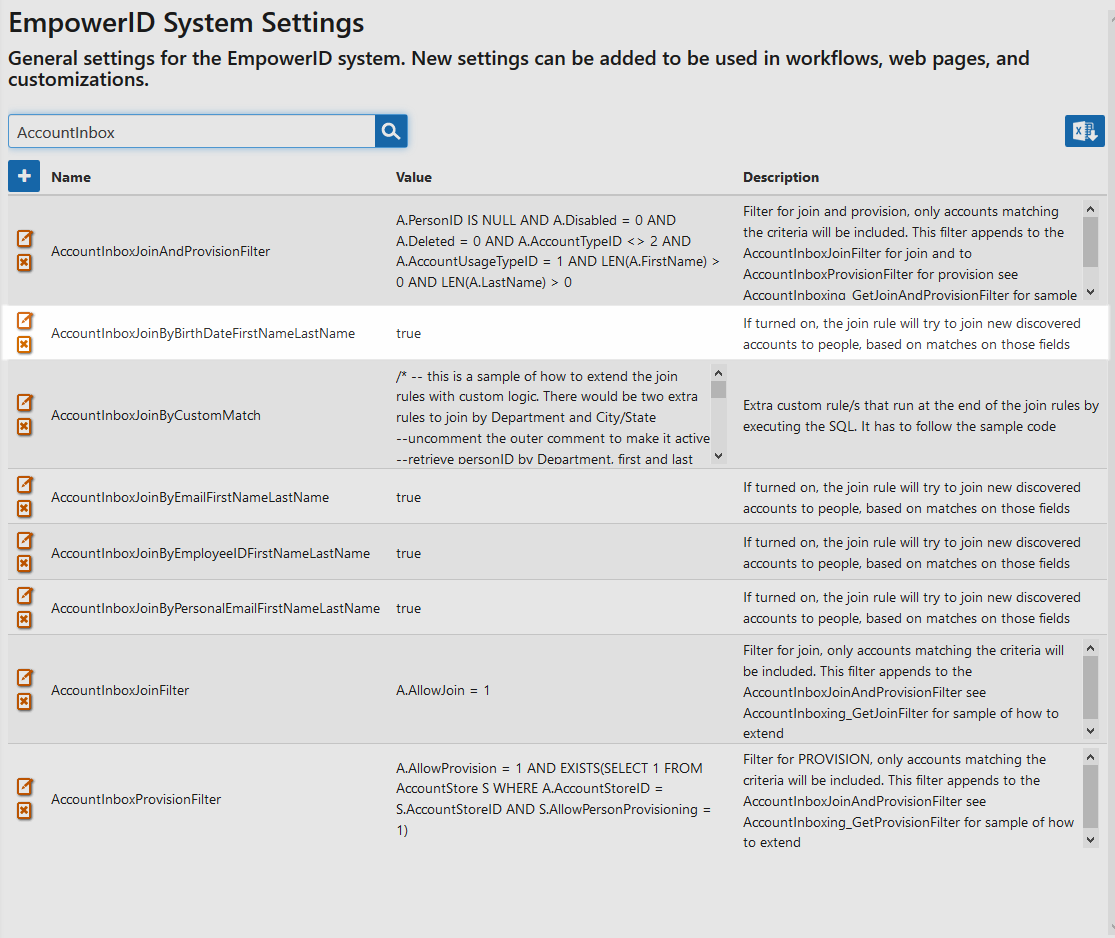
These Join rules work in conjunction with the Join and Provision filters to specify the conditions that must be met for EmpowerID to join newly discovered user accounts to an EmpowerID Person. The default logic of these Join Rules is to join an inventoried user account to an EmpowerID Person if the account store allows for Person joining and the applicable attributes on the user account match the corresponding attributes on an existing EmpowerID Person. For example, the above highlighted Join rule instructs EmpowerID to attempt to join newly discovered accounts to people if the Birth Date, First Name and Last Name attributes match.
In addition to the above rule, EmpowerID includes the following Join Rules:
- AccountInboxJoinByCustomMatch — This an empty rule that you can use to customize the attribute matches required to join an inventoried user account to an EmpowerID Person.
- AccountInboxJoinByEmailFirstNameLastName — This rule instructs EmpowerID to attempt to join newly discovered accounts to people if the Email, First Name and Last Name attributes on a given user account match that of an existing EmpoweID Person.
- AccountInboxJoinByEmployeeIDFirstNameLastName — This rule instructs EmpowerID to attempt to join newly discovered accounts to people if the EmployeeID, First Name and Last Name attributes on a given user account match that of an existing EmpoweID Person.
- AccountInboxJoinByPersonalEmailFirstNameLastName — This rule instructs EmpowerID to attempt to join newly discovered accounts to people if the PersonalEmail, First Name and Last Name attributes on a given user account match that of an existing EmpoweID Person.
By default, each of the above Join rules are enabled (except for the Custom Join rule). You can disable any of these rules from the EmpowerID System Settings page by doing the following:
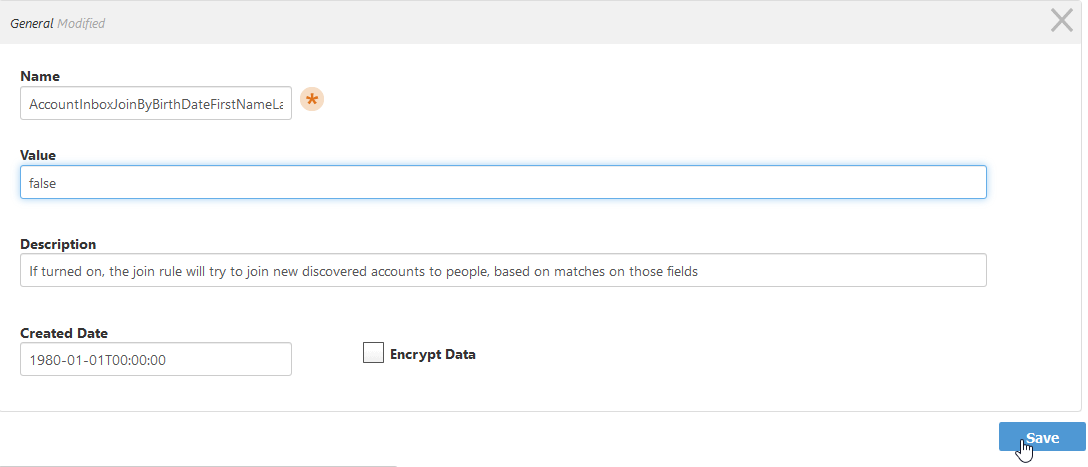
- Locate the rule you want to disable and click the Edit button for that rule.

- In the Value field of the dialog that appears, replace true with false and click Save.
| Anchor | ||||
|---|---|---|---|---|
|
- From the navigation sidebar, expand Admin > EmpowerID Servers and Settings and click EmpowerID System Settings.
- Search for AccountInbox.
- Select the filter you want to edit and click the Edit button for that filter.
In the Value field of the dialog that appears, add any additional logic to the filter and then click Save.
In our example, we edit the JoinAndProvisionFilter to specify that in addition to the default conditions, user accounts must also have an Employee Type of Permanent.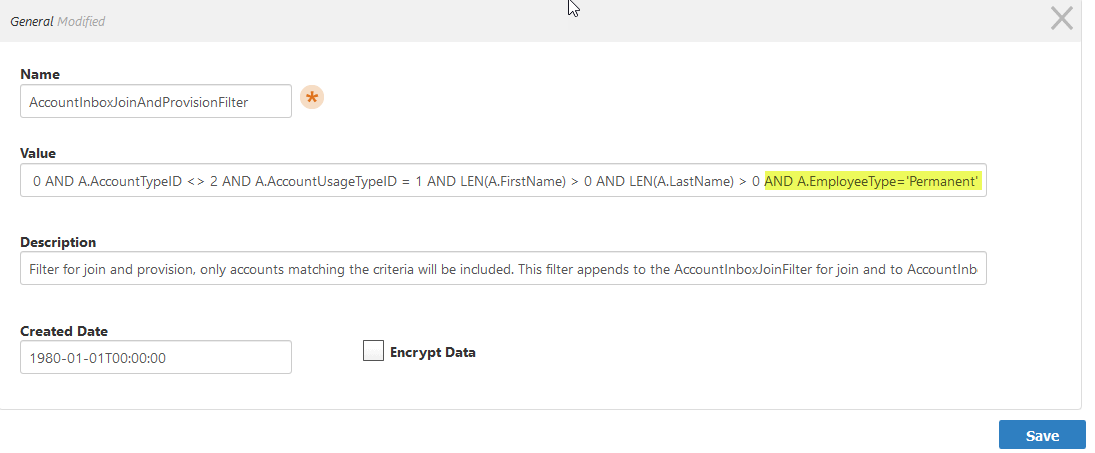
Warning As the AccountJoinAndProvision filter is used to target which account are eligible for both joining and provisioning, the filter should only be customized in situations where the custom criteria applies to accounts that are both join and provision targets.
| Div | ||||||||||||||||||||||||
|---|---|---|---|---|---|---|---|---|---|---|---|---|---|---|---|---|---|---|---|---|---|---|---|---|
| ||||||||||||||||||||||||
|