Versions Compared
Key
- This line was added.
- This line was removed.
- Formatting was changed.
Instead of searching through a list of locale keys, you can add the query string parameter ?langdebug=true to your EmpowerID web application URL, and interactively create or edit keys directly on the text as it appears in the page.
Once enabled, the Locale Key Editor Enabled info box provides you with information on how to use the editor.
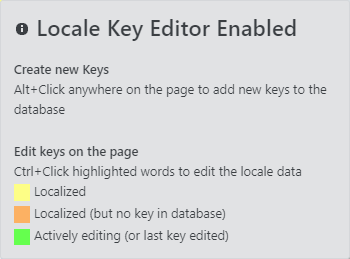
There are three things that you can accomplish using this editor.
- Create new keys — This is for use by developers who are adding new text to the UI. Developers can use this shortcut to add a key to correspond with a value in their code.
- Edit localized values for existing keys — This is for use by administrators or authorized users who are adding translations of the value for other languages or editing existing translations.
- Edit localized values and add keys — This is for use by administrators or authorized users who are adding translations of the value for other languages when keys do not yet exist in the database.
In this topic, we explore how to add or edit localized text for existing keys and how to add keys for existing localized text. We cover how to create new keys in the developer documentation.
| Info |
|---|
Each person can set their Preferred Language by clicking the globe next to My Cart and selecting from the languages supported in the organization. |
To enable the Locale Key Editor
Navigate to the EmpowerID page with text that you want to localize, and insert the query string parameter
?langdebug=truein the URL between/UIand#, in place of the slash. For example:https://sso.empoweriam.com/UI/#Common/Find/Person becomes
https://sso.empoweriam.com/UI?langdebug=true#Common/Find/PersonInfo When you navigate to other EmpowerID pages with the Locale Key Editor enabled, the query string stays in the URL so that you can continue localizing other pages. So you can start off by appending the query string to the main entry point of your EmpowerID site like this:
https://sso.empoweriam.com/UI?langdebug=trueThe Locale Key Editor Enabled info box appears, and all localized strings are highlighted in yellow, or in orange if a localized value exists in the code, but no key exists in the database.
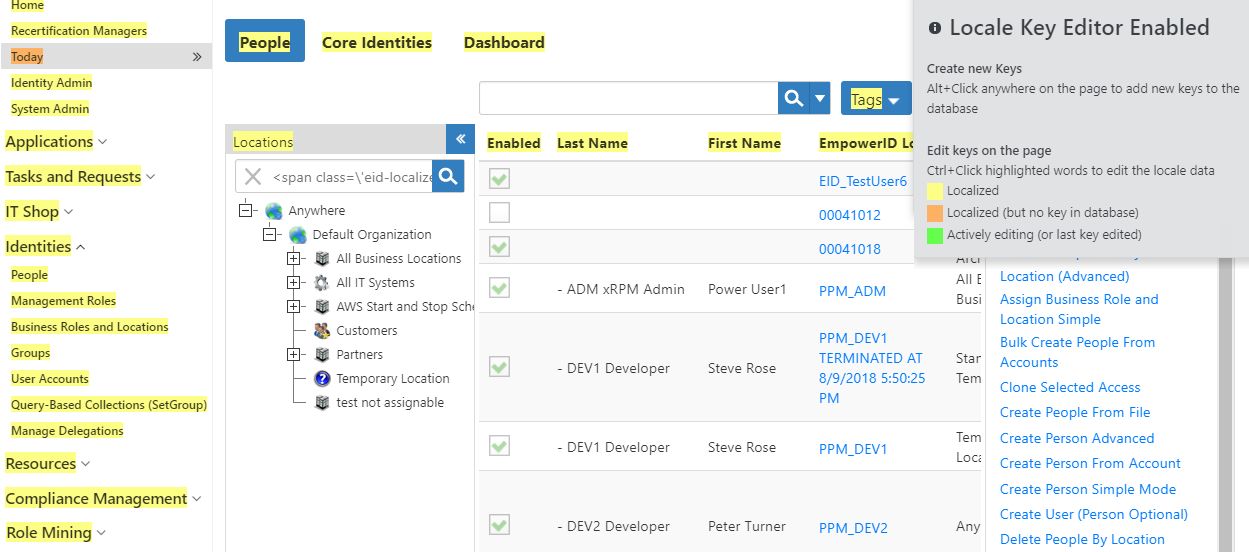
To add or edit localized text for existing keys
- While pressing the Ctrl key, click any yellow highlighted text.

The clicked text highlight changes to green to indicate that it is being edited, and the Edit an existing locale key dialog appears.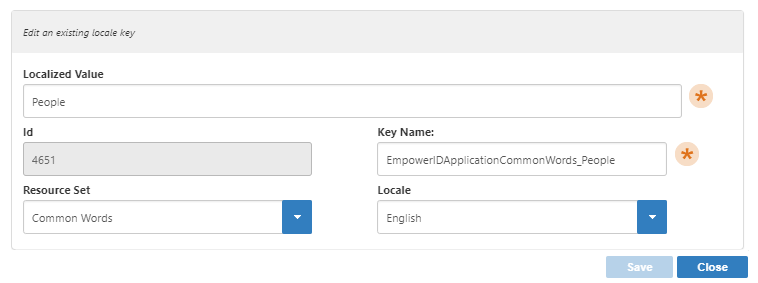 Image Removed
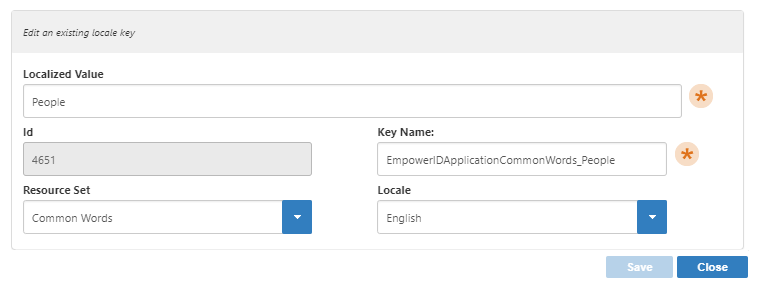 Image Added
 The default locale is English, so the Localized Value here is "People." You can customize this value. For example, your organization might prefer the term "Associate."
Warning Do not change the Key Name field, as this is what connects the value to the proper place in the UI.
- To provide a translated value for another language, drop down the Locale list and select the language you want.
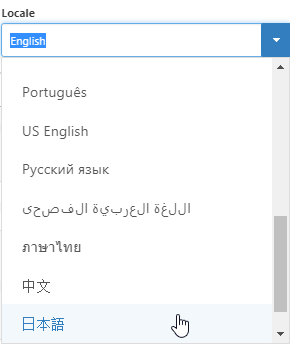 Image Removed
 Image Added
 - In the Localized Value box, enter your translation and click Save.
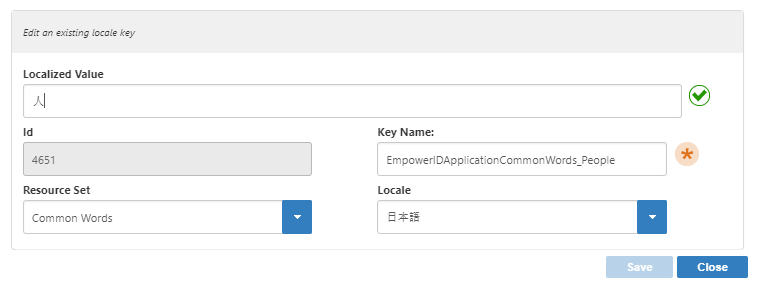 Image Removed
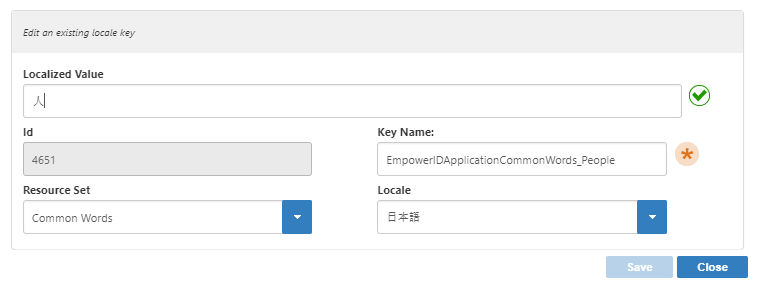 Image Added
 Once that language has a translation, you can choose another locale to translate. When you are finished, click Close.
Tip To check your work, you can append a language query string parameter to the base URL for any page in the web application to force it to display the page in that language.
To display all pages of the Web application in a specific language, append the following to the Home page URL:
?lang=<ISO 639 culture code>-<ISO 3166 subculture code>For example:
https://sso.empoweriam.com/UI/?lang=ja-jpwheresso.empoweriam.comis the FQDN of the EmpowerID Web server in your environment, andja-jprepresents the ISO settings for the locale.EmpowerID then appends that parameter to each page of the Web application until it is removed from the URL or the user session ends so that any pages you navigate to are displayed in the specified language.
The translated text is highlighted green to show that it was the last edited key.
To localize a value and add the key to the database
- While pressing the Ctrl key, click any orange highlighted text.
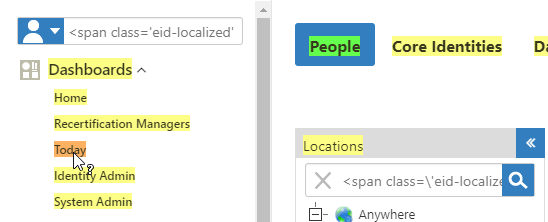 Image Removed
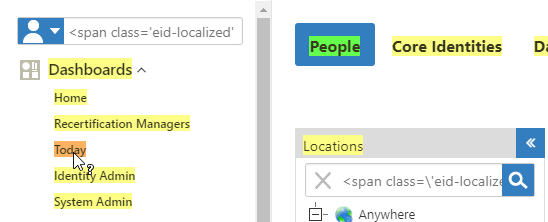 Image Added
The clicked text highlight changes to green to indicate that it is being edited, and the Change or update a locale key dialog appears.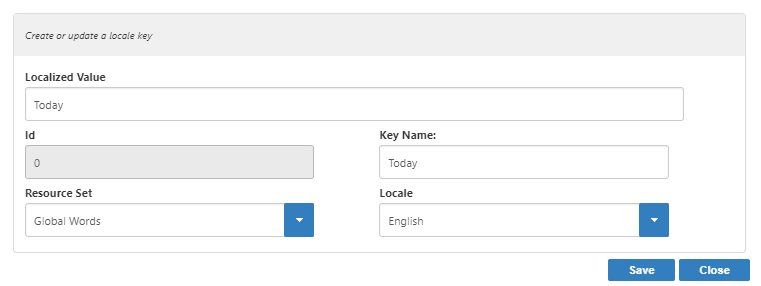 Image Removed
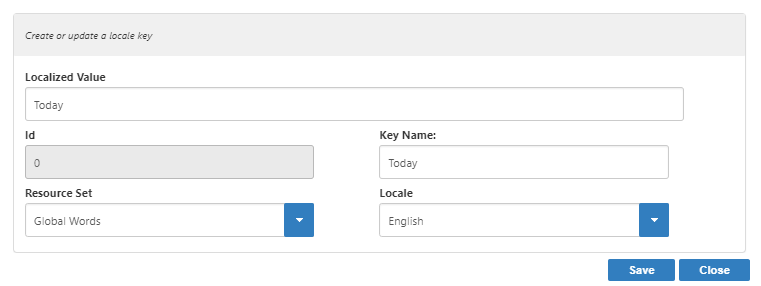 Image Added
 The default locale is English, so the Localized Value here is "Today." You can customize this value. For example, your organization might prefer the term "Current."
Warning Do not change the Key Name field, as this is what connects the value to the proper place in the UI.
- To provide a translated value for another language, drop down the Locale list and select the language you want.
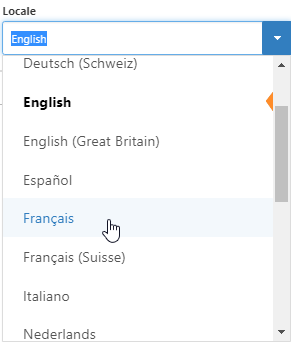
- In the Localized Value box, enter your translation and click Save.
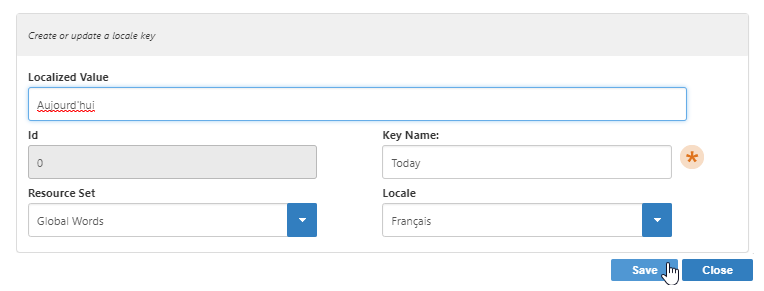 Image Removed
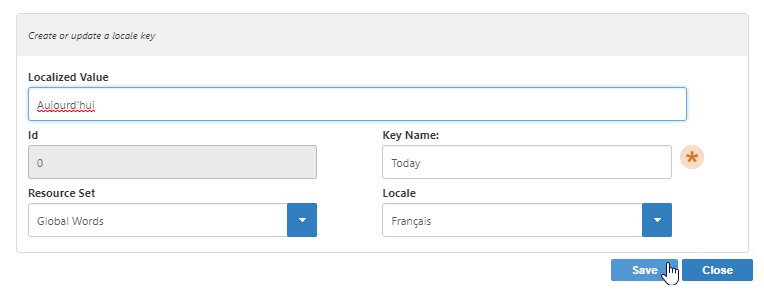 Image Added
 Once that language has a translation, you can choose another locale to translate. When you are finished, click Close.
Tip To check your work, you can append a language query string parameter to the base URL for any page in the web application to force it to display the page in that language.
To display all pages of the Web application in a specific language, append the following to the Home page URL:
?lang=<ISO 639 culture code>-<ISO 3166 subculture code>For example:
https://sso.empoweriam.com/UI/?lang=fr-frfrwheresso.empoweriam.comis the FQDN of the EmpowerID Web server in your environment, andfr-frrepresents the ISO settings for the locale.EmpowerID then appends that parameter to each page of the Web application until it is removed from the URL or the user session ends so that any pages you navigate to are displayed in the specified language.
The translated text is highlighted green to show that it was the last edited key.
To close the Locale Key Editor
- Replace the query string parameter
?langdebug=truewith a slash:/and press Enter. - The Locale Key Editor Enabled info box disappears and the highlights are removed from the text.
| Div | ||||||||||||||||||||||
|---|---|---|---|---|---|---|---|---|---|---|---|---|---|---|---|---|---|---|---|---|---|---|
| ||||||||||||||||||||||
|