If you want to run your EmpowerID services and app pools as group managed service accounts (gMSA), this topic provides details on how to configure your domain controller, SQL Server, and the computers where you run the service. For more information about such service accounts, see Microsoft's gMSA Overview topic.
To configure your domain controller
- On your domain controller machine, download the script below.
Warning To run the script, you must first open PowerShell as administrator. Otherwise, the script fails.
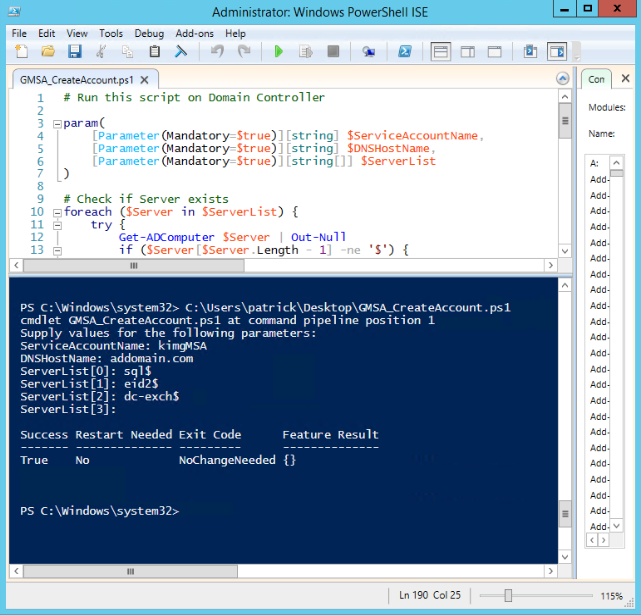
View file name GMSA_CreateAccount.ps1 height 250 - Run the script and provide values for the following parameters:
- ServiceAccountName — A name for the service account you are creating
- DNSHostName — The DNS host name for the service account (e.g. addomain.com or mycompany.internal)
ServerList — The servers you use for EmpowerID (SQL, DC, computers where you run the service as a service account) each followed by a dollar sign (e.g. sql02$, prod-dc01$, my-server$)
Info If you run the script, it asks for each server individually, or you can use the command below. You can enter as many servers as you need. If you are entering them individually, it will continue until you press Enter without entering a value.
You can run the file in PowerShell, and it will prompt you for parameter values, or you can enter the following command in PowerShell, replacing the parameter values with your own:
Code Block language powershell .\GMSA_CreateAccount.ps1 -ServiceAccountName MYgMSAccount -DNSHostName MYaddomain.com -ServerList MY-dc01$, MY-eid$, MYsql02$
- When it finishes, a message like the following appears.
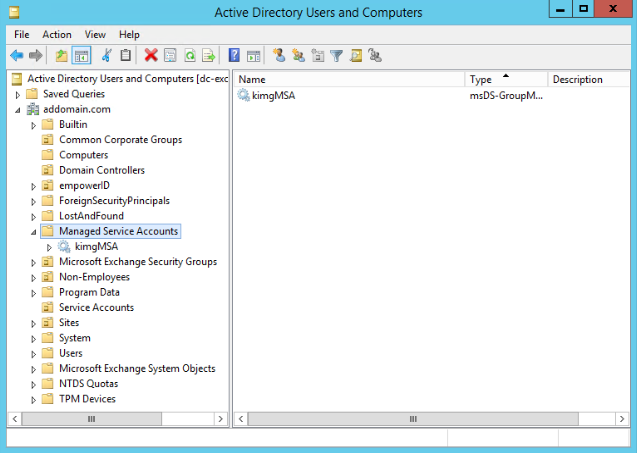
- To verify that the account was created, open Active Directory Users and Computers, expand your domain, and look under the Managed Service Accounts node.
To configure SQL Server
Next, give your Group Managed Service Account access to the SQL database.
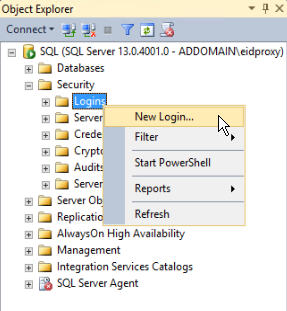
- Open Microsoft SQL Server Management Studio and connect to your server that hosts EmpowerID.
- In the Object Explorer, expand the Security node, right-click Logins, and select New Login.
- In the Login - New window that appears, next to Login name, enter your DNS Host and new Group Managed Service Account name separated by a back slash and with a trailing dollar sign.
e.g. ADDOMAIN\kimgMSA$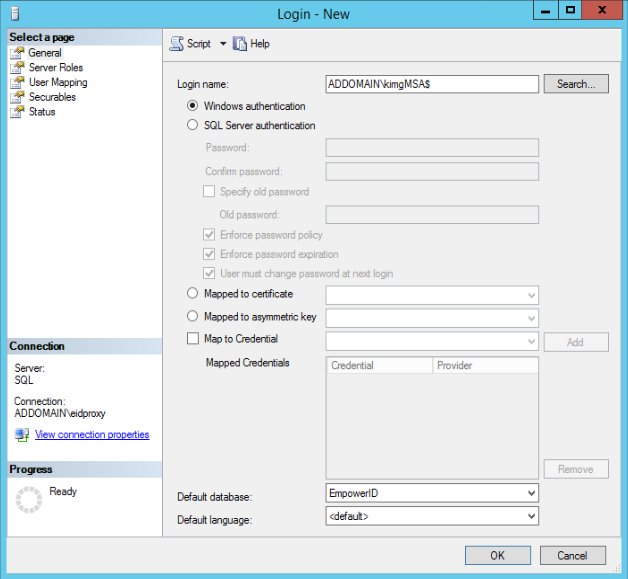
- At the top left, under Select a page, select User Mapping.
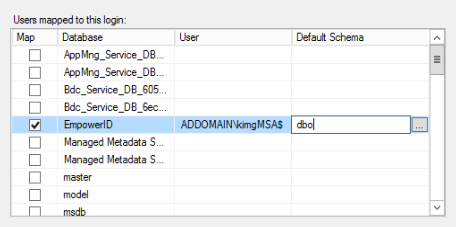
- Under Users mapped to this login, select EmpowerID. Your gMSA appears in the user column.
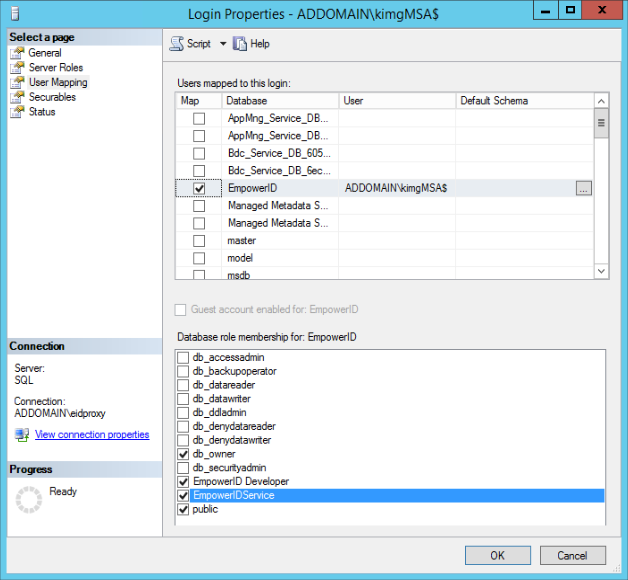
- In the Default Schema column, type dbo.
- Under Database role membership for: EmpowerID, select the following roles and click OK.
- db_owner
- EmpowerID Developer
- EmpowerIDService
- public
The login appears in Microsoft SQL Server Management Studio under the Security > Logins node.
To configure computers to run the service
On each machine where you want to run the service, download the script below to install your new Group Managed Service Account.
Warning To run the script, you must first open PowerShell as administrator. Otherwise, the script fails.
View file name GMSA_Install-ADServiceAccount.ps1 height 250 Supply your ServiceAccountName when prompted, or use the following command to run the script, replacing kimgMSA with your account.
Code Block language powershell .\GMSA_Install-ADServiceAccount.ps1 -ServiceAccountName kimgMSA
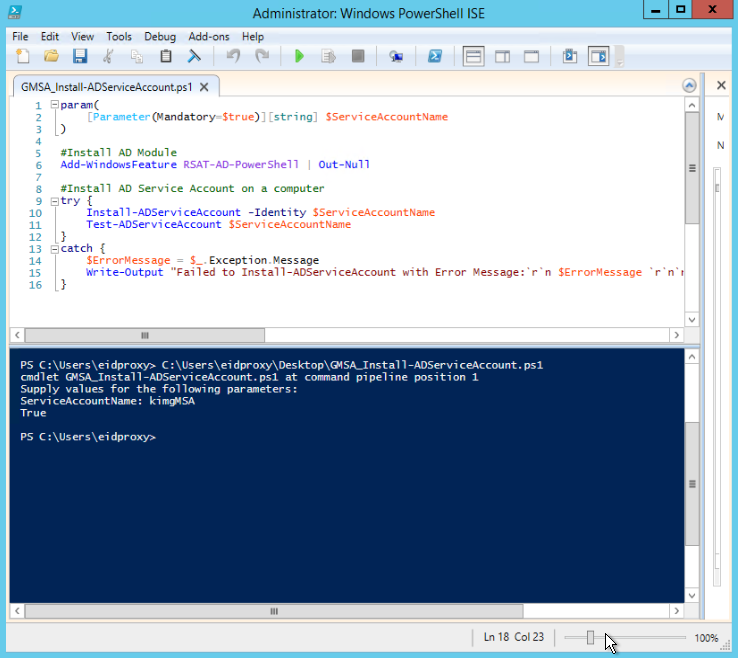
- The value True appears in the results to indicate that the service account installed successfully.
- From the Start menu, open Computer Management, and add the service account to the Administrators group using the following steps.
- Expand System Tools, then Local Users and Groups, and select Groups.
- Double-click the Administrators group, and in the dialog that appears, click the Add button.
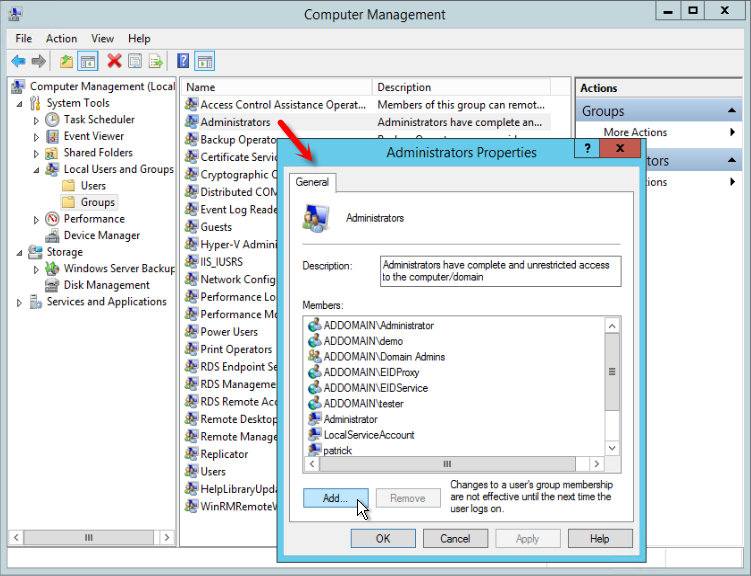
- In the dialog that appears, in the Enter object names to select box, enter your DNS host name and gMSA name separated by a back slash, e.g. addomain\kimgMSA, and click Check Names. The service account name appears underlined, without the DNS host.
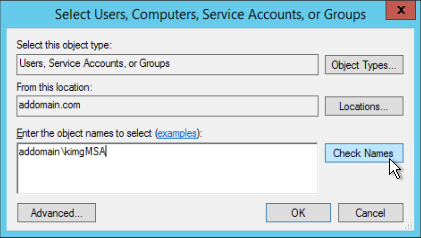
- Click OK. The service account is added to the list of Administrators group members.

To run the service with the Group Managed Service Account
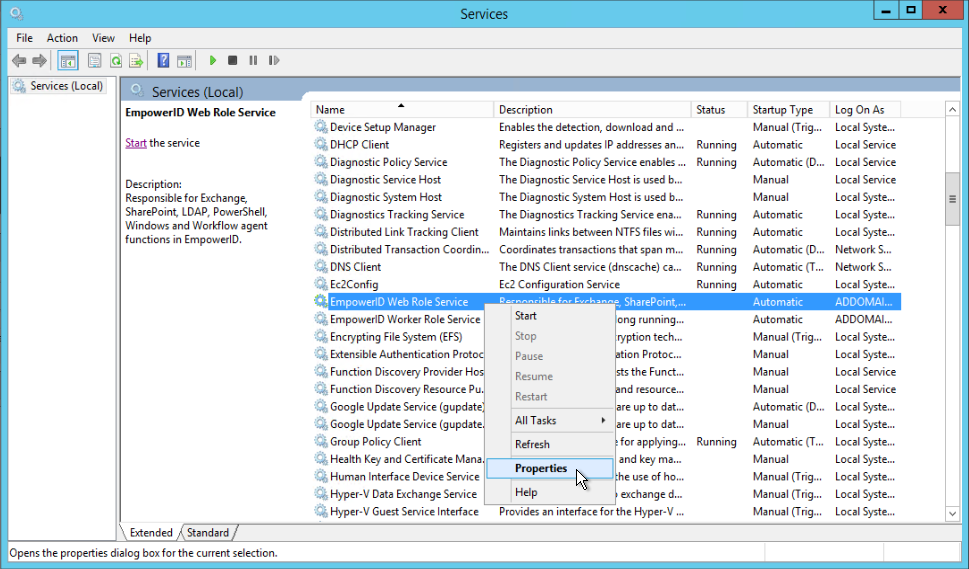
- On your EmpowerID machine, from the Start menu, open Services.
- Right-click the EmpowerID Web Role Service and click Properties.
- In the dialog that appears, select the Log On tab, and next to This account, enter your DNS host and gMSA name followed by the dollar sign, e.g. addomain\kimgMSA$.
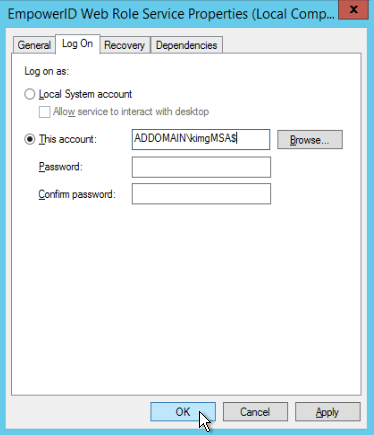
- Be sure that the password fields are cleared, and click OK.
- A Services message box informs you that the account has been granted the Log On As A Service right. Click OK.
Back in Services, the EmpowerID Web Role Service now has your gMSA account in the Log On As column. The dollar sign tells you that it is a Managed Service Account.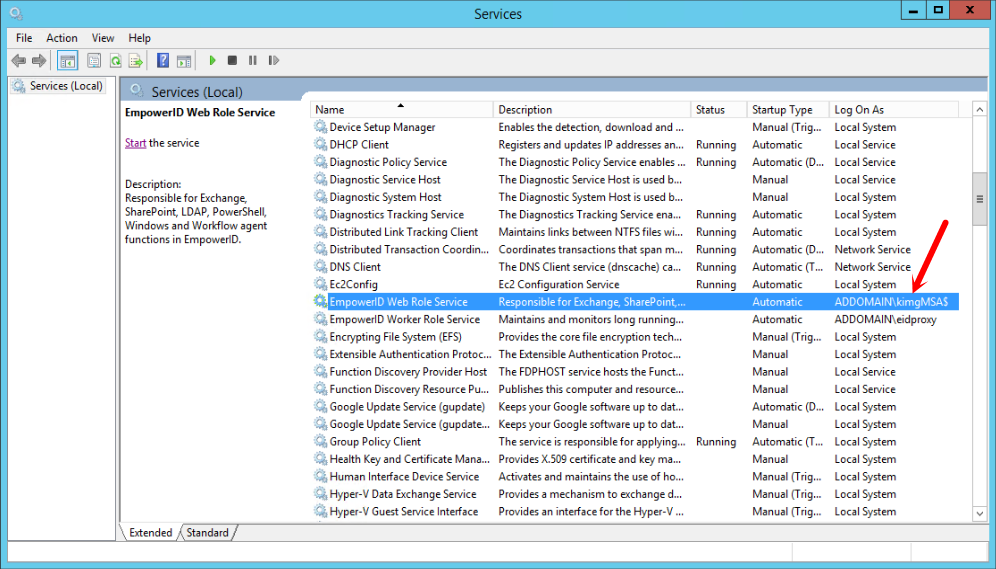
- Repeat these steps to have the service account run the EmpowerID Worker Role Service.
To configure app pools to use the service account
Download the following script onto your EmpowerID machine.
View file name EID_SetAppPoolIdentity.ps1 height 250 Warning To run the script, you must first open PowerShell as administrator. Otherwise, the script fails.
When prompted, supply your DNS Host and gMSA account followed by the dollar sign, e.g. addomain\kimgMSA$, or use the following command to run the script, replacing addomain and kimgMSA with your DNS and account name.
Code Block language powershell .\ EID_SetAppPoolIdentity.ps1 -Account addomain\kimgMSA$

- To verify the changes, open IIS Manager, expand the EmpowerID connection, and click Application Pools.
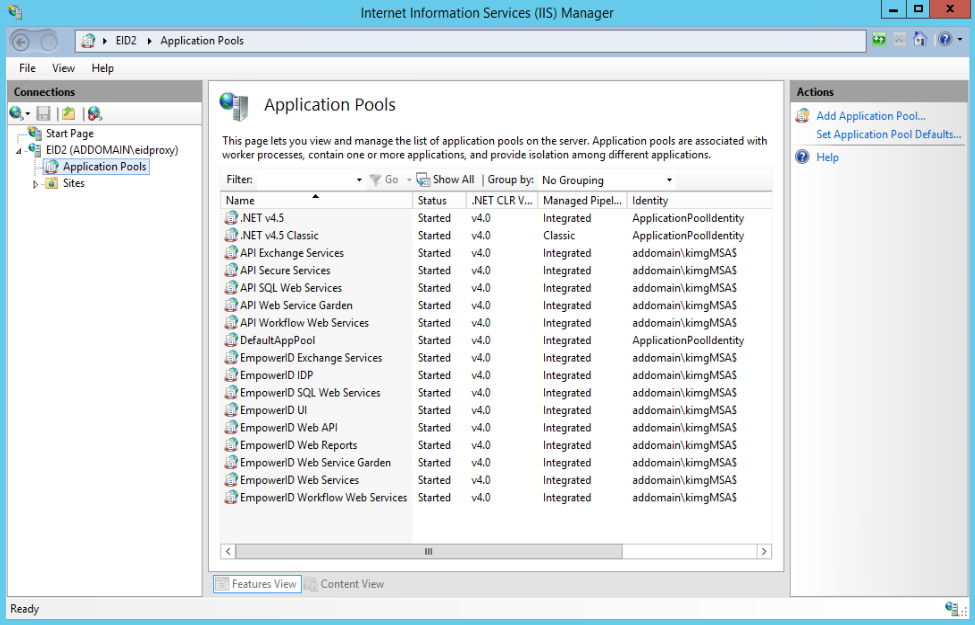
Each of the EmpowerID application pools has the new service account listed in the Identity column.
| Div | ||||||||||||||||||||||
|---|---|---|---|---|---|---|---|---|---|---|---|---|---|---|---|---|---|---|---|---|---|---|
| ||||||||||||||||||||||
|