...
| Style | ||
|---|---|---|
| ||
To use the EmpowerID Connectivity Tester
- In File Explorer, navigate to the EmpowerID programs folder on the machine hosting your EmpowerID Server. In a default installation, this folder is located in the following directory: C:\Program Files\TheDotNetFactory\EmpowerID\Programs
- Locate the EmpowerID.Troubleshooter.exe file, and double-click to open it.
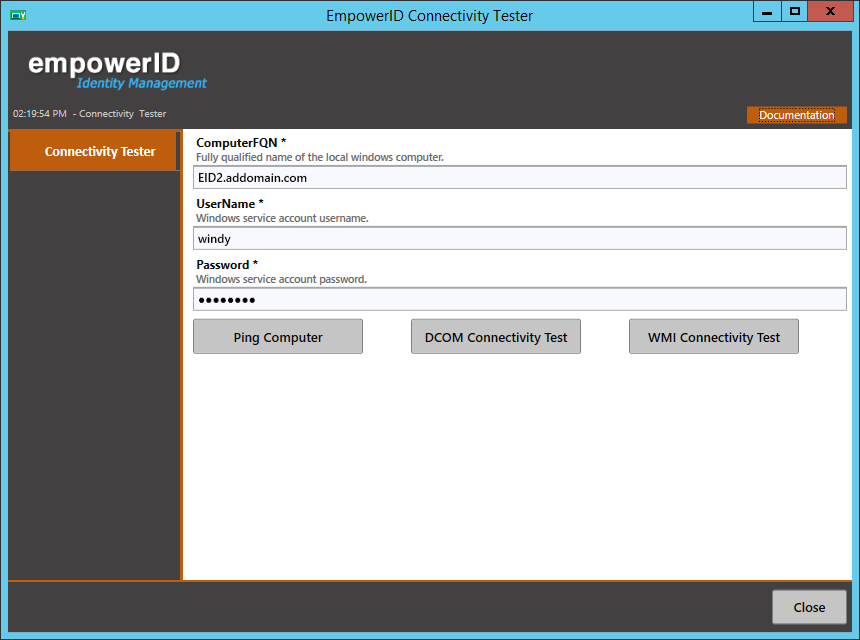
- In the ComputerFQN of the EmpowerID Connectivity Tester window that appears, enter the fully qualified name of the computer you are planning to add as a Local Windows Server Account Store.
- In the UserName field, enter the user name of the proxy account you intend to use for this account store.
- In the Password field, enter the vaulted password of the proxy account you intend to use for this account store.
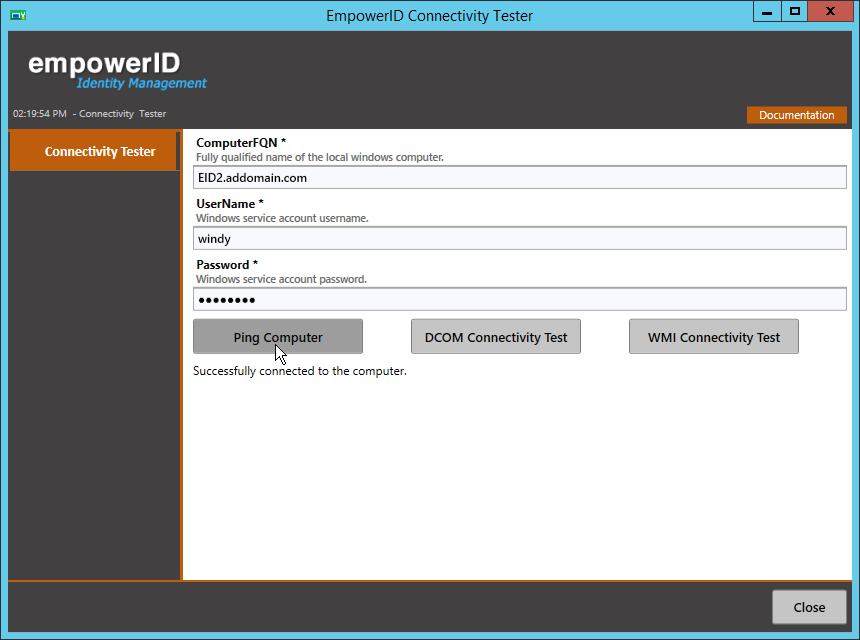
- Click the Ping Computer button to verify that you are successfully connected to the computer.
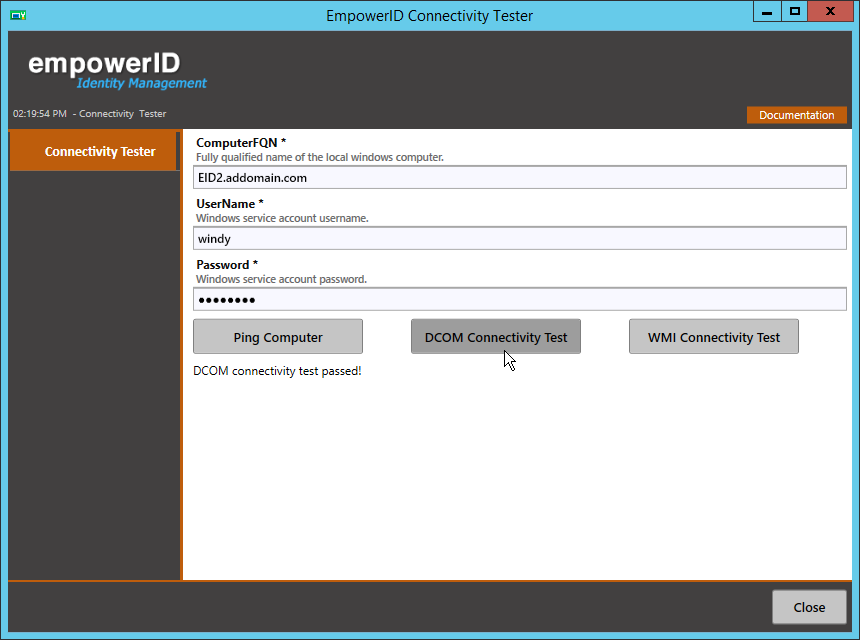
- Click the DCOM Connectivity Test button to verify DCOM connectivity.
- Click the WMI Connectivity Test button to verify WMI connectivity.
...