The EmpowerID VMWare connector allows organizations to inventory and manage the Virtual Machines, ESX servers and templates hosted in their VMWare VCenters. These management actions include the following:
- Start — This action powers on or awakens any targeted machines currently powered off or in a suspended state and marks those machines as running.
- Stop — This action powers off any targeted machines currently running and marks those machines as stopped.
- Reboot — This actions reboots the guest OS on any targeted machines. The targeted machines must be running for this action to have effect.
- Shutdown — This action shuts down the guest OS on any targeted machines. The targeted machines must be running for this action to have effect.
- Suspend — This action suspends any targeted machines. The targeted machines must be running for this action to have effect.
- Unregister — This action removes the virtual machine from EmpowerID's inventory. The targeted machine must be powered off for this action to have effect. If the machine is running, an exception occurs.
- Reset — This action resets power on any targeted machines. The targeted machines must be running in an unsuspended state for this action to have effect.
- Create Snapshot — This action creates a new snapshot of any targeted machines.
- Revert Virtual Machine to Current Snapshot — This action reverts any targeted machines to the most current snapshot. The targeted machine must have a current snapshot for this action to have effect. If the machine does not have a current snapshot, an exception occurs.
| Tip |
|---|
EmpowerID store a record for each inventoried VCenter instance in the Computer table of the EmpowerID Identity Warehouse. |
| Info | ||
|---|---|---|
| ||
In order to connect EmpowerID to VMWare, you need to provide EmpowerID with the following information:
These values are used by EmpowerID to inventory and manage the machines in your VCenter.
|
Connecting EmpowerID to VMWare
- In the navigation sidebar, expand Admin > Applications and Directories and click Account Stores and Systems.
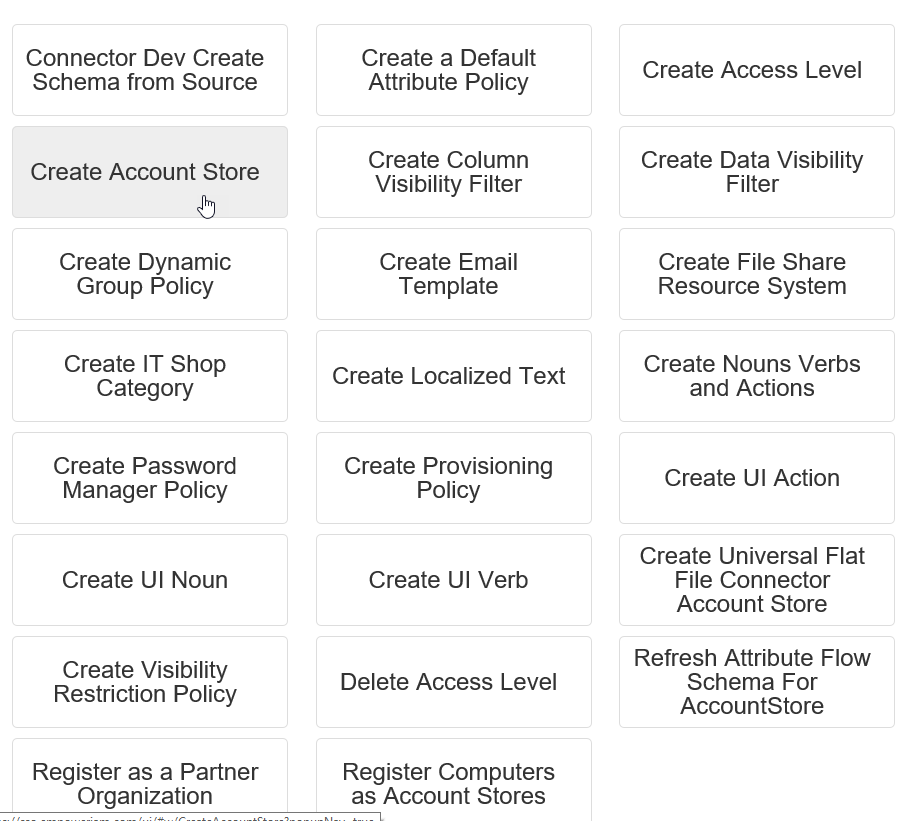
- From the Actions tab, click Create Account Store.
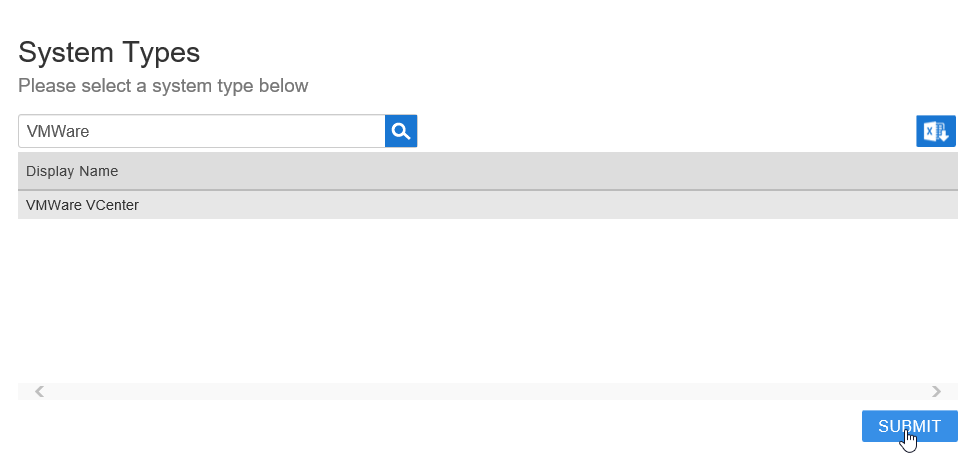
- In the System Types lookup that appears, search for VMWare.
- Click the record for VMWare VCenter to select it and then click Submit.
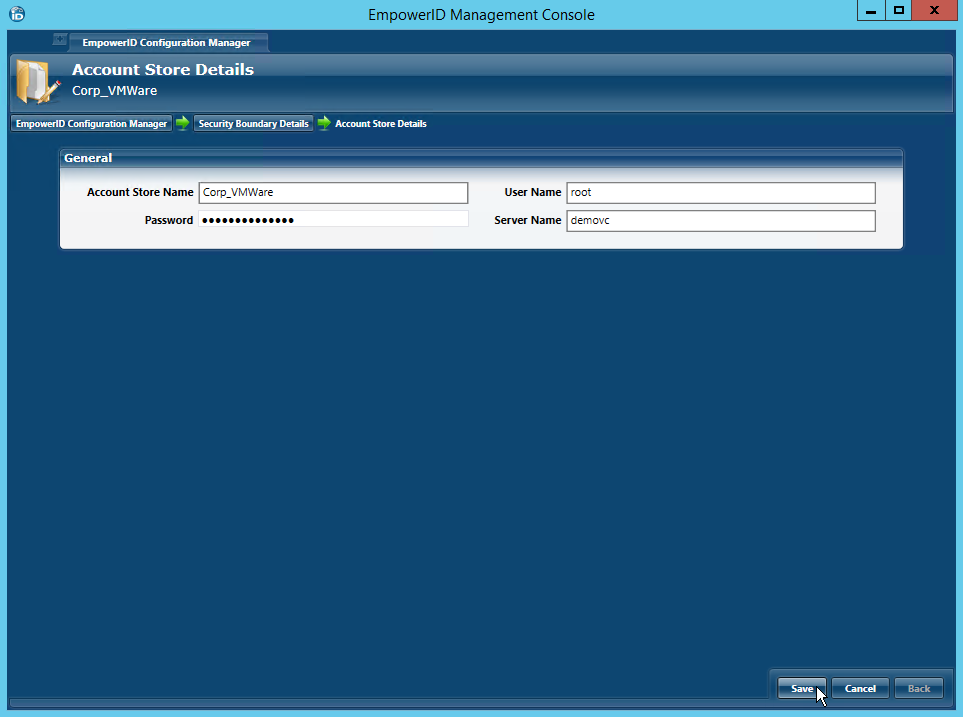
- In the Account Store Details window that appears, do the following:
- Type a name for the connector in the Account Store Name field.
- Type the administrative user in the User Name field.
- Type the password for the administrative user in the Password field.
- Type name of the VCenter server to which you want to connect in the Server Name field.
- Click Save.
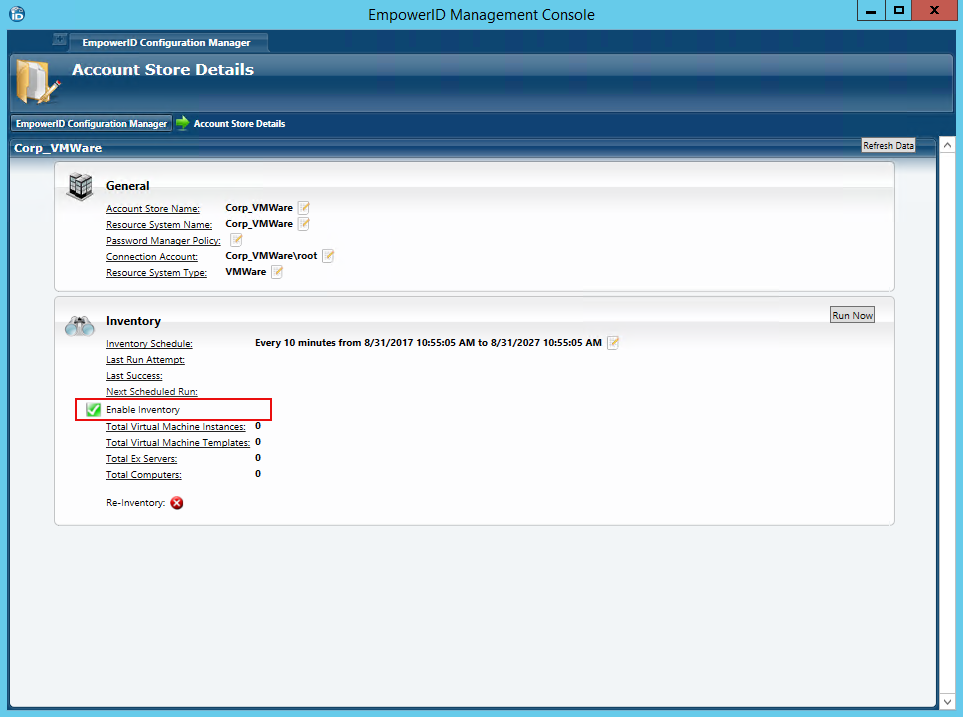
- Back in the main screen of Configuration Manager, locate the record for the VMWare account store you just created and either double-click it or right-click it and selectEdit from the context menu.
- From the Inventory pane of the the Account Store Details screen that appears, enable EmpowerID to inventory your VCenter by toggling the Enable Inventory button from a red sphere to a green check.
| Info |
|---|
After EmpowerID inventories your VCenter, you can manage the virtual machines in that VCenter. For more information, see Managing VMWare VCenter Instances. |
| Tip |
|---|
In EmpowerID, all resources belong to a location, which is a container that can be used for managing access to resources. For VMWare, the default path to this location is Anywhere/Default Organization/All IT Systems/VMWare/TheNameOfTheAccountStore. All virtual machines belonging to the ESX host belong to the location of that host. Thus in the above example, the ESX host and all machines on the host are assigned to the Anywhere/Default Organization/All IT Systems/VMWare/Corp_VMWare location |
...


