...
...
...
| import | https://docs.empowerid.com/docs.css |
|---|
| Div | ||
|---|---|---|
| ||
Home / Authorization RBAC/ABAC / Management Roles / Current: Creating Management Roles |
In EmpowerID, Management Roles are collections of operational capabilities. They are packaged as job-based bundles that let you make quick and easy bulk assignments of resources to users that match what they do in your organization.
Think of Management Roles as a more powerful version of groups that
- can grant access across platforms and
- are not limited to granting access for one application or operating system.
EmpowerID includes a number of Management Roles that you can assign to people out of the box, and you can create new ones as needed. For information on Management Roles that are included in EmpowerID, see Shipped Management Roles.
...
To create a Management Role
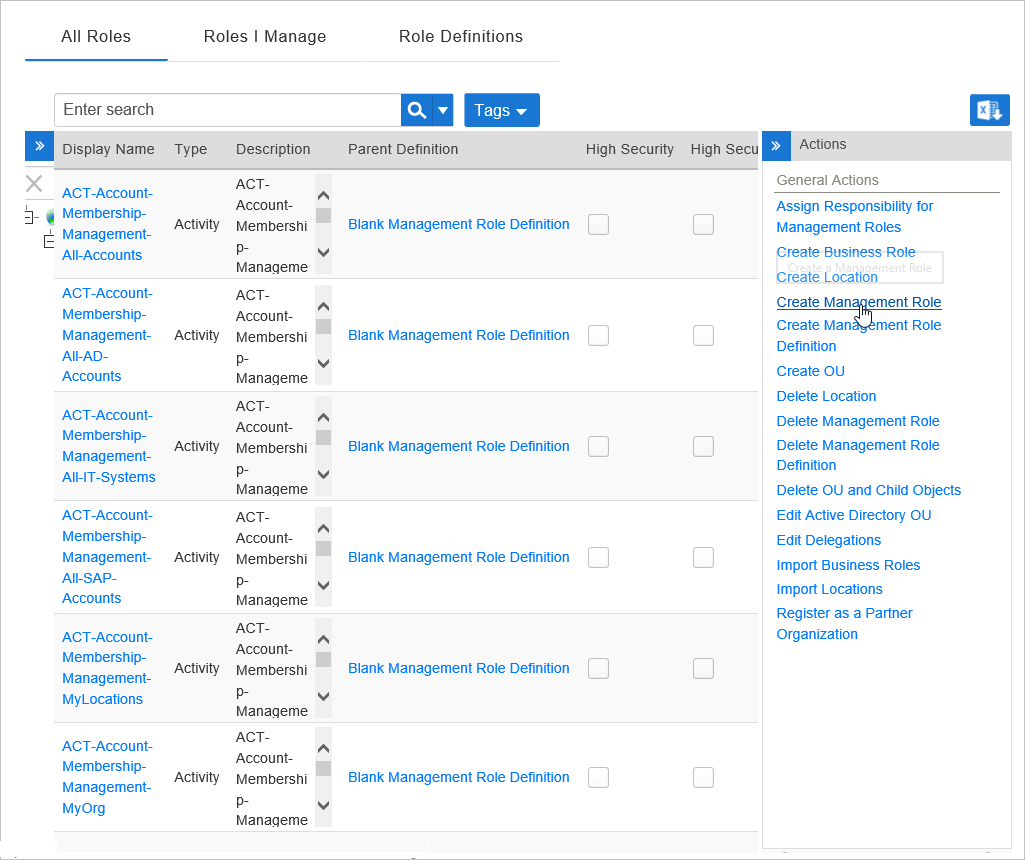
- In the Navigation Sidebar of the EmpowerID Web interface, expand Identities navigation sidebar, expand Role Management and click Management Roles.
- From On the Actions pane of the Management Role management Management Roles page, click the Create Management Role action.

In
This opens the Management Role Details form that appears, enter a name in the Name and Display Name fields.
These fields are required.Click the Role Type drop-down and select a type. page, which is where you enter the details about the role being created.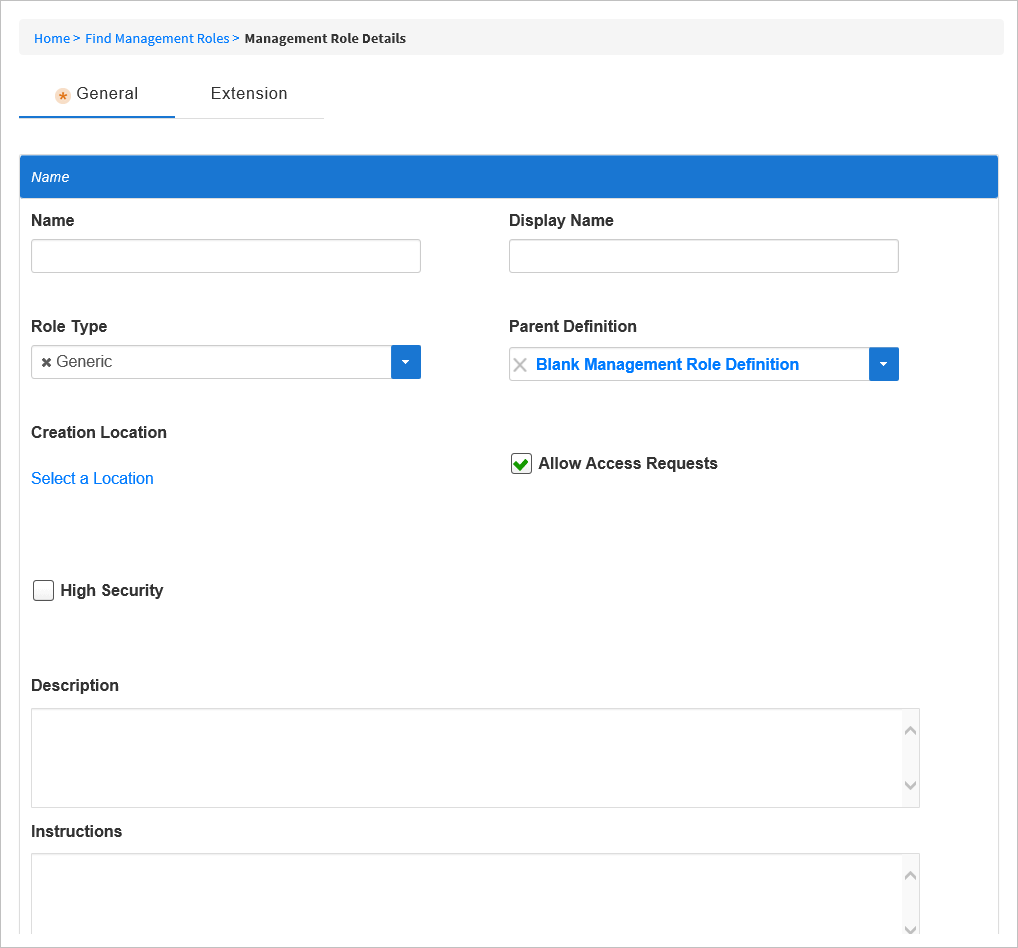
- On the General tab of Management Role Details page, fill in the following information:
- Name — Enter a name for the Management Role.
- Display Name — Enter a display name for the Management Role. The Display Name for the Management Role is the name displayed in the EmpowerID user interfaces.
- Role Type — Select the role type. The Generic role type is the default and fits most circumstances.
- Parent Definition — Select the Management Role Definition to use as the template for the role. The Blank Management Role Definition is the default. To base the role on another parent definition, click the X below Blank Management Role Definition, search for a parent definition, and then click the tile for it.
Note If you click the link for the blank definition instead of the X, EmpowerID directs your browser to the View page for it.

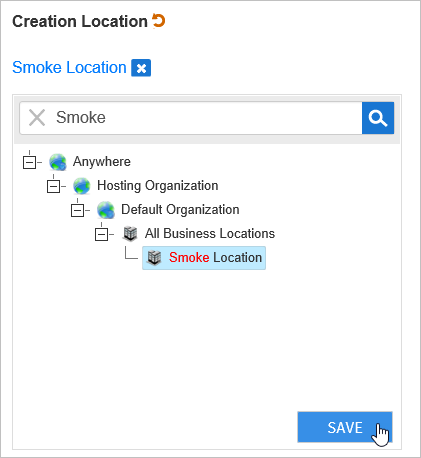
- Creation Location — Specify the EmpowerID location in which you want to create the role. To do so, click the Select a Location link
- and in the Location Selector that appears, search for and select the

Select Allow Access Requests if you want people to be able to shop for the Management Role- desired location. When done, click Save.
- Allow Access Requests — Select to display the Management Role as a requestable item in the IT Shop.
- High Security — Select if the role is a high security role.
- Description — Enter a description
- for the
These fields are required.Click Save.
To verify that the Management Role was created
- In the Navigation Sidebar, expand Compliance and Reports and click Audit Log.
- On the Recently Created Objects tab, search for the Management Role you just created.
You should see the Management Role in the grid.
- role.
- Instructions — Optionally, enter any desired information in this field.
- eMail — Optionally, enter an email address for the role.
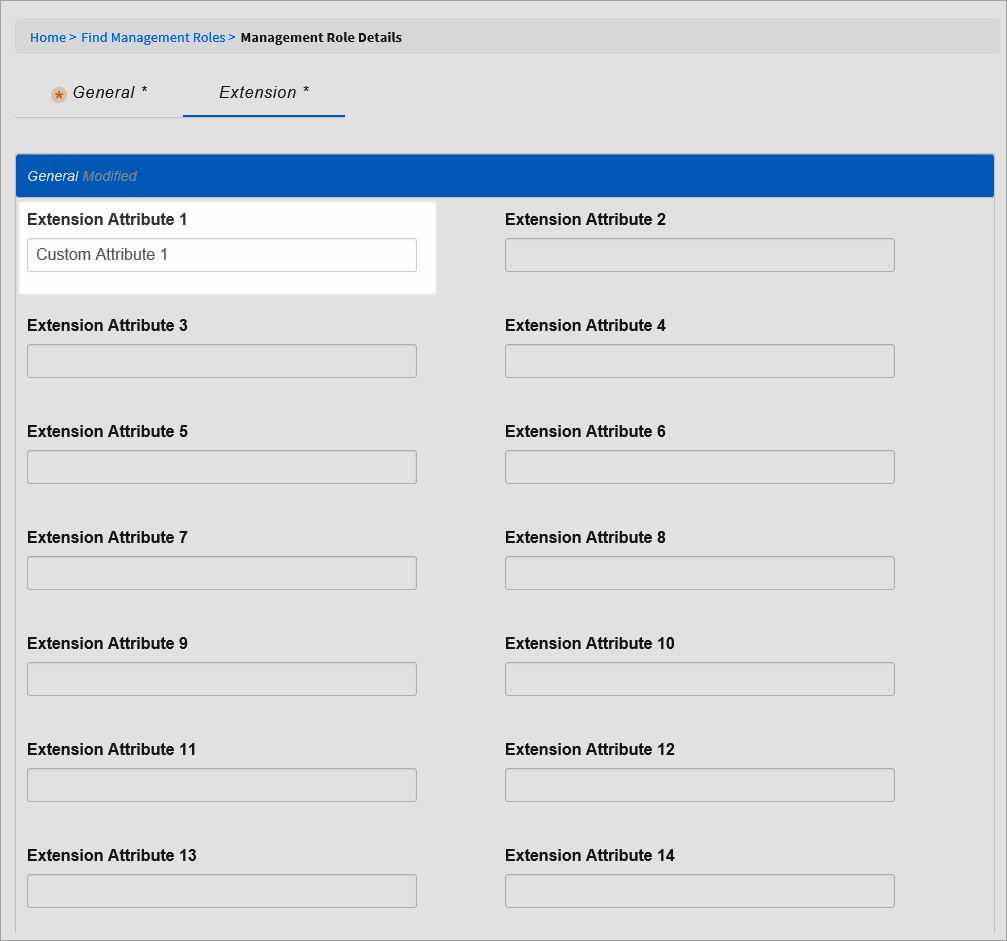
- Optionally, click the Extension tab of the Management Role Details page and add any custom attribute information in the available Extension Attribute fields.
- When ready, click Save to create the Management Role.