...
| import | https://docs.empowerid.com/docs.css |
|---|
| Div |
|---|
E2D / Authorization RBAC/ABAC / Management Roles / Current: Assigning Access Levels to Management Roles |
EmpowerID Access Levels, also known as Resource Roles, are collections of "operational capabilities" and/or "native system rights" specific to a particular resource type, such as an account, group or mailbox. When you assign an Access Level to a Management Role, you give anyone assigned membership in the Management Role the ability to perform those operations or tasks against a selected resource.
| Info |
|---|
Generally speaking, the default Management Roles shipped by EmpowerID contain all the Access Levels sufficient for those roles. Therefore, it is recommended that you only assign Access Levels to the Management Roles you create or clone. |
To assign Access Levels to Management Roles
- In the
Enter the name of the Management Role to delegate access to in the Enter a Management Role Name to Search field and click the tile for the role.
Drop down the Assignment Type and select By Location. Selecting By Location gives the Management Role
- navigation sidebar, navigate to the Management Roles page by expanding Role Management and clicking Management Roles.
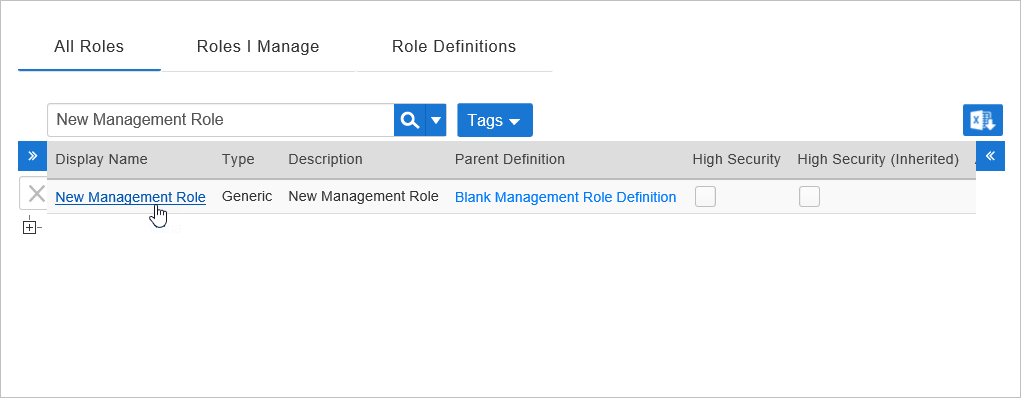
- Search for the Management Role to which you want to assign one or more Access Levels.
- From the search results, click the Display Name link for the role.
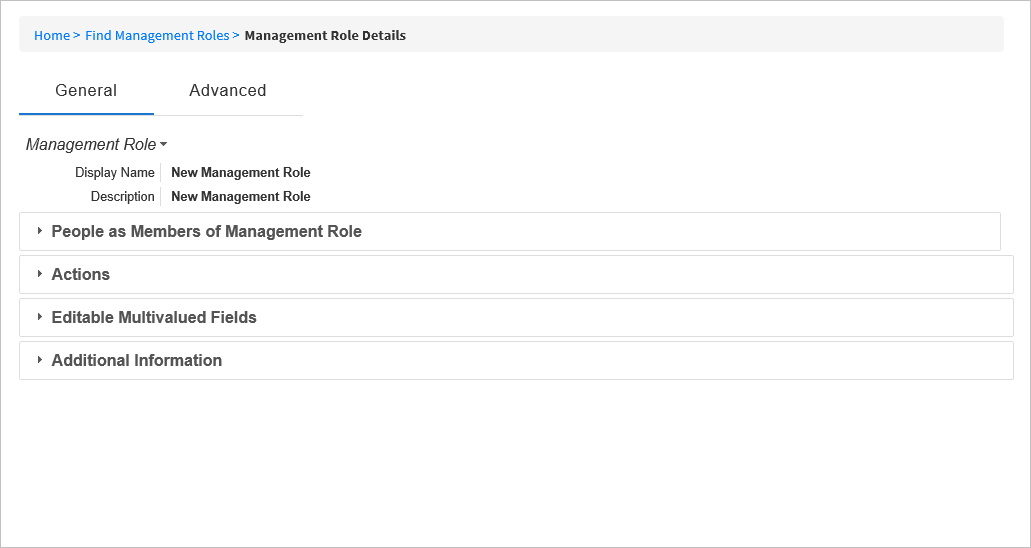
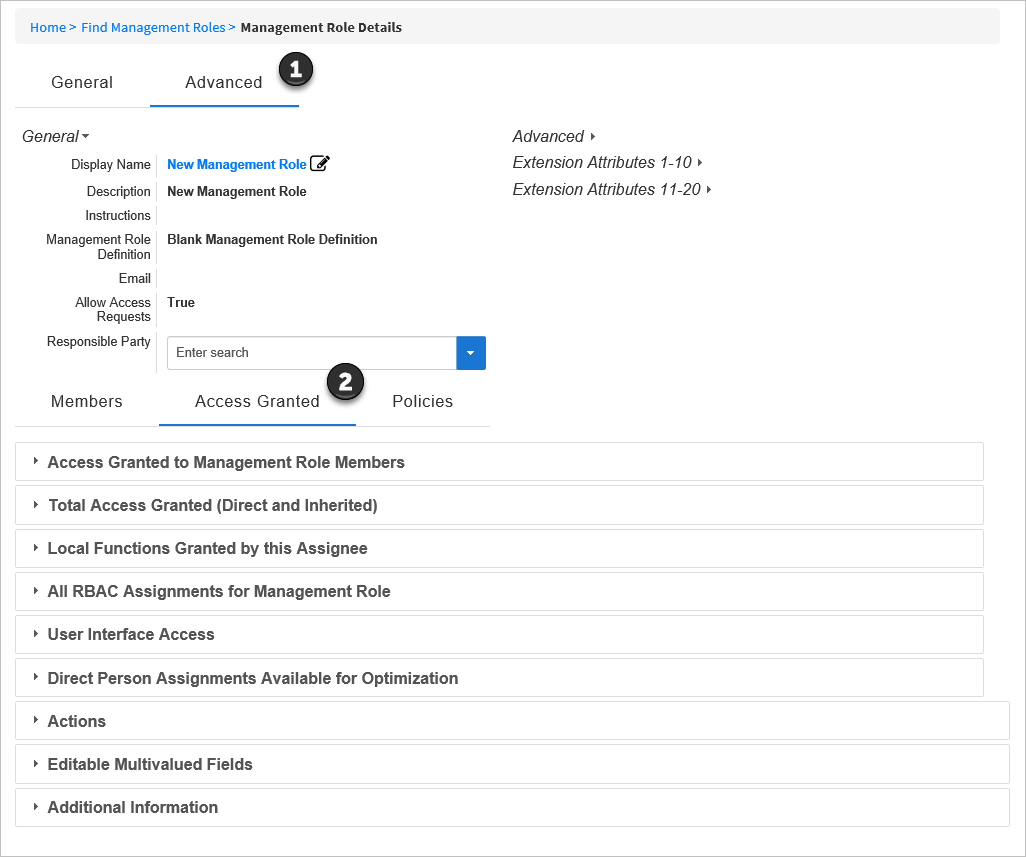
This opens the Management Role Details (View One) page for the role. This page allows you to view and edit information and configuration settings for the Management Role, as well as perform specific actions against the role. - Click the Advanced tab and then click the Access Granted sub-tab.
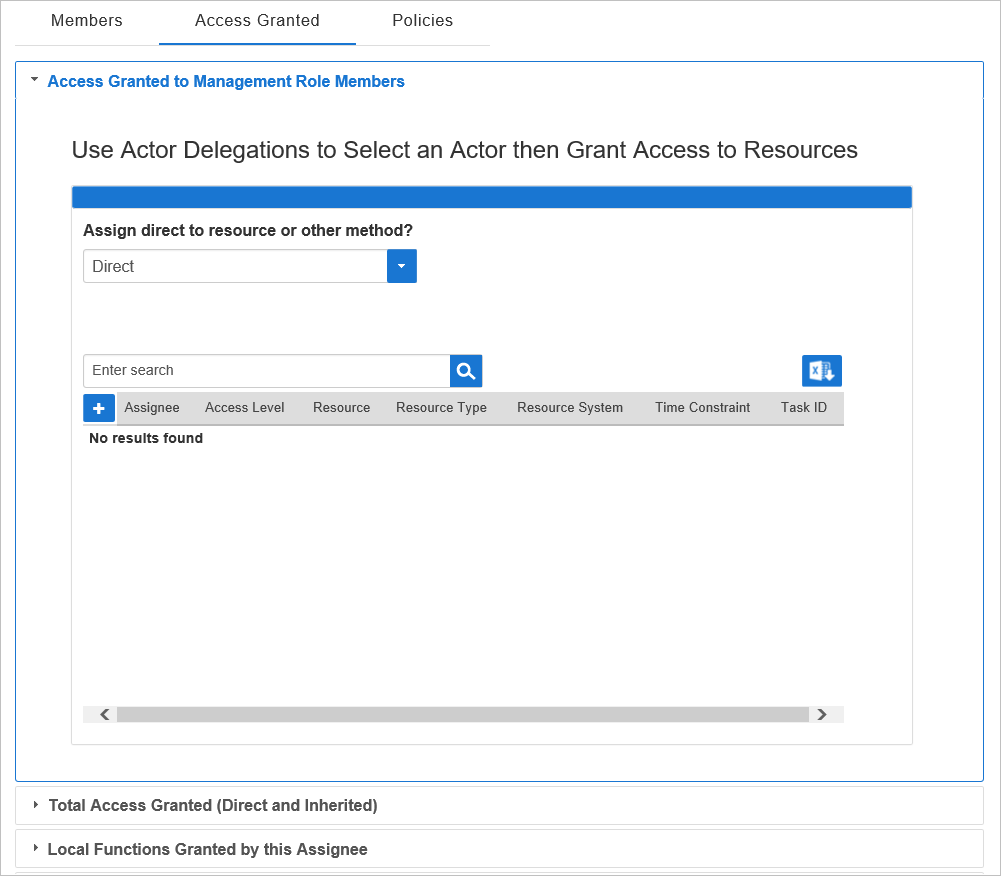
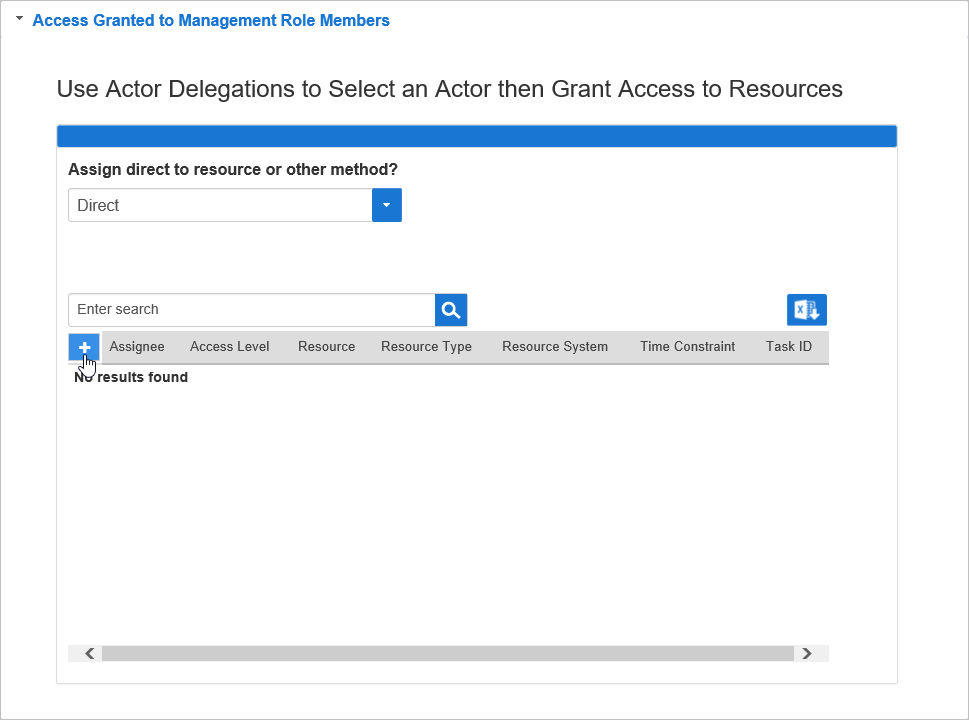
- Click the Access Granted to Management Role Members accordion to expand it.
- In the Access Granted to Management Role Members accordion, do the following:
- Assign direct to resource or other method? — Select how you want the Access Level to be assigned.
- Direct — Select this option if you want to assign to Management Role members direct access to a single resource. An example would be granting the Initiator Access Level to the Create Person workflow.
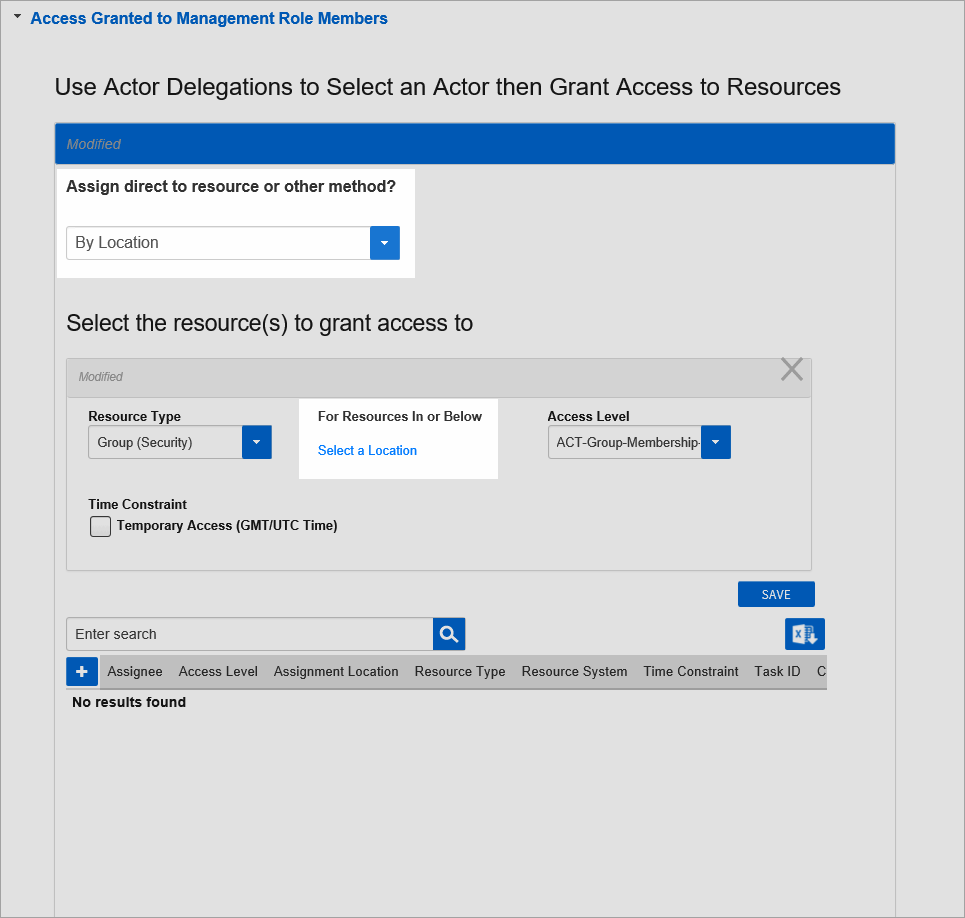
- By Location — Select this option if you want to assign to Management Role members access to all resources of a
- Assign direct to resource or other method? — Select how you want the Access Level to be assigned.
- specific type in a specific location and
- its child locations
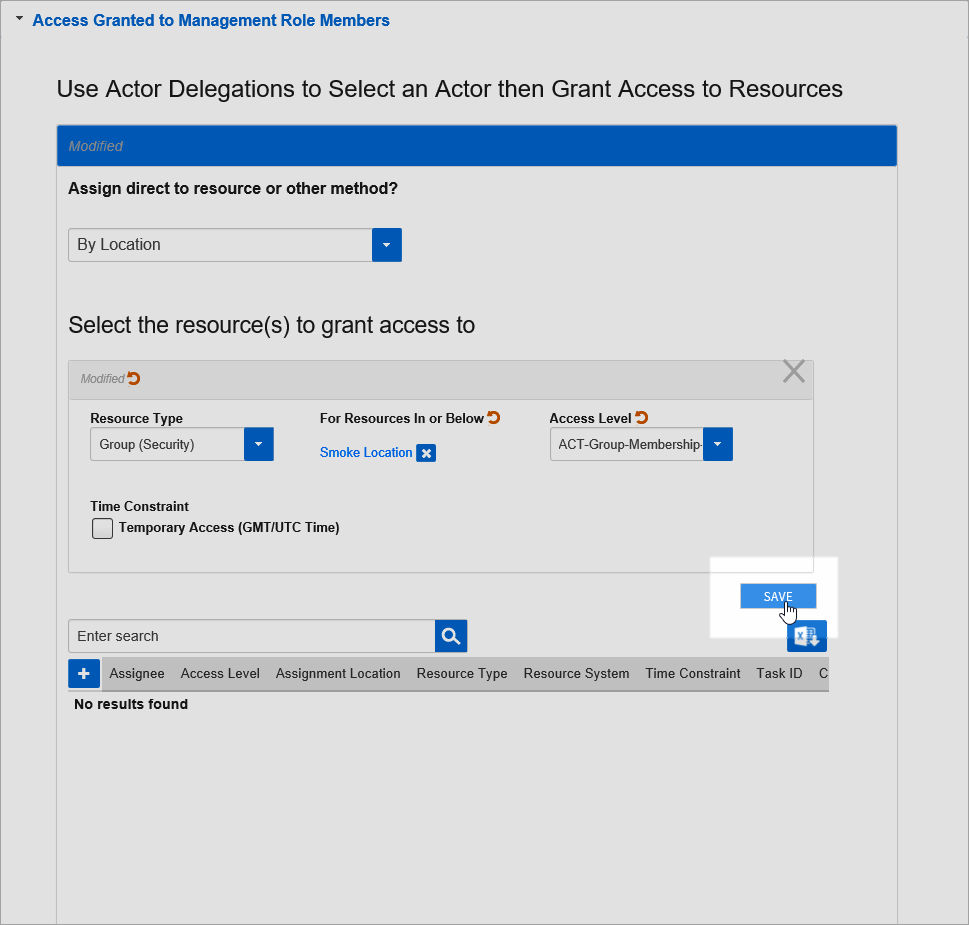
Click Save to add the assignment to the shopping cart.
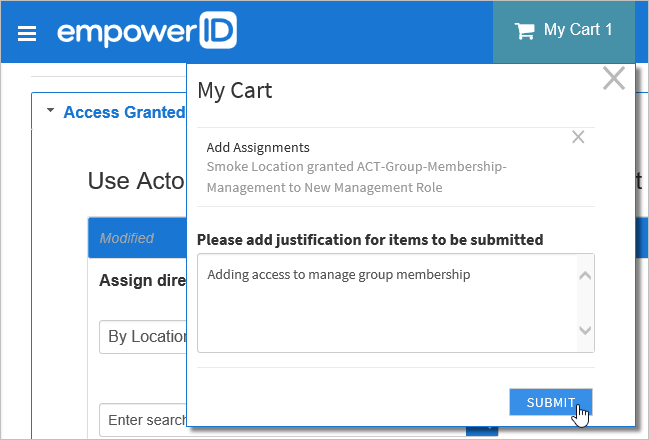
Repeat for each Access Level to assign to the Management Role Definition, and when you have finished adding Access Level assignments, click the Shopping Cart icon, type a reason for the assignments in the cart dialog and click Submit.
- (if any). An example would be granting the Access Manager Access Level for all Computers in the Default Organization and below.
- Relative — Select this option if you want to assign to Management Role members access to all resources of a specific type relative to their location within the organization. An example would be granting the Access Manager Access Level for all Computers in a member's locations and below.
- Belonging to which group? — Select this option if you want to assign to Management Role members a specific type of access to all user accounts or people belonging to a particular group. An example would be granting the ACT-Account-Membership-Management Access Level for all user accounts belonging to the Contractor's group.
- Belonging to which Management Role? — Select this option if you want to assign to Management Role members a specific type of access to all people belonging to a particular Management Role. An example would be granting the ACT-Person-Profile-Edit Access Level for all people belonging to the VIS-Person-MyOrg Management Role.
- Belonging to which Query-Based Collection? — Select this option if you want to assign to Management Role members a specific type of access to all objects belonging to a particular Query-Based Collection. An example would be granting the ACT-Account-Object-Administration Access Level for all user accounts belonging to the AD Accounts Never Logged In Query-Based Collection.
- Click the Add New button in the grid.
- Resource Type — Search for and select the specific type of resource against which you are granting the Access Level.
- Search for and select the specific resource against which you are granting the Access Level — Depending on the access assignment method chosen above and the resource type selected, the field will differ accordingly. For example, if you selected By Location as the access assignment method, you are presented with a Select a Location link, as shown below. Clicking the link opens the Location selection tree.
- Access Level — Search for and select the Access Level you want to assign to the role.
- Click Save.
- Repeat for any other Access Levels you want to assign to the role.
- After you have completed adding Access Levels, click the Shopping Cart at the top of the page.
- Enter a reason for the Access Level assignment and then click Submit.

