| Insert excerpt | ||||||
|---|---|---|---|---|---|---|
|
EmpowerID Oracle connector allows organizations to bring the user data (user accounts, profiles and roles) in their Oracle system to EmpowerID, where it can be managed and synchronized with data in any connected back-end user directories. When EmpowerID inventories Oracle, it creates an account in the EmpowerID Identity Warehouse for each Oracle user, a group for each Oracle profile, and an EmpowerID Business Role for each Oracle role. Once connected, you can manage this data from EmpowerID in the following ways:
Provision new users
Edit user attributes
Delete users
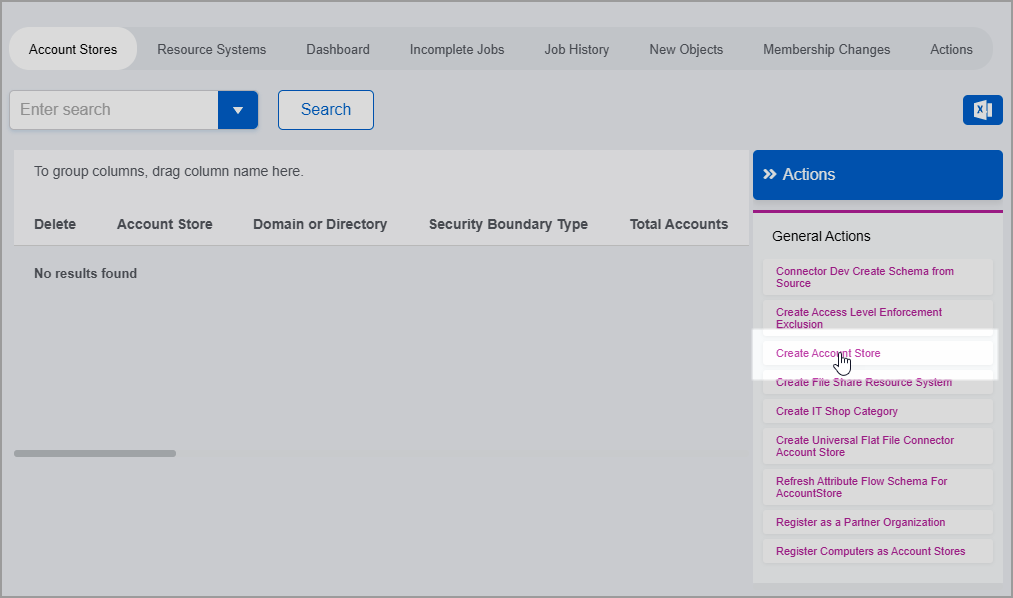
Create an Oracle account store in EmpowerID
On the navbar, expand Admin > Applications and Directories and then click Account Stores and Systems.
On the Account Stores page, click Create Account Store.
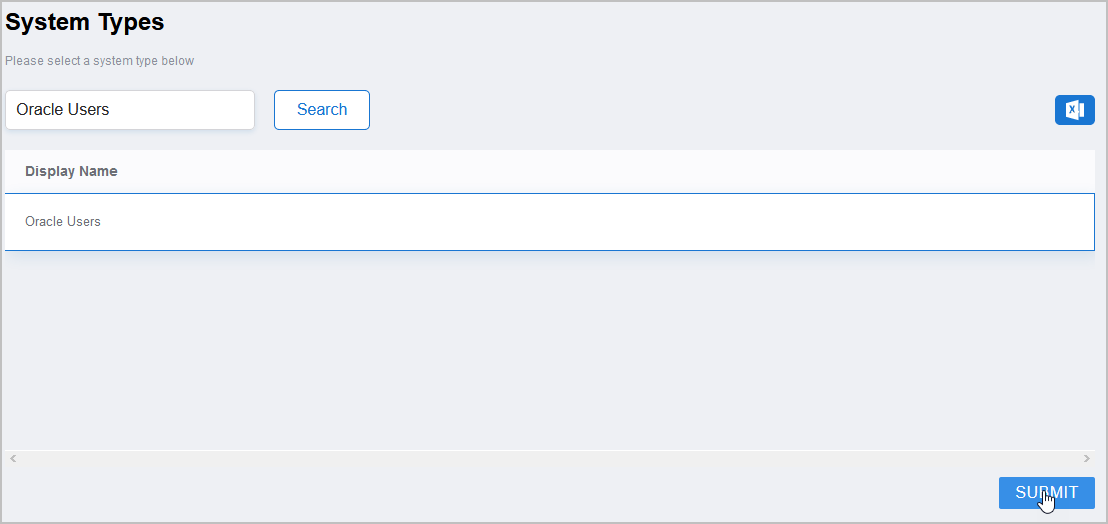
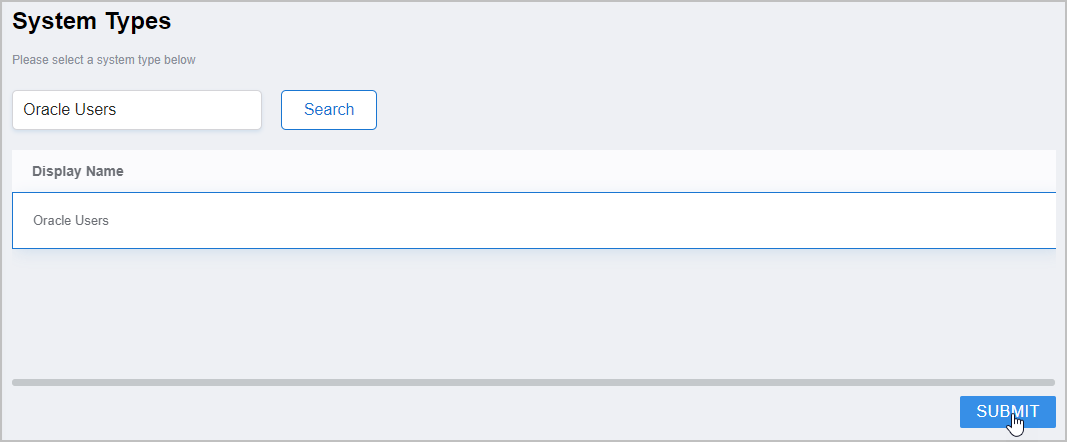
Insert excerpt IL:Create Account Store Screen IL:Create Account Store Screen nopanel true Under System Types, search for Oracle Users.
Click Oracle Users to select the type and then click Submit.
On the Oracle Settings page that appears, fill in the following information:
Name — Enter a name Name for the account store
User Name — Enter the user User name of the Oracle Administrator
Password — Enter the password Password for the Oracle Administrator
Server — Enter the FQDN or IP address of the Oracle system’s server
Database — Enter the name Name of the Oracle database
Is Remote (Requires Cloud Gateway) — This setting appears for account stores with local directories, such as Active Directory, LDAP, SAP, etc. When enabled, this tells EmpowerID to use the Cloud Gateway Connection for that account store. The Cloud Gateway Connection must be installed on an on-premise machine. For installation information, please see Installing the EmpowerID Cloud Gateway Client.
When ready click Submit to create the account store.
EmpowerID creates the account store and the associated resource system. The next step is to configure the attribute flow between the account store and EmpowerID.
| Insert excerpt | ||||||
|---|---|---|---|---|---|---|
|
Configure account store settings
On the Account Store and Resource System page, click the Account Store tab and then click the pencil icon to put the account store in edit mode.
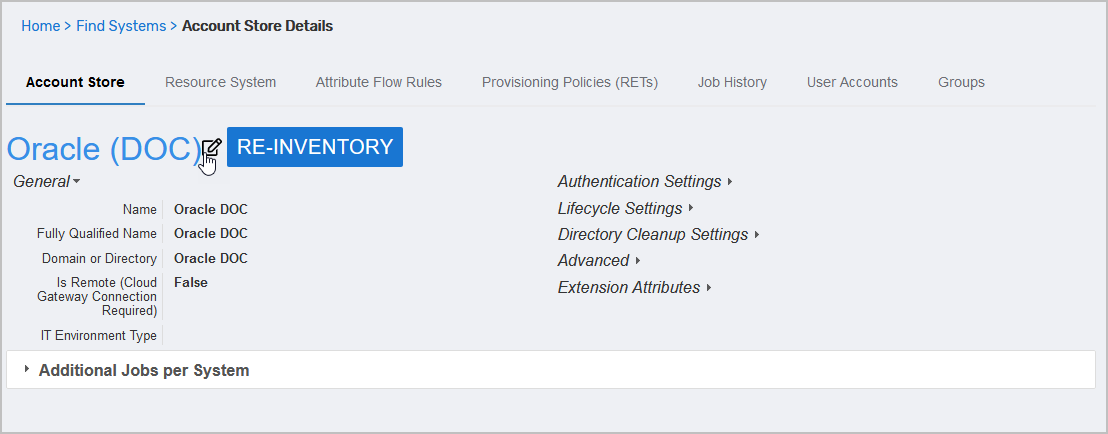
This opens the edit page for the account store. This page allows you to specify the account proxy used to connect EmpowerID to your Oracle system as well as how you want EmpowerID to handle the user information it discovers there during inventory. Settings that can be edited are described in the table below the image.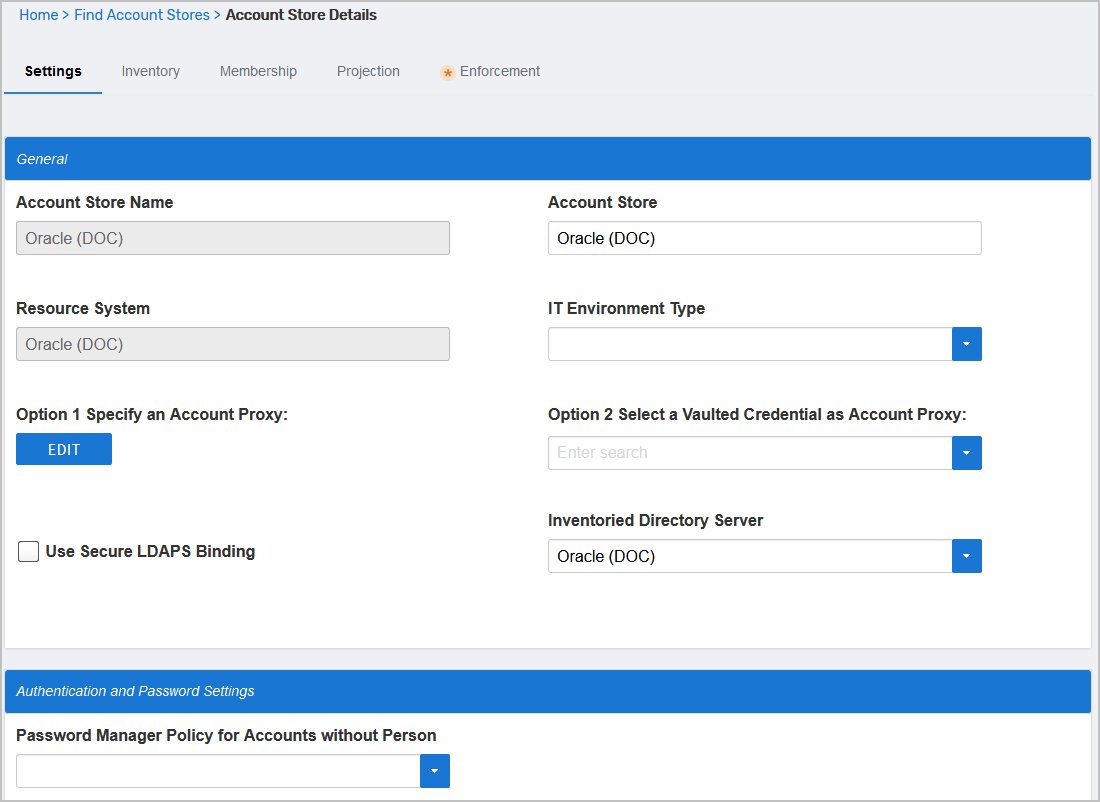
Insert excerpt IL:Oracle Account Store Settings IL:Oracle Account Store Settings nopanel true Edit the account store as needed and then click Save to save your changes.
Next, enable the Account Inbox permanent workflow to allow the Account Inbox to provision or join the user accounts in Oracle to EmpowerID Persons as demonstrated below.
| Tip |
|---|
EmpowerID recommends using the Account Inbox for provisioning and joining. |
| Insert excerpt | ||||||
|---|---|---|---|---|---|---|
|
| Insert excerpt | ||||||
|---|---|---|---|---|---|---|
|
| Insert excerpt | ||||||
|---|---|---|---|---|---|---|
|
| Div | ||||||||||
|---|---|---|---|---|---|---|---|---|---|---|
| ||||||||||
| Live Search | ||||||||||
| size | large | labels | 2020,admin||||||||
IN THIS ARTICLE
|