Versions Compared

Key

  • This line was added.
  • This line was removed.
  • Formatting was changed.

EmpowerID provides a mobile app that you and your users can download and install on Android and iOS devices from either the Google Play Store or the Apple App Store, depending on the OS of those devices. The EmpowerID Mobile App provides multi-factor authentication (MFA) with chatbot help and supports both push and passcode authentication.

Before users can use the mobile app in your environment, there are a number of configuration settings that need to be done first in Azure and then in EmpowerID. This

...

article takes you through the steps.

...

Configure Azure for the mobile app

  1. Log in to the Azure Portal as an administrator.

  2. Under Services, search for Notification Hubs.

  3. Create a notification hub, entering name, location, resource group and subscription information. Take note of the name as you need it when configuring EmpowerID for the mobile app.

  4. Under Settings, click Apple (APNS) and enter the Apple Push Notification Service settings information.

  5. Under Settings, click Google (GCM/FCM) and enter the Firebase Cloud Messaging setting information.

  6. Under Manage, click Access Policies and copy the DefaultFullSharedAccessSignature connection string. You will need this when configuring EmpowerID for the mobile app.

...

Configure EmpowerID for the mobile app

  1. On the navbar, expand Infrastructure Admin > EmpowerID Servers and Settings and click EmpowerID System Settings.

  2. On the EmpowerID System Settings page, search for

...

  1. AzureNotificationHubConnectionString and then click the Edit icon for the AzureNotificationHubConnectionString setting.

...

  1. Image Added

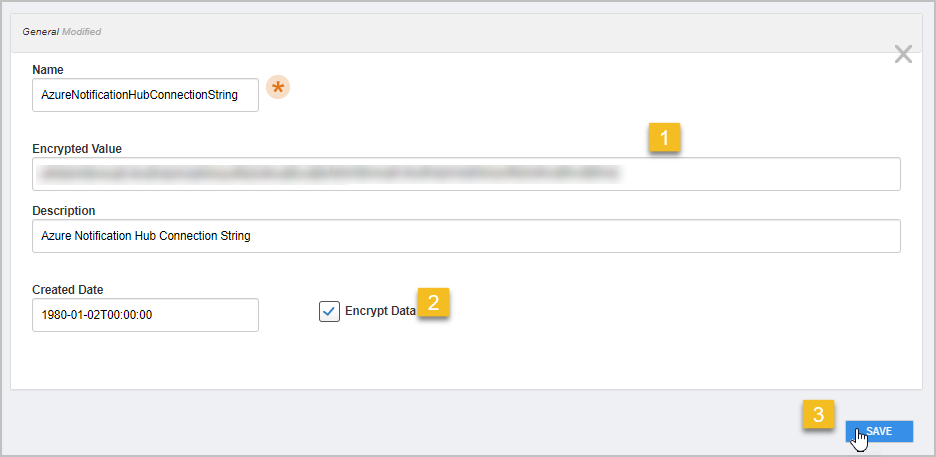
  2. In the Value field of the Edit dialog that appears, enter the DefaultFullSharedAccessSignature connection string that you copied earlier, select Encrypt Data and then click Save.

...

  1. Image Added

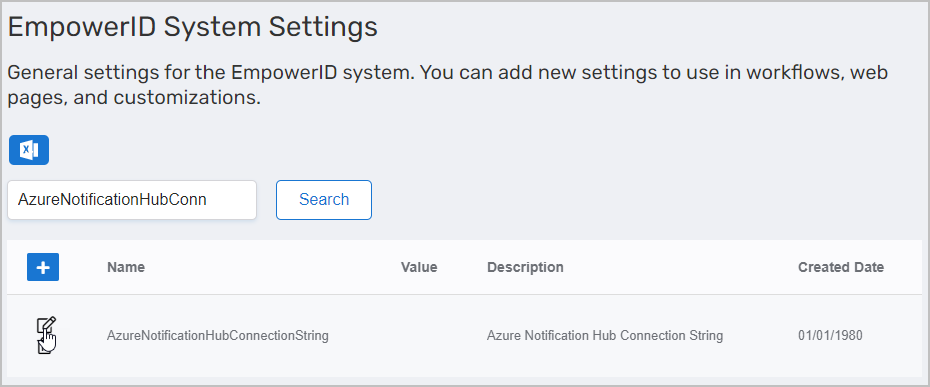
  2. Return to the EmpowerID System Settings page and search for AzureNotificationHubName.

  3. Click the Edit

...

  1. button for the

...

  1. setting.

...

  1. In the Value field of the Edit dialog that appears, enter the Name of the notification hub you created

...

  1. in Azure and click Save.

...

  1. Recycle IIS on the EmpowerID tenant.

Insert excerpt
IL:External Stylesheet
nopaneltrue

Div
stylefloat: left; position: fixed;

IN THIS ARTICLE

Table of Contents
maxLevel4
minLevel2
stylenone