Creating a Multi-Tab Page
In some cases, you may want to recreate a simpler version of an existing EmpowerID page. For example, if you allow users to manage groups, but do not want to show them all of the information included in the EmpowerID Groups page, you can recreate the page without some of the columns and tabs that are not relevant to your users.
This topic demonstrates how to create a page with multiple tabs, an action tab, and a selection tree, that reuses elements from the Groups page.
To make a plan for the elements to include
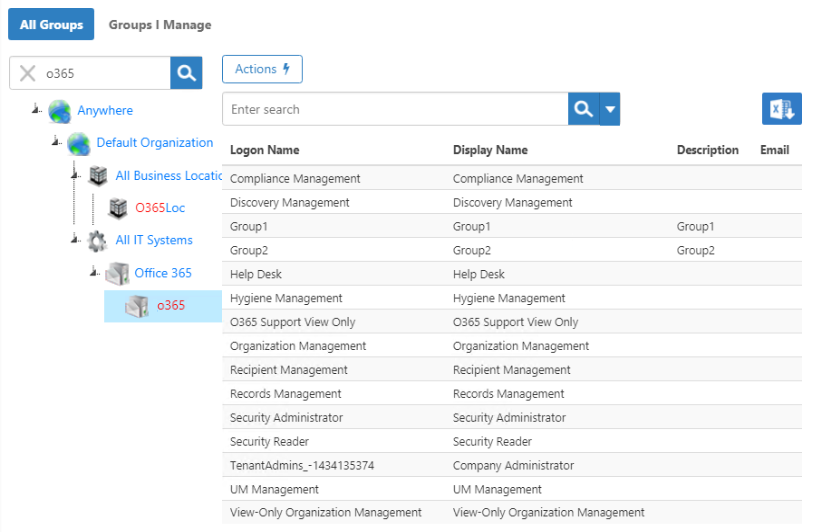
Before we begin, take stock of the elements included in the existing EmpowerID Groups page.
Tabs - There are four, but users only need the first two.
- All Groups
- Groups I Manage
Each tab has its own set of elements.
All Groups
- Advanced Search Fields - There are six, but we only need the following four fields.
- Logon Name
- Display Name
- Description
- Email
- Tags - There are tags, but our company does not use them, so we can disable them.
- Tree - The Locations tree, represented here by a button, appears to the left in the maximized page or when you click the button.
- Columns - If you scroll to the right, there are 10 columns. Users only need the following four columns.
- Logon Name
- Display Name
- Description
- Email
- Actions - There are actions on this tab that users may have access to perform, so we can reuse the existing Actions for this tab.
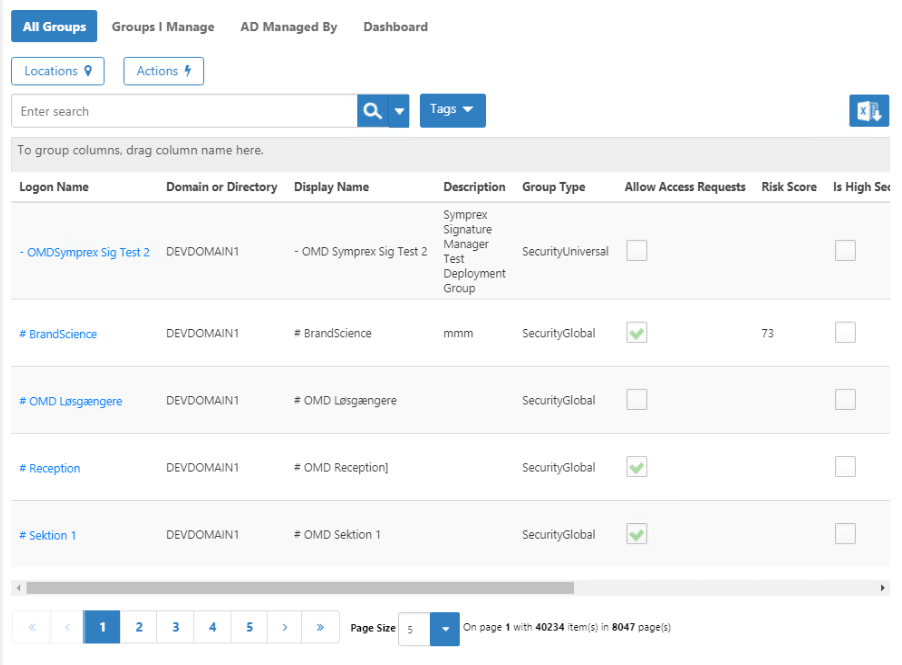
Groups I Manage
- Advanced Search Fields - There are six, but we only need the following three fields.
- Logon Name
- Display Name
- Description
- Tags - There are no tags on this tab, so we can disable them.
- Tree - There is no tree for this tab.
- Columns - If you scroll to the right, there are seven columns, and we can reuse six of them.
- Display Name
- Logon Name
- Notes
- Description
- Allow Access Requests
- Email
- Actions - There are actions on this tab that users may have access to perform, so we can reuse the existing Actions for this tab.
To create the main tab
- In Workflow Studio, click Solution Explorer and choose the Workspace tab.
- Right-click the Package to add the page to, and select Add New Item, then User Interface, then UI Page.
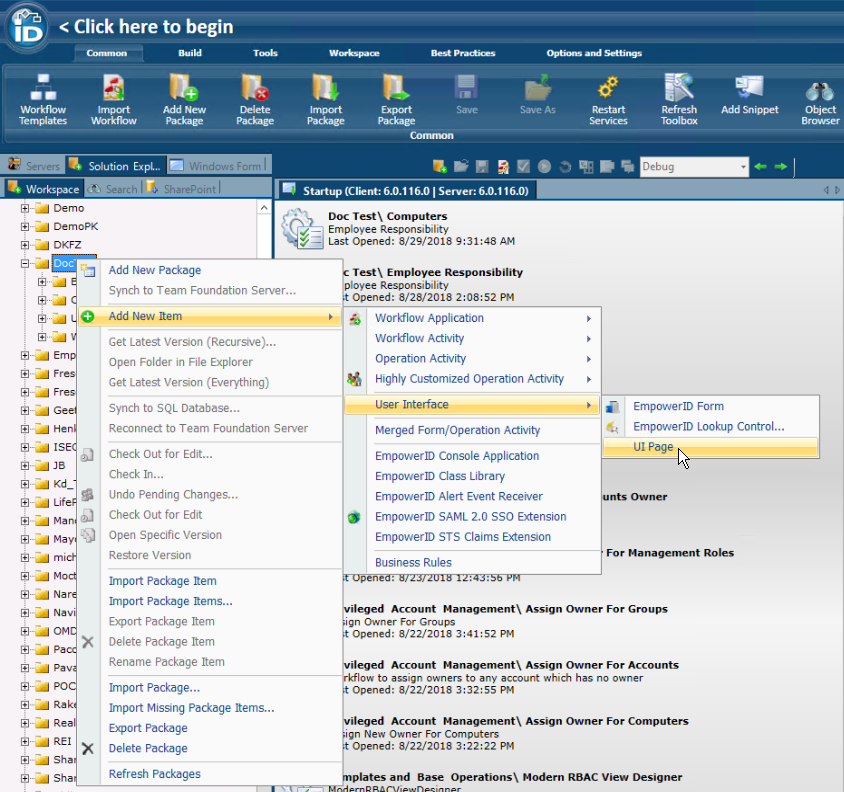
The Add New UI Page dialog appears.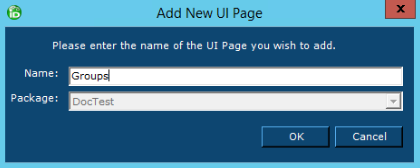
- Enter a name for your page, and click OK. An empty page design area fills the workspace.
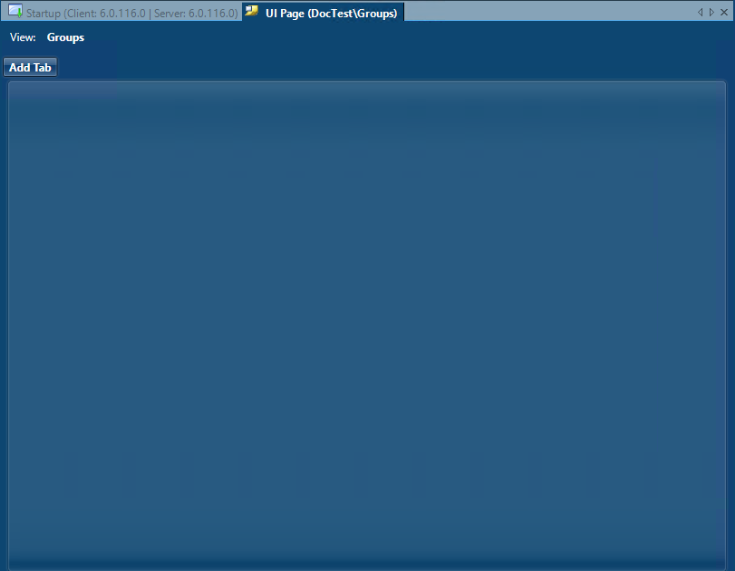
- Click Add Tab, then right-click the default No Tree tab that appears and select Edit Name.
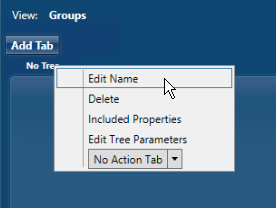
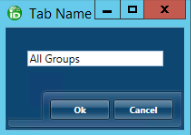
- In the Tab Name dialog that appears, name the first tab All Groups and click OK.
A tree panel fills the left third of the tab, and controls appear along the top edge.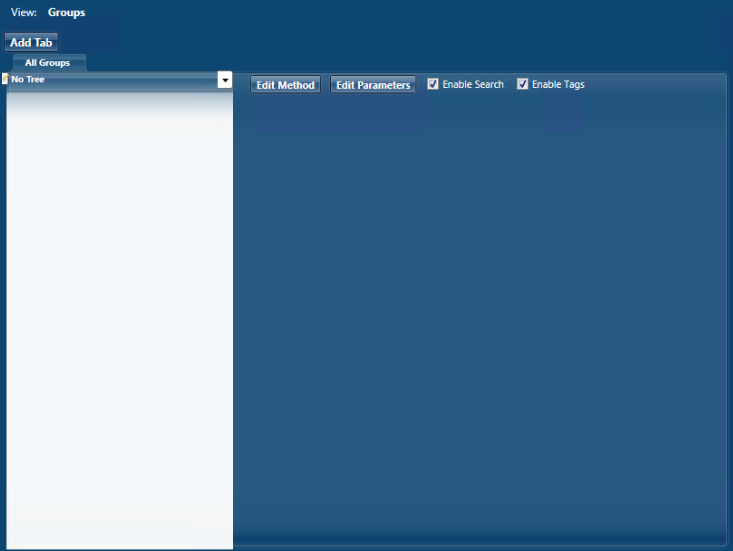
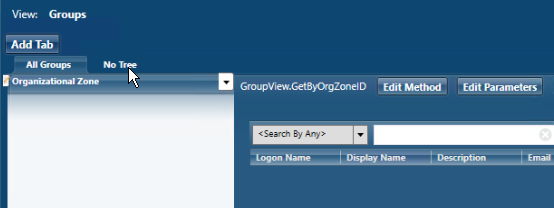
- At the top of the tree panel, click the arrow button and select the All Locations tree.
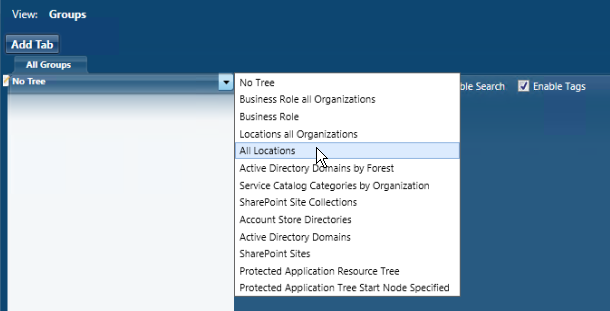
The No Tree text is replaced with Organizational Zone. - Click Edit Method. In the Select an RBAC View Method dialog that appears, type groupview in the box and click Search to see all of the view method options dealing with groups.
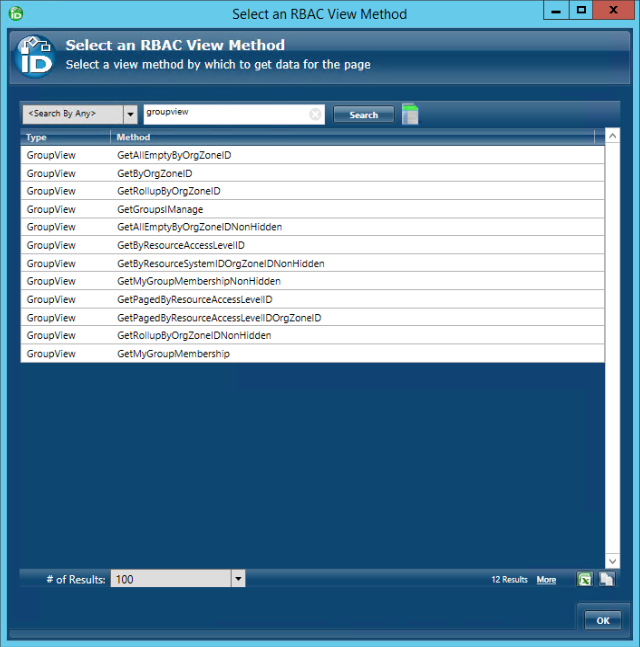
- Since we want all groups for this tab, select GetByOrgZoneID and click OK.

The method name appears to the left of the button and the grid UI appears, along with more controls along the bottom of the tab. - Above the grid, clear the Enable Tags checkbox, since we are not using tags in this page.
- To duplicate the advanced search fields in the Groups page, do the following:
- Above the grid, ensure that the Enable Search checkbox is selected.
- Below the grid, ensure that the Is Search Panel Visible checkbox is selected.
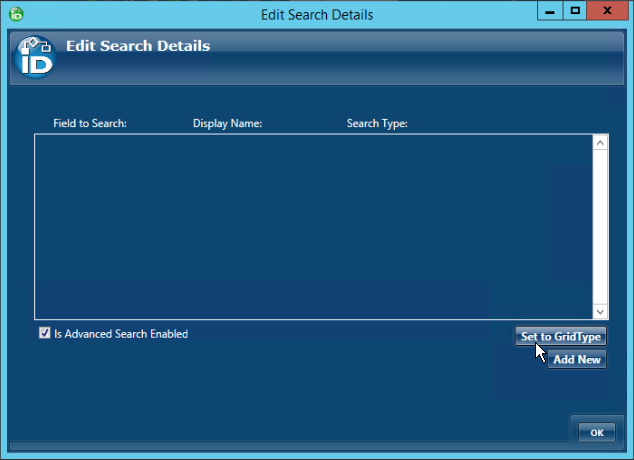
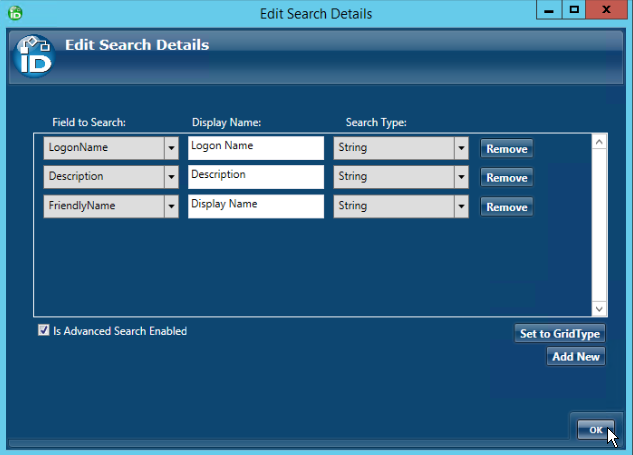
- Click Edit Search Criteria, and in the Edit Search Details dialog that appears, select the Is Advanced Search Enabled checkbox.
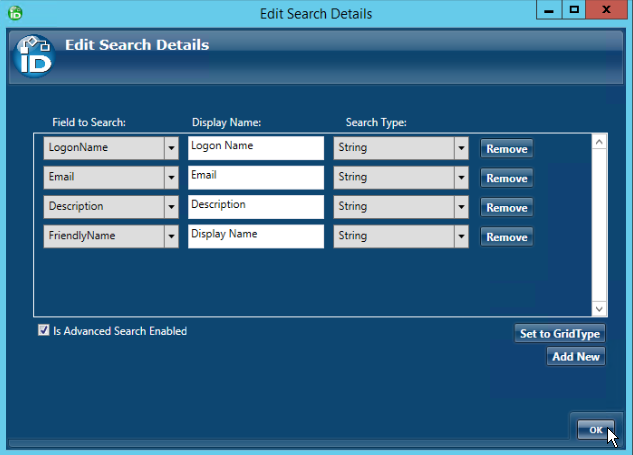
- Click Add New, and set the following values.
- Field to Search - LogonName
- Display Name - Logon Name
- Search Type - String
- Repeat the previous step for each of the following fields, then click OK to close the dialog:
- Field to Search - FriendlyName
- Display Name - Display Name
- Search Type - String
- Field to Search - Description
- Display Name - Description
- Search Type - String
- Field to Search - Email
- Display Name - Email
- Search Type - String
- Back on the grid, to add columns, do the following:
- Click Add New Column, and in the Field Selector dialog that appears, set the following values and click OK.
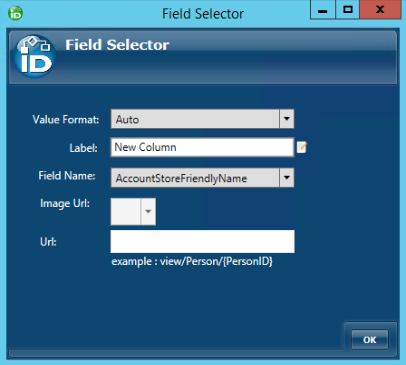
- Value Format - Auto
- Label - Logon Name
- Field Name - LogonName
- Repeat the previous step for each of the following fields:
- Value Format - Auto
- Label - Display Name
- Field Name - FriendlyName
- Value Format - Auto
- Label - Description
- Field Name - Description
- Value Format - Auto
- Label - Email
- Field Name - Email
- Click Add New Column, and in the Field Selector dialog that appears, set the following values and click OK.
- To add an Actions panel to the tab, right-click the All Groups tab and click the No Action Tab arrow, then scroll down to select the Group action panel.

To add a second tab
- Above the existing tab, click Add Tab. A new tab with the name No Tree appears to the right of the existing tab.
- Click the new tab to open the new workspace, then right-click the tab and select Edit Name to change the name that appears on the tab, in this case, Groups I Manage.
- This time, there is no tree required, so we can leave the default No Tree value.
- Clear the Enable Tags checkbox.
Click the Edit Method button and in the Select an RBAC View Method dialog that appears, type groupview in the box and click Search to see all of the view method options dealing with groups.
- Select GetGroupsIManage and click OK.
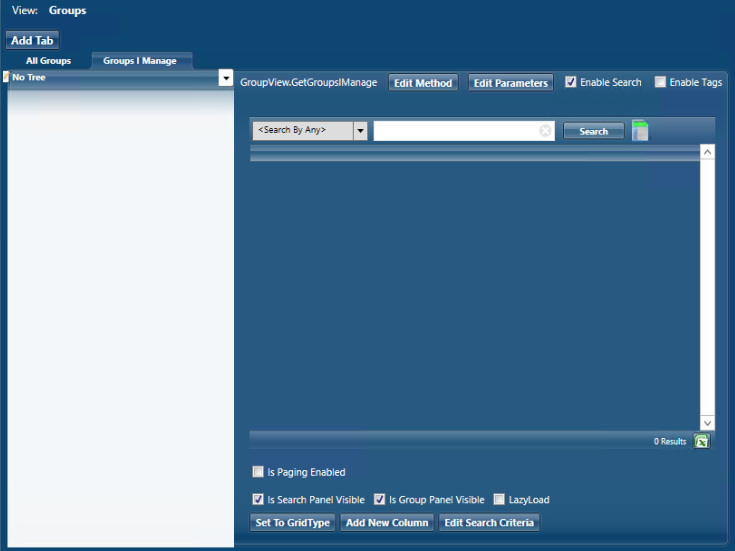
The method appears to the left of the Edit Method button, and the grid and controls along the bottom appear. - To add advanced search fields, do the following:
- Above the grid, ensure that the Enable Search checkbox is selected.
- Below the grid, ensure that the Is Search Panel Visible checkbox is selected.
- Click Edit Search Criteria, and in the Edit Search Details dialog that appears, select the Is Advanced Search Enabled checkbox.
- Click Add New, and set the following values.
- Field to Search - LogonName
- Display Name - Logon Name
- Search Type - String
- Repeat the previous step for each of the following fields, then click OK to close the dialog:
- Field to Search - FriendlyName
- Display Name - Display Name
- Search Type - String
- Field to Search - Description
- Display Name - Description
- Search Type - String
- Back on the grid, to add columns, do the following:
- Click Add New Column, and in the Field Selector dialog that appears, set the following values and click OK.
- Value Format - Auto
- Label - Logon Name
- Field Name - LogonName
- Repeat the previous step for each of the following fields:
- Value Format - Auto
- Label - Display Name
- Field Name - FriendlyName
- Value Format - Auto
- Label - Notes
- Field Name -
- Value Format - Auto
- Label - Description
- Field Name - Description
- Value Format - BooleanCheckBox
- Label - Allow Access Requests
- Field Name - AllowJoinRequests
- Value Format - Auto
- Label - Email
- Field Name - Email
- Click Add New Column, and in the Field Selector dialog that appears, set the following values and click OK.
- To add an Actions panel to the tab, right-click the All Groups tab and click the No Action Tab arrow, then scroll down to select the Group action panel.
To publish the page
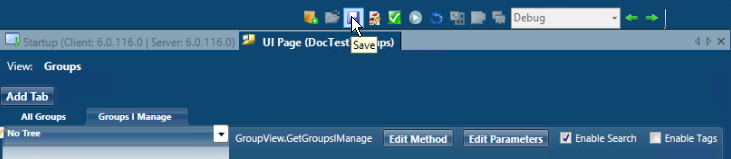
- In the toolbar above the page workspace, click Save.
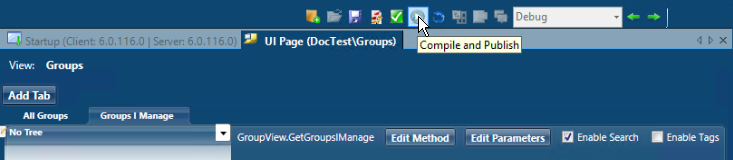
- In the same toolbar, click Compile and Publish.
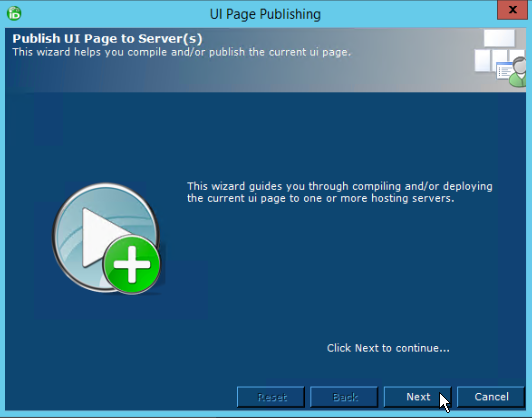
- In the UI Page Publishing wizard that appears, click Next.
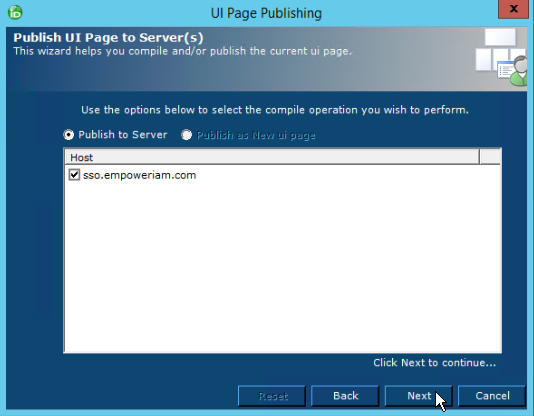
- Select your host and click Next.
The success message lets you know that the page published.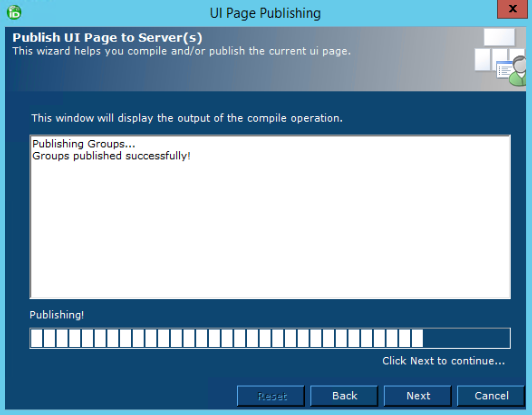
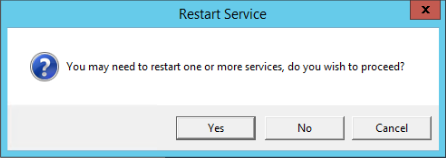
- In the Restart Service dialog that appears, click No. You do not need to restart your EmpowerID services to view your new or updated page.
To view your new page
- In Microsoft SQL Server Management Studio, in the Object Explorer, expand the Databases node and select EmpowerID.
In the toolbar, click New Query, and type the following SQL query.
select * from RBACView
- In the toolbar, click Execute.

- In the results, find the name of the page you added and make note of its corresponding RBACViewID value, in this case, 2024.
- In a browser where you are logged into EmpowerID, navigate to a URL like the following, replacing sso.empoweriam.com with your FQDN and replacing 2024 with your RBACViewID.
https://sso.empoweriam.com/UI/#common/pages/view/2024
The finished page appears like the following image at run time.