Creating a Simple Page with Advanced Search
Using the Page Designer, you can use a simple grid-view with an advanced search section to create a custom page for your EmpowerID web UI.
To create a page
- In Workflow Studio, select the Solution Explorer and click the Workspace tab.
Right-click the Package node in which you want to create the page, and select Add New Item, then User Interface, and click UI Page.
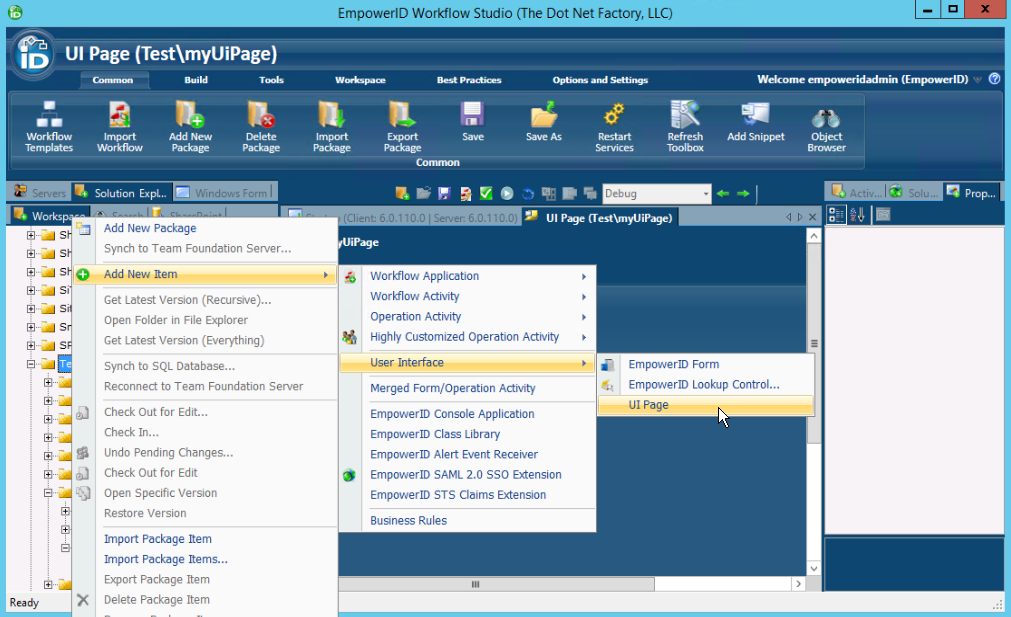
The new page is stored in the selected package under the User Interface folder in a new folder called UI Pages.
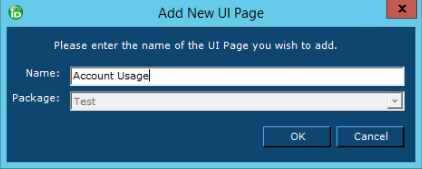
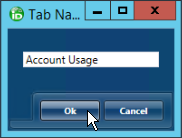
- In the Add New UI Page dialog that appears, provide a name for the page and click OK.
The Page Designer appears in the workspace with an empty page.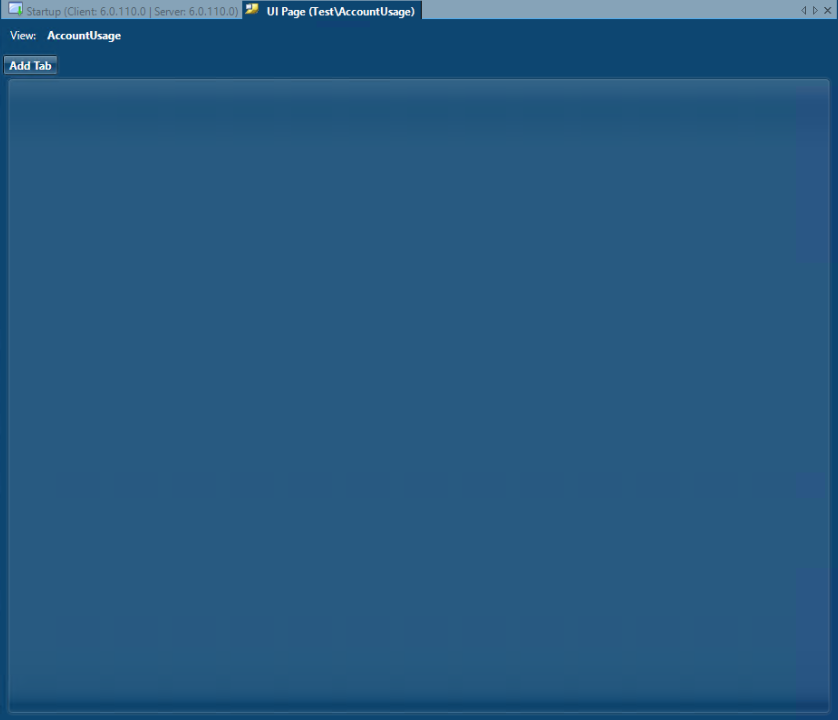
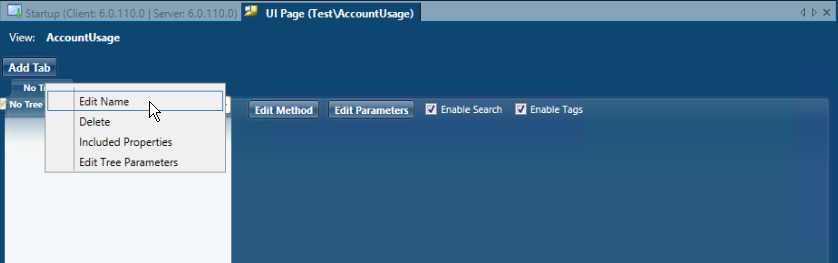
- Click Add Tab. The new tab that appears is named No Tree by default, and controls appear along the top of the tab that allow you to edit it.

- Right-click the tab name and select Edit Name. Since this page is to have a single tab, rename it to match the page name, in this case, Account Usage, and click OK.
- Since we are designing a simple page, leave the Tree drop-down selector set to No Tree. (For information about using a tree, see Creating a Multi-Tab Page.)
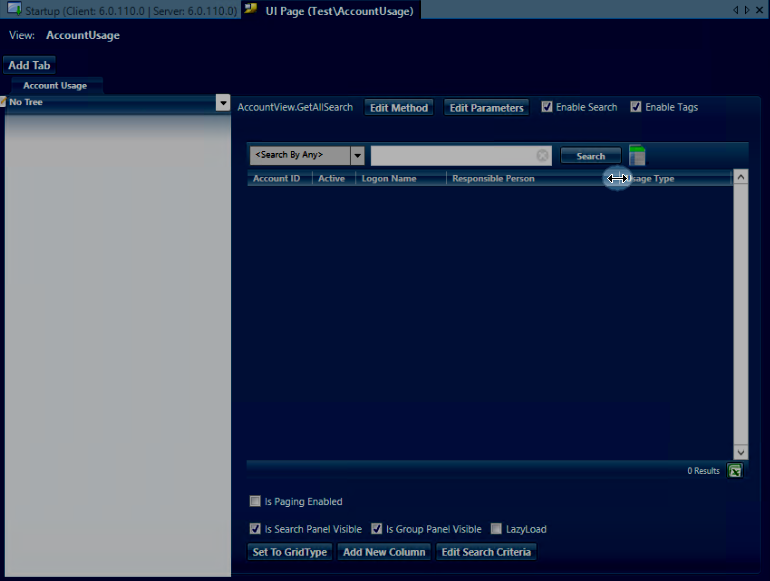
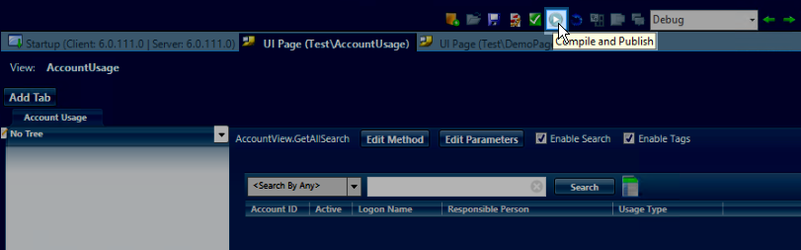
- In the buttons along the top of the tab, click Edit Method, and in the Select an RBAC View Method dialog that appears, click Search to see all of the methods that you can choose from.
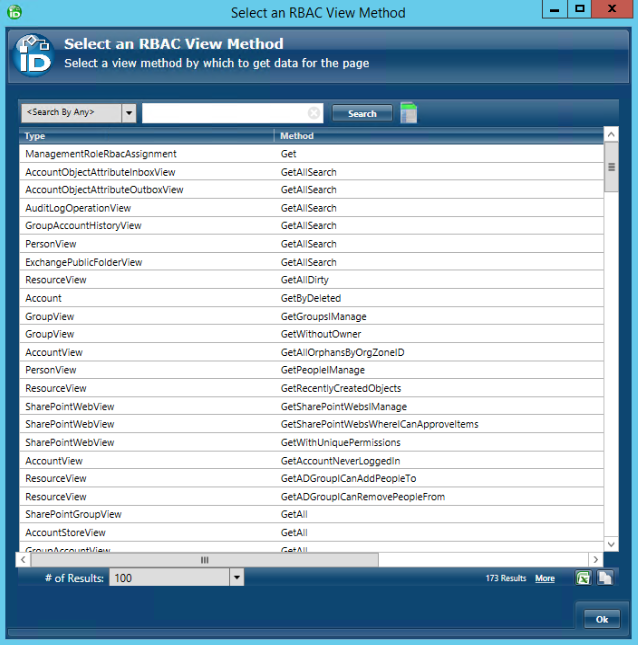
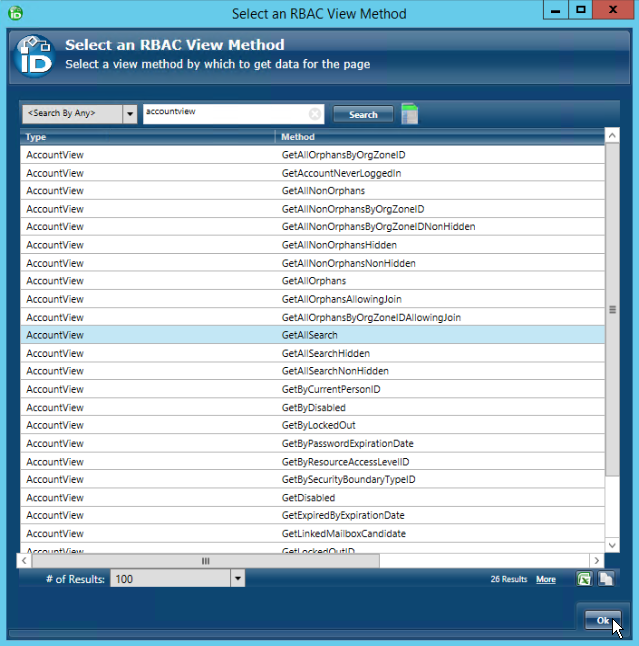
There are many, so we can narrow it down. Since our page is called Account Usage, type AccountView in the Search box and click Search to show only methods of the AccountView type, then select GetAllSearch and click OK.
The method type and name now appear to the left of the Edit Method button, and new controls appear along the bottom of the grid.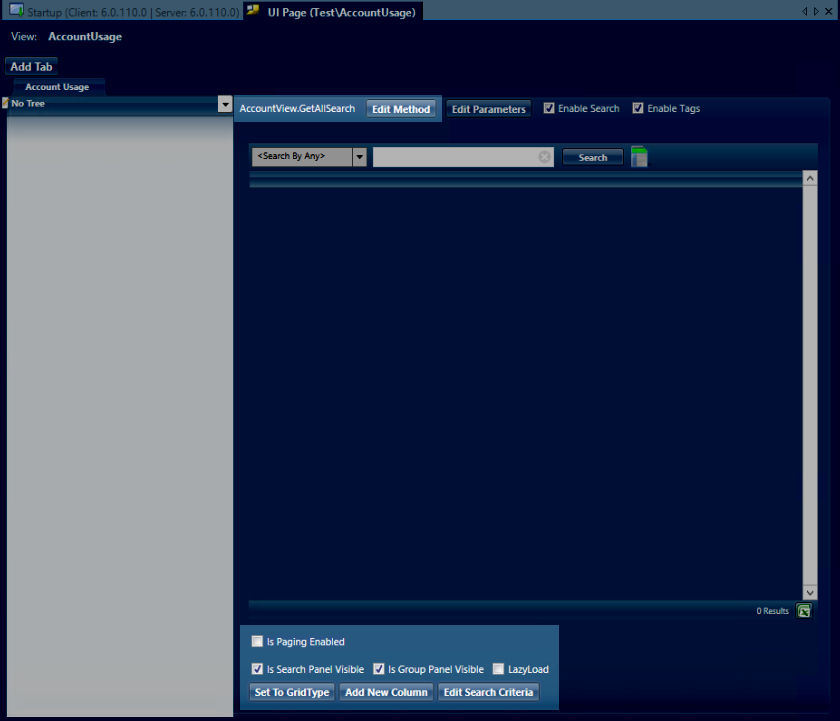
If you only want to change a few columns on an existing grid, click Set To GridType and select the one that you want to alter. This action erases any columns you may have already added and replaces them with with the columns in the selected grid type.
For this exercise, leave the default value of _Custom_.
- Since the GetAllSearch method returns a lot of data, select the Is Paging Enabled checkbox to avoid long loading times for the page.
- Click Add New Column, and in the Field Selector dialog that appears, set up the column with these values:
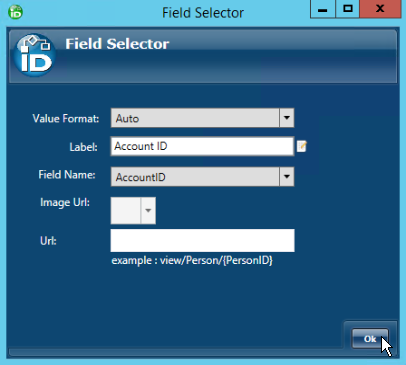
- Field Name: AccountID
- Label: Account ID
Click OK to save the column. The column is added to the grid.
Right-click any column to edit or delete it.
- Add three more columns with the following values:
- Field Name: Active
- Label: Active
- Value Format: BooleanCheckBox
- Field Name: LogonName
- Label: Logon Name
- Value Format: Hyperlink
URL: view/Account/{AccountID}
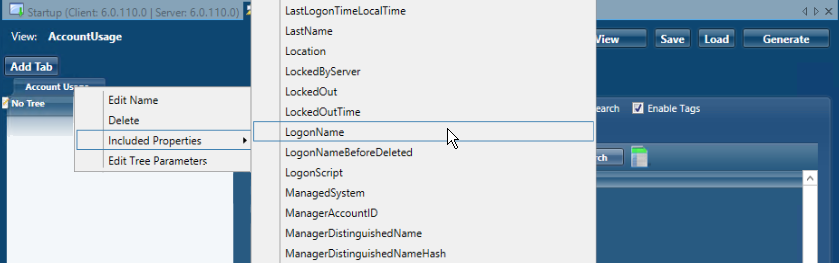
To enable the hyperlink, the property must be included on the tab. To include the property, right-click the tab above the empty tree pane and select Included Properties, then scroll down and select LogonName from the list. Included properties are marked with a check.
- Field Name: OwnerFriendlyName
- Label: Responsible Person
- Value Format: Hyperlink
- URL: view/Person/{PersonID}
- Field Name: AccountUsageTypeFriendlyName
- Label: Usage Type
- With all of the columns in place, use your mouse to resize the column widths.
At this point, you have a simple page that you can view in the browser. If you do not want to add an advanced search panel, you can skip to the To publish and view the page section below.
To add an advanced search panel
Search is enabled by default. This adds the basic search box at the top of the page. If you want to disable it, clear the Enable Search checkbox along the top of the tab. The drop-down search panel is also visible by default, but has no fields in it.
- Along the bottom of the tab, click the Edit Search Criteria button.
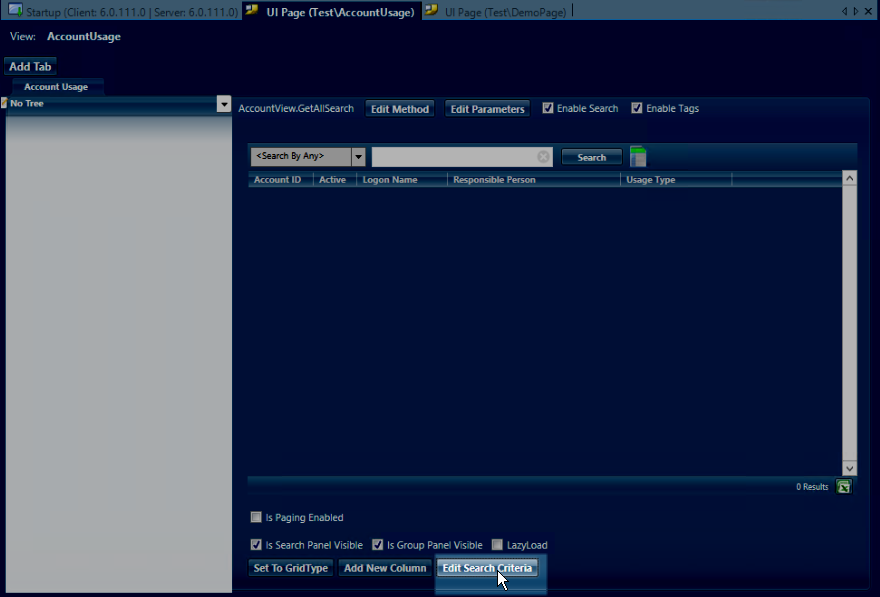
- In the Edit Search Details dialog that appears, select the Is Advanced Search Enabled checkbox at the bottom left. This allows users to search using the fields added in this dialog.
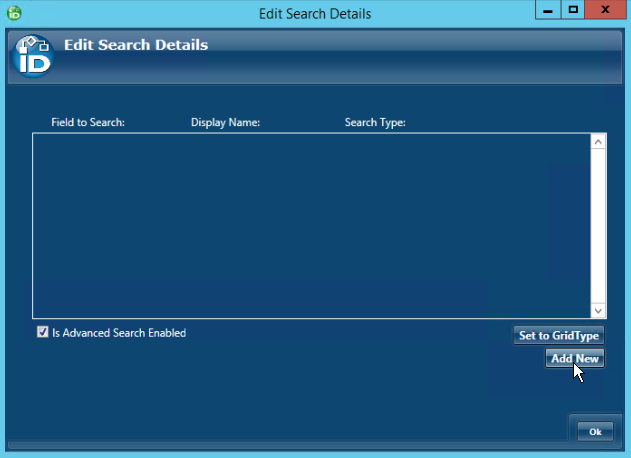
Click Add New to add a line of fields. drop down the Field to Search to select a new value, and edit the Display Name and Search Type as needed.
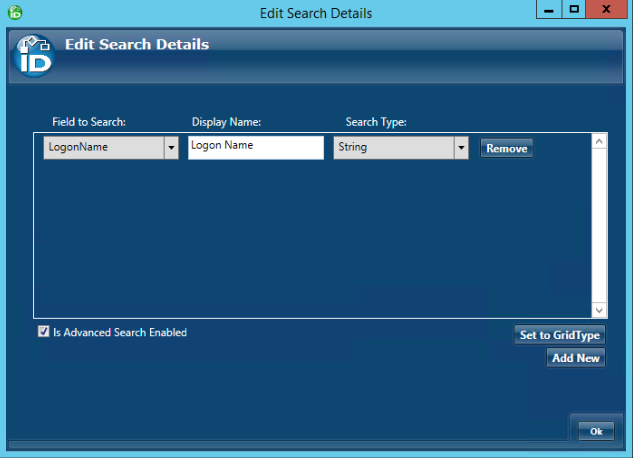
If instead of adding your own fields, you want to use the same search fields used in an existing EmpowerID page, click Set to GridType and select the grid with the advanced search fields you want to use.
- Repeat for each field that you want to allow users to search by, and click OK.
- In order for the fields to show up in the advanced search panel at run time, you must also include the fields on the tab.
- Right-click the tab and click Included Properties.
- Click each field that you selected in the fields to search for the advanced search.
To publish the page
- Right-click the UI Page tab and select Save Changes.

- Above the UI Page tab, click the Compile and Publish button.
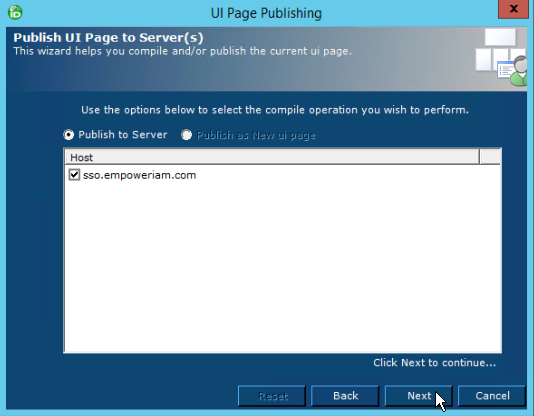
- In the UI Page Publishing wizard that appears, click Next.
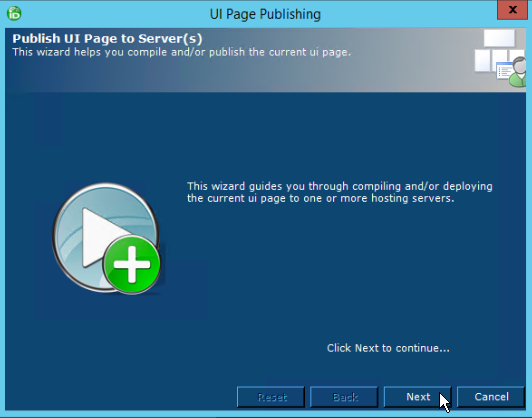
- The Host is set to your server by default, but if you have multiple servers, select the ones on which you want to publish the page, and click Next.
When it is finished, a message states that the page published successfully.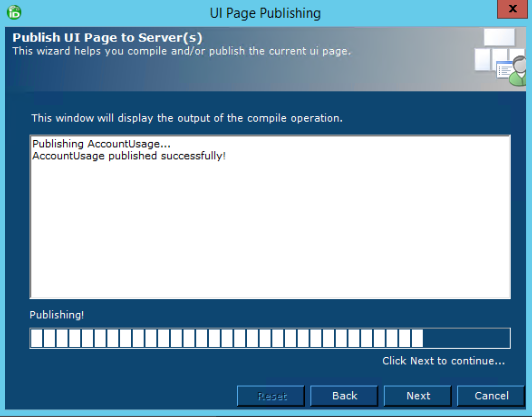
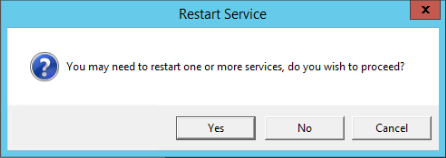
- A Restart Service message box appears. Click No. You do not need to restart services to view your new or updated page.
To view the page
- In Microsoft SQL Server Management Studio, in the Object Explorer, expand the Databases node and select EmpowerID.
In the toolbar, click New Query, and type the following SQL query.
select * from RBACView
- In the toolbar, click Execute.
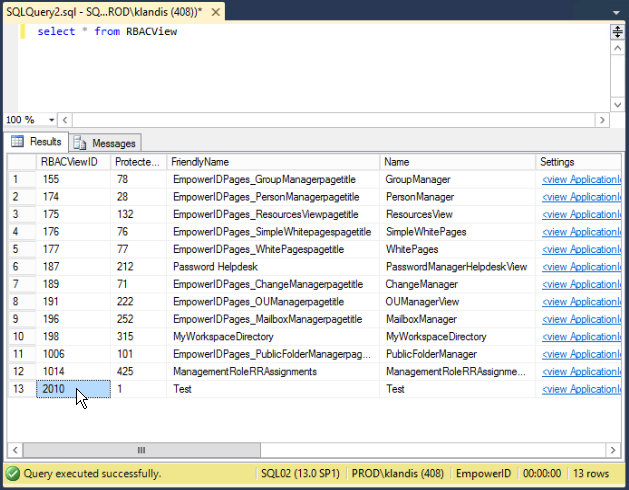
- In the results, find the name of the package you added the page to and make note of its corresponding RBACViewID value, in this case, 2010.
- In a browser where you are logged into EmpowerID, navigate to a URL like the following, replacing sso.empoweriam.com with your FQDN and replacing 2010 with your RBACViewID.
https://sso.empoweriam.com/UI/#common/pages/view/2010