Managing AWS Users
Once you have connected EmpowerID to AWS, you can manage your AWS users in EmpowerID. This includes:
- creating new AWS users
- adding AWS users to AWS groups
- removing AWS users from AWS groups
- deleting AWS users
For information on adding and removing AWS users to and from AWS groups, see Managing AWS Groups.
Prerequisites
You must have an AWS account and create an AWS account store for that account in EmpowerID.
To create an AWS user account in EmpowerID
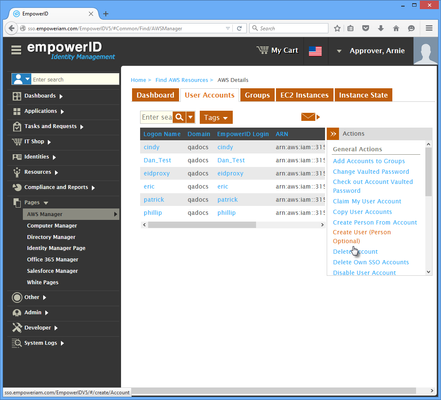
- In the Navigation Sidebar of the EmpowerID Web interface, expand Pages and click AWS Manager.
- In AWS Manager, click the User Accounts tab and then click Create User (Person Optional) to initiate the Create User workflow.
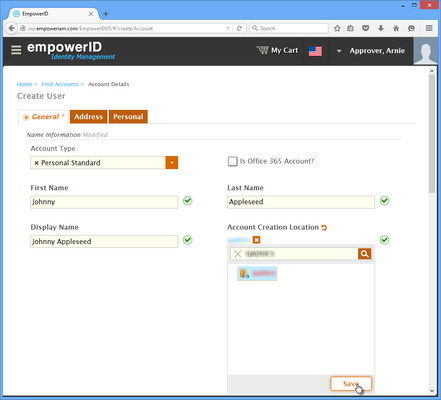
- When the Create User form for the workflow opens, select the General tab and do the following in the Name Information section:
- Select Personal Standard from the Account Type drop-down. This is the default selection.
- Type names for the user in the First Name, Last Name, Display Name and Logon Name fields.
- Leave Is Office 365 Account? cleared.
- Below Account Creation Location, click the Select a Location link, type the name of the AWS account store you created in EmpowerID, click the node for the location to select it and then click Save.
- Optionally, enter text in the Description and Comments or Justification fields.
- Select Join Account to an Existing Person if you want to link the account to a current person. Doing so opens the Account Owner search field. To select the person you want to join the account to, type the name of the person in the search field and then click for that person. This makes that person the owner of the account.

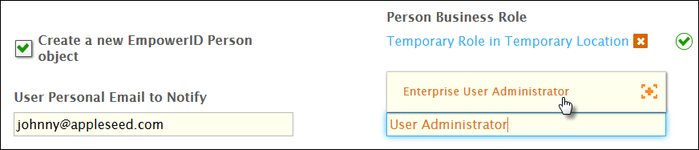
- Select Create a new EmpowerID Person object if you want to create a new person for the account. Doing so opens the following fields:
Person Business Role selector - This allows you to select the Business Role and Location for the new person (required).
- User Personal Email to Nofify - This sends an email to the user's personal email address, welcoming them to EmpowerID and notifying them of their username.
- Management Role to Notify - This sends a notification about the new person to the selected Management Role. To select a Management Role, type the name of the role in the field and then click the tile for that role.
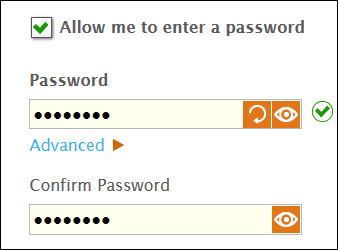
- Allow me to enter a password - This allows you to set the initial password for the person account. Selecting this option displays the Password and Confirm Password fields, along with the password complexity rules.
- Scroll to the Security section and select the appropriate options.
- Click Save.
After several moments, EmpowerID creates the user account and displays the View page for the account. Verify that the Distinguished Name field shows the AWS User ARN.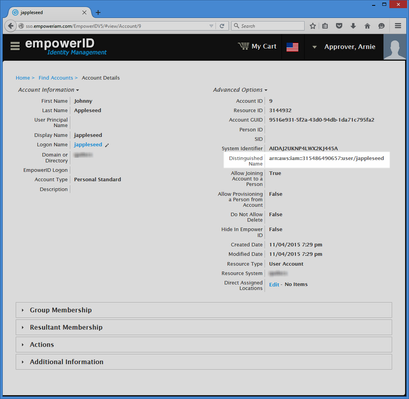
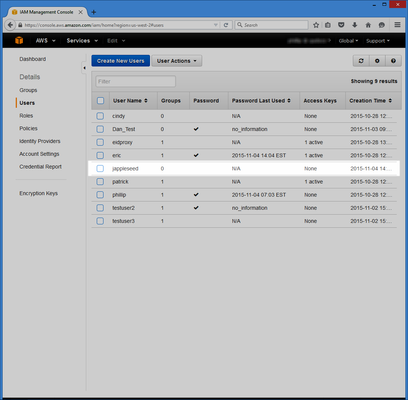
To verify the new user in AWS
- From your Web browser log in to your AWS account as an administrator.
- From the AWS dashboard , click the Users navigational link. You should see the user you just created in EmpowerID.
To delete an AWS user in EmpowerID
- In the Navigation Sidebar of the EmpowerID Web interface, expand Pages and click AWS Manager.
- In AWS Manager, click the Users tab and search for the user account you want to delete.
- Click the record for that user account to select it and then click the Delete Account action link.
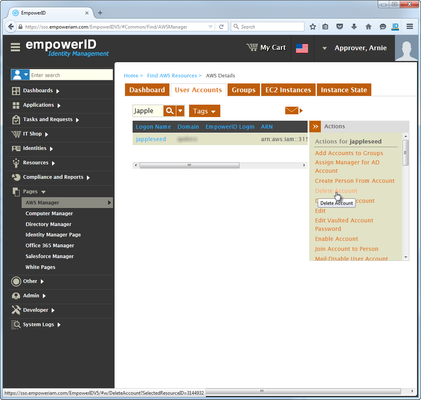
- Click Yes to confirm you want to delete the user.
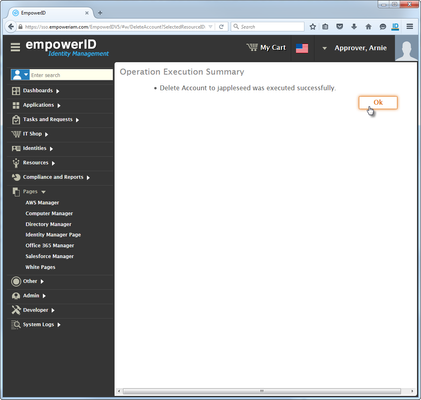
- If you left Wait to see results selected, click OK to close the Operation Execution Summary.
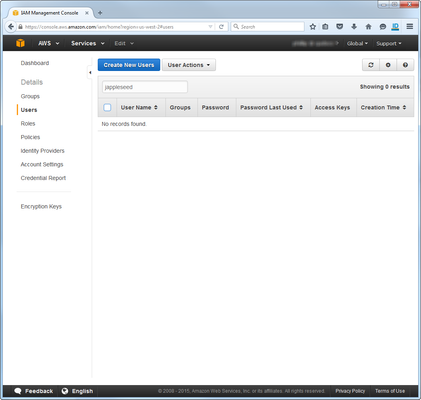
To verify user deletion in AWS
- From your Web browser log in to your AWS console as an administrator.
- From the AWS console, select Identity & Access Management.
- Click the Users navigational link and search for the user you just deleted and verify that there are no results.
EmpowerID keeps a log of all AWS actions performed in EmpowerID, including what was done, when it was done and who did it. To view these logs, expand System Logs in the Navigation Sidebar and click Audit Log. Once in Change Manager, search for AWS to filter the changes displayed. 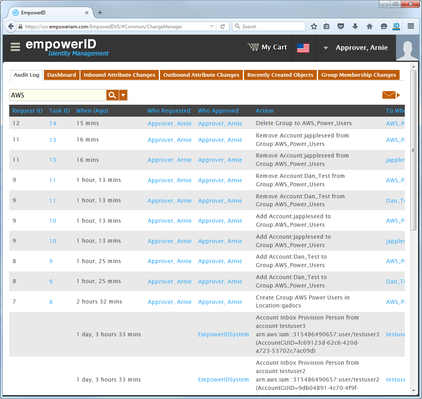
, multiple selections available,