UltiPro
EmpowerID provides connectors for a wide range of user directories and resource systems. As an administrator, you can use these connectors to quickly connect EmpowerID to your organization's identity-aware systems and applications. When you do so, you create an account store for that application in the EmpowerID Identity Warehouse and use that account store to configure how you want EmpowerID to manage the identity information in that system.
The EmpowerID UltiPro connector allows organizations to bring the user data in their UltiPro system to EmpowerID, where it can be managed and synchronized with data in any connected back-end user directories. This topic demonstrates how to create the connector in EmpowerID.
Prerequisites
In order to connect EmpowerID to UltiPro, you must have an UltiPro account that is configured to interface with external systems. This means that you must have the following information (provided by UltiPro):
- Username
- Password
- User API Key
- Customer API Key
- Base URL
These values are used to authenticate EmpowerID to UltiPro. In addition, you must create a report as a Web service that specifies the fields you want to expose and then provide EmpowerID with the path to that service.
Additionally, you will need to create a report in UltiPro and expose it as a service. The report needs to have the below fields. Fields designated as required indicate that a value must be provided.
| Field Position | Description | Required |
|---|---|---|
| 1 | Last Name | Yes |
| 2 | Middle Name | No |
| 3 | First Name | Yes |
| 3 | First Name | Yes |
| 4 | Preferred First Name | No |
| 5 | Location | No |
| 6 | Phone Number | No |
| 7 | Email Address | No |
| 8 | Mobile Phone | No |
| 9 | Job Title | No |
| 10 | Department Name | No |
| 11 | Company | No |
| 12 | Manager Name | No |
| 13 | Manager ID | No *Required if Manager Name is provided |
| 14 | Employee ID | No *Must be unique for each employee |
| 15 | Windows Login | No |
| 16 | Sales ID | No |
| 16 | Sales ID | No |
| 17 | Manager Flag | Yes *Yes for manager; No for non-manager |
| 18 | Employee Status | Yes *Active, Terminated |
| 19 | Employee Type | No |
| 20 | Sales Force | No |
| 21 | Date Of Birth | No |
| 22 | Division | No |
| 23 | Business Unit | No |
| 24 | Department Summary | No |
| 25 | Hire Date | No |
Before connecting EmpowerID to an external directory, please review the Getting Started with Directory Systems topic. The topic walks you through the prerequisites you need to complete before connecting to an external directory for the first time. These prerequisites include:
- Configuring the appropriate server roles for your EmpowerID servers
- Reviewing the Join and Provision Rules for your environment
- Reviewing the Join and Provision Filters for your environment
If you have already connected EmpowerID to another external directory, you can skip these prerequisites.
To create an account store for UltiPro via the web site
- In the Navigation Sidebar, expand Admin, then Applications and Directories, and click Account Stores and Systems.
- Click the Actions tab, and then click the Create Account Store action.
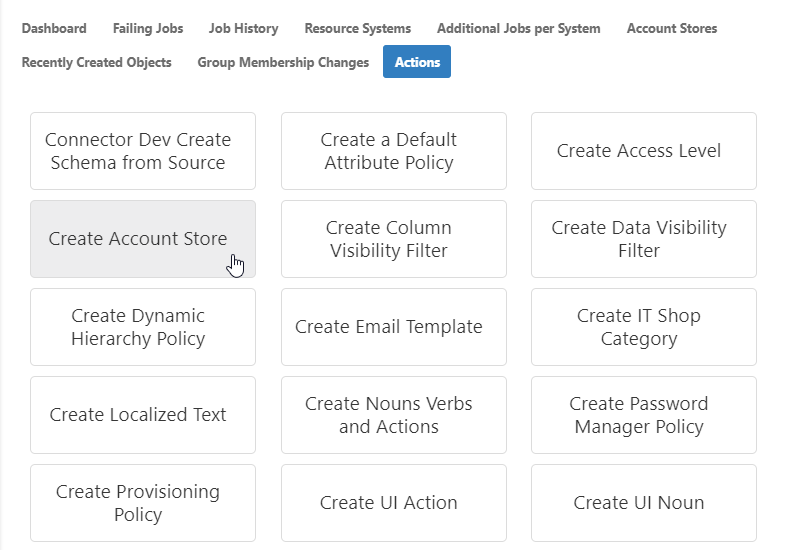
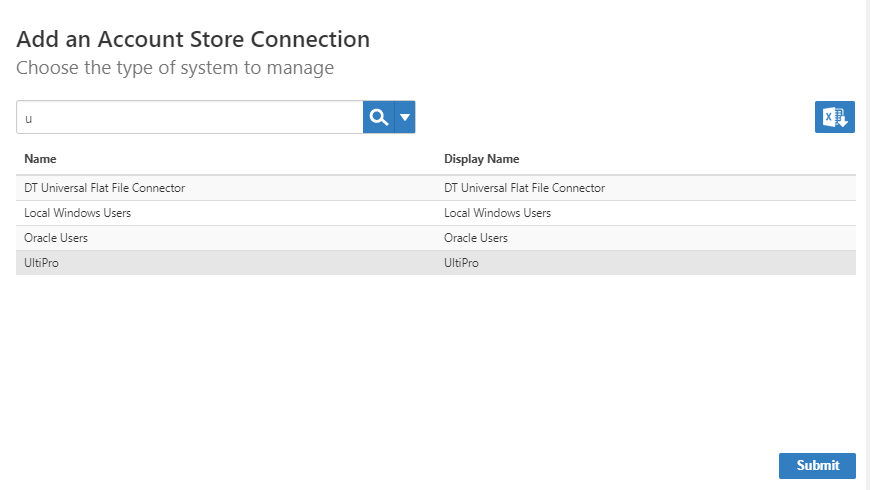
- Select UltiPro from the list of system types and click Submit.
On the UltiPro Settings page that appears, enter settings to connect to your ServiceNow instance to allow EmpowerID to discover and connect to it.
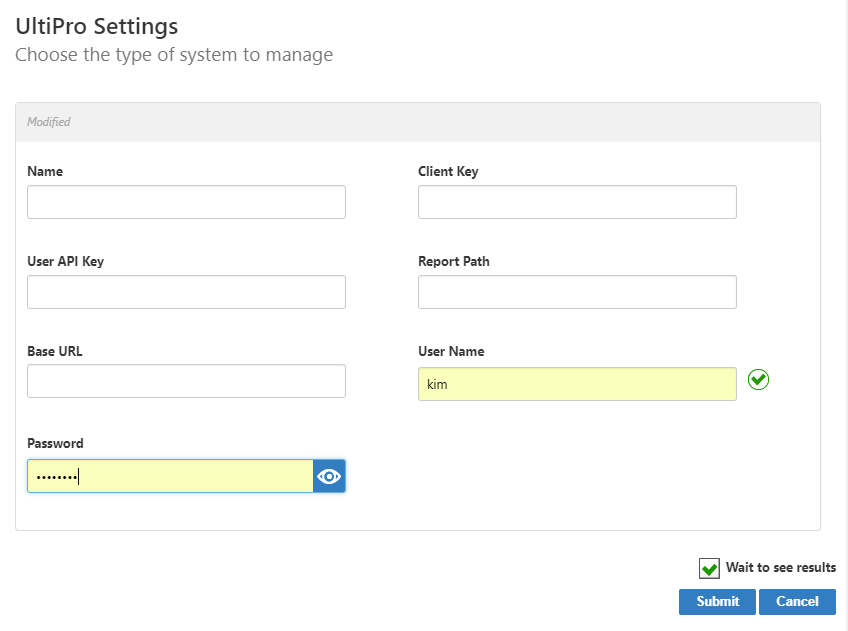
- In the Name field, enter a name for the account store.
- Client Key - The Customer API Key issued by UltiPro
- User API Key - The User API Key issued by UltiPro
- Report Path - The path to the report that you created in UltiPro and exposed as a service
- Base URL - The Base URL for your UltiPro, e.g.https://service123.ultipro.com/service/
- User Name and Password - Your UltiPro credentials
- Click Submit.
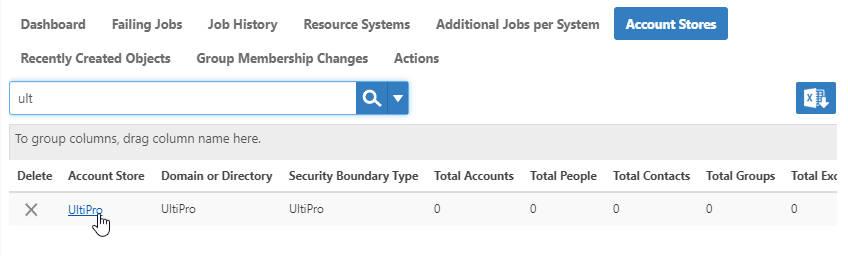
- The Account Store and associated Resource System are created and appear in both the web application and in the Management Console.
To edit account store settings on the web
- In the Navigation Sidebar, expand Admin, then Applications and Directories, and click Account Stores and Systems.
- On the Account Stores tab, search for the account store you just created and click the link to go to its details page.
- On the Account Store Details page, click the Edit button or the name of the account store.
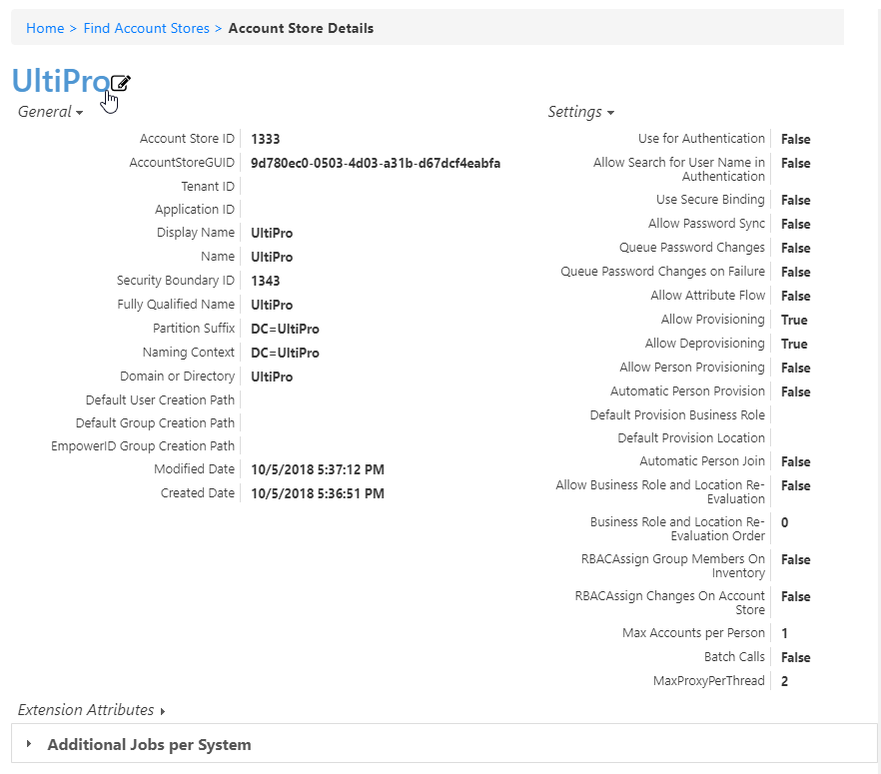
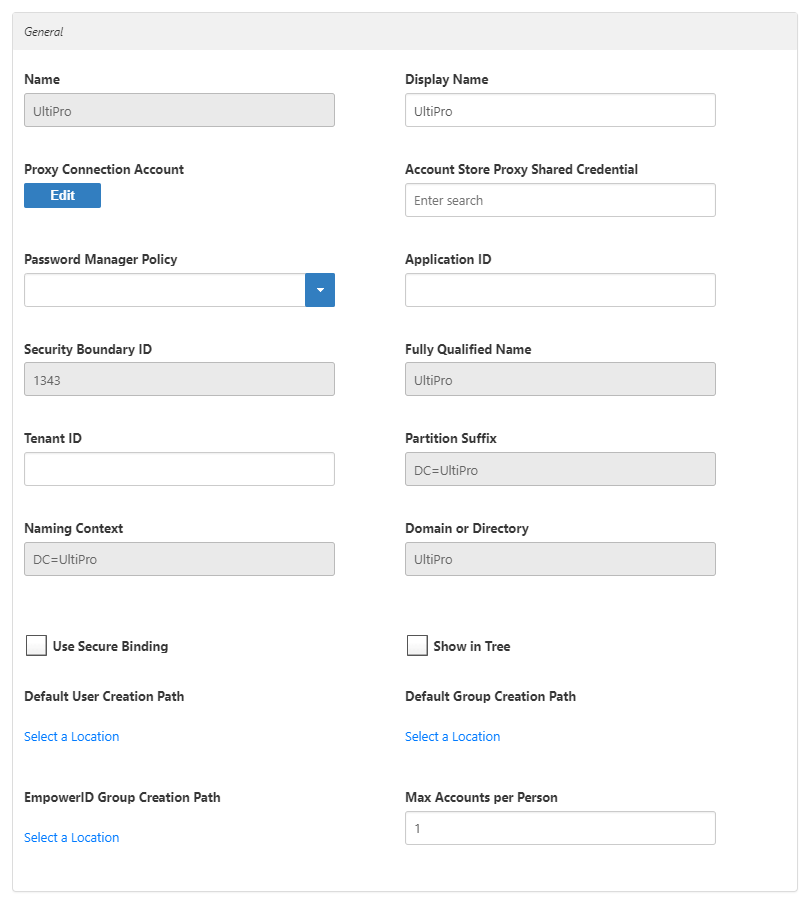
- In the edit view of the page, you can edit values in any of the enabled fields. In the General section, these are:
- Display Name – Edit the name of the account store as it appears in the list of account stores.
- Proxy Connection Account – Change the instance, user name, and password for the ServiceNow connection.
- Account Store Proxy Shared Credential – Click in this box and press Enter to see a list of shared credentials in your system to use for the proxy connection.
- Password Manager Policy – Select a password manager policy to use for the account. If not selected, it uses the Default Password Manager Policy.
- Application ID – If the account store is a one-to-one match with a Tracking Only application, enter the Application Resource GUID of the application. (This value is supplied automatically if you select the Create a New Account Directory option when creating a Tracking Only application.)
- Tenant ID – Enter the Tenant ID, if supplied by the connection account. (AWS uses this.)
- Use Secure Binding – Toggle to bind accounts with encryption.
- Show in Tree – Toggle to show the account store in the Locations tree.
- Default User Creation Path – Select a location in which to create users if none is specified.
- Default Group Creation Path – Select a location in which to create groups if none is specified.
- EmpowerID Group Creation Path – Select a location in which to create EmpowerID groups if none is specified.
- Max Accounts per Person – Enter the maximum number of user accounts from this domain that an EmpowerID Person can have linked to them. This prevents the possibility of a runaway error caused by a wrongly configured Join rule. We recommended setting this value to 1 unless users commonly have multiple accounts and you want them to be joined to the same person.
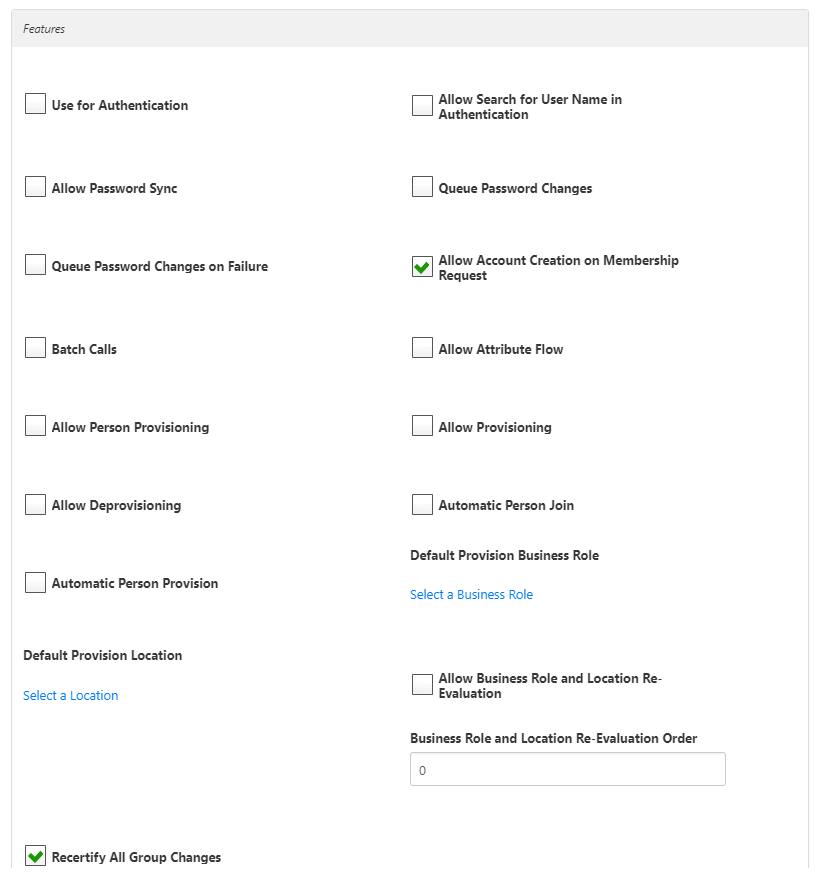
- In the Features section, you can select any of these values:
- Use for Authentication –
- Allow Search for User Name in Authentication –
- Allow Password Sync – Toggle to allow EmpowerID to sync password changes discovered during inventory.
- Queue Password Changes – Toggle to have EmpowerID send password changes to the Account Password Reset Inbox for batch processing.
- Queue Password Changes on Failure – Toggle to have EmpowerID send password changes to the Account Password Reset Inbox only when the change fails.
- Allow Account Creation on Membership Request – Toggle to allow users without accounts to request group membership and automatically have an account created.
- Batch Calls –
- Allow Attribute Flow – Toggle to allow attribute changes to flow between EmpowerID and the account store.
- Allow Person Provisioning – Toggle to allow EmpowerID to create Person objects from the user records discovered during inventory.
- Allow Provisioning – Toggle to allow EmpowerID to create new Groups in ServiceNow from requests discovered during inventory.
- Allow Deprovisioning – Toggle to allow EmpowerID to delete Groups in ServiceNow based on requests discovered during inventory.
- Automatic Person Join – Toggle to allow EmpowerID to join newly discovered accounts to people during the inventory process if they meet the Join Rule as specified by the Custom_Account_InventoryInboxJoinBulk SQL stored procedure.
- Automatic Person Provision – Toggle to allow EmpowerID to provision EmpowerID people for new accounts discovered during the inventory process if they meet the Provision Rule specified by theCustom_Account_InventoryInboxGetAccountsToProvision SQL stored procedure.
- Default Provision Business Role – Set a default Business Role to assign people if none is specified.
- Default Provision Location – Set a default Location to assign people if none is specified.
- Allow Business Role and Location Re-Evaluation – Toggle if you have multiple account stores to manage and want to specify a priority for each.
- Business Role and Location Re-Evaluation Order – Enter a number to specify the priority of the account store for determining the Business Roles and Locations to assign to a Person. Account Stores with a higher value take precedence.
- Recertify All Group Changes – Toggle to allow EmpowerID to generate recertification review tasks for all changes in ServiceNow Groups.
- When you have finished editing, click Save.
EmpowerID recommends using the Account Inbox to provision Person objects from user accounts. The below information is included to make you aware of the option to provision during inventory.
Toggle Allow Automatic Person Provision On Inventory to reflect your policy for the account store (red sphere for disable and green checkbox for enable). When enabled (and Allow Person Provisioning is enabled for the account store), EmpowerID will provision Person objects for all new accounts discovered during inventory in real-time, if they meet the conditions of your Provision rules.
- Toggle Allow Automatic Person Join On Inventory to reflect your policy for the account store (red sphere for disable and green checkbox for enable). When enabled (and Allow Person Provisioning is enabled for the account store), EmpowerID will attempt to join any new accounts discovered during inventory — if it finds one that matches the conditions of the Join rules for the account store. If this setting is not enabled, EmpowerID will not join secondary accounts to an EmpowerID Person, but will instead provision new EmpowerID Persons for each of those additional accounts.
The last action to perform on this screen is to enable inventory. However, before doing so, it is important to configure the attribute flow rules for the account store and to enable the Account Inbox if batch processing of those accounts is desired.
To configure Attribute Flow rules
- Open a browser and log in to the EmpowerID Web application.
- From the Navigation Sidebar, expand Admin > Applications and Directories and click Attribute Flow Rules.
From the Attribute Flow Rules page, click the Advanced Search drop-down button, enter the name of the account store for which you want to configure the flow rules and then click Search to filter the rules shown in the grid.
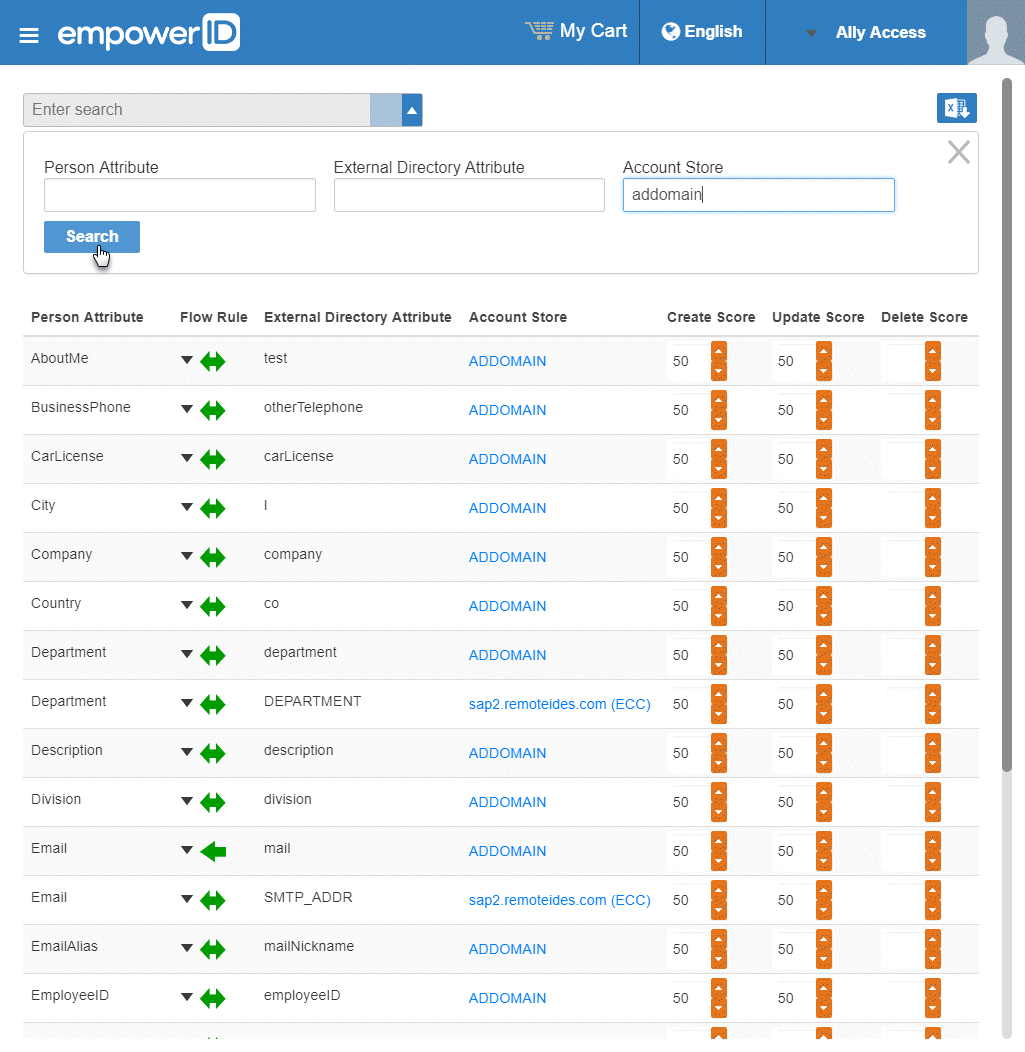
The attributes from the EmpowerID Person object are displayed in the left column with the corresponding attributes from the account store displayed in the right column.
To change the flow for an attribute, click the Attribute Flow drop-down located between the Person Attribute column and the External Directory Attribute column, and select the desired flow direction from the context menu.
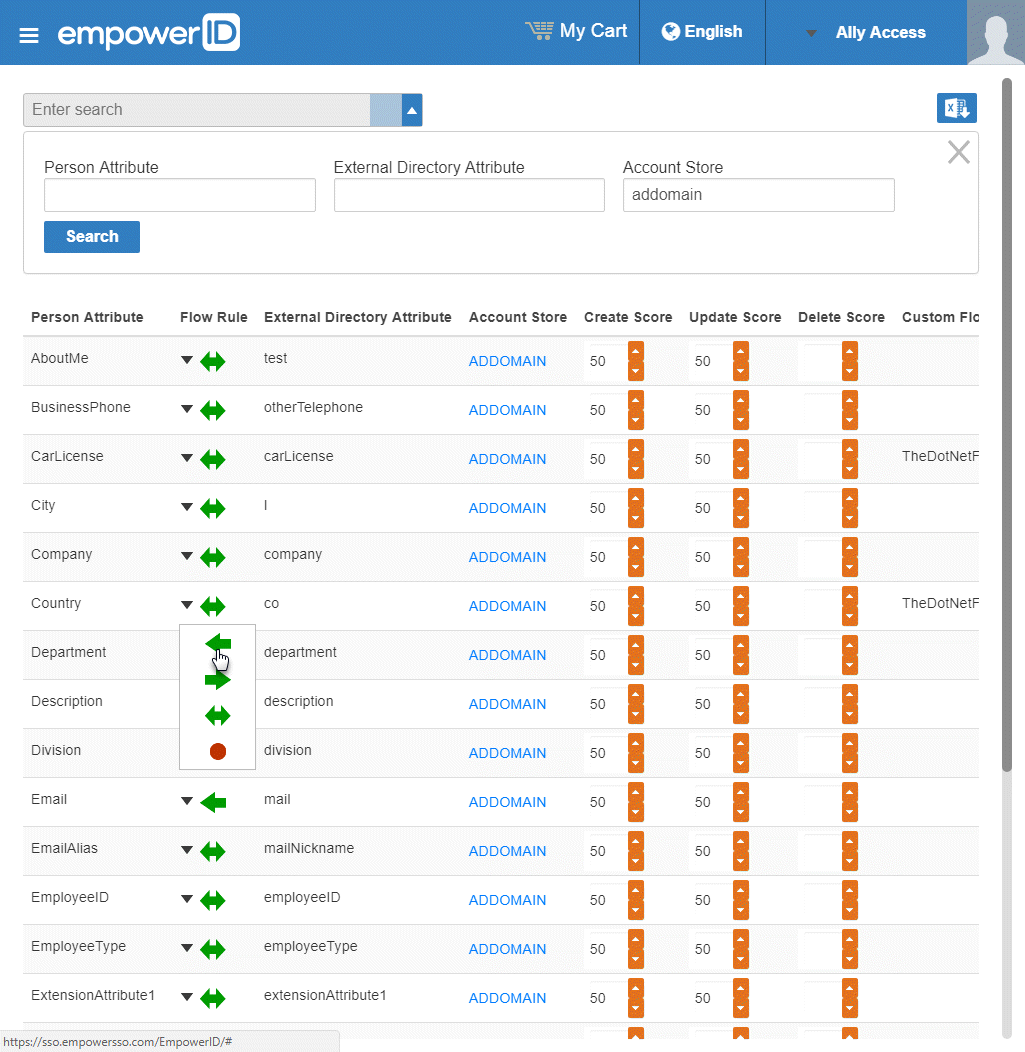
EmpowerID only considers scores for attribute CRUD operations when multiple account stores with the same user records are connected to EmpowerID, such as would be the case if an HR System and Google Apps were being inventoried by EmpowerID.
To turn on inventory
Return to the Account Store Details screen in Configuration Manager.
Look over your settings one last time and when satisfied, turn on inventory by toggling the Enable Inventory button from a red sphere to a green check box.
If you are using the Account Inbox to provision or join the user accounts in the external directory to Empower Persons, you need to turn on the Account Inbox. This is demonstrated in the below section.
To enable the Account Inbox permanent workflow
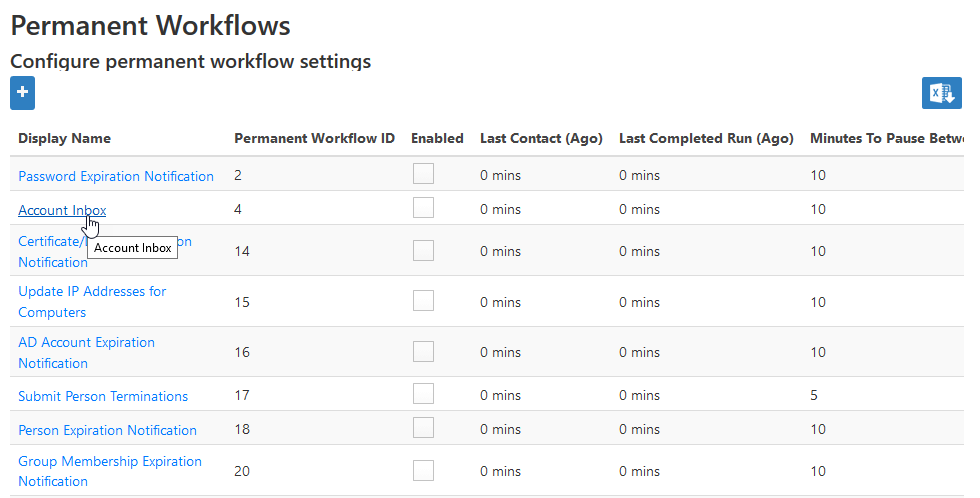
- From the Navigation Sidebar of the EmpowerID Web interface, expand Admin > EmpowerID Servers and Settings and click Permanent Workflows.
- From the Permanent Workflows page, click the Display Name link for Account Inbox.
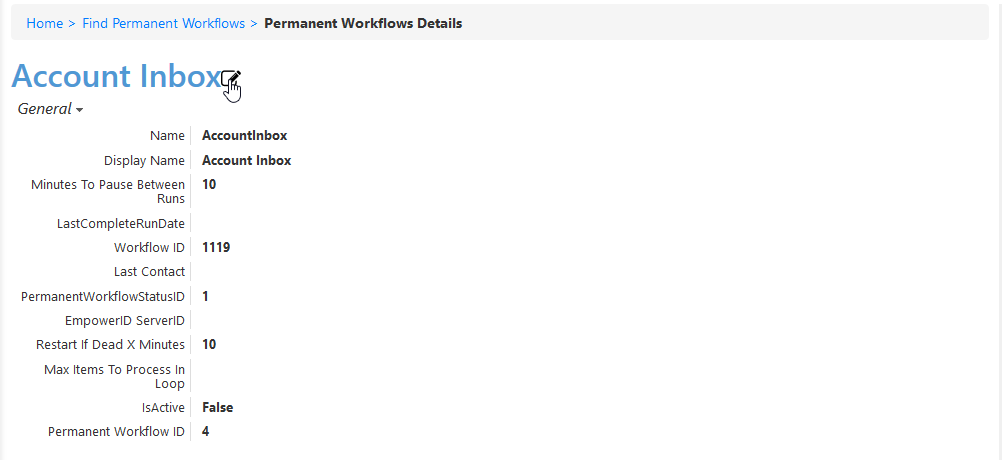
- From the View One page for the workflow that appears, click the edit link for the workflow.
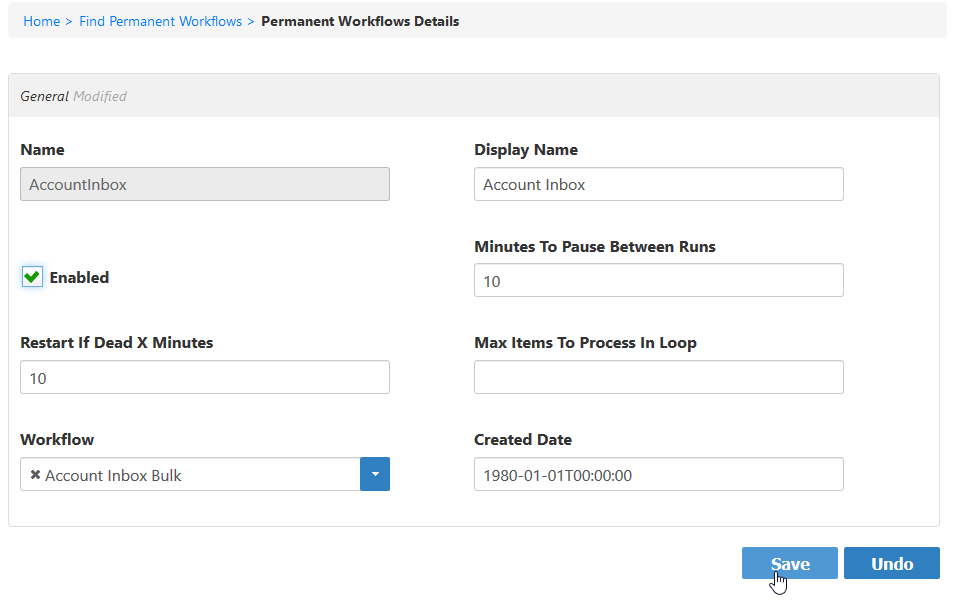
- From the Permanent Workflow Details form that appears, select Enabled and then click Save. Based on the default settings applied to the workflow, EmpowerID will process 1000 of the user accounts in the Account Inbox every ten minutes, provisioning Person objects from those user accounts and joining them together based on the Join and Provision rules applied to the account store.
To monitor inventory
- From Navigation Sidebar, expand System Logs > Policy Inbox Logs and click Account Inbox.
The Account Inbox page appears. This page provides tabbed views of all information related to processing new user accounts discovered in a connected account store during inventory. An explanation of these tabs follows.
- Dashboard - This tab provides a quick summary of account inbox activity.
- Not Processed - This tab displays a grid view of all inventoried user accounts not yet used to provision a new EmpowerID Person or joined to an existing Person. Any accounts that fail to meet the Join and Provision rules are displayed here as well.
- Failed - This tab displays a grid view of any account joining or provisioning failures.
- Ignored - This tab displays a grid view of all accounts ignored by the account inbox. Accounts are ignored if they do not qualify as user accounts.
- Joined - This tab displays a grid view of all accounts joined to an EmpowerID Person. Joins occur based on the Join rules applied to the account store.
- Processed - This tab displays a grid view of all accounts that have been used to either provision a new EmpowerID Person or joined to an existing EmpowerID Person.
- Provisioned - This tab displays a grid view of all accounts that have been used to provision an EmpowerID Person. Provisioning occurs based on the Provision rules applied to the account store.
- Orphans - This tab displays a grid view of all user accounts without an EmpowerID Person.
- All - This tab displays a grid view of all user accounts and the status of those accounts in relation to the Account Inbox.