Creating Access Levels
Access Levels are bundles of EmpowerID Operations and/or native system rights specific to resource types such as Exchange mailboxes or user accounts. Assign them to users to grant access to IT resources as specified by the Access Level.
Each resource type has its own set of Access Levels defined with different combinations of EmpowerID operations and rights (where applicable) to ensure that the level of access to the resources remains consistent for the type and the assignment. These actions can range from viewing a resource in an EmpowerID user interface to provisioning and deprovisioning resources in native systems. The extent of the access is determined by the configuration of the Access Levels and the scope of the assignment.
EmpowerID provides a large library of Access Levels already configured for most common resource types and delegation scenarios. You can use these out of the box and create your own.
To create Access Levels
- On the navbar, expand Admin > RBAC Definitions, and click RBAC Access Levels.
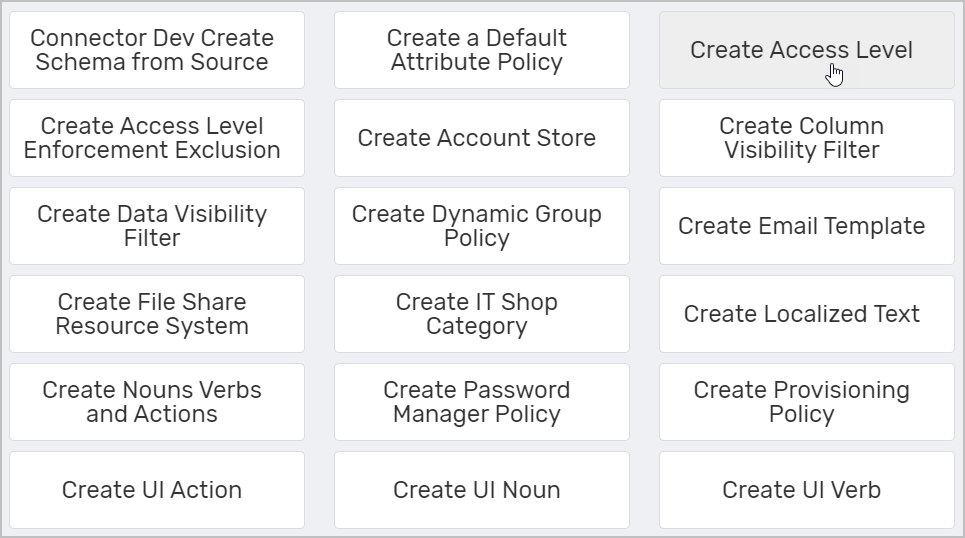
On the RBAC Access Levels page, click the Actions tab and then click Create Access Level.
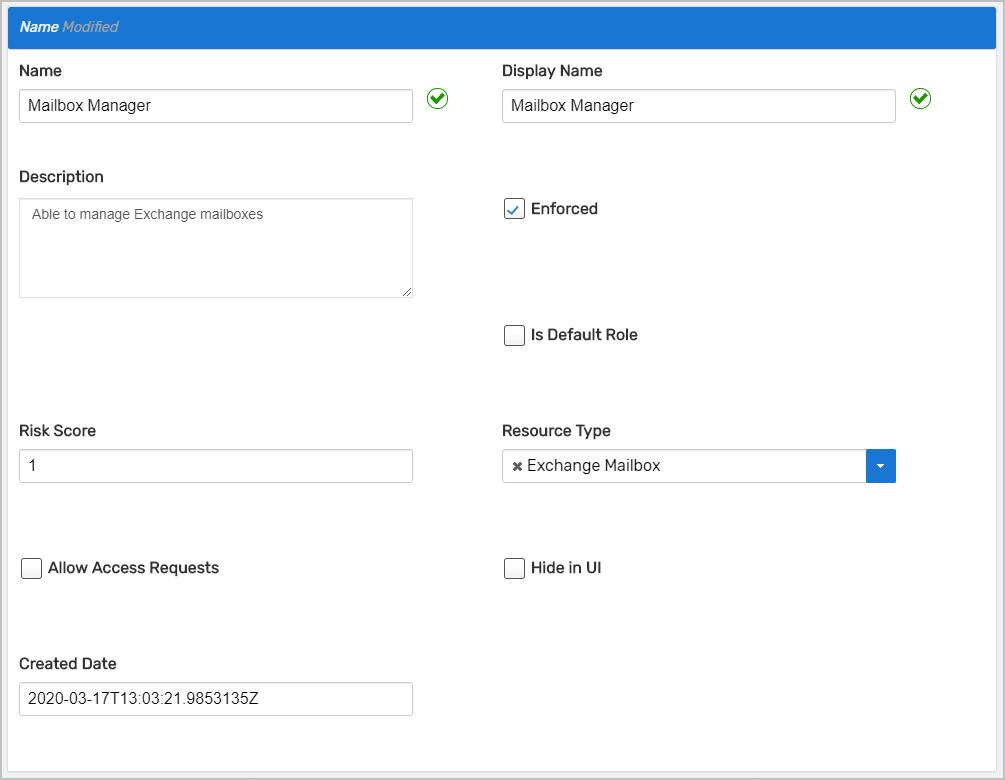
- In the Access Level Details form that appears, enter a name and description in the Name, Display Name and Description fields, respectively.
- Select Enforced to create an Access Level for an inventoried resource system, such as Exchange, if you want EmpowerID to enforce native rights that the Access Level grants.
- Select Is Default Role if the Access Level is the default for the resource type.
- Enter a numeric value (from 1 to 100) in the Risk Factor field. This number is a user-defined value that can help you identify the potential security ramifications associated with the Access Level, based upon the volume and/or nature of operations and/or native system rights associated with it. The higher the number, the higher the risk.
- Select the resource type for which you are creating the Access Level from the Resource Type field. This specifies that the Access Level Definition only applies to the selected resource type.
- Select Allow Access Assignments to allow users to request the Access Level.
- Select Hide In UI to prevent users from seeing the Access Level in EmpowerID.
- Click Save.
Once an Access Level Definition is created, it needs EmpowerID Operations and/or native system rights before it can be used to delegate resources to users. This is demonstrated in the Adding Operations to Access Level Definitions and the Adding Rights to Access Level Definitions topics.

