Removing Auth from SharePoint
Home / Installation and Configuration Guide / Configuring EmpowerID / Connecting to Directory Systems / SharePoint / Current: Removing EmpowerID Auth from SharePoint
If you no longer wish to use EmpowerID as your SharePoint Claims provider, you can remove it by following the steps outlined in this topic.
To remove EmpowerID Auth from SharePoint
- Open SharePoint Central Administration and navigate to Application Management > Manage Web Applications.
- For each Web application on the Web Application Management page, do the following:
- Click the application record and then click Authentication Providers in the ribbon.
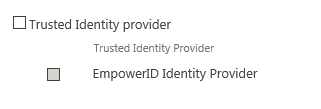
- In the Edit Authentication page that appears, clear EmpowerID Identity Provider and then clear Trusted Identity Provider.
- Click Save and then close the Edit Authentication page.
- Reset IIS.
Open the SharePoint 20XX Management Shell and run the following PowerShell cmdlet to remove the EmpowerID Claims Provider.
Remove-SPClaimProvider "EmpowerID Claims Provider"
Validate that the EmpowerID Claims Provider has been removed by running the following PowerShell cmdlet. You should not see an entry for EmpowerID.
Get-SPClaimProvider
Run the following PowerShell cmdlet to remove the EmpowerID Trusted Identity Token Issuer.
Remove-SPTrustedIdentityTokenIssuer "EmpowerID"
- Type Y to confirm you want to remove the EmpowerID Trusted Identity Token Issuer.
Validate that the EmpowerID Trusted Identity Token Issuer has been removed by running the following PowerShell cmdlet. You should not see an entry for EmpowerID.
Get-SPTrustedIdentityTokenIssuer
- Return to SharePoint Central Administration and navigate to System Settings > Manage Farm Features.
- Verify that the EmpowerID Claims Provider and EmpowerID Identity Provide features are deactivated. If they show as Active, click the Deactivate button.
- Navigate to "\Program Files\Common Files\Microsoft Shared\Web Server Extensions\14\TEMPLATE\FEATURES\ and delete the EIDPeople_Feature and People_Feature folders.
, multiple selections available,

