Windows File Servers
EmpowerID allows you to add Windows Servers as a managed resource system for file share management, providing you with automated role-based access control, delegated permissions administration, and self-service workflow-based access requests for those shares with a full audit trail. Once a server has been added as a resource system, and the Management Agent Server is set to the EmpowerID Server running the EmpowerID Windows Agent, EmpowerID will continuously inventory and monitor the server to discover new shared folders as they appear and to detect all permissions changes against those objects. This provides complete visibility over what shared folder resources exist and who may access them and in what capacity.
This topic demonstrates how to add a Windows File Server to EmpowerID as a managed resource system and is divided into the following activities:
- Adding a Windows File server as a managed resource system
- Verifying that EmpowerID inventoried all File shares on the File server
Prerequisites
Before you can create add a Windows File Server to EmpowerID as a managed resource system, EmpowerID must first be connected to Active Directory. For the details, see Active Directory.
Additionally, for EmpowerID to have the necessary NTFS permissions to create shared folders, you must associate the Windows Server Management Web Service job with a service account that is a domain user with admininstrator rights on the server hosting the shared folders. The password for that account must be vaulted in EmpowerID. For more details, see Configuring the EmpowerID Windows Server Agent Account.
Adding a Windows File server as an managed resource system
- Log in to the EmpowerID Management Console as an administrator.
- Click the application icon and select Configuration Manager from the menu.
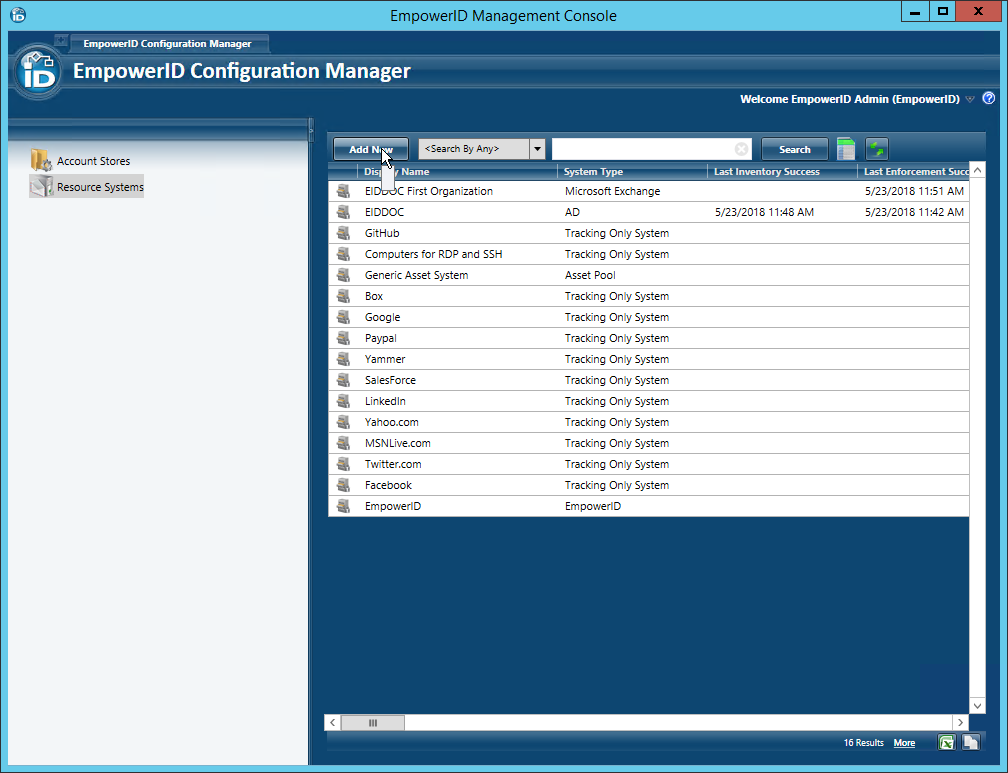
- In Configuration Manager, select the Resource Systems node and then click the Add New button above the grid.
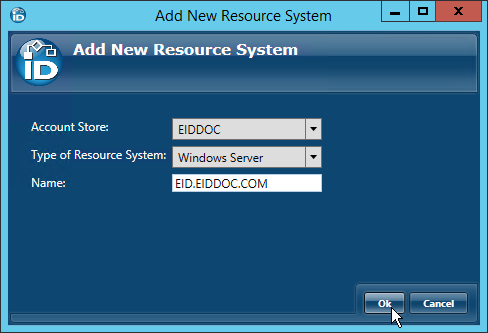
- In the Add New Resource System window that appears, do the following:
- Select the Active Directory account store in which the file server resides from the Account Store drop-down.
- Select Windows Server from the Type of Resource System drop-down.
- Type the name of the Windows file server in the Name field and then click OK to close the Add New Resource System window.
This opens the Windows Server Resource System configuration screen.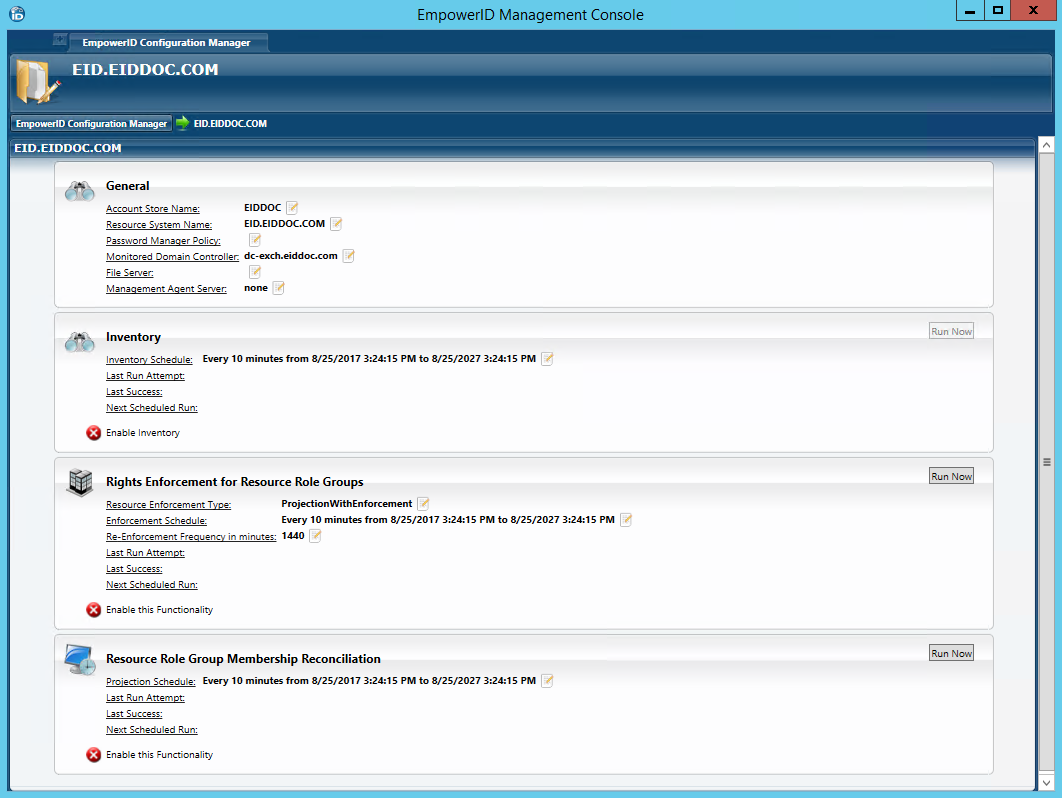
- From the Windows Server Resource System configuration screen, do the following to add your file server to the resource system:
- In the General pane, click the Edit
 button to the right of the File Server line.
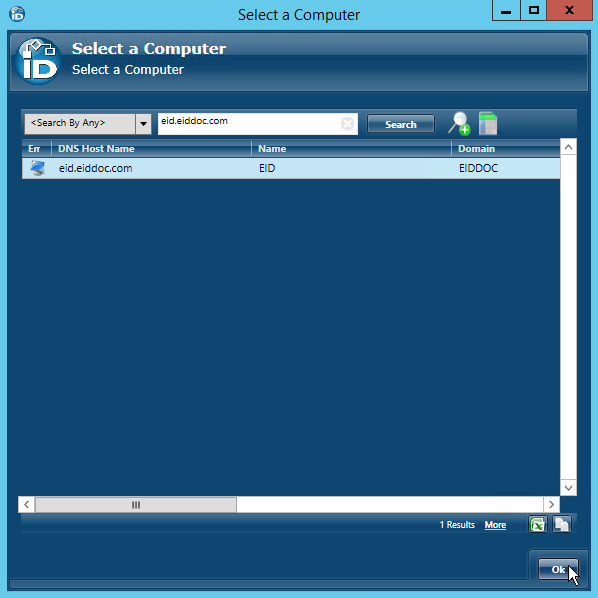
 - In the Select a Computer window that appears, search for your file server and then click the record for that server to select it.
- Click OK to close the Select a Computer window.
- In the General pane, click the Edit
- From the Windows Server Resource System configuration screen, do the following to add one or more application servers:
- In the General pane, click the Edit
 button to the right of the Management Agent Server line.
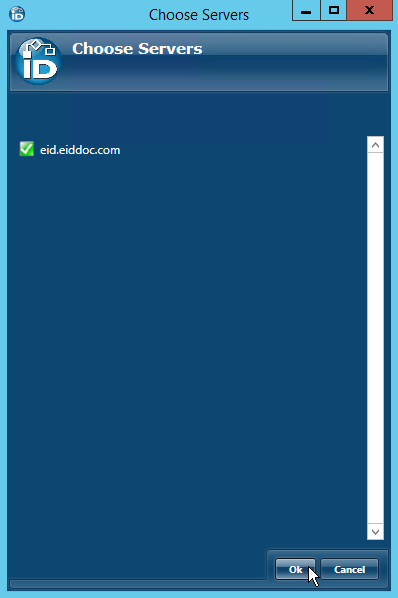
 - In the Choose Servers window that appears, select one or more servers by toggling the Server button to the right of each desired server from a red sphere to a green check.
- Click OK to close the Choose Servers window.
- In the General pane, click the Edit
- From the Windows Server Resource System configuration screen, do the following to specify the type of rights enforcement to be applied to any Resource Role groups created by EmpowerID for the shares on the file server: (This process is used to determine who should have access to shares on the server based on their assignments to Access Levels in EmpowerID and is enforced using special domain local groups known as "Resource Role Groups". )
- In the Rights Enforcement for Resource Role Groups pane, click the Edit
 button to the right of the Resource Enforcement Type line.
 - In the Change Resource Enforcement Type window that appears, select the appropriate enforcement type from the Resource Enforcement Type drop-down.
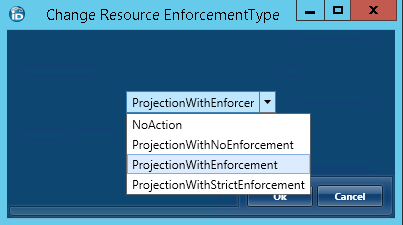
When making this selection, you have the following options:- No Action — No rights enforcement action occurs.
- Projection with No Enforcement — Adds people to Resource Role Groups in EmpowerID, but does not grant these permissions on the server.
- Projection with Enforcement — Adds people to Resource Role Groups in EmpowerID and grants the roles to the Resource Role Groups. This is the recommended setting.
- Projection with Strict Enforcement — This removes any assignments to groups that occur outside of EmpowerID. If someone is added to a group independently of EmpowerID, they are removed from the group by EmpowerID.
- Click OK to close the Change Resource Enforcement Type window.
Toggle the Enable this Functionality button from a red sphere to a green check box.

For a conceptual overview of the principals involved with projection, enforcement and Resource Role Groups, see Overview of Projection and Enforcement.
- In the Rights Enforcement for Resource Role Groups pane, click the Edit
- From the Windows Server Resource System configuration screen, enable EmpowerID to perform Resource Role Group membership by toggling the Enable this Functionality button in the Resource Role Group Membership Reconciliation pane from a red sphere
 to a green check box.
  This ensures that EmpowerID evaluates who should be members of what Resource Role groups on a regularly scheduled basis.
 - From the Windows Server Resource System configuration screen, enable EmpowerID to inventory the shared folders on the File server by toggling the Enable Inventory button from a red sphere
 to a green check box.
Verifying EmpowerID inventoried the File server shares
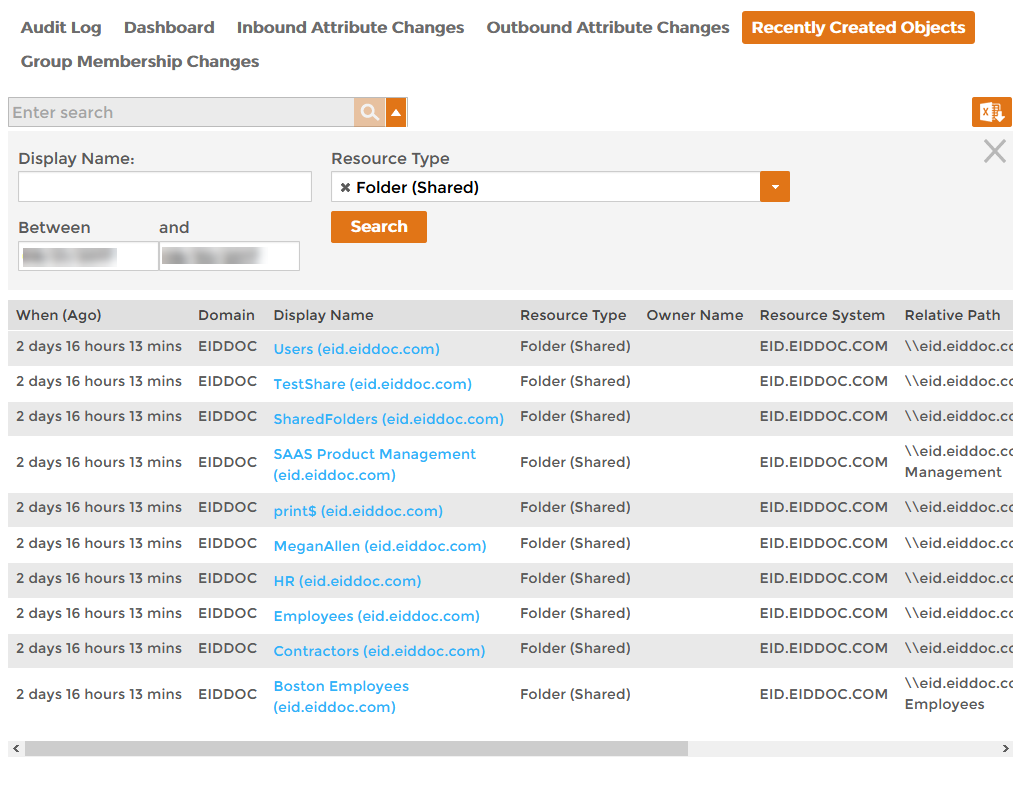
- From the Navigation Sidebar of the EmpowerID Web interface, expand System Logs and click Audit Log.
- Click the Recently Created Objects tab.
- Click the drop-down to the right of the search field and select Folder (Shared) from the Resource Type drop-down. This allows you to limit the records returned to shared folders.
.png?version=1&modificationDate=1527092049750&cacheVersion=1&api=v2&width=1023&height=947)
- Click Search or press ENTER.
You should see one record for each inventoried shared folder.