Configuring Campaigns
Once you have created a campaign you configure it to return specific users and entitlements by adding datasets and attributes to it. Datasets define the people and entitlements you want to analyze, such as the group membership for people and groups that belong to a Set Group (Query-Based Collection), while selecting an attribute returns the attribute value for all people in the dataset. Once you configure the campaign with the desired parameters, you can compile it to view the results.
The date returned from a compiled data is a frozen snapshot of the people and their entitlements at the moment the campaign was compiled.
To configure a campaign
- From the Navigation Sidebar of the EmpowerID Web interface, navigate to the Role Mining Campaign page by expanding Role Mining and clicking Role Mining Campaign.
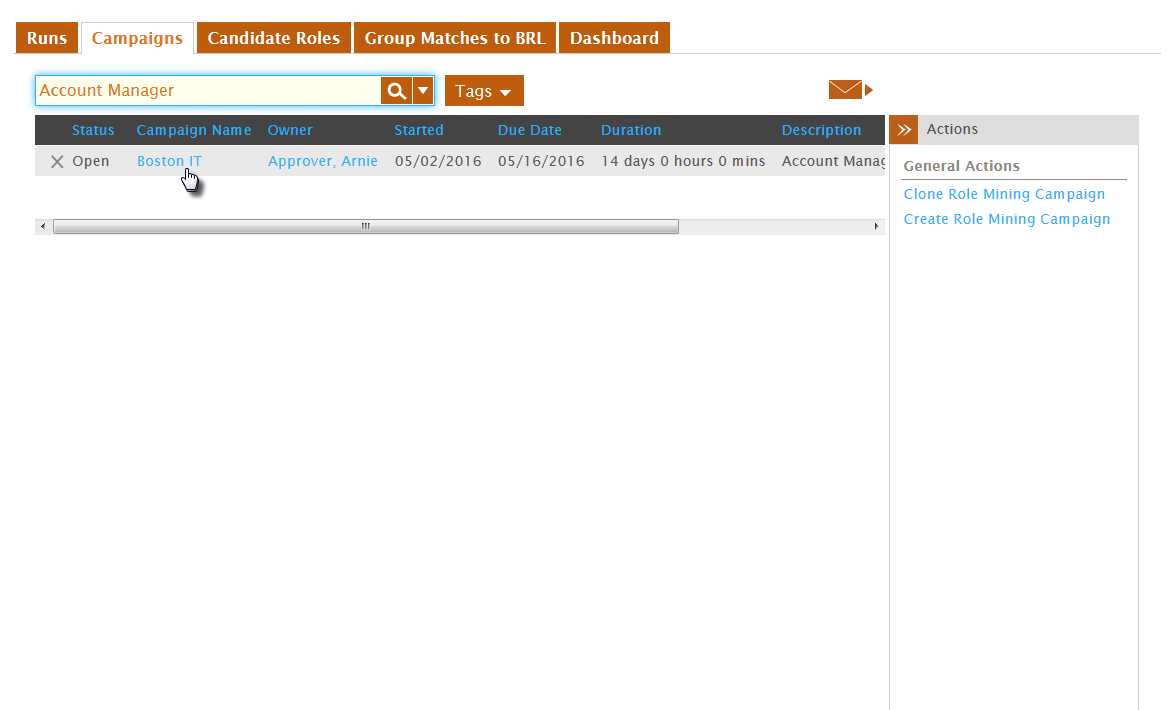
- From the Role Mining Campaign page, click the Campaigns tab and search for the campaign you want to configure.
- From the grid, click the Campaign Name link for the campaign.
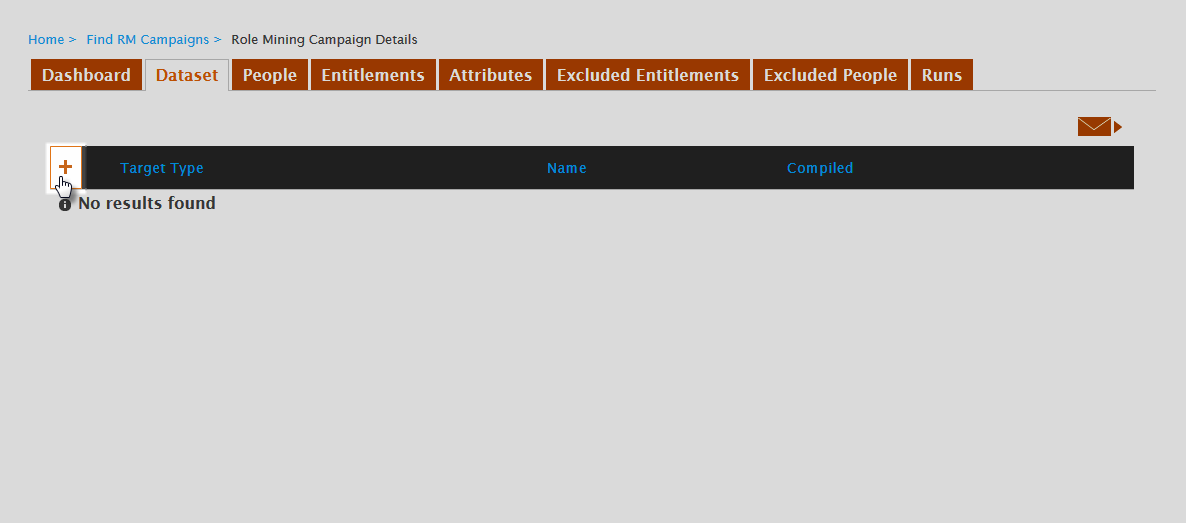
- From the Role Mining Campaign Details page for the campaign that appears, click the Dataset tab and then click the Add button on the Target Type grid.
- In the dialog that opens, do the following:
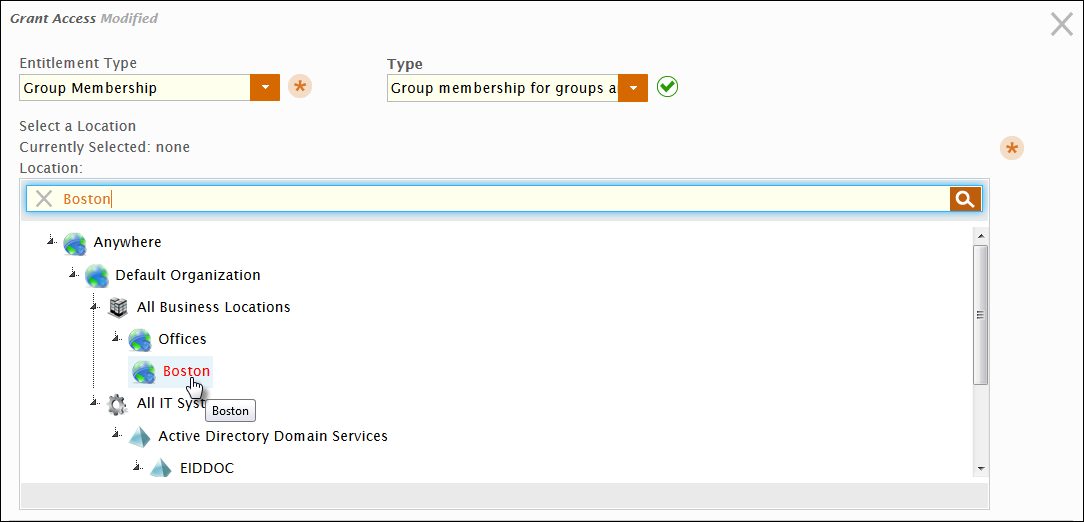
Select Group Membership from the Entitlement Type drop-down.
Currently, Group Membership is the only Entitlement Type supported.
- Select the type of group membership you want to analyze from the Type drop-down. When selecting a type, you have the following options:
- Group membership for groups and accounts in or below a selected location
- Group membership for people and groups that belong to a set group
- Group membership for people in a group
- Group membership for people in or below business role and location
- Group membership for people in the management role
- Group membership for people in the management role definition
- After selecting the type of group membership, select the appropriate target for the type. For example, if you want to analyze the group membership for groups and accounts in or below a selected location, you select the appropriate location from the location tree.
- Click Save.
- Repeat steps 4 and 5 above for each dataset you want in the campaign.
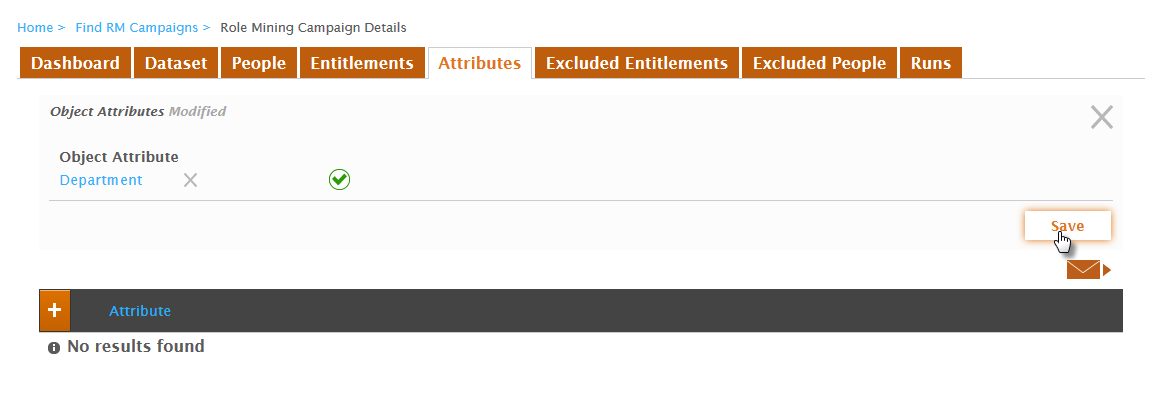
- Optionally, add an attribute to the campaign by clicking the Attributes tab and doing the following:
- Click the Add button on the Attribute grid.
- From the Object Attributes dialog that appears, select the appropriate attribute from the Object Attribute drop-down.
- Click Save to close the Object Attributes dialog.
- Repeat for each attribute you want to add to the campaign.
After you have completed configuring the campaign, the next step is to compile it.
, multiple selections available,