Creating Column Filter Policies
The Column Filter Policy is a SQL select clause written against the SQL View of an EmpowerID component or object type, such as an account or Person, that specifies what attributes of the component can be viewed by someone with the policy. For example, one of the Column Filter Policies included with EmpowerID is the "Sample AccountView removing visibility on email" policy. This policy hides the true value of each user account's Email attribute, replacing it with "N/A" so that assignees of the policy see "N/A" as the Email for any user accounts they view. You can create Column Filters like this to hide or substitute any attribute on an object.
Visibility restriction policies do not affect the EmpowerIDAdmin user.
This topic demonstrates how to create a Column Filter policy.
To create a Column Filter Policy
- In the navigation sidebar, expand Admin > RBAC and click Visibility Restriction Policies.
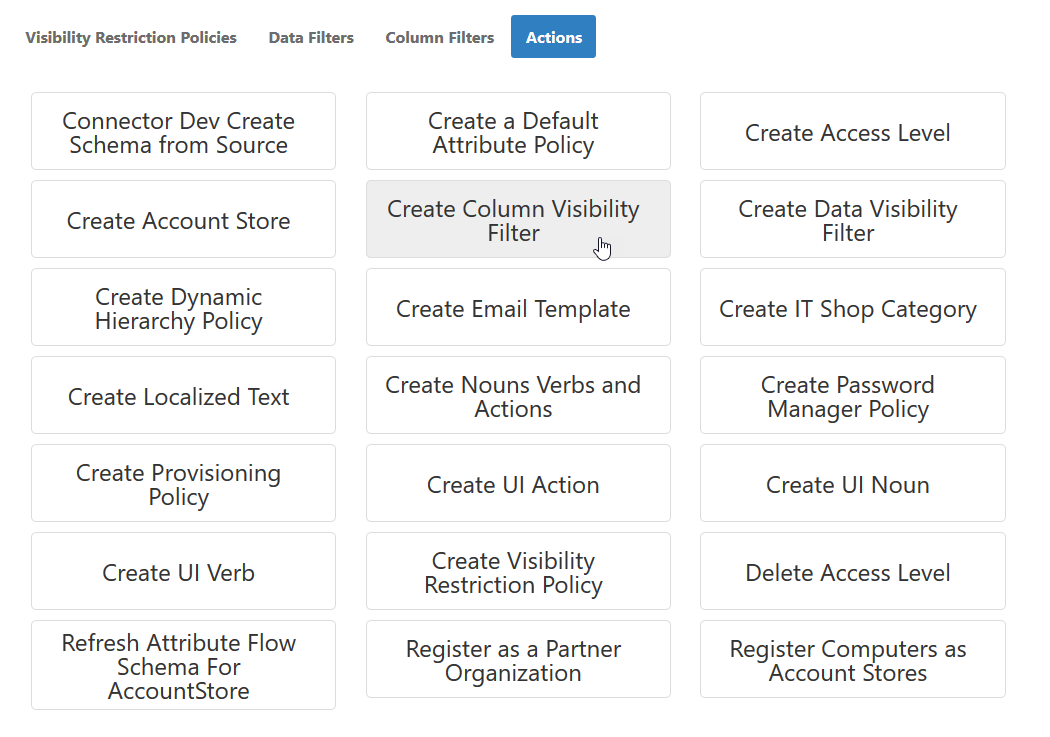
- On the Find Visibility Page that appears, click the Actions tab and then click Create Column Visibility Filter.
This opens the Filter Details form for the Column Visibility Filter.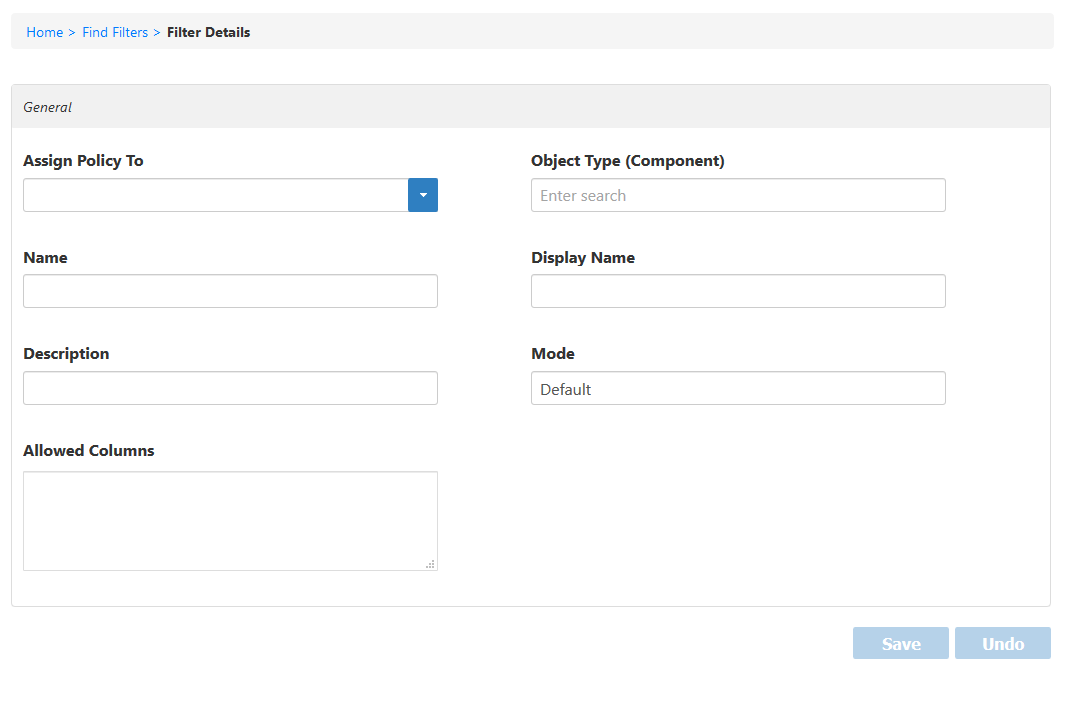
- Click the Assign Policy To drop-down and select from the following Actor types to receive the policy.
- Person — Applies the policy to a specific person.
- Group — Applies the policy to a specific group. Each person who is a member of the group receives the policy.
- Business Role and Location — Applies the policy to a specific Business Role and Location. Each person who belongs to the Business Role and Location receives the policy.
- Management Role — Applies the policy to a specific Management Role. Each person who is a member of the role receives the policy.
- Management Role Definition — Applies the policy to a specific Management Role Definition. Each Management Role that is a child of the definition receives the policy.
- Query-Based Collection (SetGroup) — Applies the policy to a specific Business Role and Location. Each person who is a member of the collection receives the policy.
- In the Assignee field that appears, do one of the following depending on the Actor type you selected.
- Type the name of the specific actor to whom you are assigning the policy and click the tile for that actor to select it. For example, to assign the policy to a group, enter the name of the group in the field and click that tile.
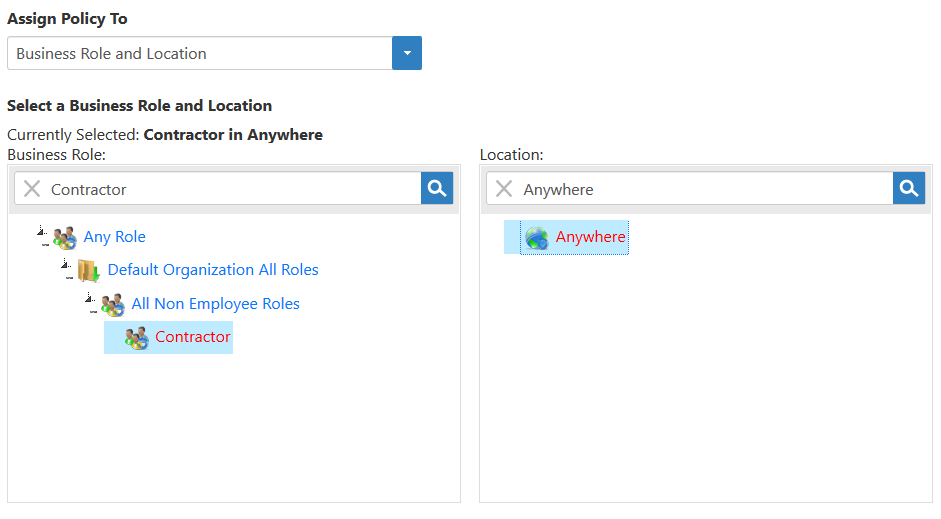
- If you selected Business Role and Location as the Actor type, click the Select a Business Role and Location link and in the Business Role and Location Selector that appears, search for and select a Business Role and Location.
- In the Object Type (Component) field, type the name of the EmpowerID Component that has the column you want to restrict, add "View," and click the tile for that View to select it. For example, to hide an attribute of a Person, enter PersonView.
- Enter a name and description for the policy in the Name, Display Name and Description fields.
- Leave the value of the Mode field as Default.
In the Allowed Columns field, enter a SQL statement for the filter that hides attribute values with a static value, returning all the rest. For example, to fill the Title attribute with the static string "Private" on a Person use this statement:
'Private' AS Title, [PersonView].*
This statement tells EmpowerID to create a new View of the Person table that replaces the Title attribute with the word Private. When a person with the policy logs in to EmpowerID and searches for another person, the value of the Title attribute will appear as Private.To restrict the data on other objects, replace the attributes and the views as is appropriate. For example, to completely hide the value of AccountStoreName and AccountStoreFriendlyName fields for groups, the SQL statement would be ' ' AS AccountStoreName,' ' AS AccountStoreFriendlyName, [GroupView].*
At this point, the Filter Details form looks like the following image (with variations for the selected options). The image depicts a Column Filter policy that replaces the Title attribute value on a Person with the word "Private" and assigns the policy to all Contractors in any location. The policy does not apply to anyone who is not a member of that Business Role and Location.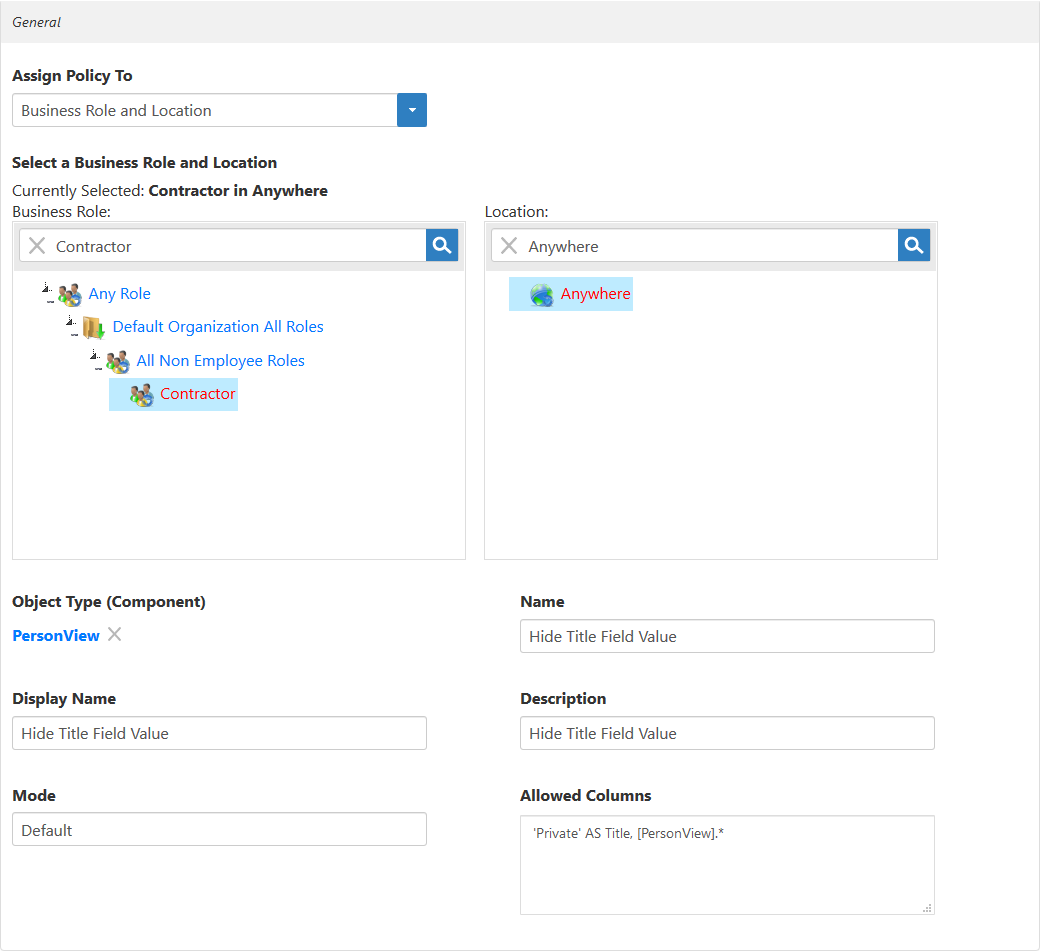
- Click Save.
To test the Column Filter Policy
- Log out of the EmpowerID Web application and log back in as a user with the Column Filter policy.
- From the Home page of the Web application, search for any resource object restricted by the policy. For example, if you created a Column Filter policy that replaces the value of an attribute on a person with another value, search for people.
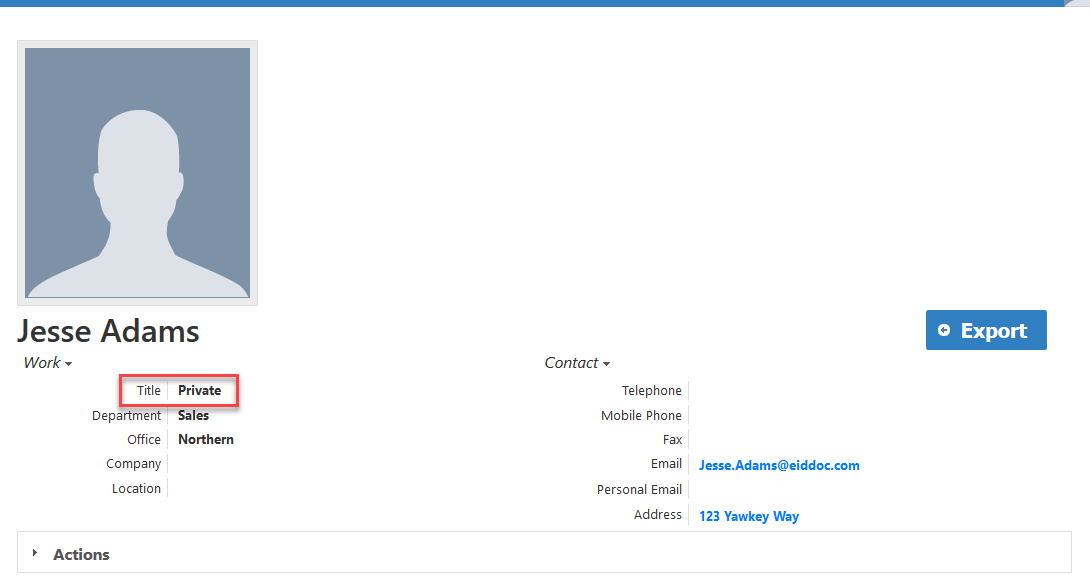
The attribute specified in the policy is replaced with the value specified in the policy. In the image below, the logged-in user is assigned a Column Filter policy that replaces the value of the Title attribute with "Private."