Customizing the Virtual Directory
Home / Identity Administration / Computers / LDAP Virtual Directory / Current: Customizing the EmpowerID Virtual Directory Server
Once you have installed the EmpowerID Virtual Directory, you can make changes to the configuration file to allow your users the ability to view as little or as much directory data as needed. By default, the EmpowerID Virtual Server is configured to allow users the ability to view only a specific subset of data in the EmpowerID database. This includes:
- The records in the Person table
- The records in the ResourceType table
- The records in the ManagementRole table
- The directory structure of connected account stores
- The user accounts in connected account stores
- The groups in connected account stores
You can customize the tabular and directory data made available to users by editing the tableSchemaConfig and the directoryObjectConfig objects in the index.js file. The tableSchemaConfig object includes settings for displaying any table or view in the EmpowerID database within the directory tree, while the directoryObjectConfig object includes settings for the display of external accounts, containers, and groups within any account store that has been inventoried by EmpowerID.
In this topic, we demonstrate how to extend the default configuration of the EmpowerID Virtual Directory Server by adding configuration data to the index.js file that allows the ExchangeMailboxView view of the EmpowerID database to be viewed in the virtual directory.
For security reasons, we recommend exposing views to your users rather than raw tables.
To customize the EmpowerID Virtual Directory
- Navigate to the TheDotNetFactory > EmpowerID > LdapServer >EidLdapServer > config folder and locate the index.js file in that folder.
- Open the index.js file in any text editor and locate the tableSchemaConfig object in that file.
- Copy the definition for the ResourceType table and then paste it into the tableSchemaConfig just below the existing ResourceType table definition. You should now see two exact ResourceType definitions in the file. An explanation of the table schema for this object follows below the image.
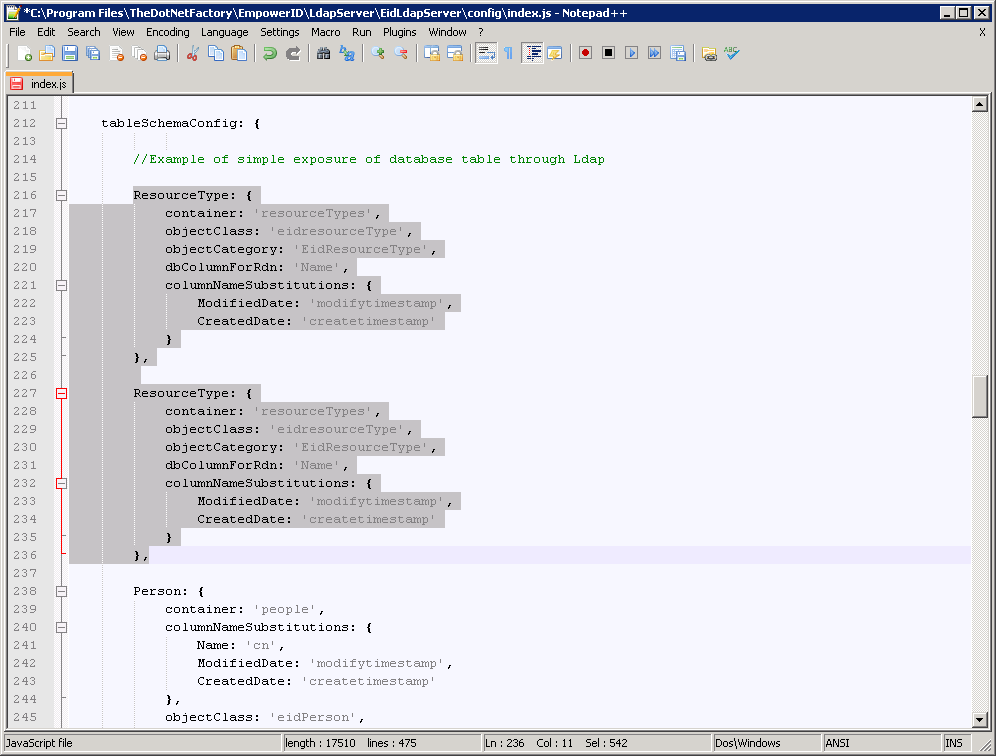
- ResourceType — This is the name of the specific table in the EmpowerID database that is being exposed to the virtual directory. Thus, in this case, ResourceType exposes the ResourceType table. The value here must match the name of the table in the EmpowerID database.
- container — This is the name of the table node as it will appear in the virtual directory view. In the above image, the table node will read "resourceTypes."
- objectClass — This is the EmpowerID attribute for the object in the objectClass schema. This value can be any desired value.
- objectCategory — This is the objectCategory for the object in the LDAP schema. this value can be any desired value.
- dbColumnForRdn — This is the relative distinguished name of each record in the table you are exposing. This corresponds to a specific field where the value of that field is unique for each record in that table. For example, no two resource types contained in the ResourceType table have the same name, thus the schema for the ResourceType table uses that field to uniquely identify each resource type record.
- columnNameSubstitutions — This allows you to rename specific columns in the EmpowerID database, making those names the default attributes in the virtual directory. For example, two of the columns in the ResourceType table are the ModifiedDate and the CreatedDate columns. In the image above, we are substituting these names of these columns with "modifytimestamp" and "createtimestamp," respectively. Thus, in the virtual directory, we will see "modifytimestamp" and "createtimestamp" attributes, but not "ModifiedDate" and "CreatedDate" attributes.
- In the ResourceType object you just pasted into the index.js file, make the following changes so that the virtual directory displays the ExchangeMailboxView:
- Change the first line from ResourceType to ExchangeMailboxView.
- Change the value for the container attribute from resourceTypes to mailboxes.
- Change the value for the objectClass attribute from eidResourceType to eidMailbox.
- Change the value for the objectCategory attribute from EidResourceType to EidMailbox.
- Change the value for the dbColumnForRdn attribute from Name to Alias.
The Alias attribute is unique for each mailbox record in the ExchangeMailbox table, whereas the Name attribute may not be. - Leave the values for columnNameSubstitutions as is.
After you have made the above changes, the index.js file should look like the image below.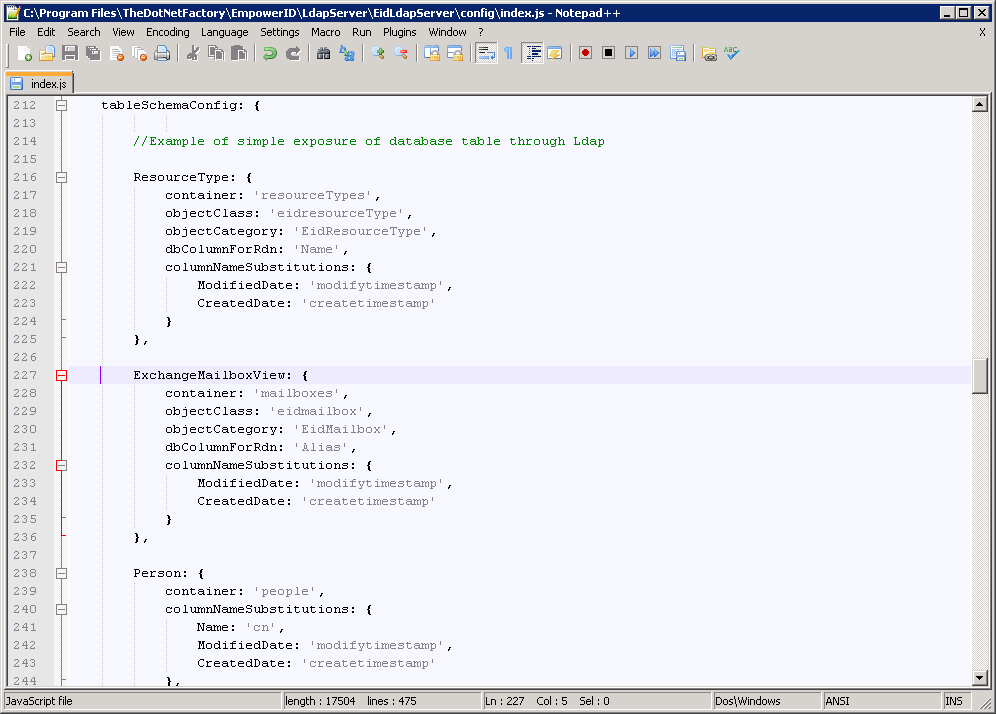
Save the changes to the index.js file and restart the EmpowerID LDAP Server Windows service.
You can restart the EmpowerID LDAP Server from the command line by opening a command window in the EidLdapServer folder and typing node index at the command prompt.
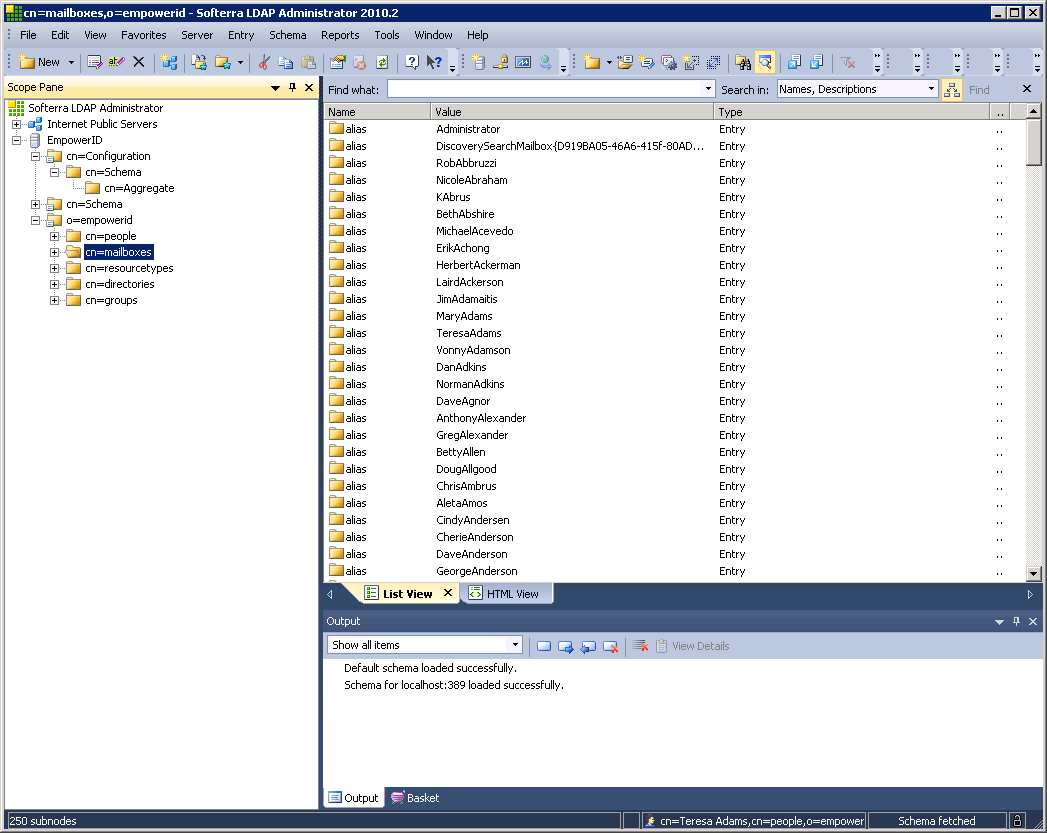
Open your LDAP browser (or refresh if it is already open). You should see the newly added table in the directory.