Scheduling Start or Stop Times
You can set up AWS and Azure computers to automatically start up and shut down at specific hours of the day. Shutting down computers automatically can save your organization a lot of money in hourly fees when employees forget to turn them off. You start by setting up a location for any of the start-up and shut-down times you will use, and then you tag each computer with the time that you want it to start up or shut down. This allows you to set different times for different employees, allowing those who work later to carry on without interruption.
You can set one time for each computer, either a start or a stop. You can choose from four start times and four stop times. Their search tags are as follows:
- Start6AM
- Start7AM
- Start8AM
- Start9AM
- Shutdown5PM
- Shutdown7PM
- Shutdown9PM
- Shutdown12AM
The StartStopAWSInstancesPermWF permanent workflow checks for these tags each time it runs. When it detects a tag for the current hour, it then starts or stops the computer. For this reason, the exact timing of the start or stop of the computer depends on when the workflow first runs within the hour set. For example, if the workflow runs at 8:58 a.m., it is not triggered by a 9AM tag, so the computer is not started until the next time the workflow runs.
These start and stop times only take effect on week days.
To set up a scheduling parent location
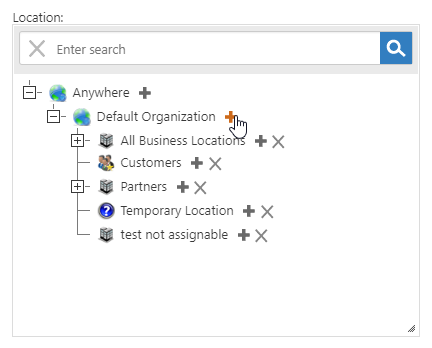
The schedule location becomes the parent for all of the schedule times.
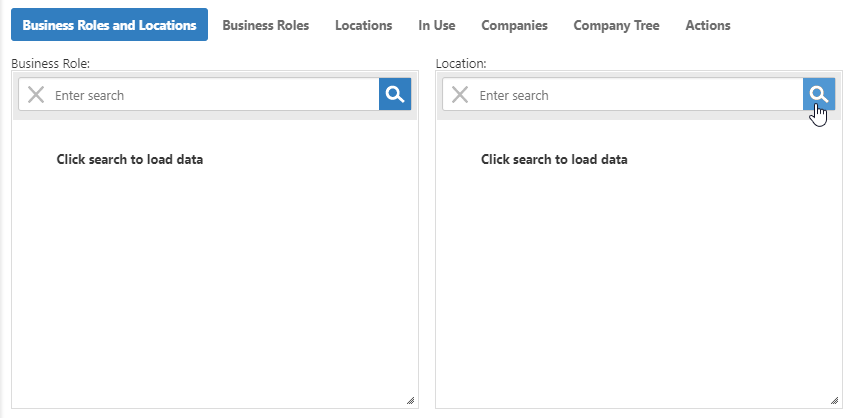
- From the Navigation Sidebar, expand Identities and click Business Roles and Locations.
- On the Business Roles and Locations tab, click the search icon (magnifying glass) to populate the Location box.
- To the right of the location under which you want to place your scheduling, click the add button.
- On the Location Details page that appears, enter a Name, Display Name, and Description for your location. For example, AWS Start and Stop Schedules.
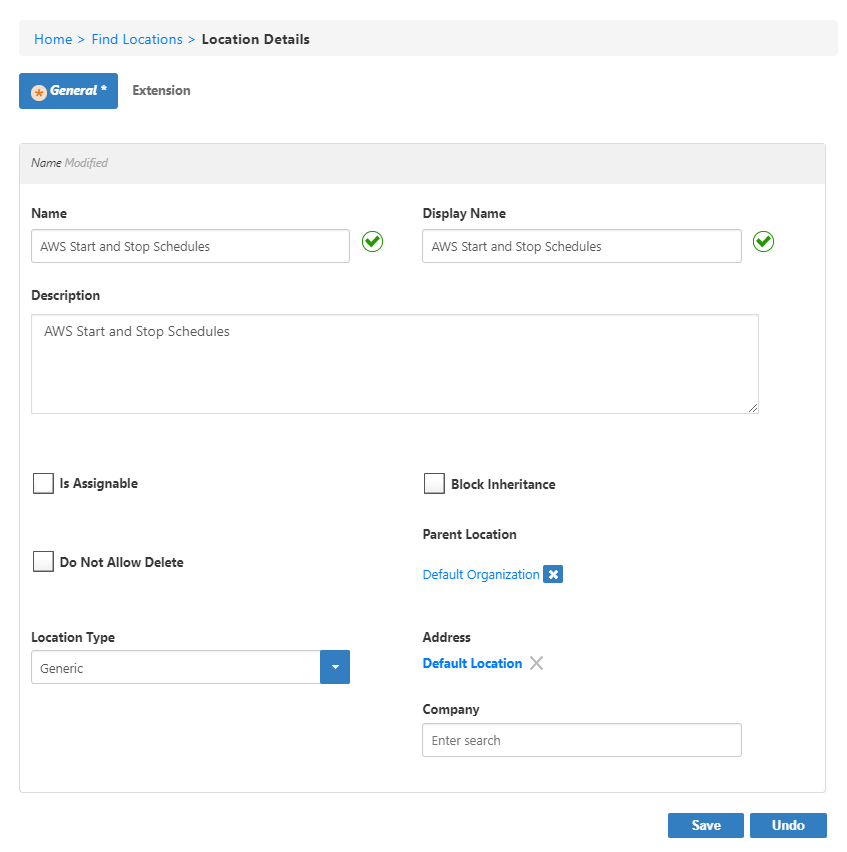
- Click Save.
To add times to the scheduling location
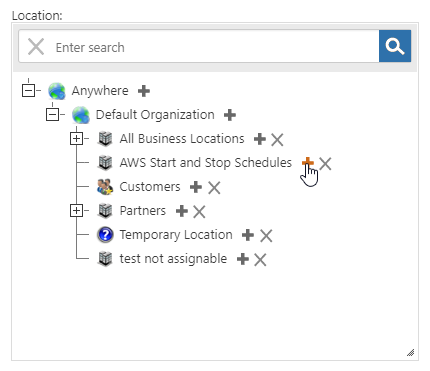
- Back on the Business Roles and Locations tab, click the add button next to the new scheduling location.
- In the Location Details form that appears, in the Name, Display Name, and Description fields, enter a name that includes start or stop and a time. For example, Start up at 9 a.m.
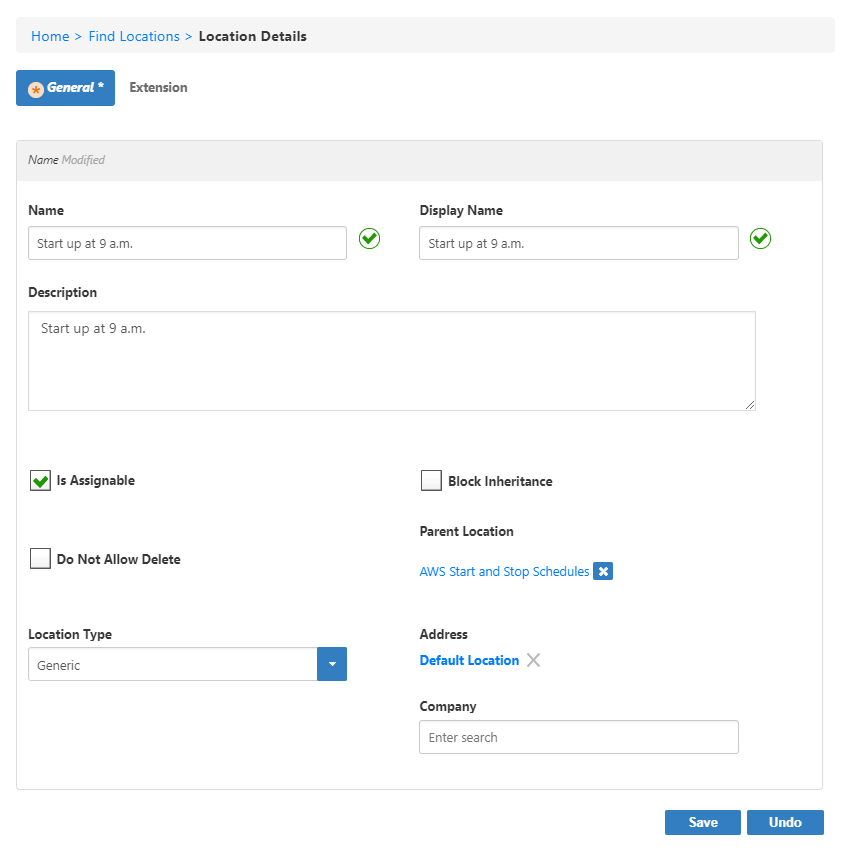
- Select the Is Assignable check box so that you can assign it to computers, and click Save.
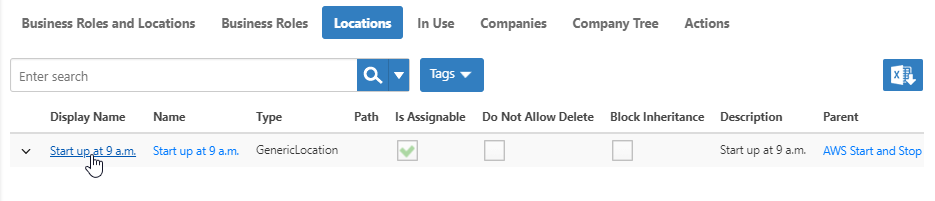
- Back on the Business Roles and Locations page, click the Locations tab and then click the Display Name link of the new time.
- On the Location Details page that appears, expand the Editable Multivalued Fields accordion.
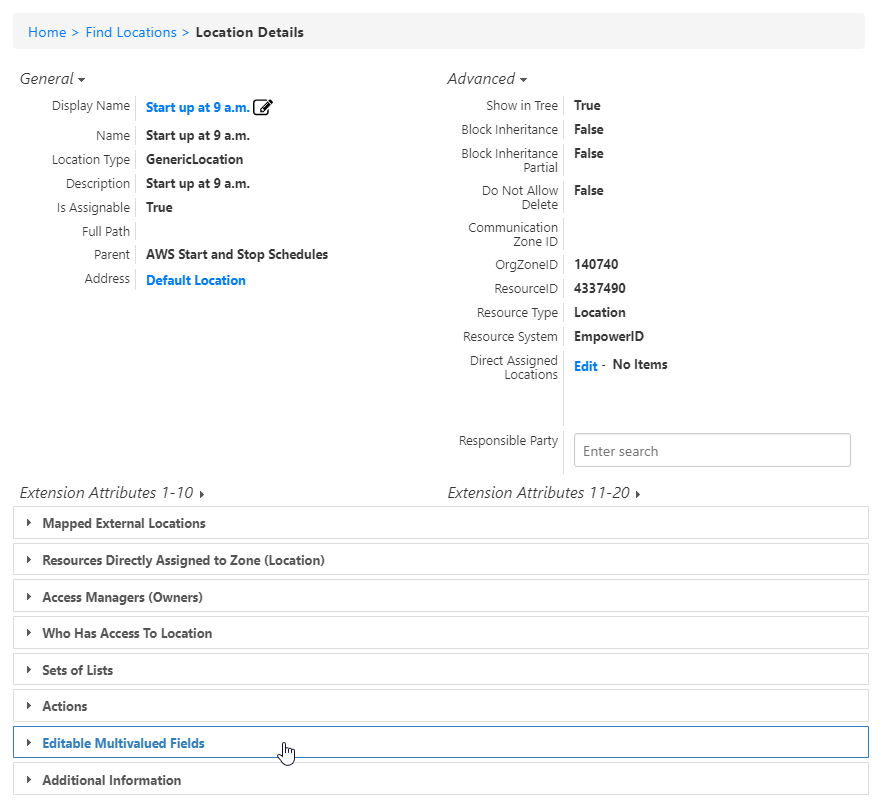
- Above the Search Tags section, click Edit.
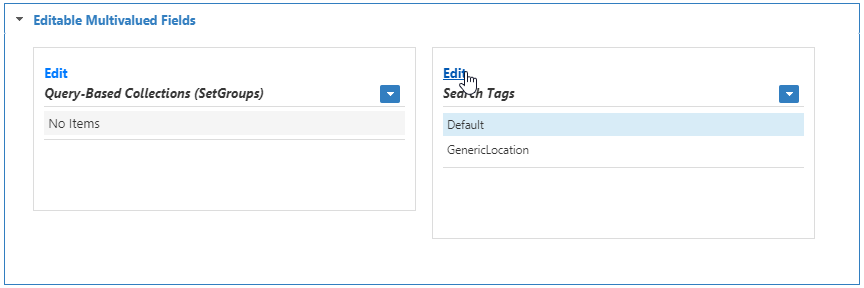
- In the blank field that appears, use one of the following schedule tags.
- For start-up times, use one of the following:
- Start6AM
- Start7AM
- Start8AM
- Start9AM
- For shut-down times, use one of the following:
- Shutdown5PM
- Shutdown7PM
- Shutdown9PM
- Shutdown12AM
- For start-up times, use one of the following:
- Press the Enter key and then click Save.

- Repeat for every start-up or shut-down time that you want to add.
To add scheduled times to a computer
Although you can add a computer to the time via the Resources Directly Assigned to Zone (Location) accordion, you cannot add the necessary tag to it from there. For that reason, we set it up on the computer itself. However, once you have set it up on various computers, you can expand the Resources Directly Assigned to Zone (Location) accordion to see which computers use it.
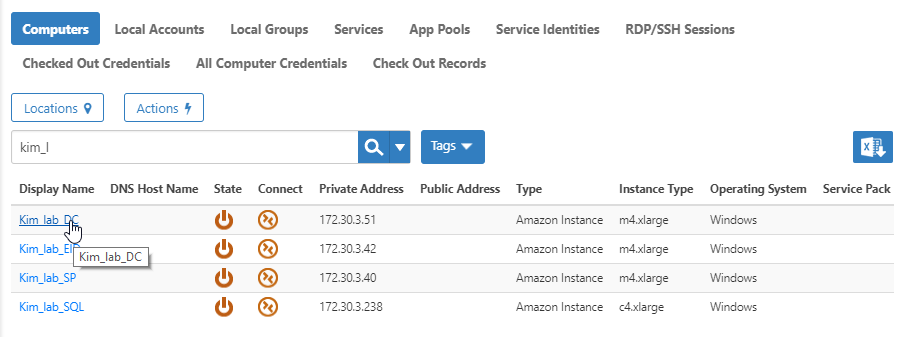
- In the Navigation Sidebar, expand Resources and select Computers.
- Search for and click the Display Name link for a computer to schedule.
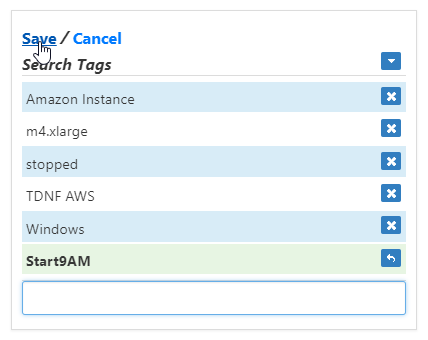
- On the Computer Details page that appears, in the Search Tags section, click Edit.
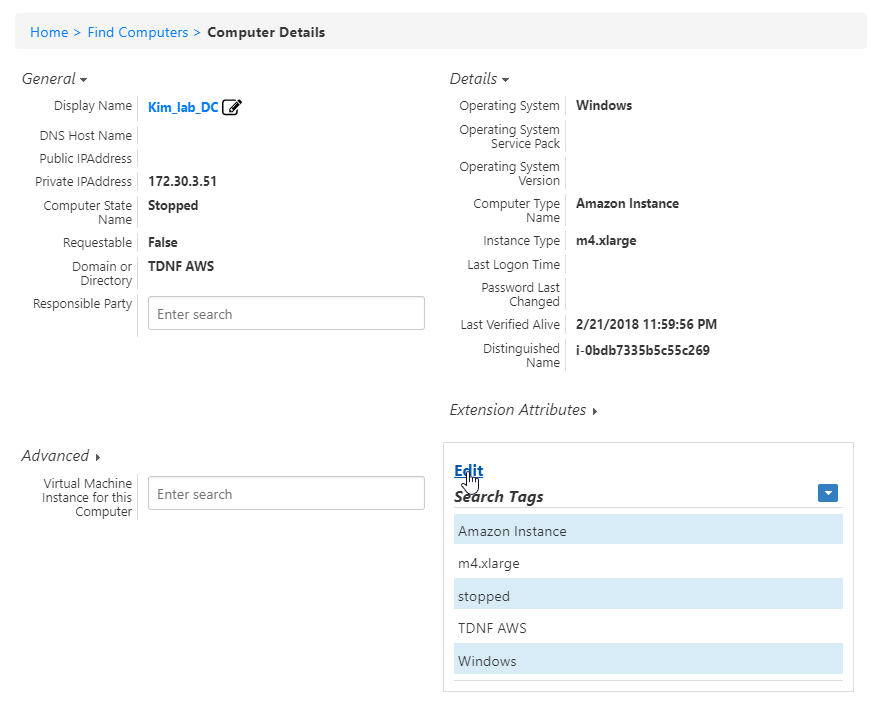
- In the blank field that appears, use one of the following schedule tags that matches the time you set up.
- For start-up times, use one of the following:
- Start6AM
- Start7AM
- Start8AM
- Start9AM
- For shut-down times, use one of the following:
- Shutdown5PM
- Shutdown7PM
- Shutdown9PM
- Shutdown12AM
- For start-up times, use one of the following:
- Press the Enter key and then click Save.
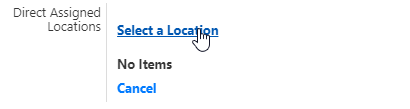
- Expand the Advanced section and then, next to the Direct Assigned Locations attribute, click the Edit link.
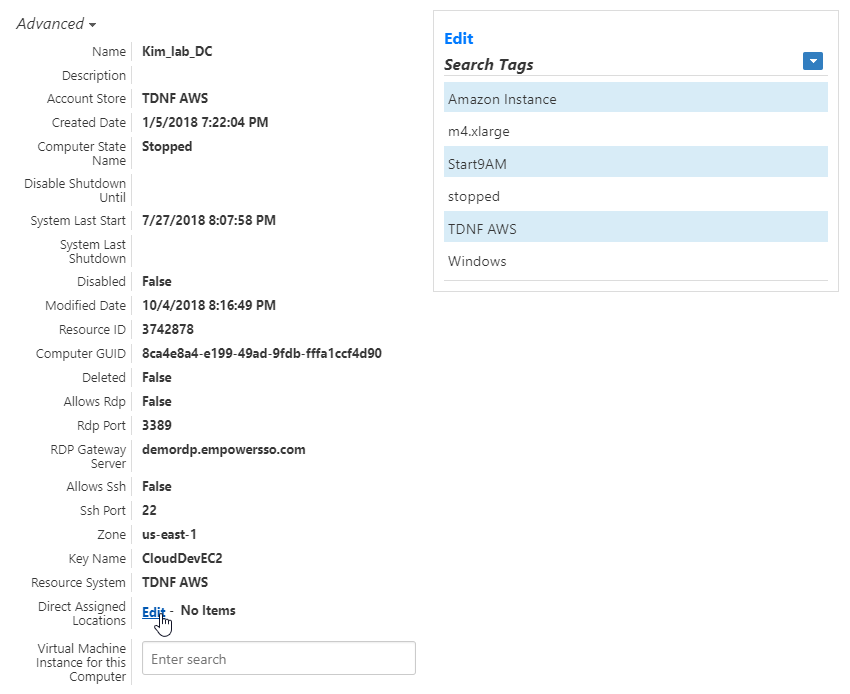
- Click the Select a Location link that appears.
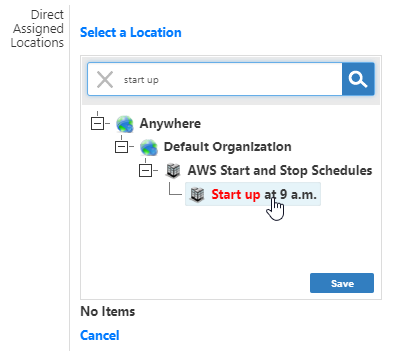
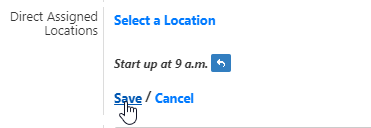
- In the search box that appears, search for the time location that corresponds to the search tag that you entered, select it, and click Save.
- Click Save again.
The next time the StartStopAWSInstancesPermWF permanent workflow runs and detects that the hour portion of the current time is 9, it checks for this tag and starts any computers set up with this tag and location.
The exact timing of the start or stop of the computer depends on when the workflow first runs within the hour set. For example, if the workflow runs at 8:58 a.m., it is not triggered by the Start9AM tag, so the computer is not started until the next time the workflow runs.