Adding Dynamic Activities
If you want to simplify your workflows and improve their speed, you can use code to add dynamic activities to your workflows at run time. This topic demonstrates how to create two forms and a workflow, add one form to the workflow dynamically, add the other form statically, and pass values from the dynamic form to the static one in code.
To create a dynamic form activity
We will add this form activity to the workflow dynamically.
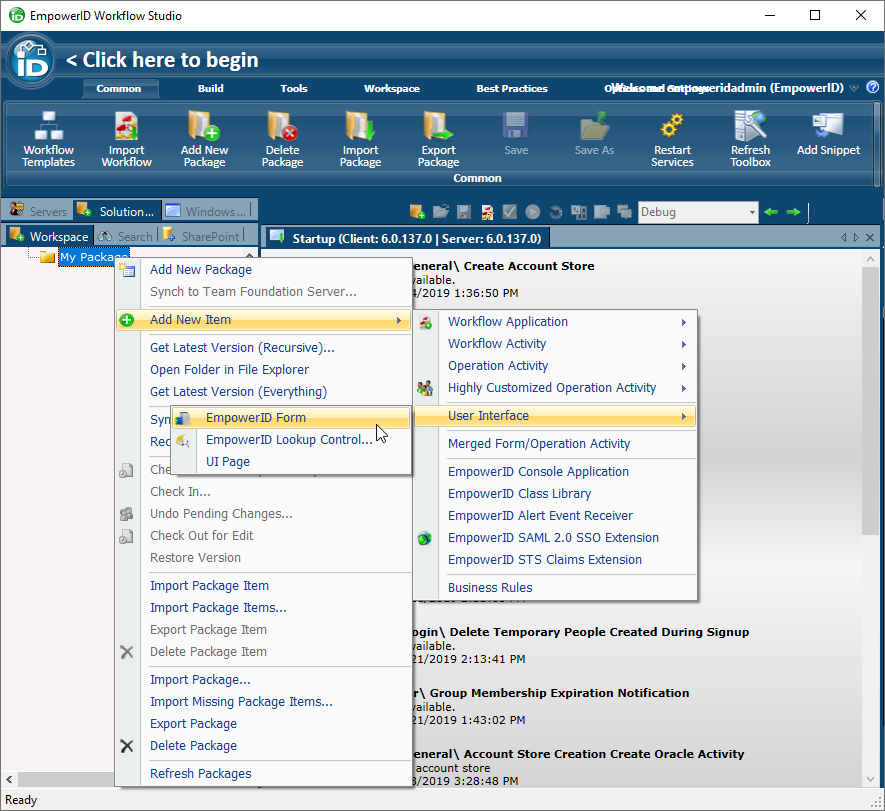
- In Workflow Studio, in the Solution Explorer, right-click the package in which to create the form, expand Add New Item, then User Interface, and select EmpowerID Form.
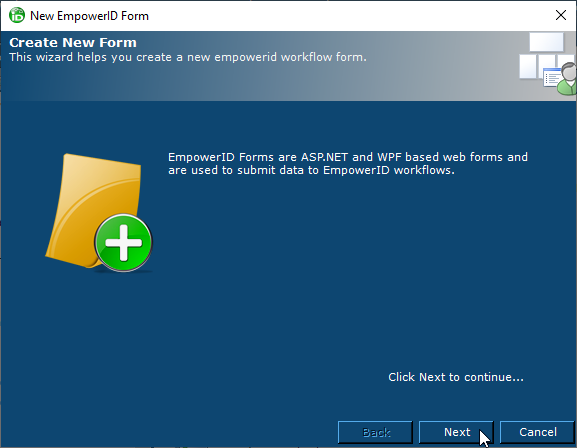
- In the New EmpowerID Form wizard that appears, click Next.
- Enter a Name for your form and click Next. The name value is how you reference the form in code.

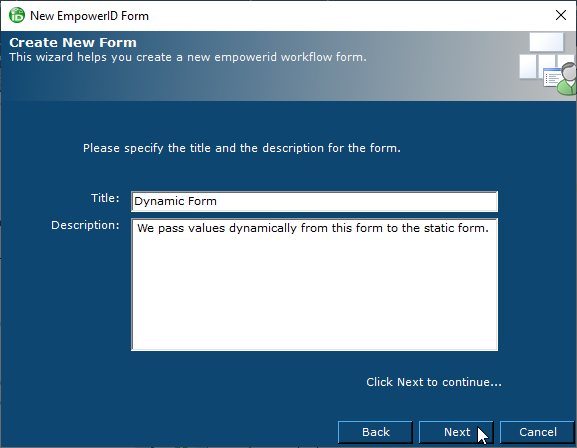
- Enter a Title and Description for the form and click Next. The title and description values appear on the form at run time.
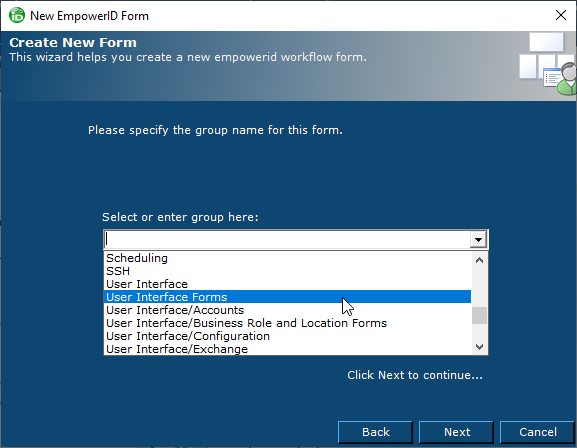
- Select the User Interface Forms group in which to place the form within the package: and click Next.
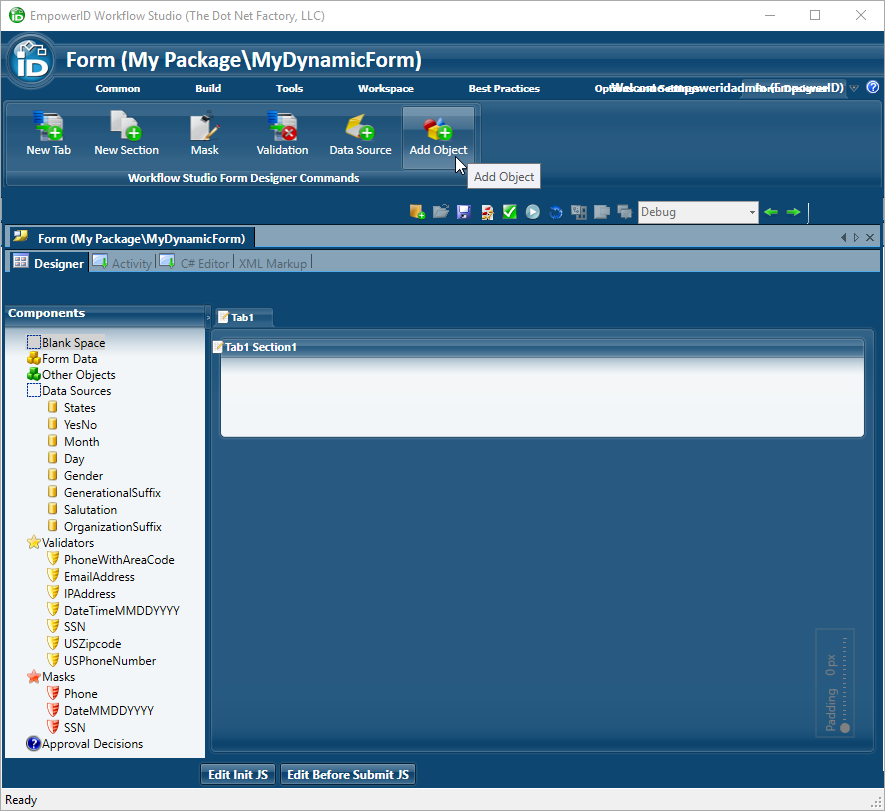
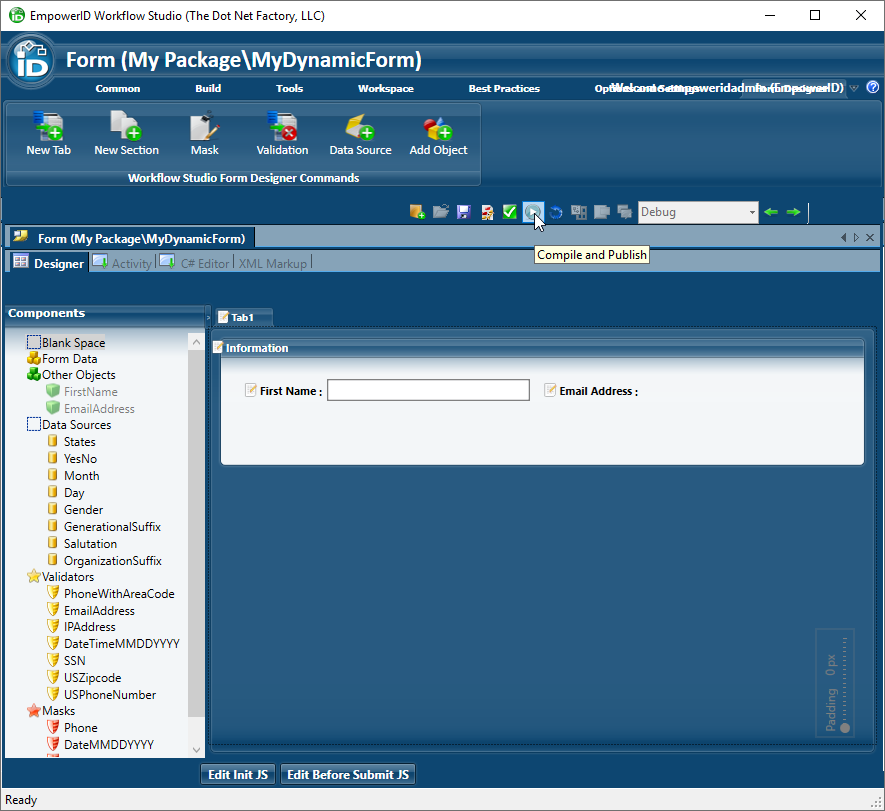
A blank form appears. On the tool ribbon, click Add Object.
To preserve screen space, you can hide the left and right panels using the green arrows in the toolbar just above the document space.

You can hide the ribbon along the top by double-clicking the current ribbon tab.
- In the Add Object dialog that appears, select String and click Add.

- In the Components pane to the left of the form, String1 appears under Other Objects.
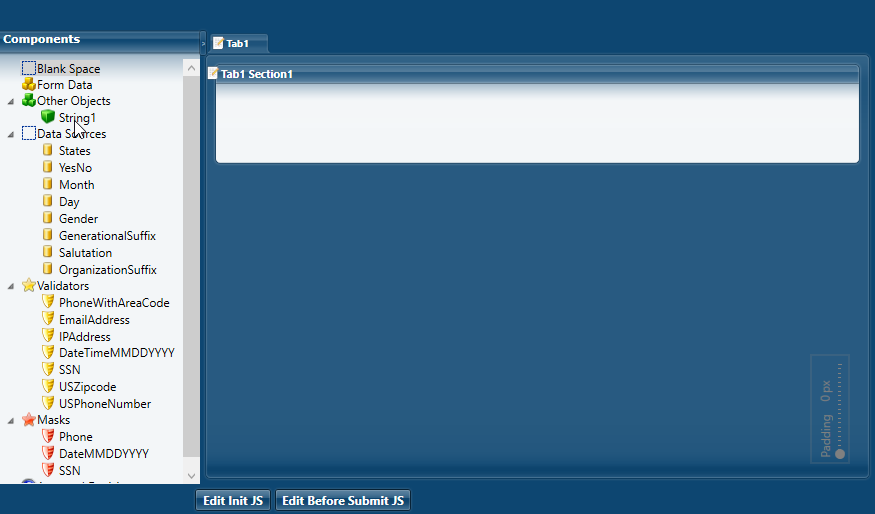
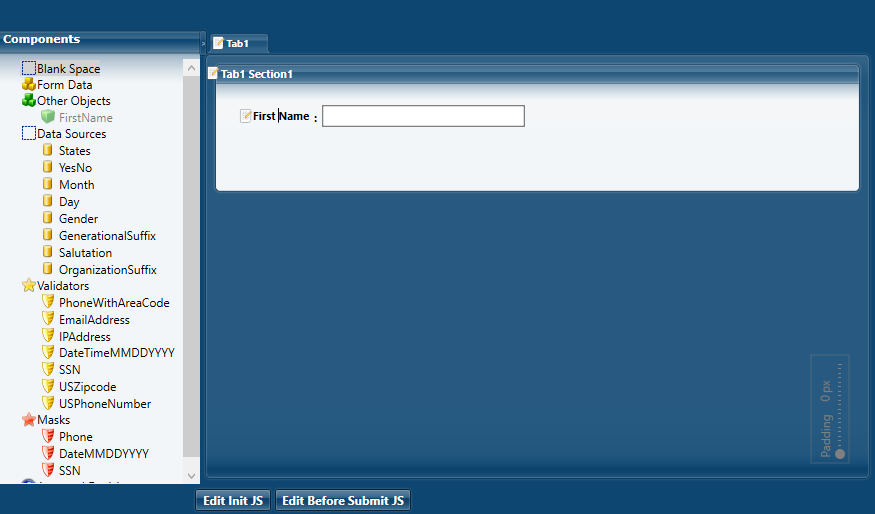
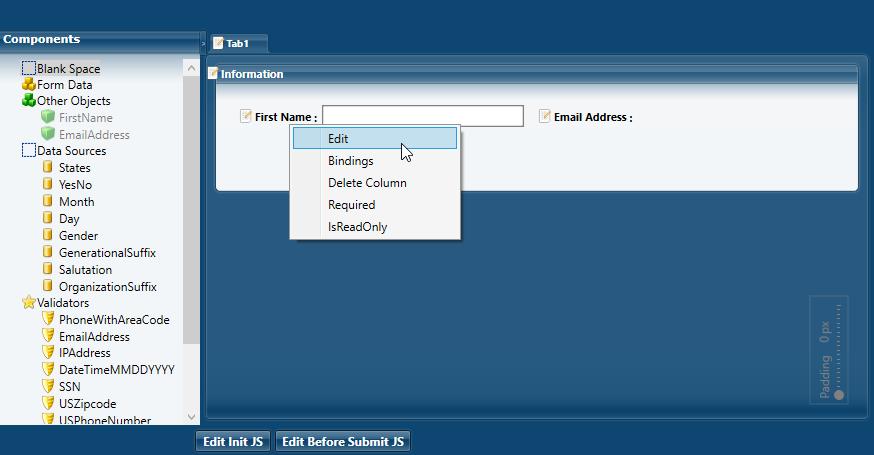
- Double-click String1 and change the text to FirstName, then drag it onto the form. (Double-click FirstName on the form to add a space between words.)
- To add a second field to the form, on the tool ribbon, click Add Object and this time, select Email as the type of object to add.
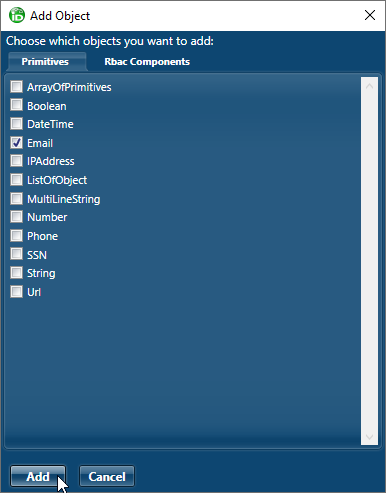
- In the Components panel, double-click Email1 and change the text to EmailAddress, then drag it onto the form.
- Save, then Compile and Publish the form. You can restart services and restart Workflow Services at this time.
To create a static form activity
Here, we essentially create the same form as above, but this time with read-only fields.
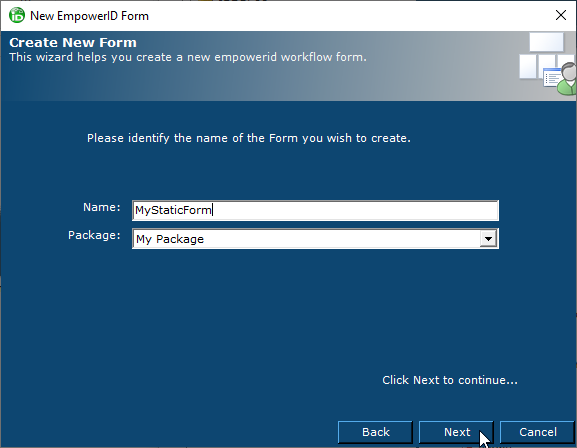
- Create a new form as above, but with a different Name, and click Next.
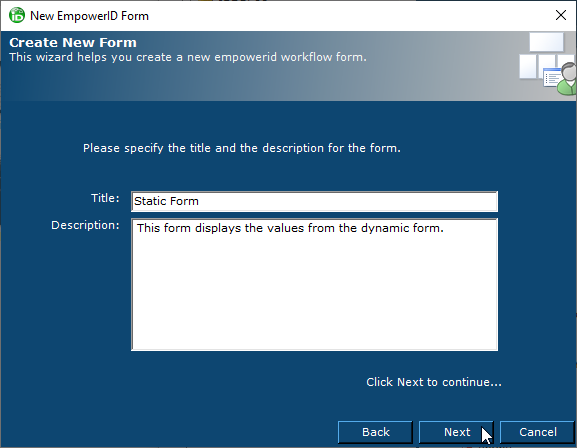
- Provide a Title and Description for the form and click Next.
- For the group name, select User Interface Forms and click Next.
A blank form appears. - On the tool ribbon, click Add Object, select String, and click Add.
- Double-click String1 and change the text to FirstName, then drag it onto the form. (Double-click FirstName on the form to add a space between words.)
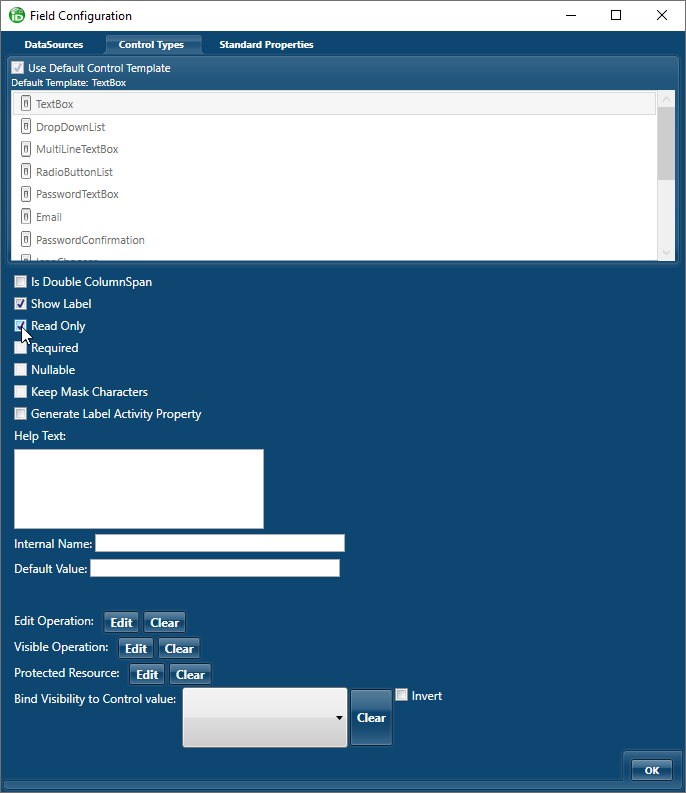
- Right-click First Name on the form and select Edit.
- In the Field Configuration window that appears, select Read Only and click OK.
- To add a second field to the form, on the tool ribbon, click Add Object and this time, select Email as the type of object to add.
- In the Components panel, double-click Email1 and change the text to EmailAddress, then drag it onto the form.
- Right-click and select Edit, then select Read Only and then OK.
Save, then Compile and Publish the form, this time restarting your Web Role Service and restarting Workflow Studio.
It is important to restart Workflow Studio at this point. Until you do so, the forms are not available for use in workflows.
To create a workflow with dynamic activities
In this workflow, we use a system code activity to add an instance of the dynamic form, and add a reference to the form so that the workflow has access to its properties.
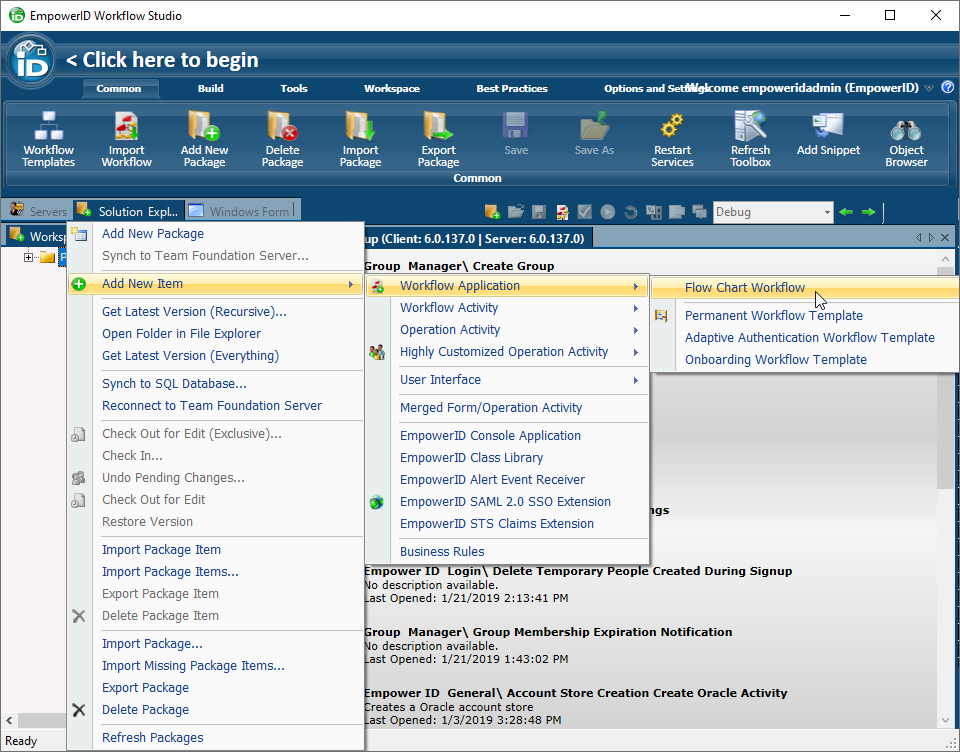
- In Workflow Studio, in the Solution Explorer, right-click the package in which to create the workflow, expand Add New Item, then Workflow Application, and select Flow Chart Workflow.
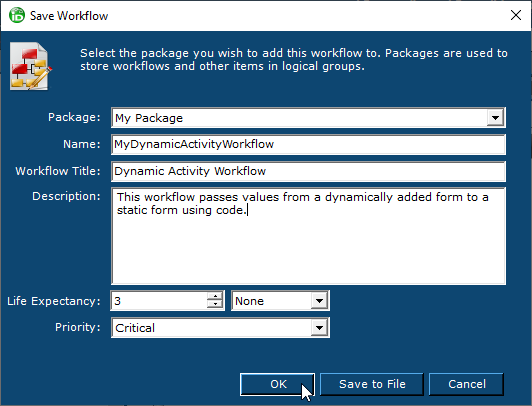
In the Save Workflow dialog that appears, the Package is populated with the one you selected; fill in the Name, Workflow Title, and Description fields as appropriate, and click OK.
A blank workflow with only FlowStart and FlowStop endpoints appears on the Workflow Designer tab.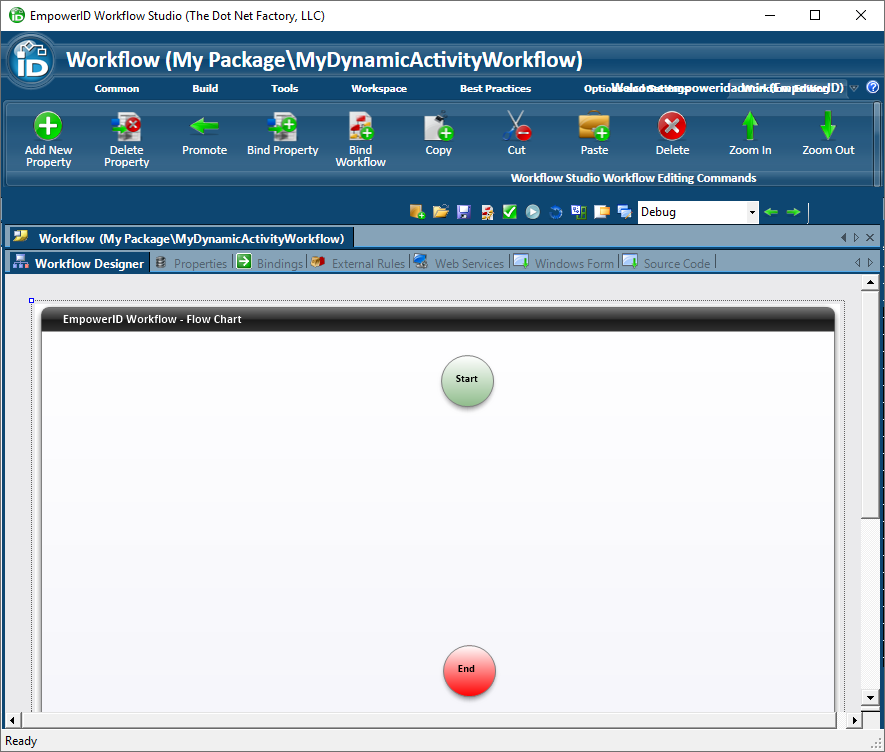
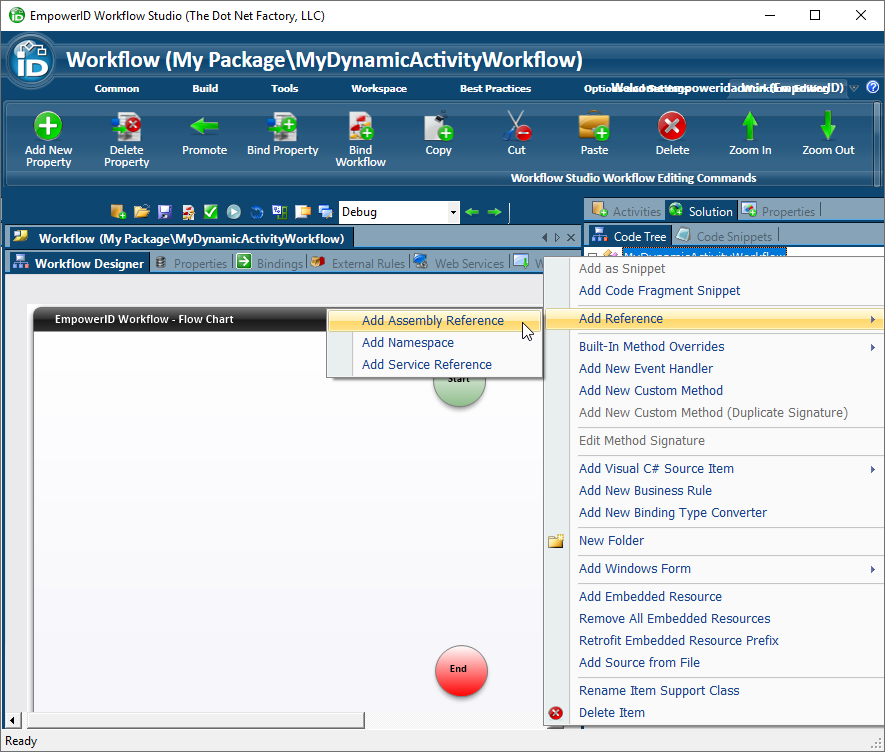
- In order to add an activity dynamically, we must add a reference to the activity's assembly, in this case, MyDynamicForm.
- In the right panel, click the Code Tree tab, right-click the References node, and select Add Reference, then Add Assembly Reference.
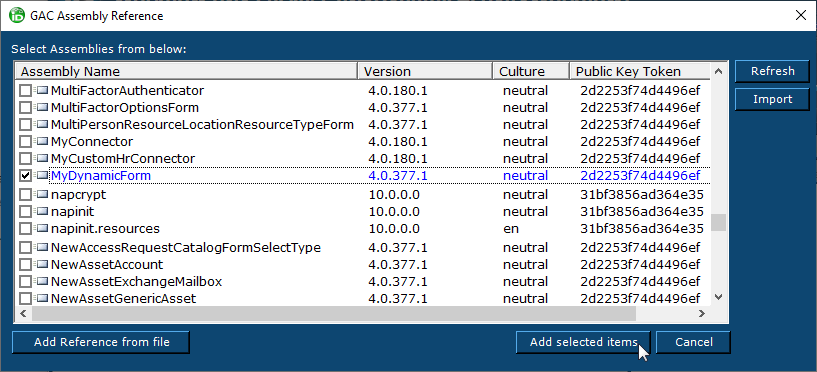
- In the GAC Assembly Reference dialog that appears, type the first letter of your dynamic form's name, then select it and click Add selected items.
- In the right panel, click the Code Tree tab, right-click the References node, and select Add Reference, then Add Assembly Reference.
- In order to add the code to call and act upon a dynamic activity, we must add a System Code Activity to the workflow.
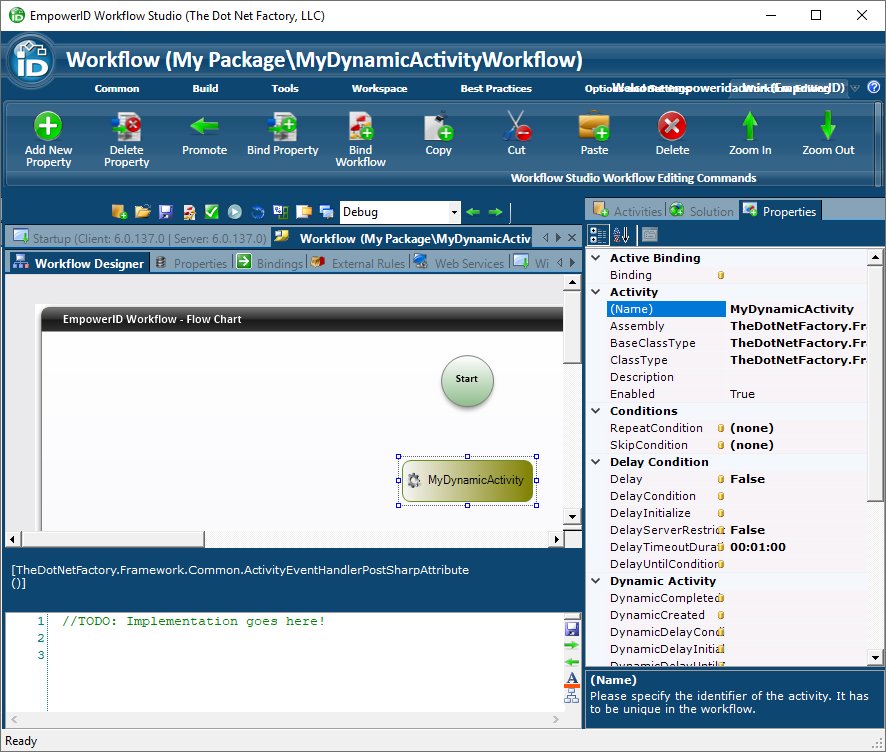
- In the right panel, click the Activities tab and search for SystemCodeActivity, then drag the activity onto the workflow.
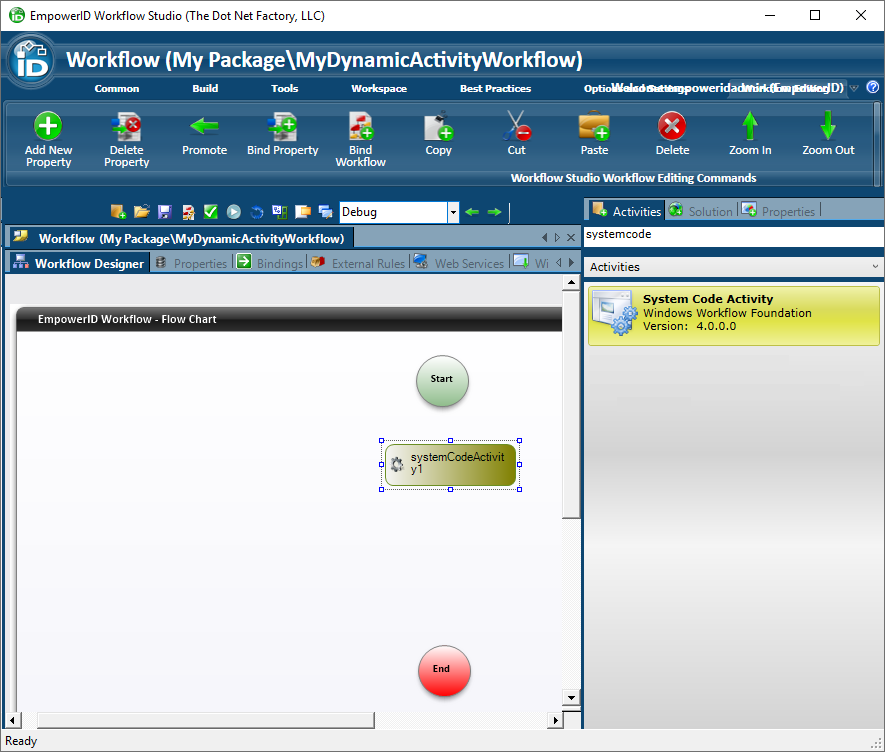
- In the Properties tab, under Activity, set the Name value, in this example MyDynamicActivity.
- Double-click MyDynamicActivity. This creates a handler where you can enter code to execute for the activity.
Add code like the following to the event handler, where MyDynamicFormActivity is the full name of the class we created.

// Add an instance of the dynamic form to this activity.
MyDynamicFormActivity dynamicForm = new MyDynamicFormActivity();
this.MyDynamicActivity.AddDynamicActivity(dynamicForm);
- In the right panel, click the Activities tab and search for SystemCodeActivity, then drag the activity onto the workflow.
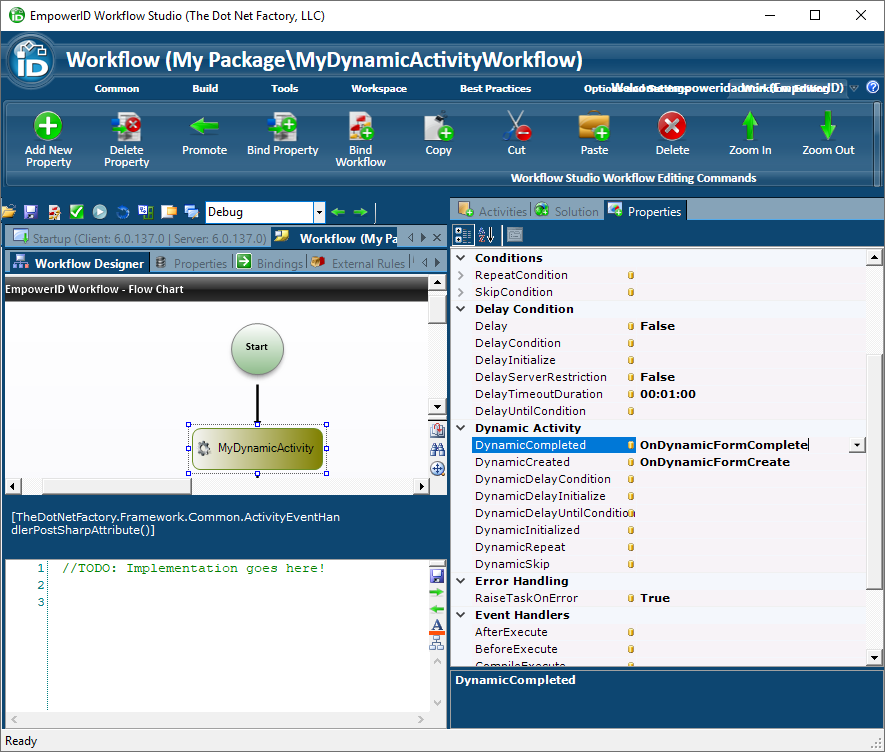
- In order to pass values into the dynamic activity on creation, we must create an event handler for the DynamicCreated event where we can add code.
With the System Code Activity selected (DynamicActivity in this example), in the Properties tab under Dynamic Activity, type a name for your event handler in the DynamicCreated property. In this example, we use OnDynamicFormCreate.
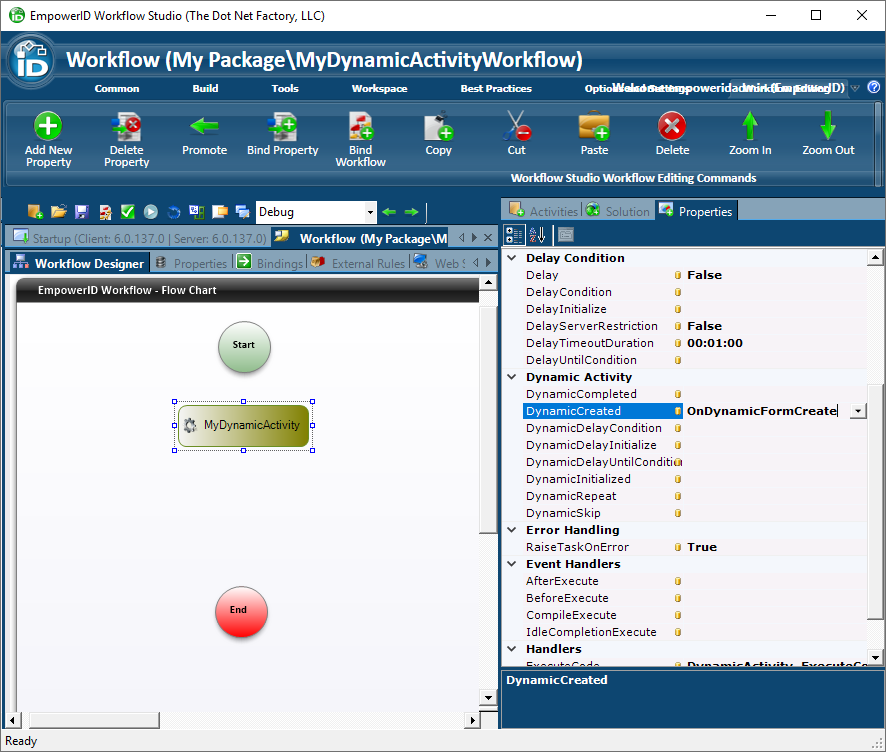
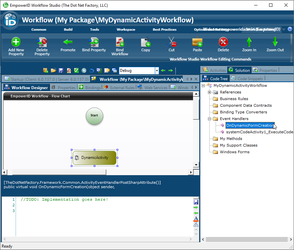
Press Enter and the code editor appears below the workflow.
If you want to open the code editor for the event handler later, click the Solution tab and expand the Event Handlers node, then double-click the event handler.
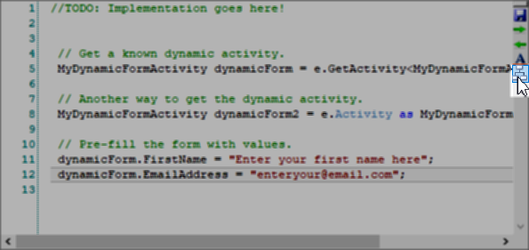
Add code like the following to pre-populate the form with values.
 // Get a known dynamic activity.
 MyDynamicFormActivity dynamicForm = e.GetActivity<MyDynamicFormActivity>();

 // Another way to get the dynamic activity.
 MyDynamicFormActivity dynamicForm2 = e.Activity as MyDynamicFormActivity;

 // Pre-fill the form with values.
 dynamicForm.FirstName = "Enter your first name here";
 dynamicForm.EmailAddress = "enteryour@email.com";
To close the code editor, click the Close Editor button in the toolbar to the right.
- To add the static form to the workflow, on the Activities tab, search for the static form you created, MyStaticFormActivity in this example, and drag the activity onto the workflow.
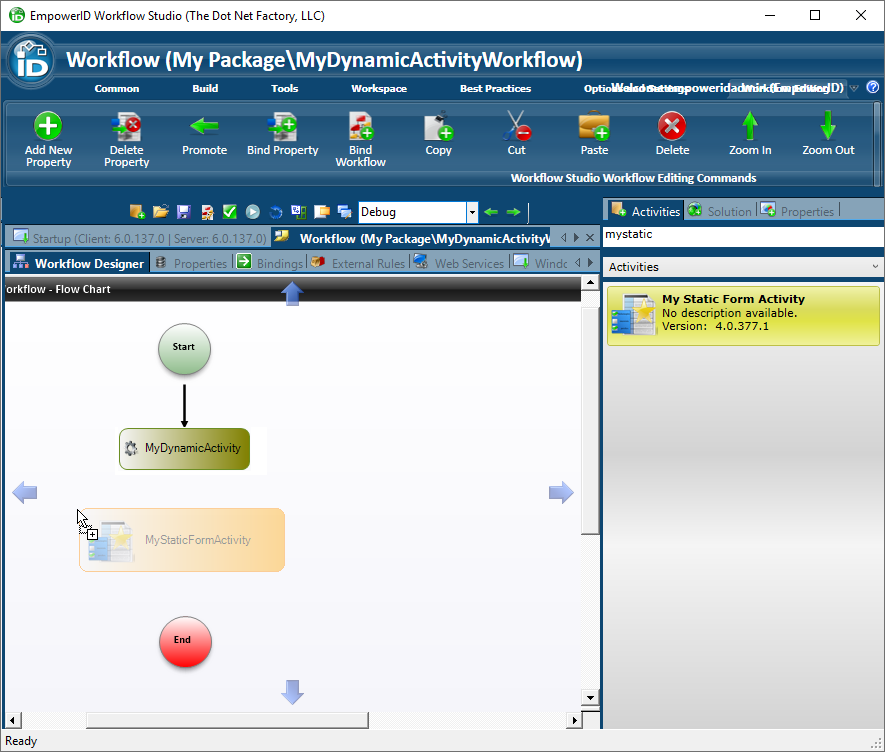
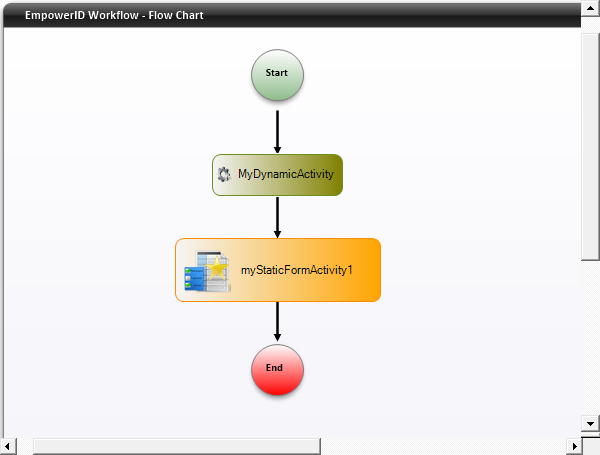
- In the Workflow Designer, drag a line from Start to the MyDynamicActivity system code activity, another from the MyDynamicActivity to the StaticFormActivity, and another from the StaticFormActivity to the End so that the workflow looks something like this.
- In order to pass values from the dynamic activity on completion, we must create an event handler for the DynamicCompleted event where we can add code.
- With the System Code Activity selected (DynamicActivity in this example), in the Properties tab under Dynamic Activity, type a name for your event handler in the DynamicCompleted property. In this example, we use OnDynamicFormComplete. Press Enter and the code editor for the handler appears below the workflow.
Add code like the following to pass the values from the dynamic form to the static form.
 // Get a known dynamic activity.
 MyDynamicFormActivity dynamicForm = e.GetActivity<MyDynamicFormActivity>();

 // Another way to get the dynamic activity.
 MyDynamicFormActivity dynamicForm2 = e.Activity as MyDynamicFormActivity;

 // Assign values from the dynamic form to the static form.
 this.myStaticFormActivity1.FirstName =  dynamicForm.FirstName;
 this.myStaticFormActivity1.EmailAddress = dynamicForm.EmailAddress;
- With the System Code Activity selected (DynamicActivity in this example), in the Properties tab under Dynamic Activity, type a name for your event handler in the DynamicCompleted property. In this example, we use OnDynamicFormComplete. Press Enter and the code editor for the handler appears below the workflow.
To compile, publish, and create the request workflow
Users do not have direct access to workflows. Instead, Workflow Studio creates a request workflow that they can interact with that runs the actual workflow.
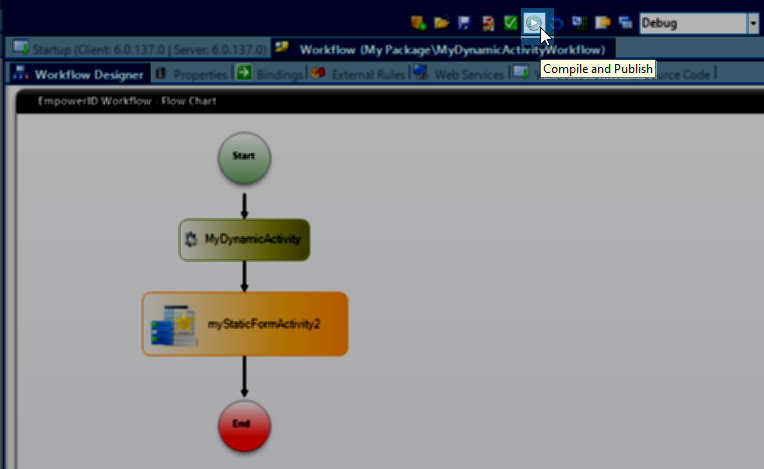
- In the toolbar above the document space, click the Save icon, then click the Compile and Publish icon.
- In the Publish Workflow wizard that appears, click Next, select the Host, then click Next again.
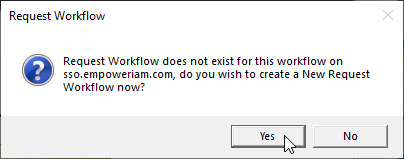
- Once compilation is complete, a Request Workflow message box appears. Click Yes to create a new request workflow.
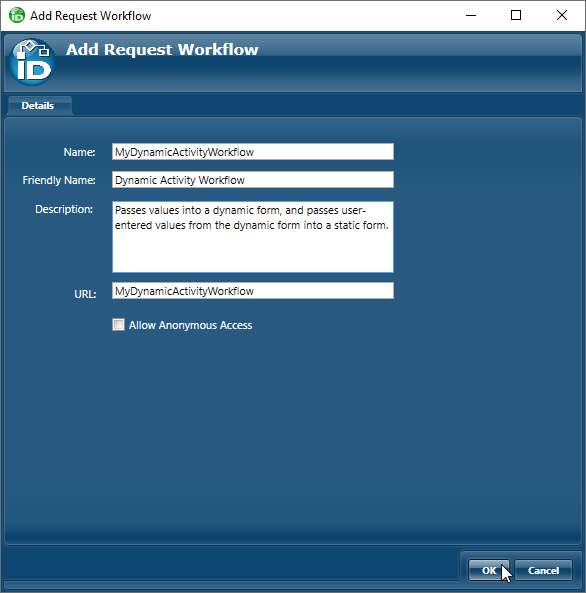
- In the Add Request Workflow dialog that appears, you can change the Name, Friendly Name, Description, and URL values, and specify whether to Allow Anonymous Access. Click OK to create the request workflow. Make note of the URL value.
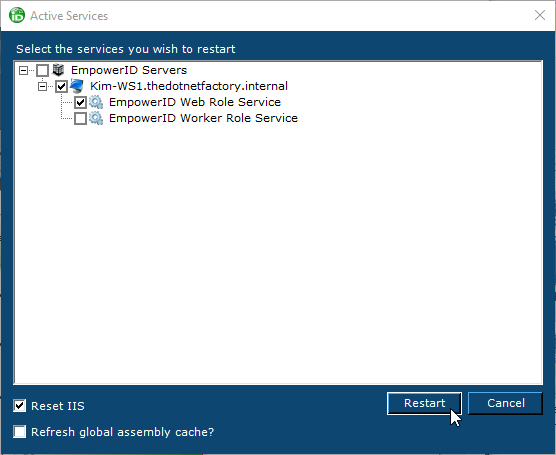
- In the Restart Service message box that appears, click Yes.
- In the Active Services dialog that appears, expand your server and select the EmpowerID Web Role Service, and at the bottom, select the Reset IIS checkbox and click Restart.
When it has finished, the message area along the bottom of the window displays "Ready."
To run the published workflow
- Log into your EmpowerID web application.
- Change the URL to one like the following, where the URL value from the request workflow is the last part:
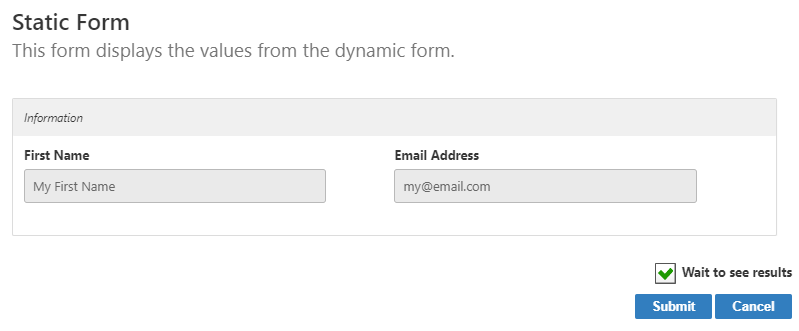
https://sso.empoweriam.com/ui#w#/MyDynamicActivityWorkflow - The Dynamic Form form activity appears, pre-populated with values.
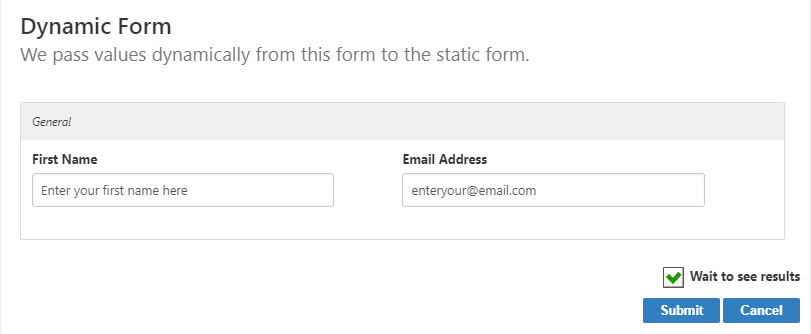
- Enter new values and click Submit. The static form appears, populated with the values passed from the dynamic form.