Custom Directories
EmpowerID provides connectors for a wide range of user directories and resource systems. As an administrator, you can use these connectors to quickly connect EmpowerID to your organization's identity-aware systems and applications. When you do so, you create an account store for that application in the EmpowerID Identity Warehouse and use that account store to configure how you want EmpowerID to manage the identity information in that system.
The EmpowerID Universal Connector allows organizations to use their own internal DB resources to easily create both simple and advanced connectors for their directories and applications. In this topic, we demonstrate how to perform the administrative tasks necessary for using the Universal Connector to connect to an external system. These tasks include the following:
- Creating the Universal Connector database
- Setting up the Universal Connector account store
To create the Universal Connector database, you will need the following SQL scripts:
SchemaGeneration.sql - This script generates the tables, stored procedures and other database objects used by EmpowerID to store and maintain the identity information imported into the intermediary database from an external data store. You can download the script (UCv2SchemaGenerationScript) here.
If you are already using an older version of the Universal Connector (versions prior to EmpowerID 2016), instead of running the SchemaGeneration.sql, you need to upgrade the schema for the existing Universal Connector database. To do so, download the upgrade script (UCv1tov2upgradescript) here and execute it against the database.
DataGeneration.sql - This script generates data that is used by EmpowerID to explain the type of changes that have occurred to any of the business objects in the Universal Connector database via an EmpowerID workflow. You can download this script here.
The DataGeneration script is only necessary if you are using the Changelog to batch process changes. When possible, EmpowerID recommends real-time processing over batch processing.
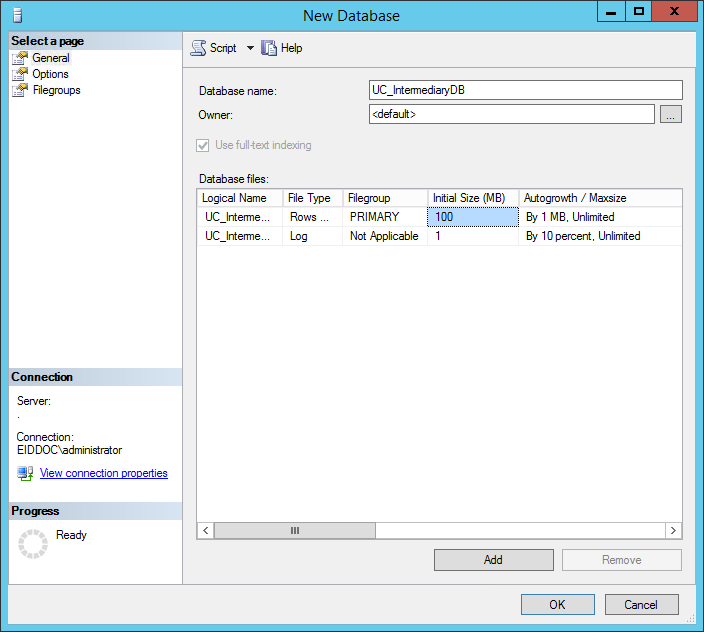
To create the Universal Connector database
- From any EmpowerID server with SQL Management tools installed, open Microsoft SQL Server Management Studio (SSMS).
- From SSMS, right-click Databases and select New Database... from the context menu.
- In the New Database window that opens, type a name for the database in the Database name field, set the Initial Size to 100 MB and then click OK.
- From the new Universal Connector database, open the SchemaGeneration.sql file you received from EmpowerID and execute the script.
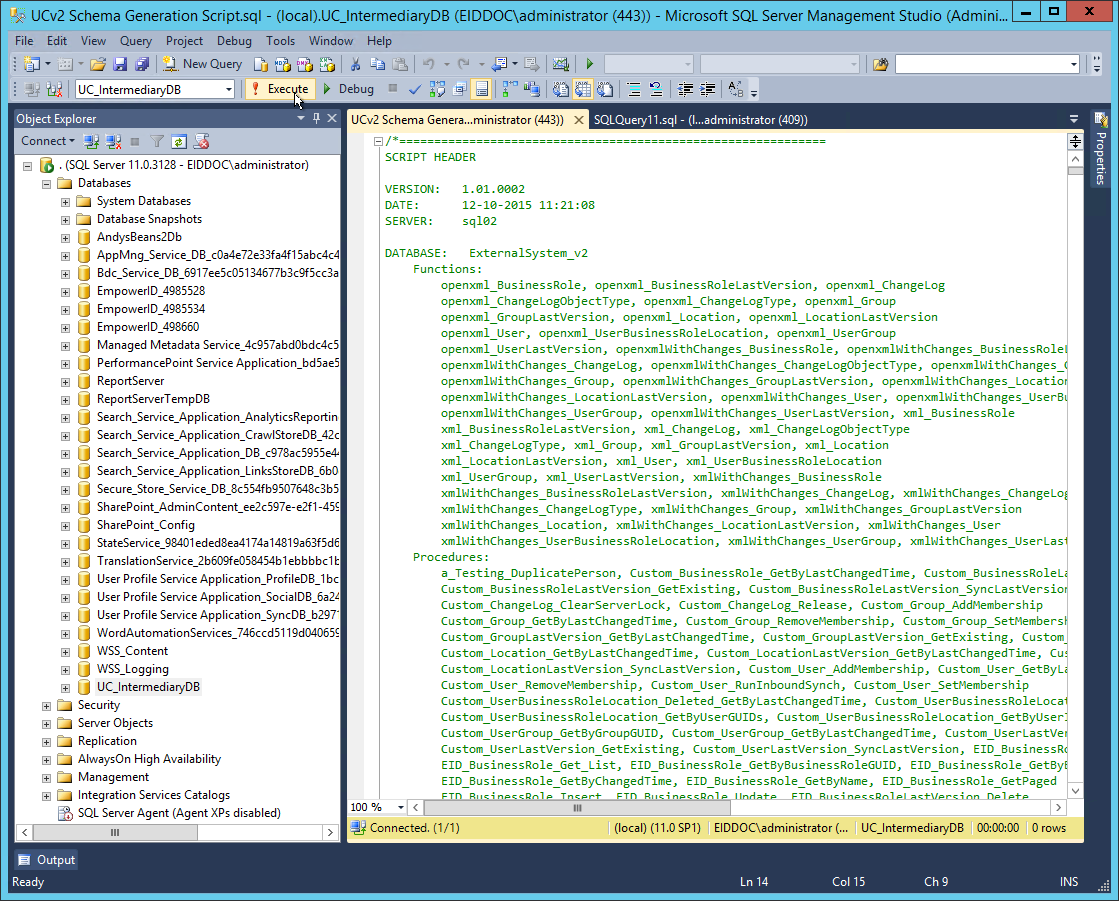
This generates the tables EmpowerID uses to maintain the identity information you import into EmpowerID as well as a number of stored procedures for querying and manipulating the data in those tables.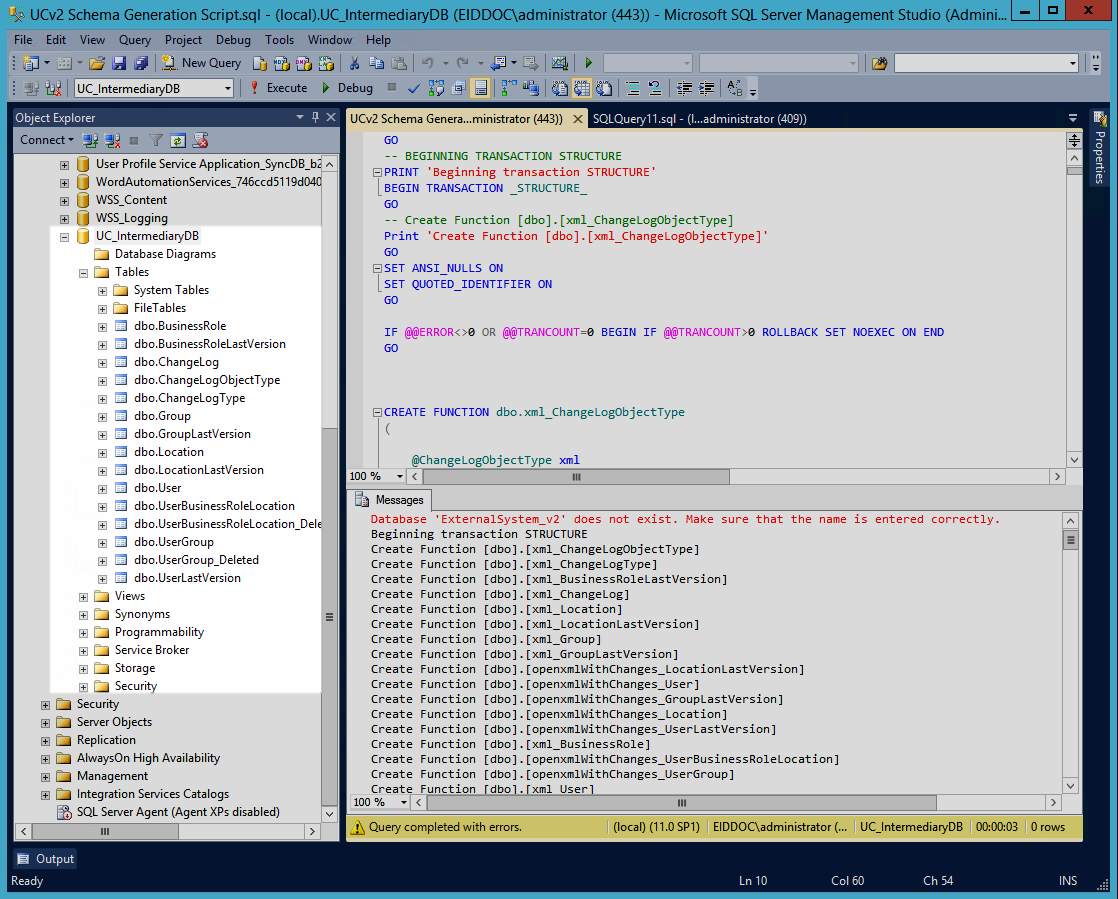
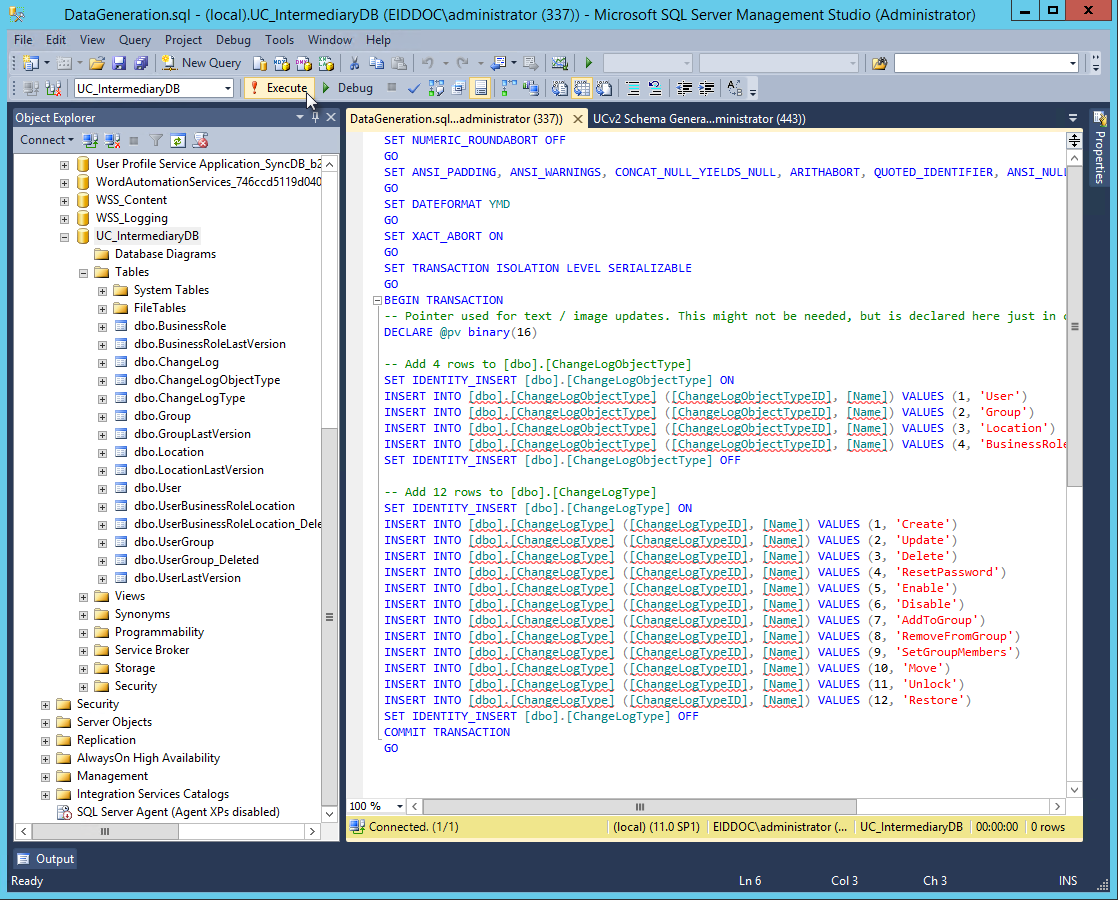
- Next, if you plan to use the ChangeLog for batch processing instead of real-time processing of the changes to your data, open the DataGeneration.sql script you received from EmpowerID and execute the script to populate the ChangeLogObjectType and ChangeLogObjectType tables of the Universal Connector database. These tables work in conjunction with the ChangeLog table to explain the types of changes that have occurred to objects in EmpowerID, when the Universal Connector is operating in batch mode.
To set up the Universal Connector account store
- Log in to the EmpowerID Management Console as an administrator.
- Click the application icon and select Configuration Manager from the menu.
In Configuration Manager, select the Account Stores node and then click the Add New button above the grid.
Unable to render {include} The included page could not be found.- In the Add New Security Boundary window that opens, select Universal Connector from the Security Boundary drop-down and then click OK.
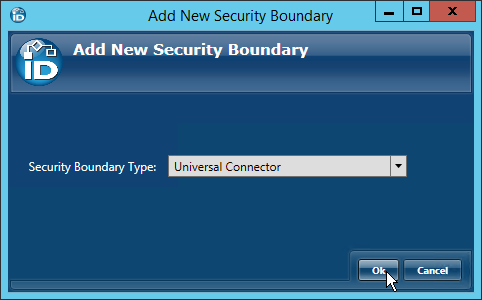
- In the Security Boundary Details screen that appears, type an appropriate Name and Display Name for the Universal Connector account store and then click Save.

- Back in the Account Stores grid, right-click the Universal Connector account store you just created and select Edit from the context menu.
- In the General panel of the Universal Connector Details screen that appears, click the Edit
 button beside SQL Database.
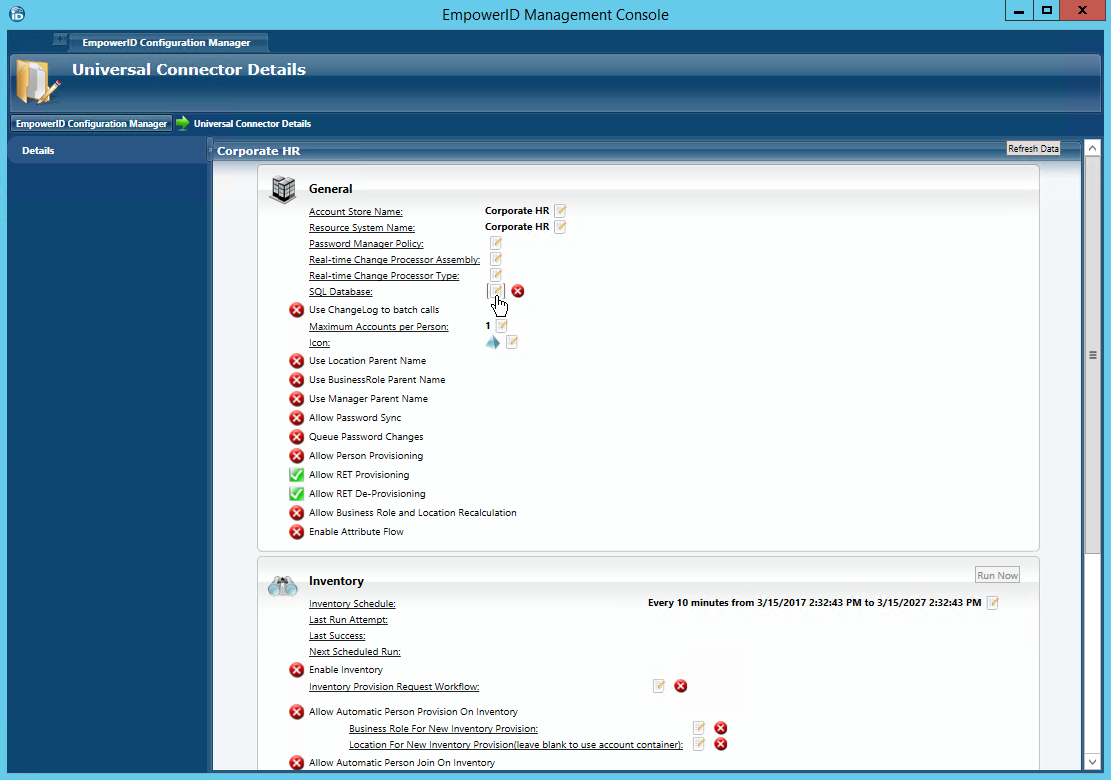
- In the Data Link Properties dialog that appears, do the following:
- On the Provider tab, select Microsoft OLE DB Provider for SQL Server.
- On the Connection tab, select your server, enter the information to log on to the server, and then select the Universal Connector database you created earlier.
- Click OK to close the Data Link Properties dialog.
- Back in the General pane of the Universal Connector Details screen, enable the following options as needed:
- Use ChangeLog to batch calls - Enable this option if you want EmpowerID to batch send (as opposed to real-time sending) changes that have occurred to your inventoried objects as the result of workflows or provisioning policies being executed against them in EmpowerID. When this option is enabled, EmpowerID writes these changes to the ChangeLog table of the Universal Connector database.
- Use Location Parent Name - Enable this option when using the name of a Location's parent to identify that parent. If disabled, the ID of the parent location is used.
- Use BusinessRole Parent Name - Enable this option when using the name of a Business Role's parent to identify that parent. If disabled, the ID of the parent Business Role is used.
- Use Manager Parent Name - Enable this option when using the name of user's manager to identify that manager. If disable, the ID of the user's manager is used.
- Allow Password Sync - Enables or disables the synchronization of password changes to user accounts in the account store based on password changes for the owning person object or another account owned by the person. This setting does not prevent password changes by users running the reset user account password workflows.
- Allow Person Provisioning - If enabled, EmpowerID provisions a Person object for each user discovered in the account store.
- Allow RET Provisioning - If enabled, EmpowerID applies any Resource Entitlements policies to each person provisioned from an inventoried AWS account if those people are placed in a Business Role and Location that is targeted by a Resource Entitlement Policy.
- Allow RET De-Provisioning - Allows or disallows the Resource Entitlement Inbox process to auto de-provision accounts for this domain for users who still have RET policy-assigned user accounts, but no longer receive a policy that grants them a user account in the domain. De-provisioning only occurs if the de-provision action on the Resource Entitlement policy is set to De-Provision.
- Allow Create Account On Membership Request — Select to allow users without accounts to request group membership and automatically have an account created.
- Enable Attribute Flow - Allows or disallows attribute changes to flow between EmpowerID and the Universal Connector account store
From the Inventory pane of the Account Store Details screen, do the following:
EmpowerID recommends using the Account Inbox to provision Person objects from user accounts. The below information is included to make you aware of the option to provision during inventory.
Toggle Allow Automatic Person Provision On Inventory to reflect your policy for the account store (red sphere for disable and green checkbox for enable). When enabled (and Allow Person Provisioning is enabled for the account store), EmpowerID will provision Person objects for all new accounts discovered during inventory in real-time, if they meet the conditions of your Provision rules.
- Toggle Allow Automatic Person Join On Inventory to reflect your policy for the account store (red sphere for disable and green checkbox for enable). When enabled (and Allow Person Provisioning is enabled for the account store), EmpowerID will attempt to join any new accounts discovered during inventory — if it finds one that matches the conditions of the Join rules for the account store. If this setting is not enabled, EmpowerID will not join secondary accounts to an EmpowerID Person, but will instead provision new EmpowerID Persons for each of those additional accounts.
- Enable inventory by toggling the Enable Inventory button from a red sphere to a green check box. Please note that the Universal Connector database must be populated with the business objects in your application before inventory. In addition, if you want to map the locations in your external system to EmpowerID logical locations to aid in delegations, you should map the locations before you inventory the external system. For general information on location mapping, see Mapping Locations.