Adding Escalations to Workflows
In a workflow application, Operation and Form activities can be configured with escalation rules to take specific actions when certain conditions are not met within a desired time frame.
This topic demonstrates how to add an escalation to a workflow activity to re-notify a workflow task approver if that approver has not responded to the task within 12 hours.
To add escalations to workflows
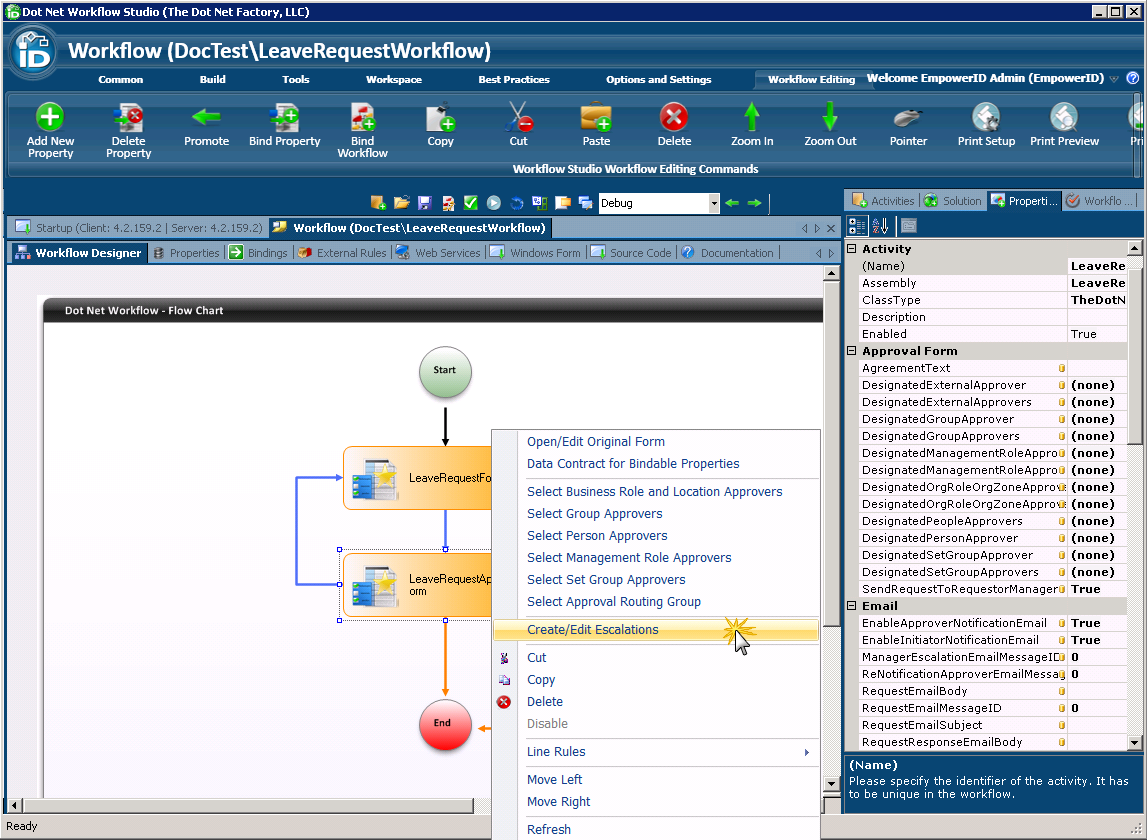
- With a workflow open in the Workflow Designer, right-click on a Form or Operation activity and select Create/Edit Escalations from the activity's context menu.
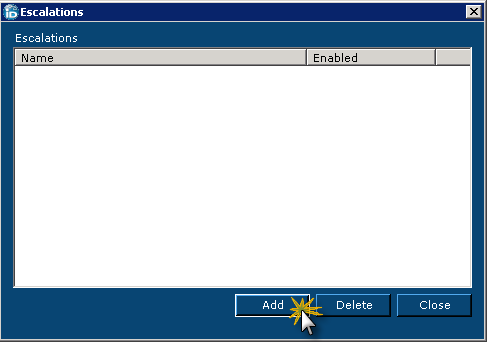
- In the Escalations window that appears, click the Add button.
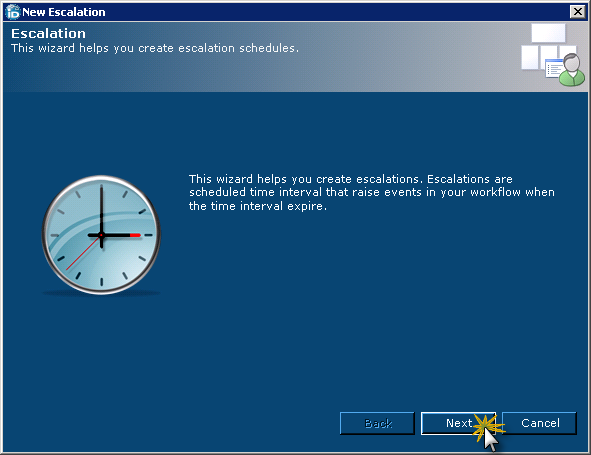
- In the New Escalations wizard that appears, click the Next button.
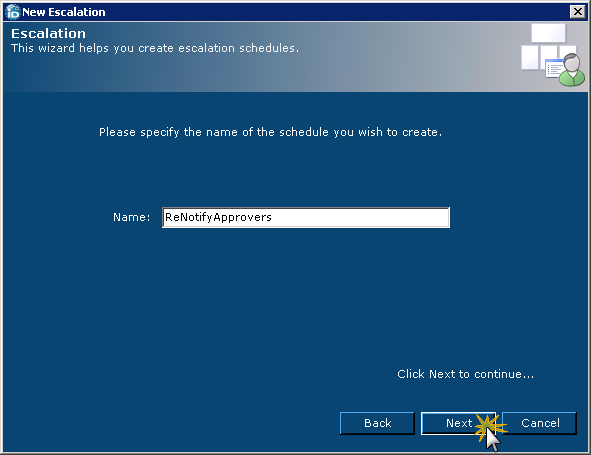
- Type a name for the escalation in the Name text field and click Next to continue.
- Click the Schedule(...) button to open the Set Schedule Interval window. The Set Schedule Interval window allows you to enter parameters for the escalation, directing how often and at what frequency the escalation should run. In our example, the escalation will run once every 12 hours for a total of two times. To set these values, do the following:
- Select a start date and end date for the escalation in the Task Start and Task End calendar objects. Select the Task Start and Task End dates from the Task Start and Task End calendars. By default, the Task End calendar object gets set to a date that is 10 years later than the date entered into the Task Start calendar. However, you can change the Task End date as desired.
- Select Hour Interval.
- Type a value, such as 2, in the Number of Times to Run field.
- Type a value, such as 12, in the Interval field.
- Click OK to close the Set Schedule Interval window.
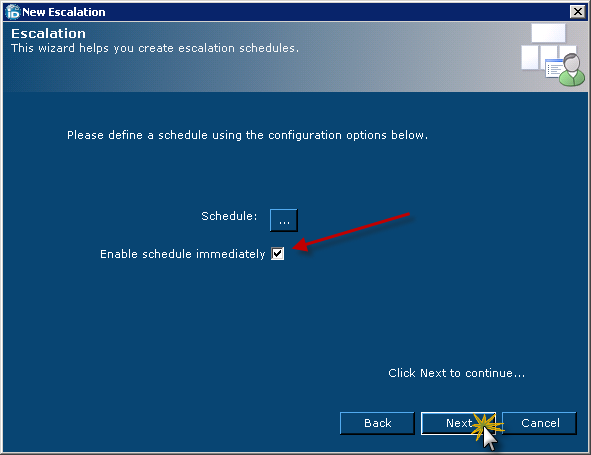
- Select Enable schedule immediately and then click Next to continue.
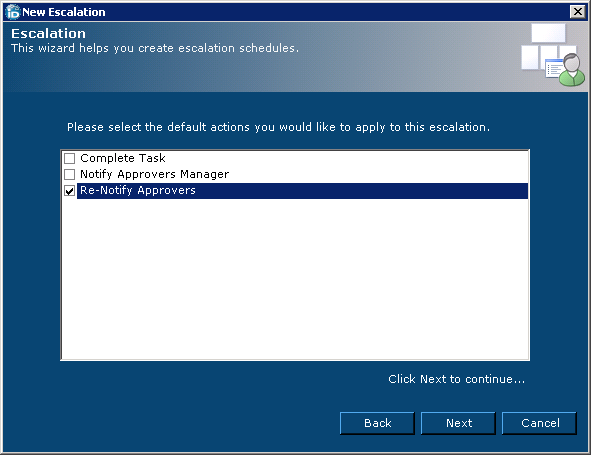
- Select Re-Notify Approvers to hard-code the escalation for that task and then click Next to continue.
You should see the new escalation in the Escalations pane of the wizard.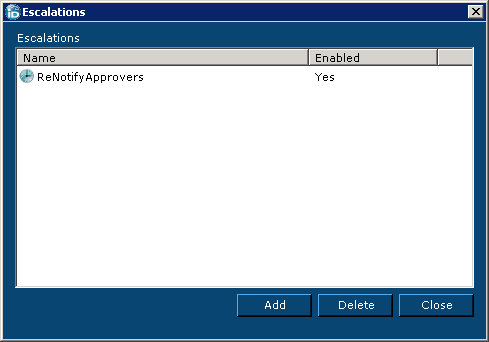
Click Close to exit the wizard.
Additionally, when creating an escalation, you can choose to ignore the default actions offered by the wizard, simply bypassing them and completing the wizard. This will add the escalation to the activity and the EmpowerID Identity Warehouse as a Business Process Escalation object controlled by the Escalations job. However, when doing this, you must specify in code what it is that you want to occur; otherwise, the escalation will have no bearing in the workflow Each Form and Operation activity has an event handler dedicated for this, the EscalationExecuteCode event handler, which is accessible from the Properties grid for these type of activities. You can have multiple custom escalations on any given Form or Operation activity, with each being handled through this one event handler. Creating this escalation event handler is a matter of clicking the activity with the escalation in the Workflow Designer and entering a name for the event handling method in the Properties grid. Doing so opens the C# Editor stubbed with the event handling method.
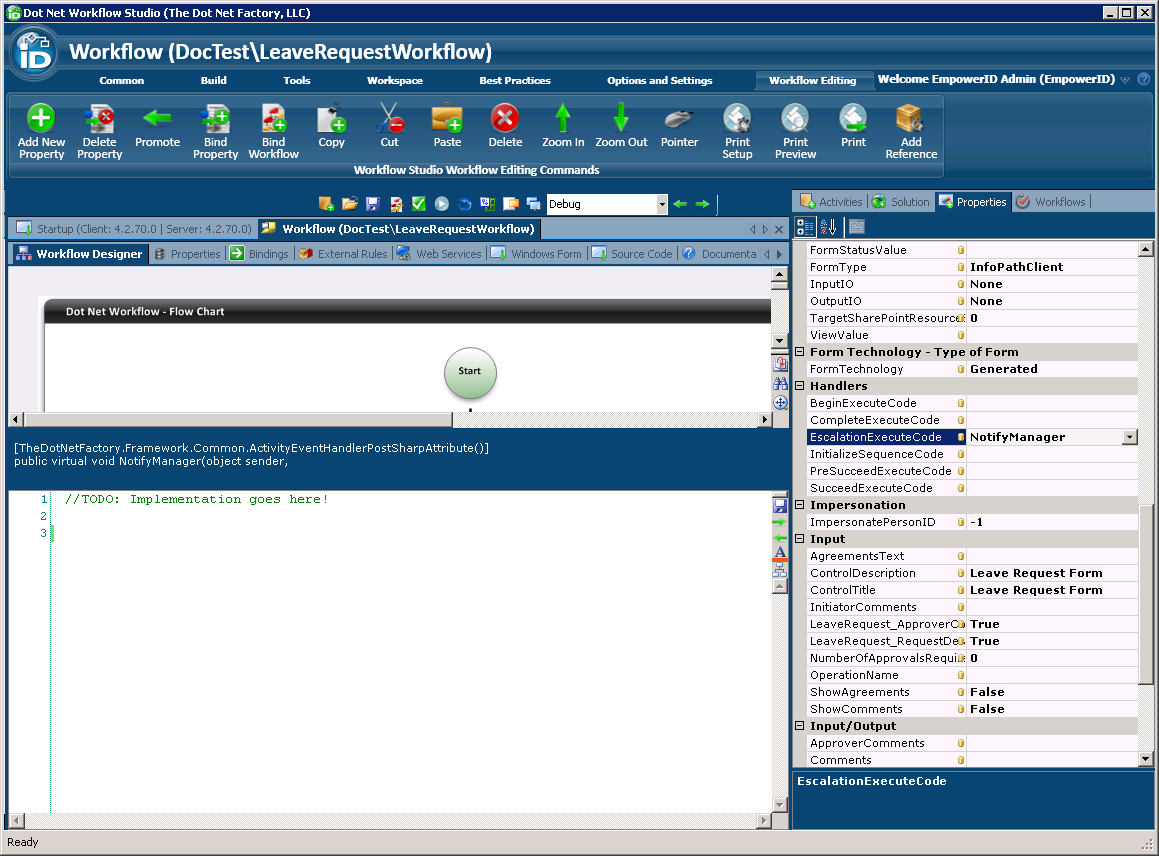
The EscalationEventArgs parameters expose several properties and methods relevant to escalation handling. You can use these properties and methods to direct what should occur when an escalation is raised. For example, in the event an approver does not respond within a specific amount of time you could call the ChangePersonOnBusinessProcessUserList() method to change the approver to a secondary person. To do so, you pass the name of the existing approver followed by the name of the new approver into the method, as demonstrated by the below code://Replace Chris Emerick with Vince Lopresti e.ControlOption.ChangePersonOnBusinessProcessUserList("chris.emerick", "vince.lopresti");