Managing Cloud Instances
EmpowerID provides an administrative dashboard that you can use to manage the state of any machine instances that are hosted by a supported cloud provider with whom EmpowerID is connected, such as Amazon Web Services (AWS) or Microsoft Azure.
This topic demonstrates how to manage the state of cloud instances hosted by AWS.
Prerequisites
You must have an AWS account and have connected EmpowerID to AWS.
To manage the state of instances in EmpowerID, a user needs an Access Level assignment to the Computer resource type with the following operations allowed:
- Start Instance
- Stop Instance
- Reboot Instance
By default, these operations are allowed on the following Access Levels:
- All Access (EmpowerID Admin)
- Access Manager
- Administrator
- Local Computer Administrator
To start or stop an instance in EmpowerID
- In the Navigation Sidebar of the EmpowerID Web interface, expand Dashboards and click Identity Admin.
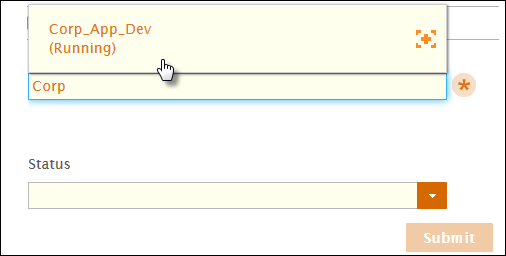
- From the Identity Admin page, locate the Start or Stop a Computer widget.

- Type the name of the instance whose state you want to change and click the tile for that instance to select it.
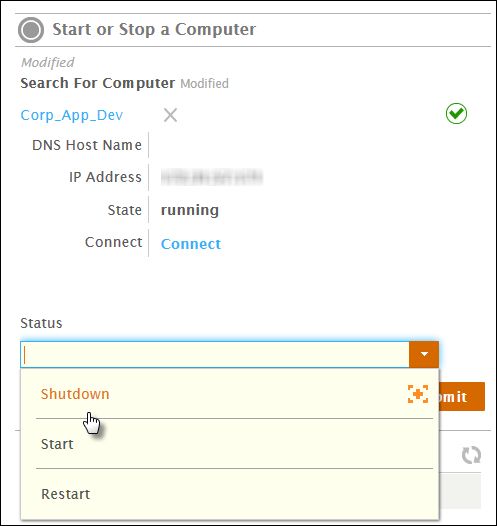
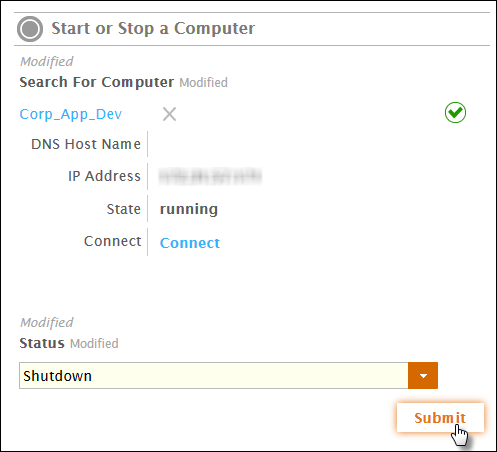
- Select the desired state from the Status drop-down.
- Click Submit.
- Select or clear Wait to see results depending on whether you want to see if the instance is created.
- Click Submit.
To verify the instance state
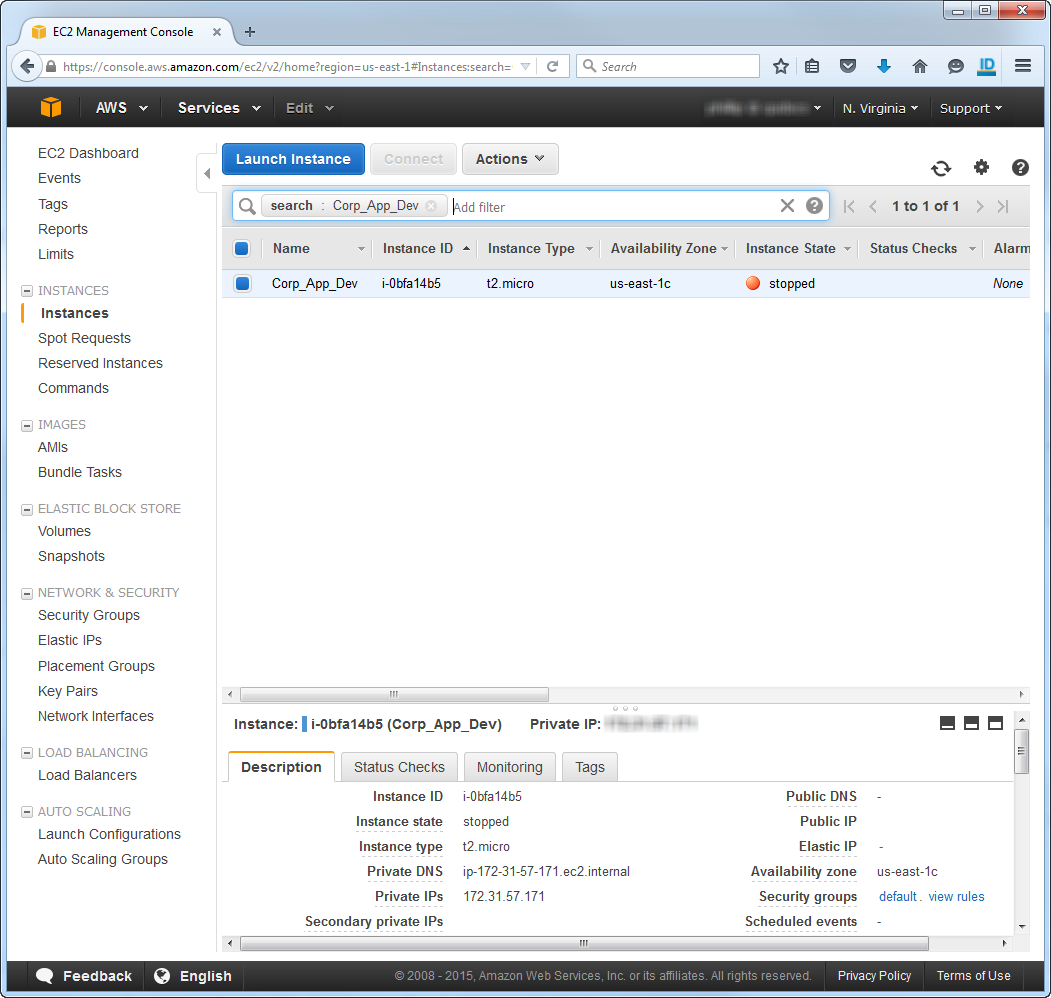
- From your Web browser log into your AWS console as an administrator.
- From the AWS dashboard, navigate to the EC2 Dashboard and click Instances in the navigation sidebar. The instance state reflects the change you made in EmpowerID.
EmpowerID keeps a log of all AWS actions performed in EmpowerID, including what was done, when it was done and who did it. To view these logs, in the Navigation Sidebar, expand System Logs and click Audit Log. Once in Change Manager, search for AWS to filter the changes displayed.