---title: Managing Local Windows Users---
- Home
- User Provisioning
- Connecting to Directory Systems
- Local Windows Servers
- Current: Managing Local Windows Users
Managing Local Windows Users
If you have Windows servers with local users and groups, you can add those servers to EmpowerID as managed account stores. This allows you to inventory local users and groups and manage those objects from EmpowerID, providing you with automated role-based access control, delegated permissions administration, and provisioning policy capabilities with a full audit trail of any actions involving those objects. This article demonstrates how to manage local Windows users in EmpowerID.
To manage local Windows users
Administrative Procedures:
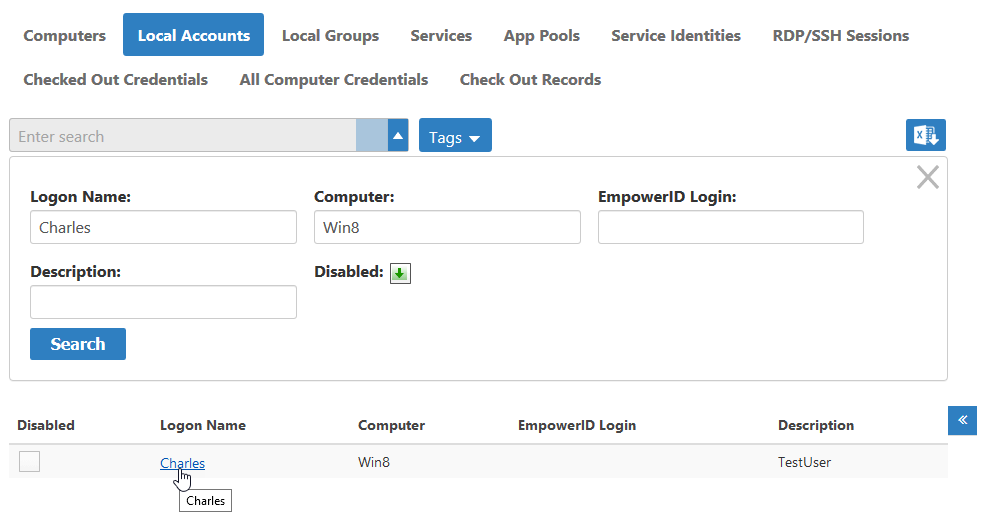
- From the Navigation Sidebar of the EmpowerID Web interface, navigate to Find Computer page by expanding Resources and clicking expand Resources and click Computers.
- From the Find Computer page, click the Local UsersUsers tab and then click the Advanced Search drop-down button shown below to open advanced search options. This allows you to limit the local groups appearing in the grid to those on a specific local Windows server that are managing.
- Type Enter the name of your the local Windows server in the Computer field and press ENTER. You should see all users on the server appear in the grid.Click the Advanced Search drop-down to close the advanced search options and then search for the user account on the local Windows server , the logon name for the user you want to manage in the Logon Name field and press ENTER.
- From the grid, click the Click the Logon Name link for the user account.
From
This opens the View One page, expand the Actions accordion. You should see all Actions that can be performed against the user account.Click the tile for the action that represents what you want to do against the accountfor the user account. This page allows you to view and manage information about the user account as needed.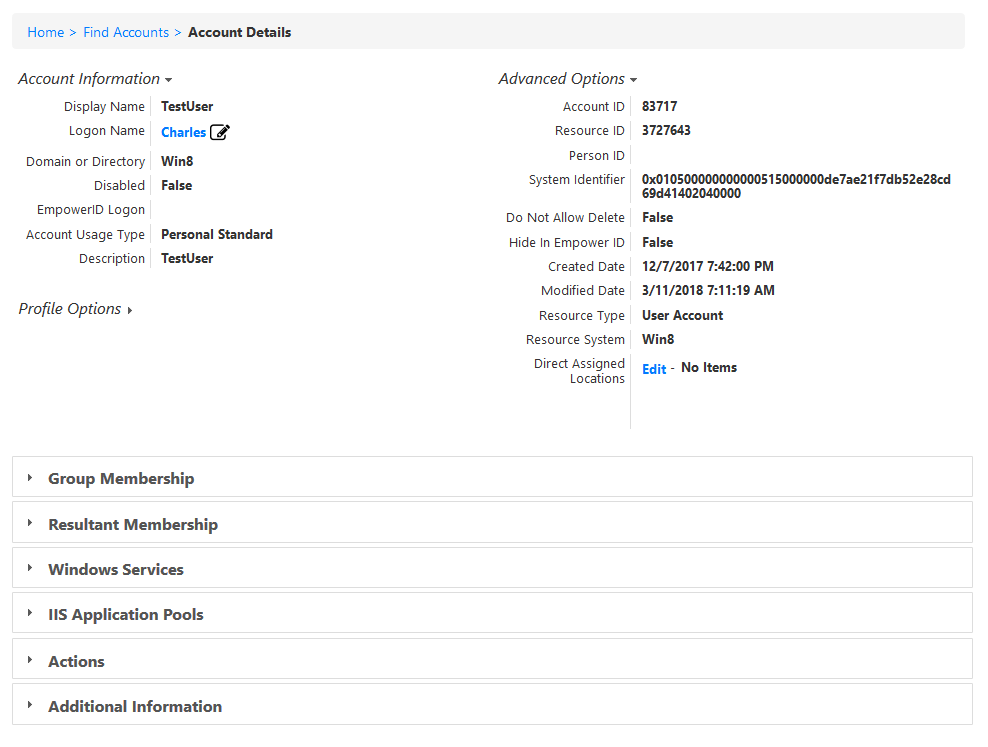
- To view a list of actions that you can perform against the account, expand the Actions accordion.
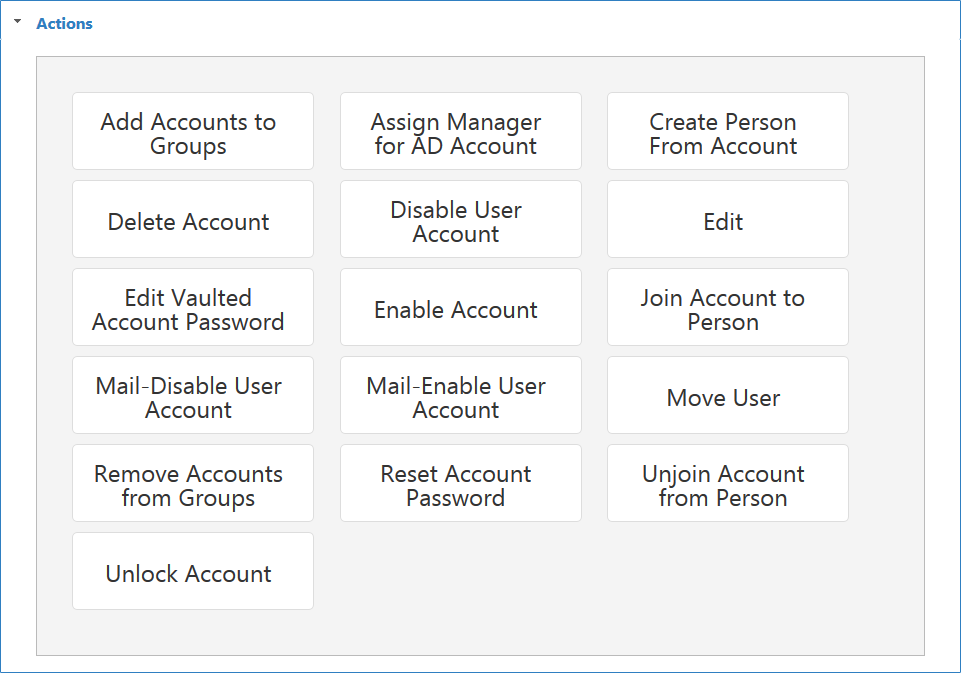
To perform an action, click the tile or button for that action. For example, if you want to edit one or more attributes, you
wouldclick the Edit
tilebutton; if you
wantedwant to create an EmpowerID Person from the account, you
wouldclick the Create Person From Account
tilebutton; if you
wantedwant to delete the account you would click the Delete Account
tilebutton, and so on.
Info Each Action corresponds to a specific EmpowerID workflow. The number of actions available in the Actions accordion will vary depending on the Access Levels of the person who is currently logged in. To see a particular Action, the person must have the Initiator Access Level for the workflow that corresponds to the Action.