...
...
...
Connecting to Ultipro
...
- Home
- Installation and Configuration
- Connecting to Directory Systems
- Current: Connecting to Ultipro
| Insert excerpt | ||||||
|---|---|---|---|---|---|---|
|
The EmpowerID UltiPro connector allows organizations to bring the user data in their UltiPro system to EmpowerID, where it can be managed and synchronized with data in any connected back-end user directories. This topic demonstrates how to create the connector in EmpowerID.
| Info | ||
|---|---|---|
|
In order to connect EmpowerID to UltiPro, you must have an UltiPro account that is configured to interface with external systems. This means that you must have the following information (provided by UltiPro):
These values are used to authenticate EmpowerID to UltiPro. In addition, you must create a report as a Web service that specifies the fields you want to expose and then provide EmpowerID with the path to that service. Additionally, you will need to create a report and expose it as a service. The report needs to have the below fields. Fields designated as required indicate that a value must be provided.
|
|
|
|
| Insert excerpt | ||||||
|---|---|---|---|---|---|---|
|
To connect EmpowerID to
UltiProUltipro
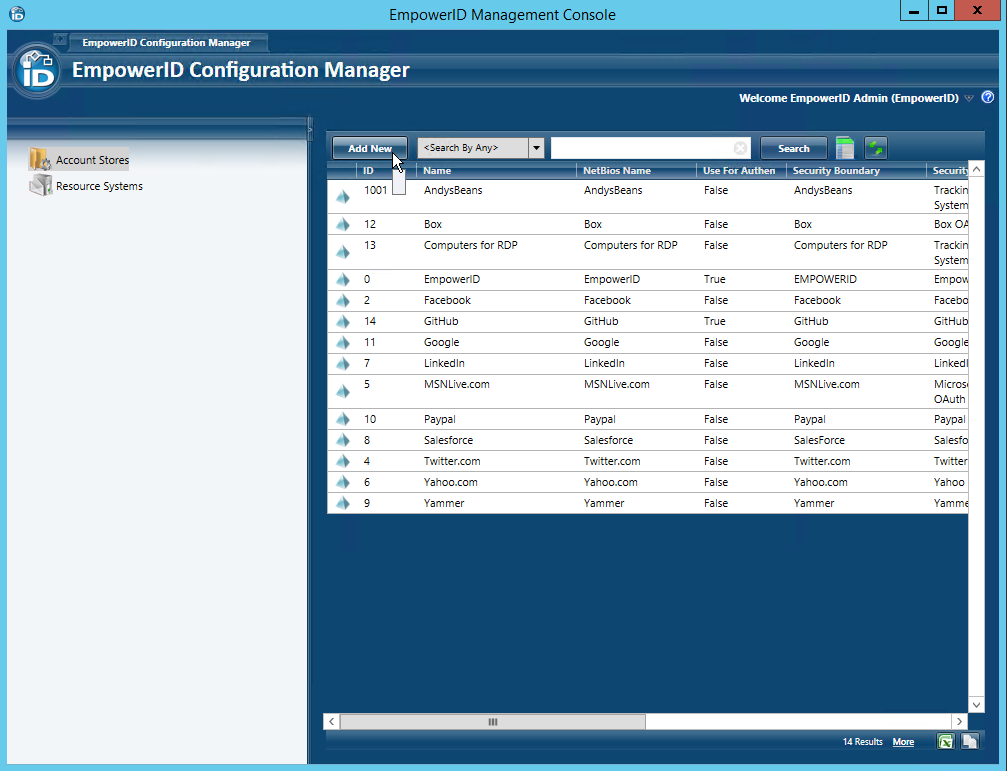
- Log in to the EmpowerID Management Console as an administrator.
- Click the application icon and select Configuration Manager from the menu.
- In Configuration Manager,
- select the Account Stores node and then click
- the Add New button above the grid.
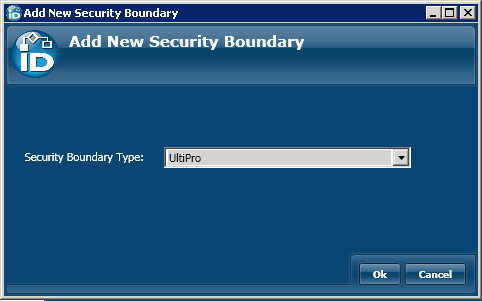
- In the Add New Security Boundary window that opens, select the UltiPro Security Boundary type from the drop-down list and then click OK.
- In the Account Store Details window that appears, do the following:
- Type a name for the connector in the Name field.
- Type the Client Access Key in the Client Key field.
- Type the User Access Key in the User Key field.
- Type the path to the report in the ReportPath field.
- Click Save.
- Enter your UltiPro credentials in the UltiPro Credentials window and then click OK to close the window.
- Click the Resource Systems node and locate the UltiPro resource system that EmpowerID created for the account store.
- Double-click the record or right-click it and select Edit from the context menu.
- This opens the Account Store Details for the Ultipro account store. The use of this screen is discussed in the next section.
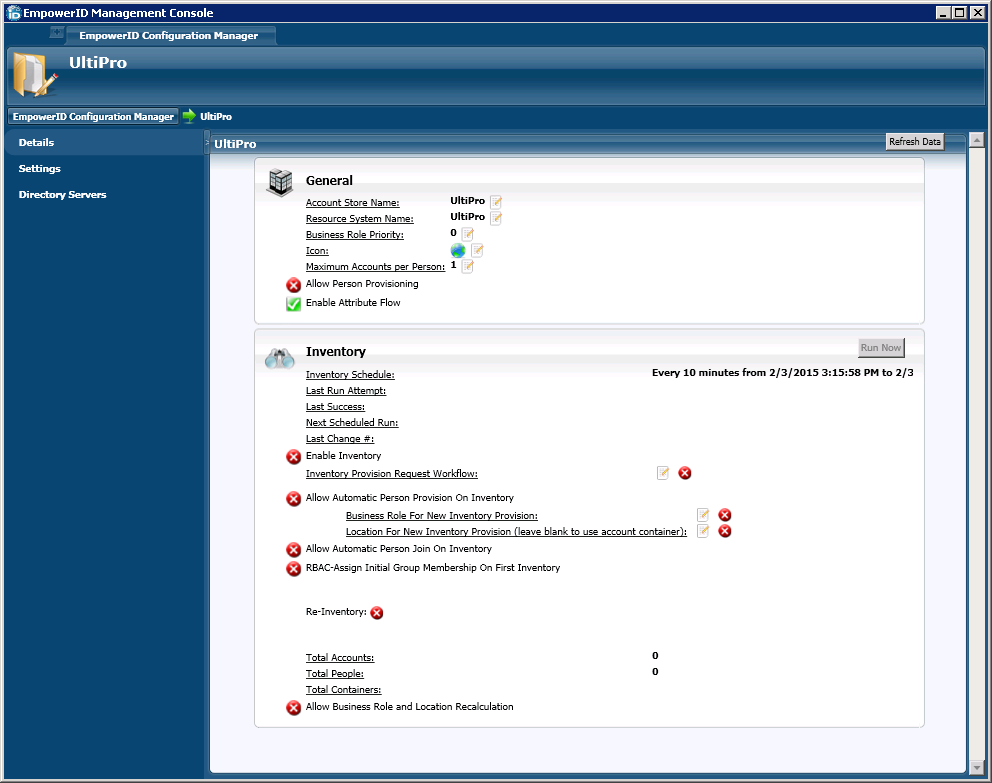
To configure EmpowerID settings for the account store
The Account Store Details screen contains two main panes—a General pane and an Inventory pane—each with settings for configuring a different aspect of the Ultipro account store you just created. To view reference information about a particular pane, expand the drop-down for
...
This pane is used to set general configuration information for the Account Store.
...
that
...
pane
...
- Enable Inventory - This allows EmpowerID to inventory the Account Store. The Inventory Job must be enabled for inventory to occur. This is discussed further in the below section.
- Inventory Provision Request Workflow - This is the request workflow that is initiated when new accounts are discovered via the inventory feature. If you set this workflow, the Allow Automatic Person Provision and Allow Automatic Join Provision flags described below are ignored. You can enable this feature by clicking the Edit
 button.
 - Allow Automatic Person Provision on Inventory - This allows EmpowerID to provision EmpowerID people for new accounts discovered during the inventory process if they meet the Provision Rule specified by the Custom_Account_InventoryInboxGetAccountsToProvision SQL stored procedure. For more information on implementing the rule, see Reviewing Join and Provision Rules.
- Allow Automatic Person Join on Inventory - This allows EmpowerID to join newly discovered accounts to people during the inventory process if they meet the Join Rule as specified by the Custom_Account_InventoryInboxJoinBulk SQL stored procedure. For more information on implementing the rule, see Reviewing Join and Provision Rules.
- RBAC-Assign Initial Group Membership On First Inventory - This setting pertains to Active Directory account stores only.
- Re-Inventory - Enabling this option re-inventories all changes.
- Allow Business Role and Location Recalculation - Allows or disallows the Account Store to be used by the Role and Location Compiler and Role and Location Processor to determine the Business Roles and Locations that should be associated with a person. You can enable this feature by toggling the button to the left of the line from a red sphere to a green check.

...
- When do you want EmpowerID to provision Person objects for those user accounts? At inventory or at a later point in time?
- If inventory provisioning is desired, in what Business Role and Location should those Person objects be placed?
- How many user accounts can one Person have in the account store?
- If people can have more that one user account in the account store, do you want EmpowerID to attempt to automatically join any user accounts meeting the conditions of your Join rules to an existing Person during inventory?
- Do you want attribute flow to occur between EmpowerID and the account store? If so, what rules do you want to apply?
...
.
- From the General pane of the Account Store Details screen, do the following:
- Optionally, click the Edit
...
 button to the right of Business Role Priority and specify the priority for the account store when determining the Business Role of the people.
- Click the Edit
...
- button to the right of Maximum Accounts Per Person and specify the maximum number of accounts from the domain that a Person can have linked to them. Setting this prevents the possibility of a runaway error caused by a wrongly configured Join rule.
- Toggle Allow Person Provisioning to reflect your policy for the account store (red sphere for disable and green checkbox for enable). If enabled, EmpowerID provisions a Person object for each user discovered in the account store.
- Toggle Enable Attribute Flow to reflect your policy for the account store (red sphere for disable and green checkbox for enable). When enabled, changes occurring to user attributes in the account store will occur in EmpowerID and vice-versa depending on how you have set up your attribute flow rules. The default flow for most user attributes for active directory is bi-directional. You can change these as needed.
- From
...
- the Inventory pane of the Account Store Details screen, do
...
- the
...
- following
...
- :
- Business Role for New Inventory Provision - This allows you to select an EmpowerID Business Role for all Persons provisioned during inventory. By default, EmpowerID assigns these people to the Temporary Business Role; however, you can pick others by clicking the Edit button to the right of the line and selecting the desired Business Role from theBusiness Role Selector window that appears. If you pick another and wish to remove it in favor of the default, you can do so by clicking on the red sphere to the right of the Edit button.
- Location for New Inventory Provision - This allows you to select the location that is to be the primary location for the each Person provisioned during inventory.
...
Concepts:
- Understanding the EmpowerID Identity Warehouse
- Understanding Inventory
- Understanding the Account Inbox
- Understanding Attribute Flow
- Understanding Projection and EnforcementUnderstanding Projection and Enforcement
...
Administrative Procedures:
...
| Insert excerpt | ||||||
|---|---|---|---|---|---|---|
|