EmpowerID supports tracking and assigning responsible owners for key objects like accounts, groups, computers, management roles, Locations, and Shared Credentials. This ownership relationship differs from that of a Person owning an account because that account represents them and is their personal account. Responsible person ownership is to signify who is responsible for an IT object from a security and audit perspective. Any EmpowerID RBAC Actor Type can be assigned as the "single" responsible owner but in most organizations, EmpowerID will be configured to only allow the assignment of single Person objects. The field storing this assignment is called ownerAssigneeID and is found on the respective objects tables.
If your system is audited, the auditor needs to know who is responsible for any privileged accounts. You can assign an owner using the Single Owner To avoid having accounts with no responsible party, run the Accounts without a Responsible Party report. You can assign responsibility using the Responsible Party property on the Account Details page for each account, or bulk assign them from the Computers ViewMany page.
| Info |
|---|
By default, the type of |
responsible party is set to Person, but you can edit the EmpowerID System Settings to change it to any actor type. |
Having no one responsible for a privileged account is something to avoid. The Accounts without Owners report can help you to avoid such a situation.
To assign a person as the owner ofSee Changing the Responsible Party Type for more information. |
To find accounts without a responsible party
- In the Navigation Sidebar, expand System Logs and select Reports.
- Scroll down and click the Accounts without a Responsible Party tile.
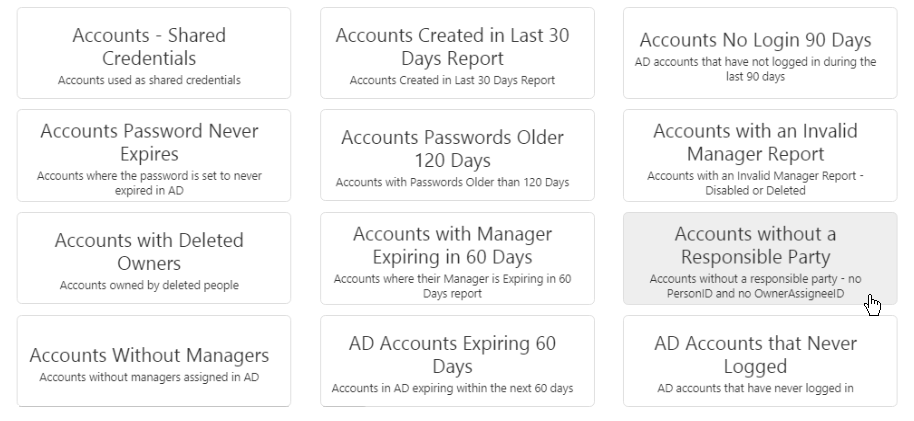
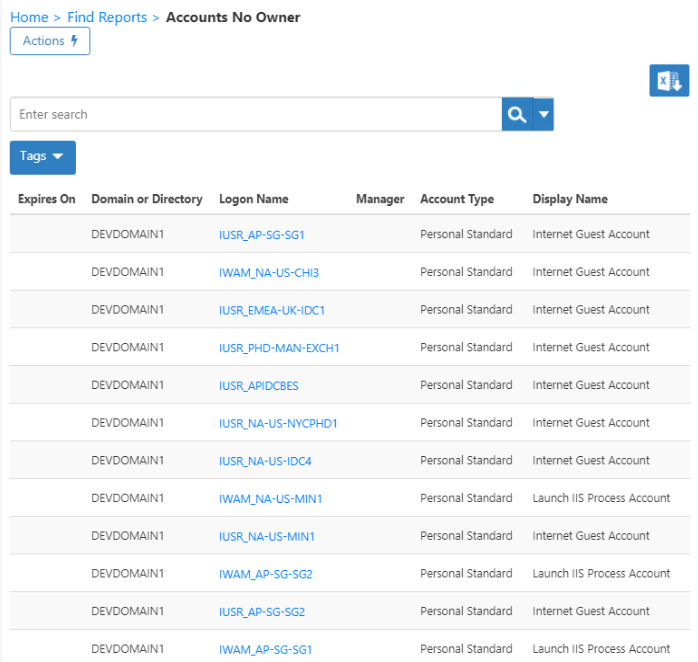
- A grid populates with information about all accounts in the EmpowerID system that do not have a responsible party.
To assign a person responsibility for an account
In the Navigation Sidebar, expand Identities and select User Accounts.
Tip User Accounts
, click the Account Type header to sort by that field, or search for a specific account.

- Click the Logon Name for the account that you want to assign.
- On the Account Details page that appears, under Account Information, click in the Single Owner Responsible Person field and start typing a name to search, and then click the tile for that person to select it.

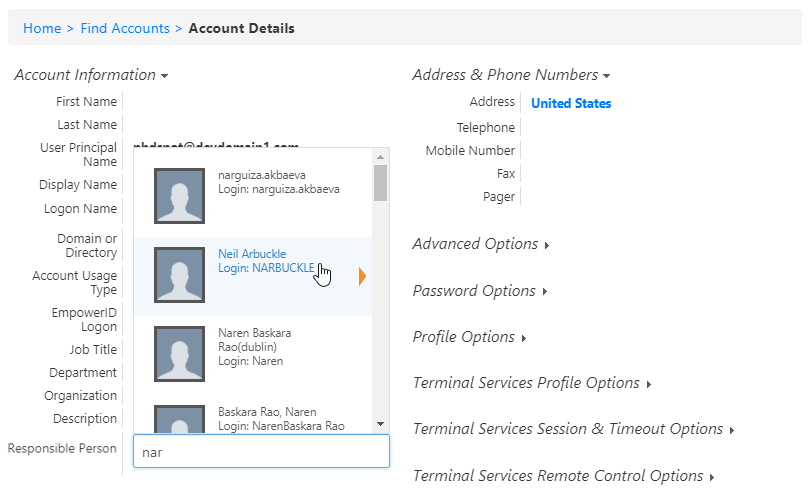
- The account updates automatically when you select the tile, and an Update Complete message informs you when it is finished.

To change the owner type or allow the user to choose
By default, the owner type is set to 1, so that only a person may be assigned as the Single Owner of an account, but you can hard code another actor type, or set no value so that the Single Owner attribute displays a drop-down list of actor types.To bulk assign a responsible party for a number of accounts
- In the Navigation Sidebar, expand Admin, then EmpowerID Servers and Settings, and select EmpowerID System Settings.
- On the EmpowerID System Settings page, in the search box, type "owner" and press Enter or click the magnifying glass icon. Click the Edit button next to OwnerRequiredAsigneeTypeID.
- Click Save.
- To see the Single Owner setting update on the Account Details page:
- In the Navigation Sidebar, expand IT Shop and select Workflows.
- Click the Recycle EmpowerID AppPools workflow and allow it to finish.

The Value field is set to 1 by default, but you can set it to any of the other options listed in the description, or leave the field empty to allow the user to choose.

To find accounts without owners
- In the Navigation Sidebar, expand System Logs and select Reports.
- Scroll down and click the Accounts without Owners Report tile.

A grid populates with information about all accounts in the EmpowerID system that do not have an owner. Identities and select User Accounts.
 - On the Actions tab, click Assign Responsibility for Accounts.

- On the Select Accounts page that appears, select accounts to assign to a responsible party and click Submit.
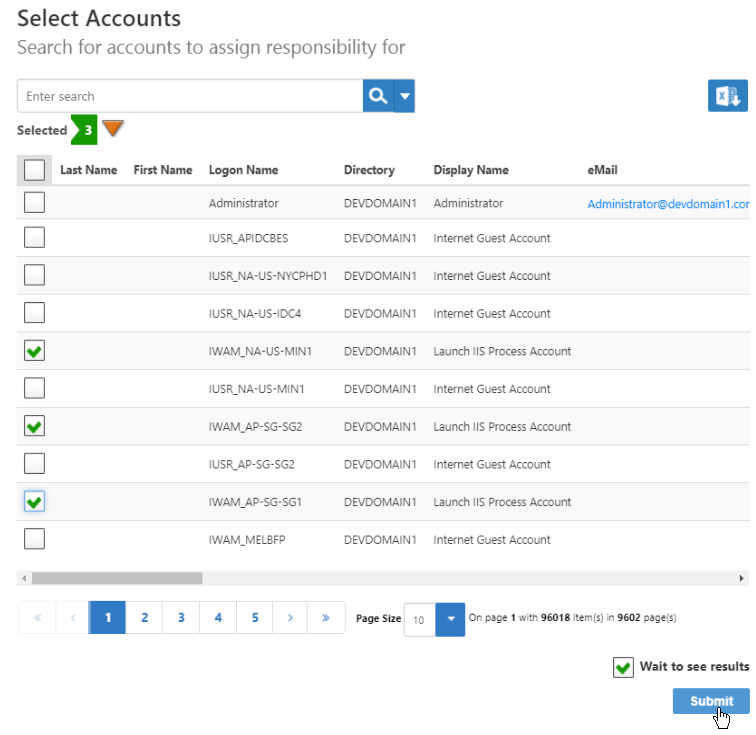
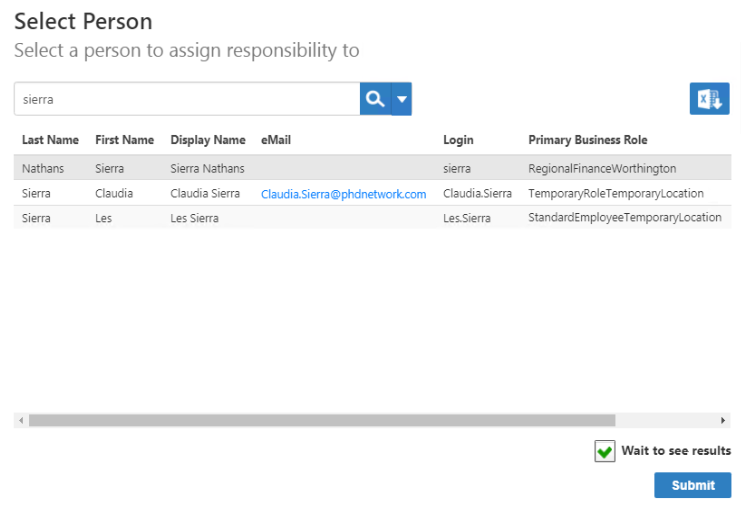
- In the Select Person page that appears, select the person you want to assign as the responsible party for the selected accounts and click Submit.
- A Starting workflow message appears, and when the workflow finishes, a Request Complete message appears.

| Div | ||||||||||||||||||||||
|---|---|---|---|---|---|---|---|---|---|---|---|---|---|---|---|---|---|---|---|---|---|---|
| ||||||||||||||||||||||
|