Versions Compared
Key
- This line was added.
- This line was removed.
- Formatting was changed.
Home / Identity Administration / User Accounts and Groups / Current: Creating Groups
EmpowerID provides two methods for creating groups, the Create Group Simple method and the Create Group Advanced method. If minimal information is needed, use the Create Group Simple method for fewer fields and options. If you need to input more information or configure more properties for the group, use the Create Group Advanced method.
This topic demonstrates how to create an Active Directory group using both methods.
| Info | ||
|---|---|---|
| ||
EmpowerID must be connected to Active Directory. For details, see Connecting to Active Directory. |
To create an AD security group in simple mode
- In the Navigation Sidebar of the EmpowerID Web interface, expand Identities and click Groups.
- From the Actions pane of Group Manager, click the Create Group Simple action.
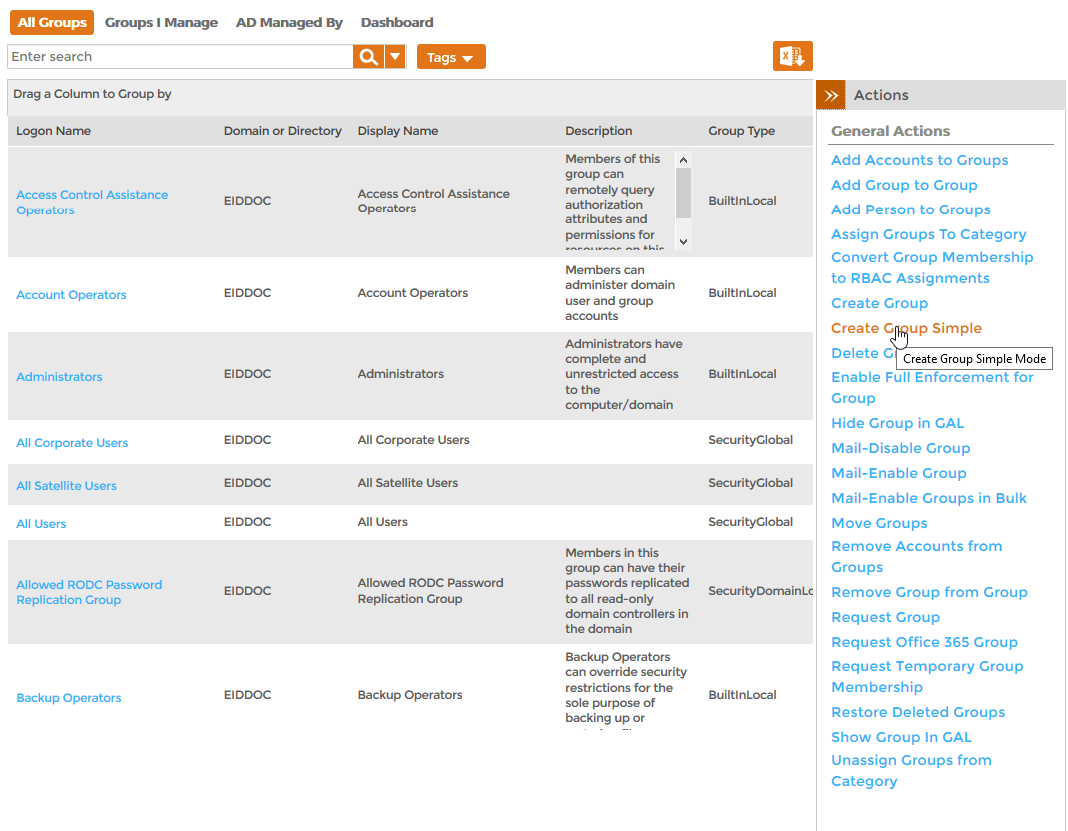
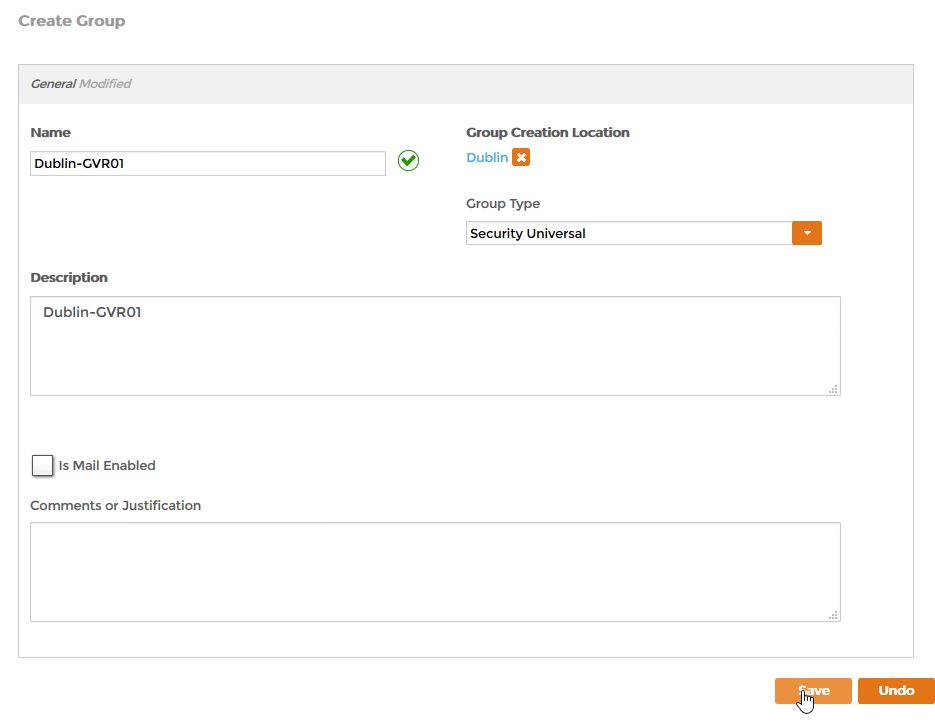
- In the Create Group form that appears, type a name and description in the Name and Description fields, respectively.
- Below Group Creation Location, click the Select a Location link and in the Location Selector that opens do the following:
- Search for and select the appropriate directory location for the group.
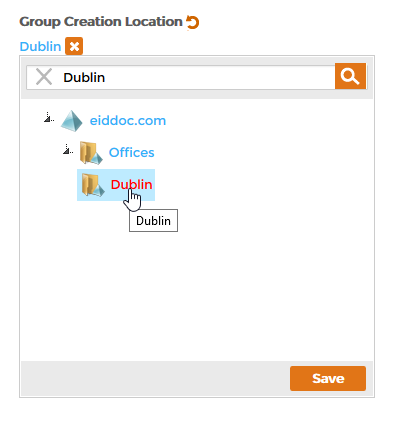
- Click Save to close the Location Selector.
- Search for and select the appropriate directory location for the group.
- Select the appropriate group type from the Group Type drop-down.
- Optionally, select Is Mail Enabled to mail-enable the group (Microsoft Exchange is required) and type any comments in the Comments or Justification field.
- Click Save.
After creating the group, EmpowerID directs you to the group's View Page. View pages allow you to view information about a selected resource and manage that resource as needed.
To create an AD security group in advanced mode
- In the Navigation Sidebar of the EmpowerID Web interface, expand Identities and click Groups.
- From the Actions pane of Group Manager, click the Create Group action.
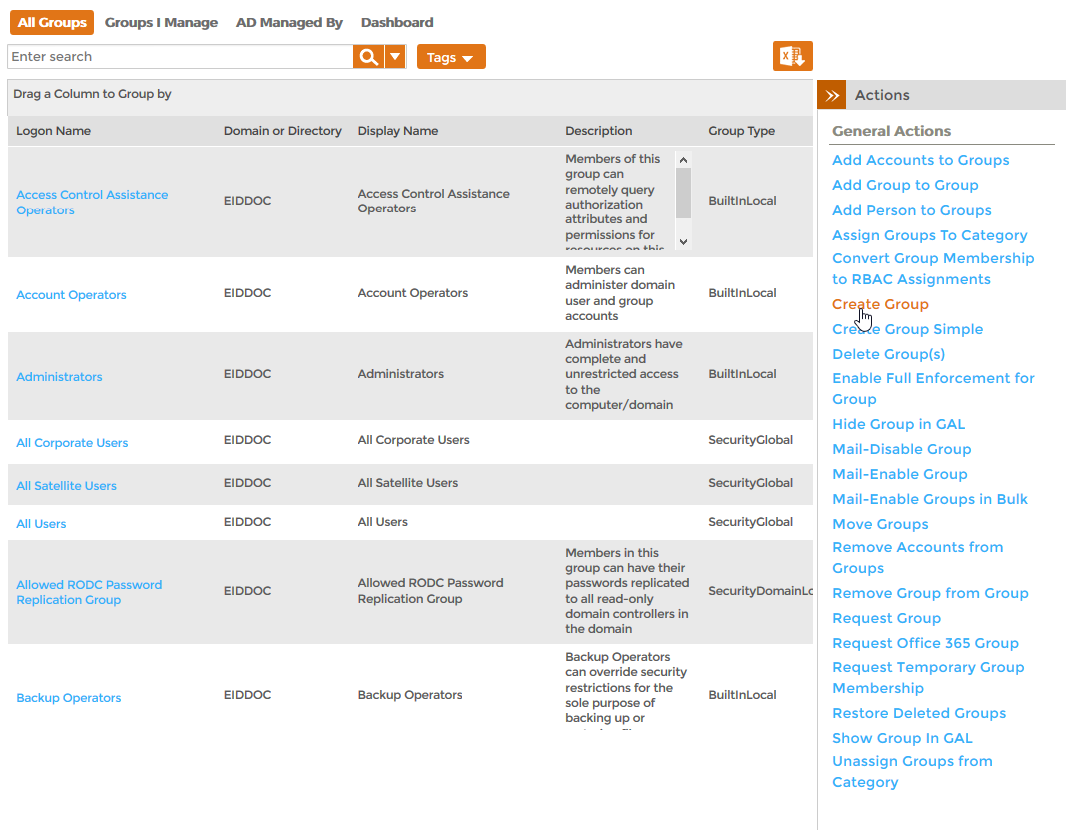
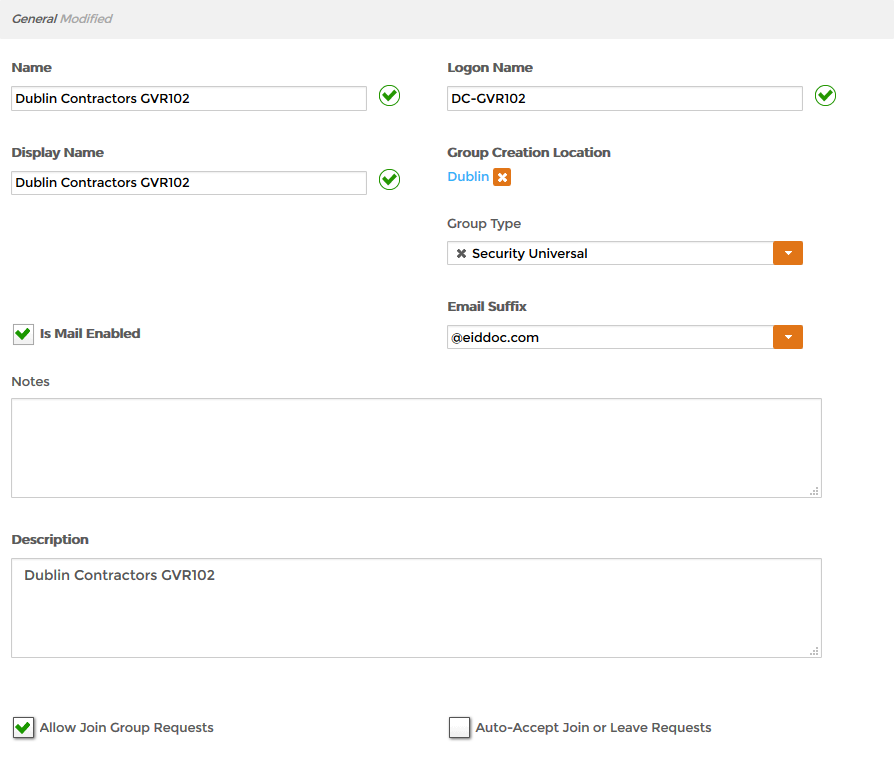
- In the General section of the Create Group form that appears, do the following:
- Type a name, logon name and display name for the group in the Name, Logon Name and Display Name fields, respectively.
- Below Group Creation Location, click the Select a Location link and in the Location Selector that opens do the following:
- Search for and select the appropriate directory location for the group.

- Click Save to close the Location Selector.
- Search for and select the appropriate directory location for the group.
- Select the appropriate group type from the Group Type drop-down.
- Optionally, select Is Mail Enabled to mail-enable the group (Microsoft Exchange is required and EmpowerID must be configured for your Exchange environment).
- If you selected Is Mail Enabled, select the suffix for the email address from the Email Suffix drop-down.
- Optionally, add any notes to the Notes field.
- Type a description in the Description field.
- Select or clear (selected by default) Allow Join Requests. If selected, users can shop for the group in the IT Shop.
Optionally, select or clear (cleared by default) Auto-Accept Join or Leave Requests. If selected, users can self-service join and leave the group without requiring approval.
Tip Auto-Accept only works if Allow Join Requests is enabled.
- In the Advanced section of the Create Group form, do the following:
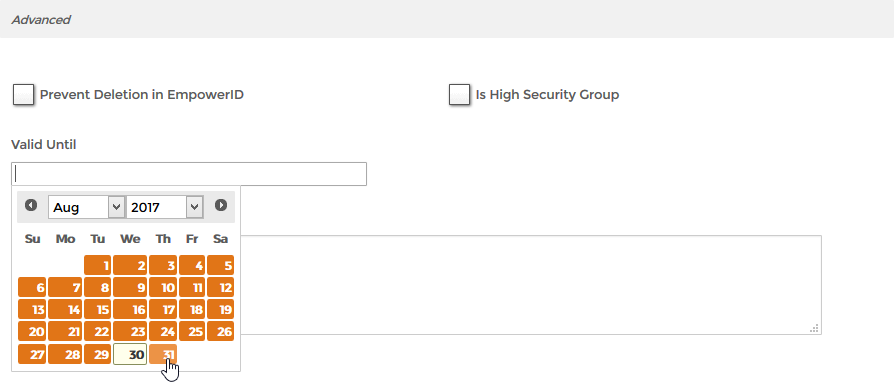
- Optionally, select Prevent Deletion in EmpowerID if you want to prevent the group from being deleted via the EmpowerID UI.
- Optionally, select Is High Security Group if the group meets that criteria.
- Optionally, if you have a custom workflow that uses it, click the Valid Until field and select a date from the calendar control.
- Optionally, add any comments to the Comments or Justification field.
- Click Save.
After creating the group, EmpowerID directs you to the group's View Page. View pages allow you to view information about a selected resource and manage that resource as needed.
To verify that the group was created in EmpowerID
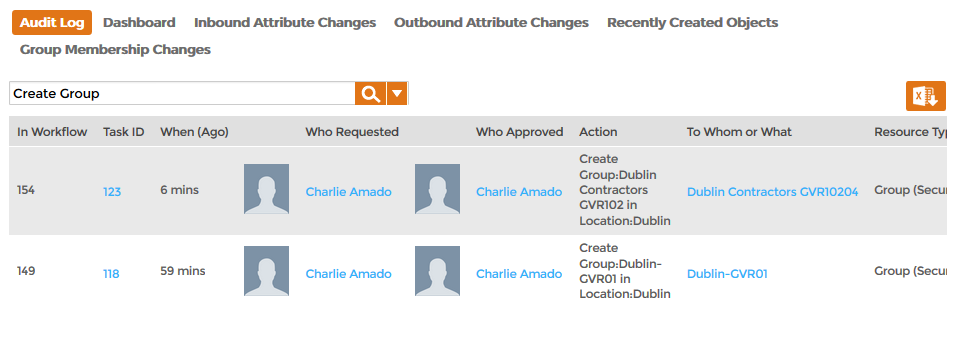
- In the Navigation Sidebar, expand System Logs and click Audit Log.
- From the Audit Log tab, type Create Group in the Search field and press ENTER to verify that a record is returned for the group. This record allows you to see who requested and approved that the group be created, when it was created, etc.
To verify that the group was created in Active Directory
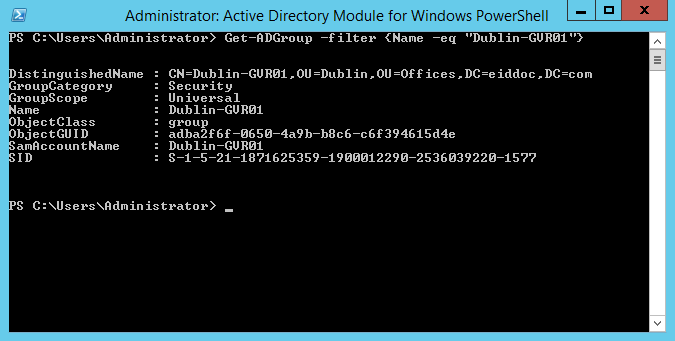
On a machine with the Active Directory Module for Windows PowerShell installed, run the following cmdlet, substituting the name of the group with your group:
Code Block language powershell GET-ADGroup -filter {Name -eq "Dublin-GVR01"}- Verify that the group you created is returned.
| Div | ||||||||||||||||||||||||
|---|---|---|---|---|---|---|---|---|---|---|---|---|---|---|---|---|---|---|---|---|---|---|---|---|
| ||||||||||||||||||||||||
|