Home / Identity Administration / User Accounts and Groups / Office 365 / Current: Creating Unlicensed Office 365 Users
This topic demonstrates how to create unlicensed Office 365 users in EmpowerID.
...
To create an unlicensed Office 365 User in EmpowerID
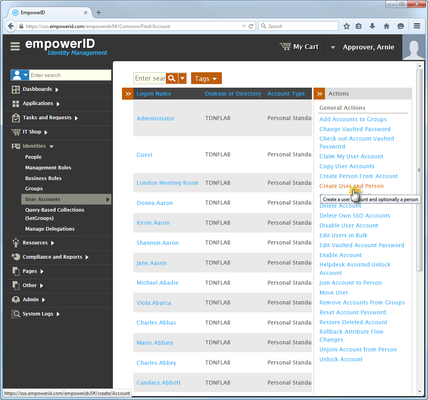
- From the Navigation Sidebar of the EmpowerID Web interface, expand Pages and click Office 365 Manager.
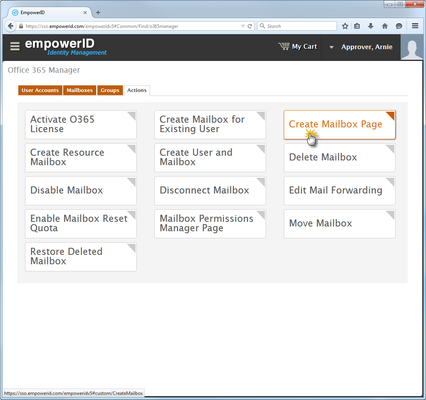
In Office 365 Manager, click the Mailbox tab and then click the Create Mailbox Page Action Link.
Info In the following image, the Locations pane is collapsed to conserve screen real estate.
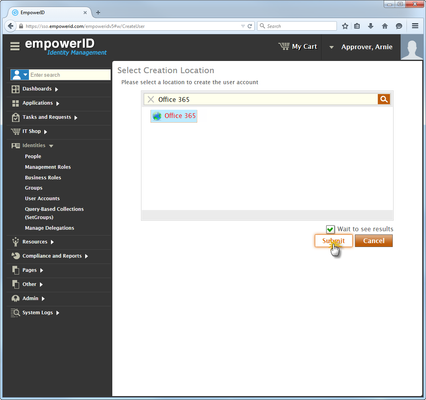
In the Select Creation Location selector that appears, search for and select the location of your Office 365 account store and then click Submit.
To allow the process to continue leaveTip
deselectFor immediate processing, leave Wait to See Results selected. If you
Results on this screenclear Wait to See
thenResults and
creationclick Submit, the
will idleprocess
will createidles and EmpowerID
usercreates a task for it, routing it to any Person with the delegations to continue creating the
account.
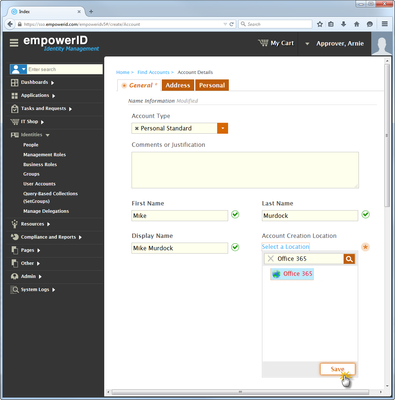
- From the General tab of the Account Details form that appears, do the following:
Select Personal Standard from the Account Type drop-down.
type anyInfo Optionally,
enter comments in the Comments or Justification field.
- Type the first name, last name, display name and logon name for the user in the First Name, Last Name, Display Name and Logon Name fields, respectively.
- Underneath Below Account Creation Location, click the Select a Location link and in the Location Selector that appears, search for and select your Office 365 location.
- Click Save to close the Location Selector.
- Leave Join Account to an Existing Person cleared.
- Tick
Select Create a new EmpowerID Person object
if you want EmpowerID toto create a new Person for the Office 365 user account.
Info If you do not select this option, but have enabled Person provisioning on the Office 365 account store, EmpowerID will provision a person for the account at the next inventory of your Office 365 tenant.
If you
tickedselected Create a New EmpowerID Person object, click the Select a Role and Location link and in the Role and Location selector that appears, search for and select the appropriate role and location for the person.
Tick
. If you do not want to set a password at this time, skip this stepInfo Optionally select Allow me to enter a password and then type a password in the Password and Confirm Password fields
.
- Scroll to the Security section and select Enable Sync Password. This allows password changes originating in Office 365 to be synchronized with any user accounts and Person objects belonging to the Office 365 account store in EmpowerID and vice-versa.
- Click Save.
To verify the new unlicensed user in Office 365
- From your Web browser log in to your corporate Office 365 account as an administrator.
- From the Office 365 admin center, click users and groups and then select Unlicensed users from the Select a view drop-down.
- Search for the user you just created in EmpowerID . You should and verify that you see that user in the view.
| Info | ||||||
|---|---|---|---|---|---|---|
| ||||||
|