Versions Compared
| Version | Old Version 9 | New Version Current |
|---|---|---|
| Changes made by | ||
| Saved on |
Key
- This line was added.
- This line was removed.
- Formatting was changed.
| Insert excerpt | ||||||
|---|---|---|---|---|---|---|
|
EmpowerID includes an Amazon Web Services (AWS) connector that allows organizations to bring the data (user accounts, groups, roles and computers) in their AWS domain to EmpowerID, where it can be managed and synchronized with data in any connected back-end user directories. When EmpowerID inventories AWS, it creates an account in the EmpowerID Identity Warehouse for each Amazon user account, a computer for each Amazon computer, a group for each Amazon group, and a special group called an RBAC-Only group for each Amazon role.
| Info | ||
|---|---|---|
| ||
In order to connect EmpowerID to AWS, you must have an AWS domain with an account that EmpowerID can use to connect to AWS. (EmpowerID recommends using a dedicated service account.) At a minimum, this account must have a policy with permission to read the user, group and computer data in AWS. If you plan to use EmpowerID to provision, deprovision and modify this data in AWS, the profile needs to have create, update and delete permissions as well. In addition, you must provide EmpowerID with the following information:
|
| Insert excerpt | ||||||
|---|---|---|---|---|---|---|
|
After ensuring you have met the prerequisites specified in the Getting Started with Directory Systems topic, you connect EmpowerID to AWS by doing the following:
- Creating an account store in EmpowerID for AWS.
- Configuring EmpowerID settings for the account store connection, including whether to provision EmpowerID Persons during inventory or in batches using the Account Inbox permanent workflow (recommended).
- Reviewing and configuring the attribute flow rules for the account store.
- Turning on inventory.
- Enabling the Account Inbox Permanent Workflow when ready—if you are using batch processing to provision Person objects from the inventoried user accounts. This is the recommended method.
- Monitoring Inventory.
| Anchor | ||||
|---|---|---|---|---|
|
Create an account store for AWS
- In the navigation sidebar, expand Admin, then Applications and Directories, and click Account Stores and Systems.
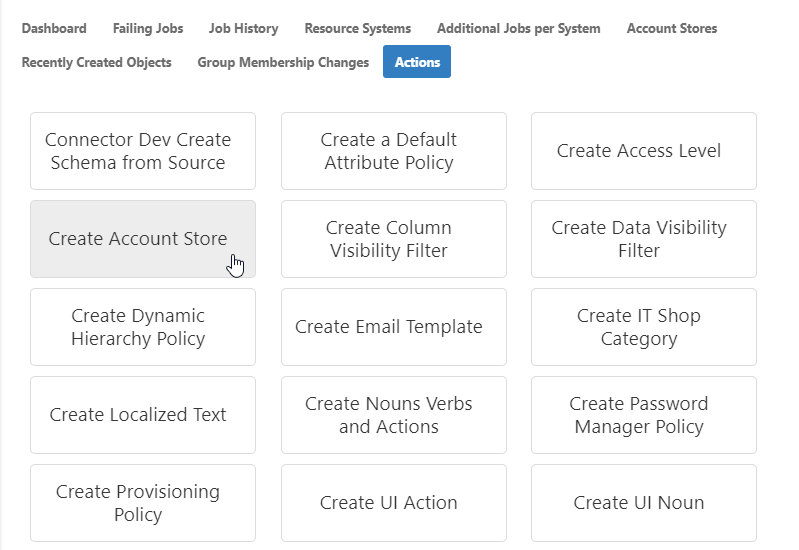
- Click the Actions tab, and then click the Create Account Store action.
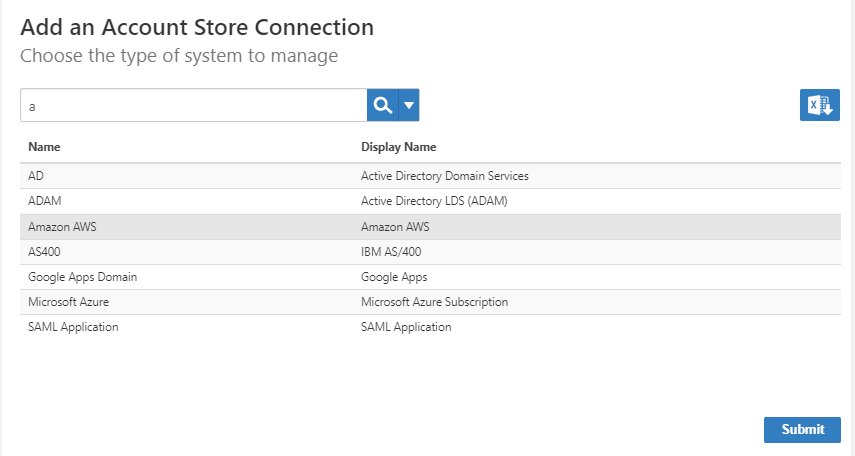
- Select Amazon AWS from the list of system types and click Submit.
On the AWS Settings page that appears, enter settings to connect to your Amazon instance to allow EmpowerID to discover and connect to it.
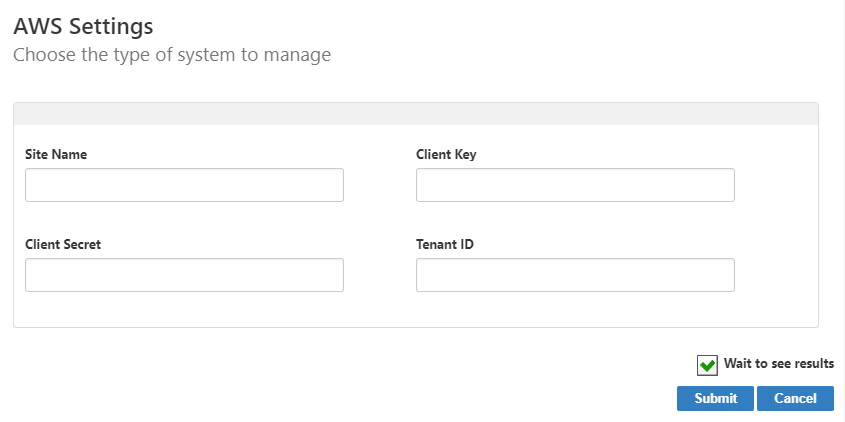
- Site Name-The address of your AWS site
- Client Key- The Access Key ID generated by Amazon for the service account
- Client Secret- The Secret Access Key generated by Amazon for the service account
- Tenant ID - The Tenant ID for your AWS site
- Click Submit.
- EmpowerID creates the account store and the associated resource system. The next step is to configure the attribute flow between the account store and EmpowerID.
| Anchor | ||||
|---|---|---|---|---|
|
| Insert excerpt | ||||||
|---|---|---|---|---|---|---|
|
Now that the attribute flow has been set, the next steps include configuring the account store and enabling EmpowerID to inventory it.
| Anchor | ||||
|---|---|---|---|---|
|
Configure account store settings
- In the navigation sidebar, expand Admin, then Applications and Directories, and click Account Stores and Systems.
- On the Account Stores tab, search for the account store you just created and click the link to go to its details page.

- On the Account Store Details page, click the Edit button or the name of the account store.
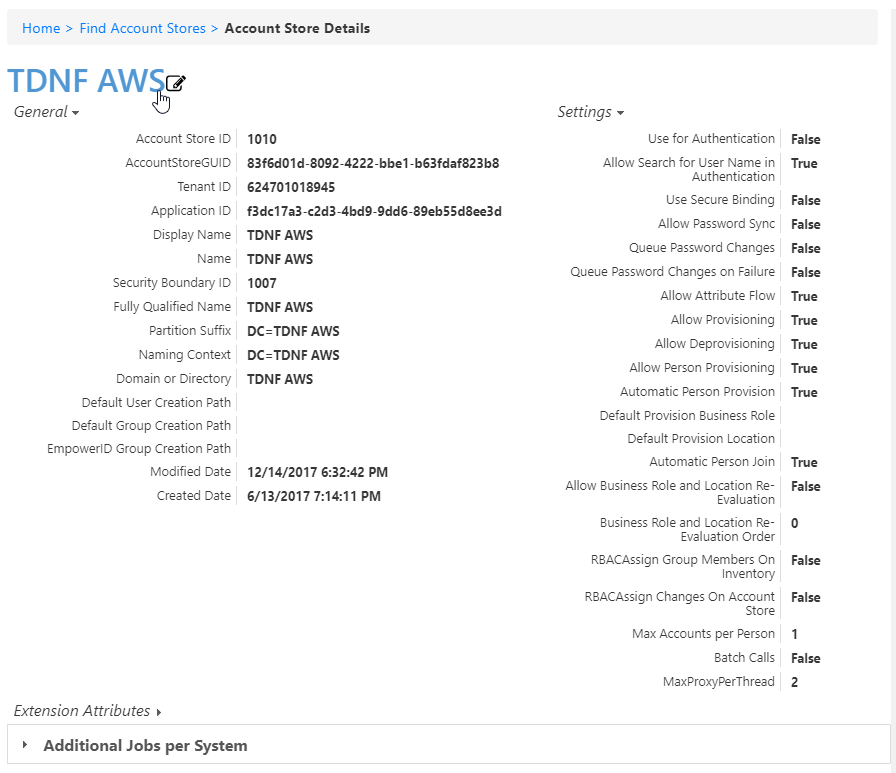
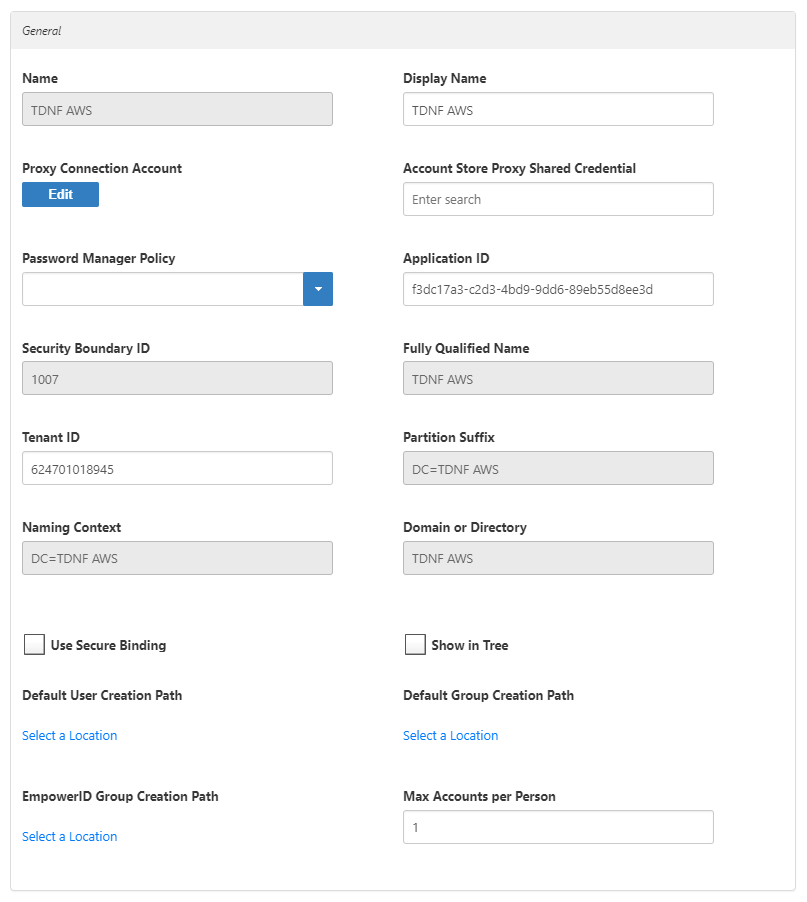
- In the edit view of the page, you can edit values in any of the enabled fields. In the General section, these are:
- Display Name – Edit the name of the account store as it appears in the list of account stores.
- Proxy Connection Account – Change the instance, user name, and password for the ServiceNow connection.
- Account Store Proxy Shared Credential – Click in this box and press Enter to see a list of shared credentials in your system to use for the proxy connection.
- Password Manager Policy – Select a password manager policy to use for the account. If not selected, it uses the Default Password Manager Policy.
- Application ID – If the account store is a one-to-one match with a Tracking Only application, enter the Application Resource GUID of the application. (This value is supplied automatically if you select the Create a New Account Directory option when creating a Tracking Only application.)
- Tenant ID – Enter the Tenant ID, if supplied by the connection account. (AWS uses this.)
- Use Secure Binding – Toggleto bind accounts with encryption.
- Show in Tree – Toggle to show the account store in the Locations tree.
- Default User Creation Path – Select a location in which to create users if none is specified.
- Default Group Creation Path – Select a location in which to create groups if none is specified.
- EmpowerID Group Creation Path – Select a location in which to create EmpowerID groups if none is specified.
- Max Accounts per Person – Enter the maximum number of user accounts from this domain that an EmpowerID Person can have linked to them. This prevents the possibility of a runaway error caused by a wrongly configured Join rule. We recommended setting this value to 1 unless users commonly have multiple accounts and you want them to be joined to the same person.
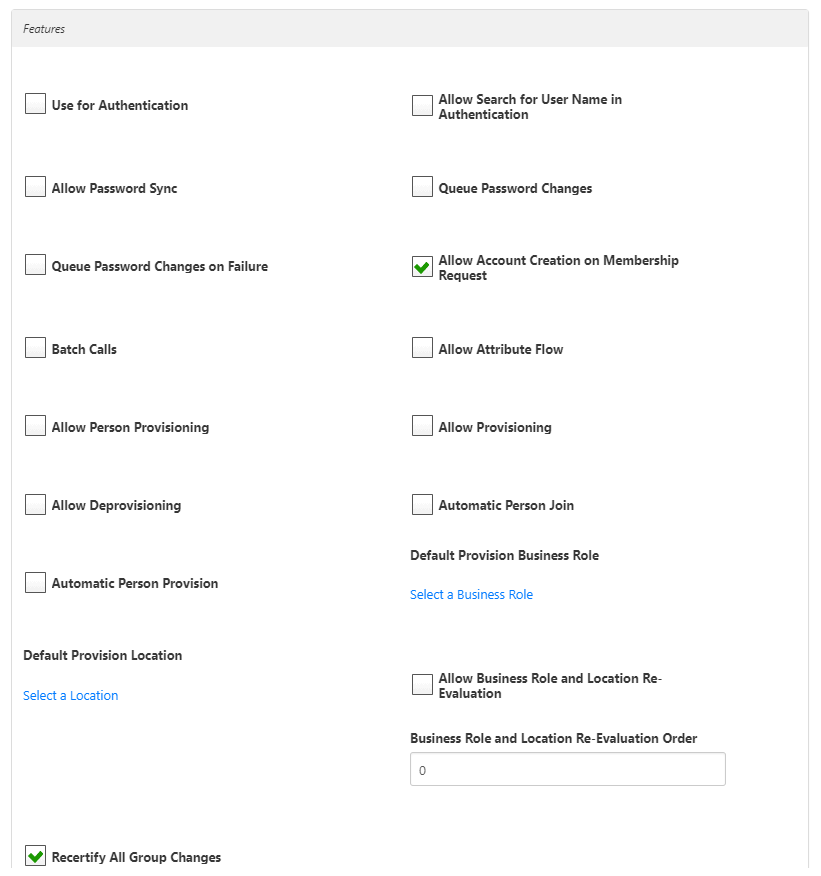
- In the Features section, you can select any of these values:
- Use for Authentication –
- Allow Search for User Name in Authentication –
- Allow Password Sync – Toggle to allow EmpowerID to sync password changes discovered during inventory.
- Queue Password Changes – Toggle to have EmpowerID send password changes to the Account Password Reset Inbox for batch processing.
- Queue Password Changes on Failure – Toggle to have EmpowerID send password changes to the Account Password Reset Inbox only when the change fails.
- Allow Account Creation on Membership Request – Toggle to allowusers without accounts to request group membership and automatically have an account created.
- Batch Calls –
- Allow Attribute Flow – Toggle to allowattribute changes to flow between EmpowerID and the account store.
- Allow Person Provisioning – Toggle to allow EmpowerID to create Person objects from the user records discovered during inventory.
- Allow Provisioning – Toggle to allow EmpowerID to create new Groups in ServiceNow from requests discovered during inventory.
- Allow Deprovisioning – Toggle to allowEmpowerID to delete Groups in ServiceNow based on requests discovered during inventory.
- Automatic Person Join – Toggle to allowEmpowerID to join newly discovered accounts to people during the inventory process if they meet the Join Rule as specified by the Custom_Account_InventoryInboxJoinBulkSQL stored procedure.
- Automatic Person Provision – Toggle to allowEmpowerID to provision EmpowerID people for new accounts discovered during the inventory process if they meet the Provision Rule specified by theCustom_Account_InventoryInboxGetAccountsToProvisionSQL stored procedure.
- Default Provision Business Role – Set a default Business Role to assign people if none is specified.
- Default Provision Location – Set a default Location to assign people if none is specified.
- Allow Business Role and Location Re-Evaluation – Toggle if you have multiple account stores to manage and want to specify a priority for each.
- Business Role and Location Re-Evaluation Order – Enter a number to specify the priority of the account store for determining the Business Roles and Locations to assign to a Person. Account Stores with a higher value take precedence.
- Recertify All Group Changes – Toggle to allowEmpowerID to generate recertification review tasks for all changes in ServiceNow Groups.
- When you have finished configuring the settings the last step is to enable EmpowerID to enable inventory. To do so, click the Inventory tab and select Enable Inventory.
- When finished, click Save to save your changes.
If you are using the Account Inbox to provision or join the user accounts in AWS to Empower Persons (recommended), you need to turn on the Account Inbox. This is demonstrated below.
| Anchor | ||||
|---|---|---|---|---|
|
| Insert excerpt | ||||||
|---|---|---|---|---|---|---|
|
| Anchor | ||||
|---|---|---|---|---|
|
| Insert excerpt | ||||||
|---|---|---|---|---|---|---|
|
Confirm inventory
- From the navigation sidebar, navigate to the Audit Log by expanding System Logs and clicking Audit Log.
- Type AWS in the Search field and press ENTER. You should records for your AWS users approved by EmpowerID System.
- If you have AWS groups, click the Group Membership Changes tab and search for your AWS groups. You should those groups and the group members.
- From the navigation sidebar, navigate to AWS Manager by expanding Pages and clicking AWS Manager. You should see a dashboard displaying your AWS account store information.
- Click through each tab of AWS Manager. You should the information relevant to that tab, as well as an Actions panel with a list of actions that you can perform against the selected resource or resource type. For example, if you select the EC2 Instances tab, you can view information about your EC2 instances, delete or disable those instances as well create new instances, among other things.
| Expand | ||||||||||||||
|---|---|---|---|---|---|---|---|---|---|---|---|---|---|---|
| ||||||||||||||
|
| Div | |||||||||||
|---|---|---|---|---|---|---|---|---|---|---|---|
| |||||||||||
| Div | |||||||||||
| |||||||||||
| Live Search | |||||||||||
| placeholder | Search the documentation | ||||||||||
| type | page | labels | 2020|||||||||
|