EmpowerID provides two methods for creating groups, Create Group and Create Group Simple. The Create Group Simple form has the bare minimum of fields and options to create a group. But if you need to set advanced options on requests, deletions, high security, or valid dates, then Create Group is the best option.
This topic demonstrates how to create a ServiceNow group using both methods.
- Creating a ServiceNow security group in EmpowerID using the simple method
- Creating a ServiceNow security group in EmpowerID using the advanced method
- Creating an EmpowerID group in ServiceNow
- Verifying that the group was created in EmpowerID
- Verifying that the group was created in ServiceNow
Prerequisites
Before you can create ServiceNow security groups, EmpowerID must first be connected to ServiceNow. For the details, see Connecting to ServiceNow.
To create a ServiceNow security group using the simple method
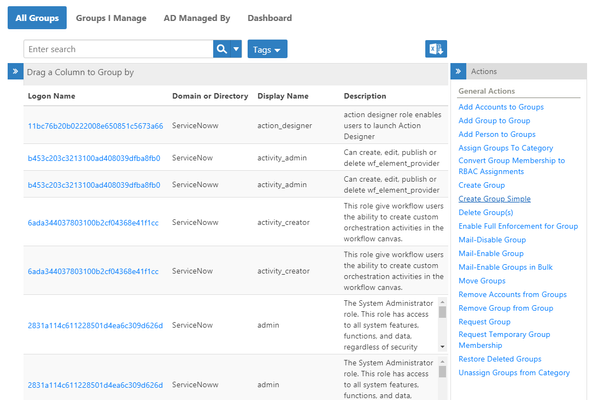
- From the Navigation Sidebar of the EmpowerID Web interface, expand Identities and click Groups.
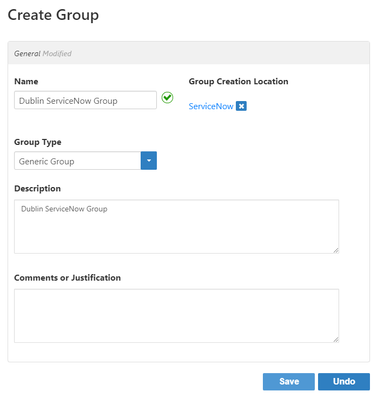
- From the Actions pane of Group Manager, click the Create Group Simple action.
- In the Create Group form that appears, type a name and description in the Name and Description fields, respectively.
- Below Group Creation Location, click the Select a Location link. Search for and select the ServiceNow location, and click Save to save the location.
- The Group Type automatically becomes Generic Group.
- Optionally, type any comments in the Comments or Justification field.
- Click Save.
To create a ServiceNow group using advanced features
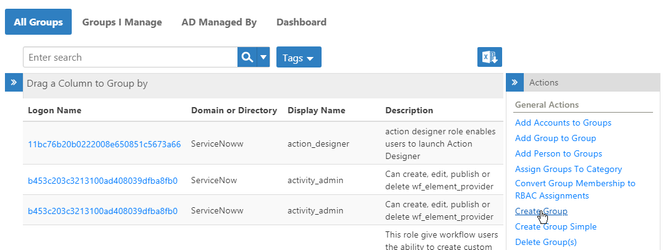
- From the Navigation Sidebar of the EmpowerID Web interface, expand Identities and click Groups.
- From the Actions pane of Group Manager, click the Create Group action.
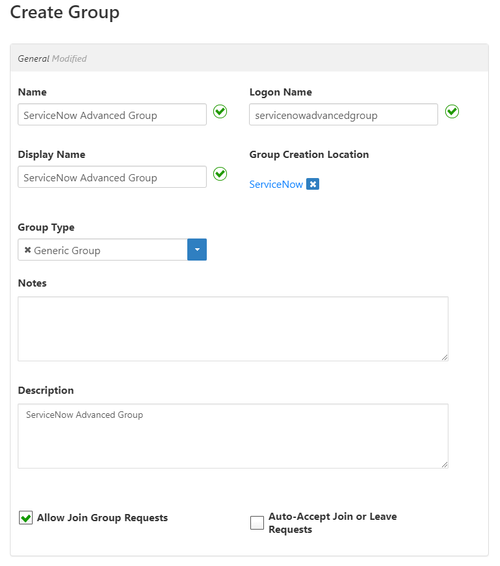
- In the General section of the Create Group form that appears, set these values.
- Enter values for the group in the Name, Logon Name and Display Name fields, respectively.
- Below Group Creation Location, click Select a Location, select the ServiceNow directory location, and click Save to close the Location Selector.
- From the Group Type drop-down, select Generic Group.
- Type a description in the Description field.
- You can also use the following optional settings.
- If you have Microsoft Exchange and have configured EmpowerID for Exchange, you may select Is Mail Enabled to mail-enable the group.
- If you selected Is Mail Enabled, select the suffix for the email address from the Email Suffix drop-down.
- Add any notes to the Notes field.
- Select or clear Allow Join Requests. If selected, users can shop for the group in the IT Shop.
Select or clear Auto-Accept Join or Leave Requests. If selected, users can self-service join and leave the group without requiring approval.
Auto-Accept only works if Allow Join Group Requests is enabled.
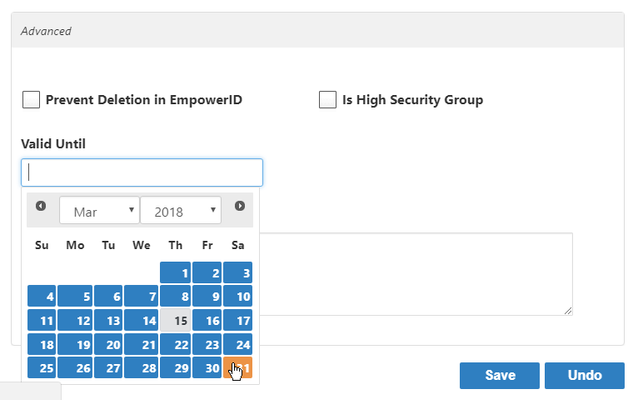
- In the Advanced section of the Create Group form, you can use the following optional settings.
- Select Prevent Deletion in EmpowerID if you want to prevent the group from being deleted via the EmpowerID UI.
- Select Is High Security Group if the group meets that criteria.
- If you have a custom workflow that uses it, click the Valid Until field and select a date from the calendar control.
- Add any comments to the Comments or Justification field.
- Click Save.
To create an EmpowerID group in ServiceNow
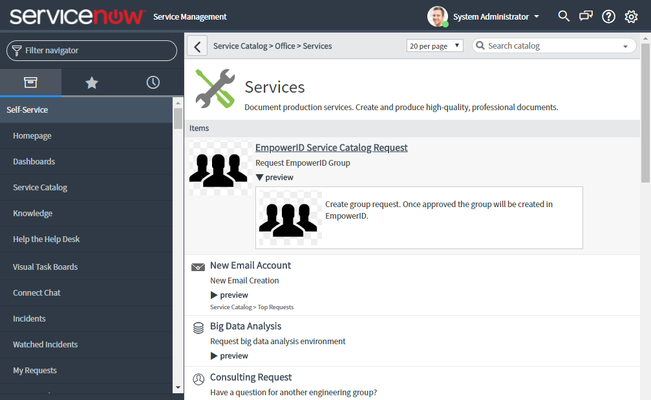
- Log in to your ServiceNow instance, and in the navigation pane, under Self-Service, select Service Catalog, and click the Services tile.
- In the list of services, click the EmpowerID Service Catalog Request.
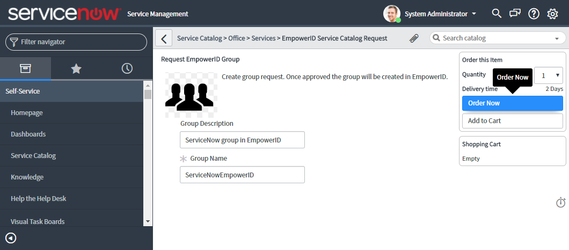
- Enter a Group Description and a Group Name, and click Order Now.
- An Order Status message appears with details about your request. If you expand the Stage field, you can see that the request is waiting for approval by the System Administrator.
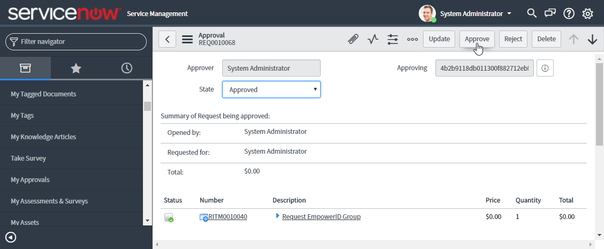
- In the navigation pane, under Self-Service, select My Approvals, and click the first approval. (You can hover over the info button to see details and ensure that you have the correct one.)
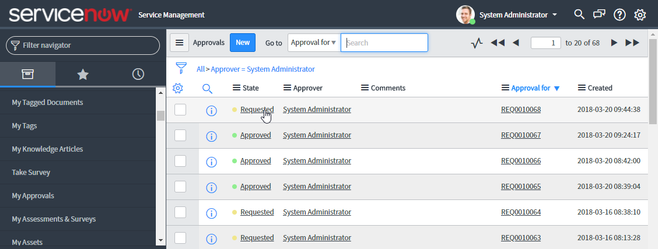
- On the Approval form, change the State to Approved and click the Approve button.
- To see the group created in EmpowerID, in the navigation pane, expand Identities, select Groups, and search for the group. Note that groups created in ServiceNow have GUIDs for their logon names.
To verify that the group was created in EmpowerID
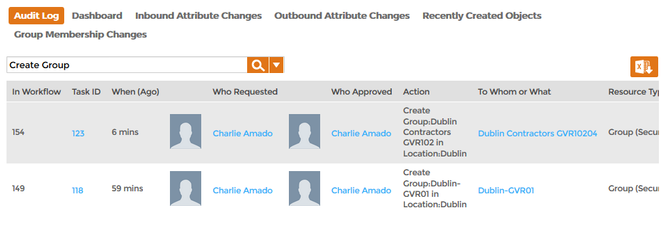
- In the Navigation Sidebar, expand System Logs and click Audit Log.
- On the Audit Log tab, type Create Group in the Search field and press ENTER. You should see a record returned for the group. This record allows you to see who requested and approved creation of the group, when it was created, etc.
To verify that the group was created in ServiceNow
- In ServiceNow, search for Groups and select the one under System Security, Users and Groups.
- Above the list of groups, change the Go to value to Name or Description, and search for your group.
Related Content