- Created by Phillip Hanegan, last modified on Jun 16, 2020
You are viewing an old version of this page. View the current version.
Compare with Current View Page History
« Previous Version 9 Next »
Before connecting EmpowerID to an external directory, please review the Getting Started with Directory Systems topic. The topic walks you through the prerequisites you need to complete before connecting to an external directory for the first time. These prerequisites include: Configuring the appropriate server roles for your EmpowerID servers Reviewing the Join and Provision Rules for your environment Reviewing the Join and Provision Filters for your environment If you have already connected EmpowerID to another external directory, you can skip the above prerequisites. EmpowerID provides connectors for a wide range of user directories and resource systems. As an administrator, you can use these connectors to quickly connect EmpowerID to your organization's identity-aware systems and applications. When you do so, you create an account store for that application in the EmpowerID Identity Warehouse and use that account store to configure how you want EmpowerID to manage the identity information in that system.
EmpowerID Dynamics AX connector allows organizations to bring the user data in their Dynamics AX system to EmpowerID, where it can be managed and synchronized with data in any connected back-end user directories. Once connected, you can manage this data from EmpowerID in the following ways:
- Provision new users
- Edit user attributes
- Delete users
Additionally, EmpowerID provides Provisioning policies or Resource Entitlements (RETs) that allow you to automatically provision DAX accounts for any person within your organization based on your policy requirements. For more information on RETs and DAX, see Creating a Provisioning Policy for Microsoft Dynamics Users.
Prerequisites
In order to connect EmpowerID to Dynamics AX, you need to have a Dynamics AX server with the Dynamics AX client installed. In addition, you need to have the installer for the EmpowerID Dynamics AX Web services. This installer is a separate package that needs to be requested from EmpowerID.
- Installing the EmpowerID Dynamics AX Web Services
- Connecting EmpowerID to your Dynamics AX User directory
- Configuring the Dynamics AX Account Store in EmpowerID
- Connecting EmpowerID to your Dynamics AX Worker directory
To install the EmpowerID Dynamics AX Web Service
- On your Dynamics AX server, double-click the Dynamics AX WebServices X.X.X.X msi to launch the EmpowerID Dynamics AX Services Setup wizard.
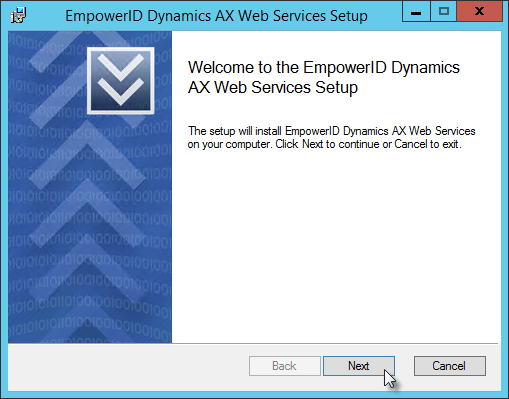
- Click Next to begin the installation.
- Select the terms of the license agreement and click Next.
- Select the destination folder and click Next.
- Click Install.
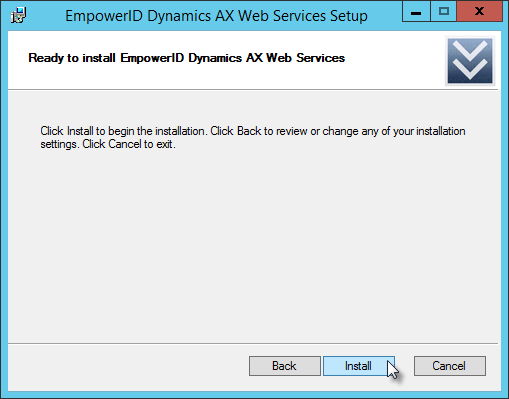
EmpowerID installs the service and opens the EmpowerID DAX Configuration window. You use this window to set the application identity and installation configuration information needed by EmpowerID to communicate with the service.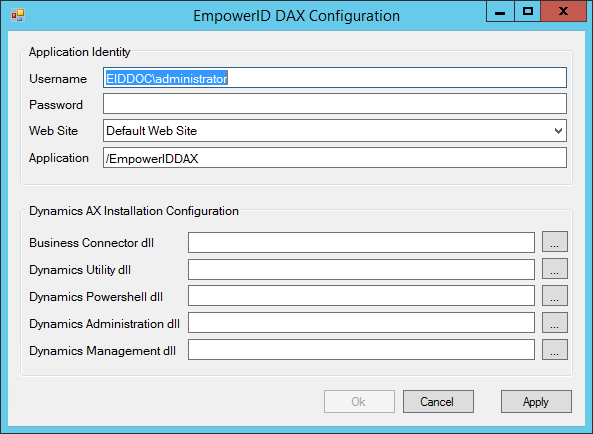
- In the Application Identity pane of the EmpowerID DAX Configuration window, do the following:
- Type the user name and password of the service identity in the Username and Password fields, respectively. These credentials need to be those of a DAX administrator with read and write permissions to the DAX database.
- Select the Web site for the service from the Web Site drop-down. You can keep the default selection or choose another.
- Leave the Application field as is.
- In the Dyanamics AX Installation Configuration pane of the EmpowerID DAX Configuration window, do the following:
- Click the Ellipses (...) for the Business Connector dll field, browse to the bin folder of your Dynamics AX installation (located by default at "C:\Program Files (x86)\Microsoft Dynamics AX\60\Client\Bin") and select BusinessConnectorNet.dll DLL.
- Click the Ellipses (...) for the Dynamics Utility dll field, browse to the bin folder of your Dynamics AX installation (located by default at "C:\Program Files (x86)\Microsoft Dynamics AX\60\Client\Bin") and select AXUtilLib.dll.
- Click the Ellipses (...) for the Dynamics Powershell dll field, browse to the bin folder of your Dynamics AX installation (located by default at "C:\Program Files (x86)\Microsoft Dynamics AX\60\Client\Bin") and select AXUtilLib.Powershell.dll.
- Click the Ellipses (...) for the Dynamics Administration dll field, browse to the bin folder of your Dynamics AX installation (located by default at "C:\Program Files (x86)\Microsoft Dynamics AX\60\Client\Bin") and select Microsoft.Dynamics.Administration.dll.
- Click the Ellipses (...) for the Dynamics Management dll field, browse to the bin folder of your Dynamics AX installation (located by default at "C:\Program Files (x86)\Microsoft Dynamics AX\60\Client\Bin") and select Microsoft.Dynamics.AX.Framework.Management.dll.
After completing the above steps, the EmpowerID DAX Configuration window should look similar to the below image.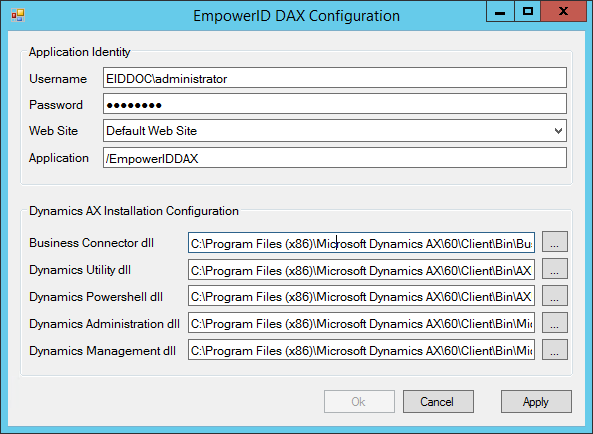
Click Apply and then click Ok to close the window.
After installing the Web service, make note of the service URL. You will need this URL when connecting EmpowerID to your Dynamics AX directories. The default URL is https://YourServerName/EmpowerIDDAX/DAXUserService.svc, where YourServerName is the FQDN of your Dynamics server.
To create an account store for your Dynamics AX User directory
In the navigation sidebar, expand Admin, then Applications and Directories, and click Account Stores and Systems.
- Click the Actions tab, and then click the Create Account Store action.

- Search for and select Microsoft Dynamics AX User from the list of system types and then click Submit.

- Enter the Name and the ServiceUrl and then click Submit.
To configure EmpowerID to manage the DAX account store
EmpowerID supports the configuration of attribute synchronization rules for flowing attribute changes between directories and the EmpowerID Identity Warehouse. Attribute Flow rules are visually configured and are always relative to the relationship between an attribute in a directory and the corresponding attribute in the EmpowerID Identity Warehouse. Attribute Flow rules define the specific fields and attributes that are synchronized between the EmpowerID Identity Warehouse person objects and the external user accounts to which they are linked. Additionally, Attribute Flow rules can be weighted by account store. For example, if you have connected EmpowerID to an HR system as well as Active Directory, and you want any changes made to an attribute in the HR system to take priority over changes made in Active Directory or EmpowerID (while allowing changes to be made in any system), you would give a higher score for each CRUD operation originating from the HR account store and correspondingly lower scores for the Active Directory account store. The following flow rules are available: No Sync ( Red Circle) — When this option is selected, no information flows between EmpowerID and the native system. Bidirectional Flow (Bidirectional Green Arrow) — When this option is selected, changes made within EmpowerID update the native system and vice-versa. For most attributes, this is the default setting. Account Store Changes Only (Left Pointing Arrow) — When this option is selected, changes can only be made in the native system and are then passed to EmpowerID. EmpowerID Changes Only (Right Pointing Arrow) — When this option is selected, changes can only be made in EmpowerID and are then passed to the native system. The following CRUD operations are available: Create — This operation is used to create an attribute value for an existing attribute when the value of that attribute is null. Update — This operation is used to update the value of an attribute. Delete — This operation is used to delete the value of an attribute. From the Account Stores tab of the Account Stores and Systems page, search for the account store you just created and click the Account Store link for it. Click the Attribute Flow Rules tab to view the current rules for the account store. Please note that the attributes available depend on the account store. To change the flow for an attribute, click the Attribute Flow drop-down located between the Person Attribute column and the External Directory Attribute column, and select the desired flow direction from the context menu. To change the score for any of the available CRUD operations (Create, Update and Delete), enter the new score in the appropriate field. By default, scores are weighted evenly, which means that a change to an attribute originating in one connected external directory has the same authority as a change to an attribute occurring in another connected external directory. EmpowerID only considers scores for attribute CRUD operations when multiple account stores with the same user records are connected to EmpowerID, such as would be the case if an HR System and this account store were being inventoried by EmpowerID.attributeflowrules.mp4
| AccountInboxPW.mp4
|
On the navbar, expand System Logs > Policy Inbox Logs and click Account Inbox. Dashboard — This tab provides a quick summary of account inbox activity. Not Processed — This tab displays a grid view of all inventoried user accounts not yet used to provision a new EmpowerID Person or joined to an existing Person. Any accounts that fail to meet the Join and Provision rules are displayed here as well. Failed — This tab displays a grid view of any account joining or provisioning failures. Ignored — This tab displays a grid view of all accounts ignored by the account inbox. Accounts are ignored if they do not qualify as user accounts. Joined — This tab displays a grid view of all accounts joined to an EmpowerID Person. Joins occur based on the Join rules applied to the account store. Processed — This tab displays a grid view of all accounts that have been used to either provision a new EmpowerID Person or joined to an existing EmpowerID Person. Provisioned — This tab displays a grid view of all accounts that have been used to provision an EmpowerID Person. Provisioning occurs based on the Provision rules applied to the account store. Orphans — This tab displays a grid view of all user accounts without an EmpowerID Person. All — This tab displays a grid view of all user accounts and the status of those accounts in relation to the Account Inbox.Monitor inventory
The Account Inbox page appears. This page provides tabbed views of all information related to processing new user accounts discovered in a connected account store during inventory. An explanation of these tabs follows.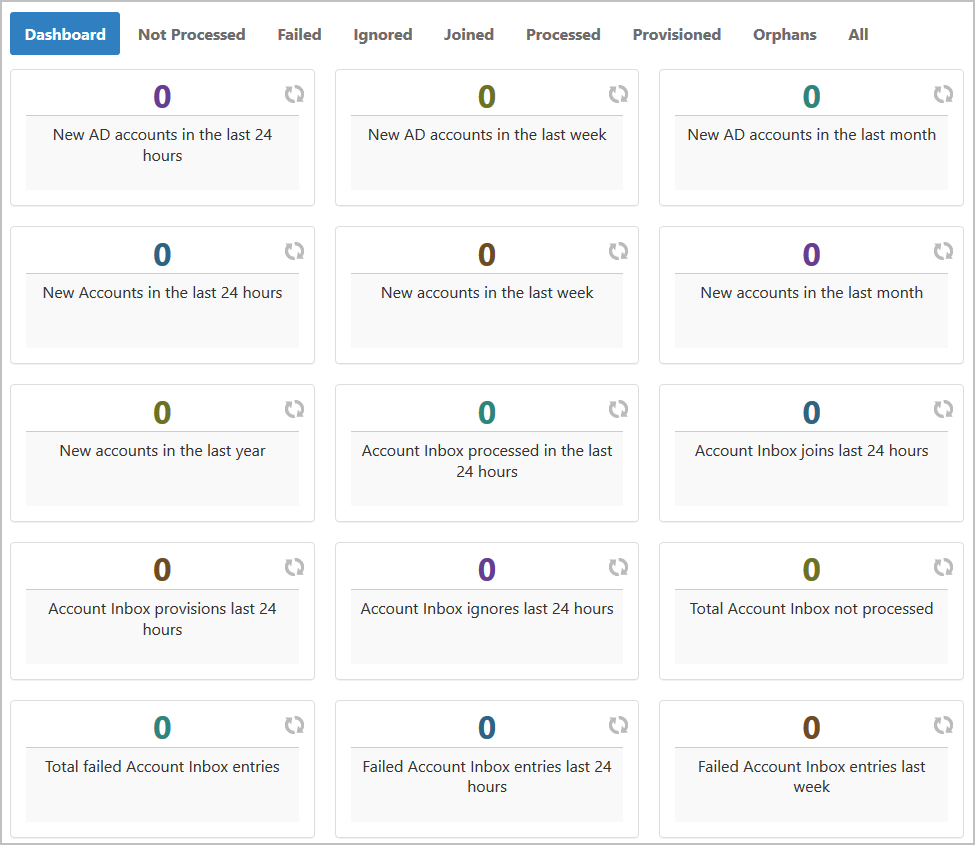
- No labels