Assigning Access Levels to Management Role Definitions
- Universal Importer for Confluence
- Phillip Hanegan
- Kim Landis (Unlicensed)
After you create a Management Role Definition, the next step is to add Access Levels to it. In this way, when you create a child Management Role from the definition, that role will have an initial amount of access assigned to it. Without Access Levels, a Management Role Definition is a blank container. You can still use it as a base template for creating Management Roles, but those Management Roles will not grant any initial access to resources.
Although you can add also Access Levels to child Management Roles, adding as many as possible to a Management Role Definition before creating any child Management Roles allows you to build a consistent framework for general resource allocation based on user roles. Once you have added Access Level Assignments to a Management Role Definition, you can tailor child Management Roles with additional Resource Roles to meet the needs of your organization.
To assign resources to a Management Role Definition
- In the navigation sidebar, expand Identities and click Manage Delegations.
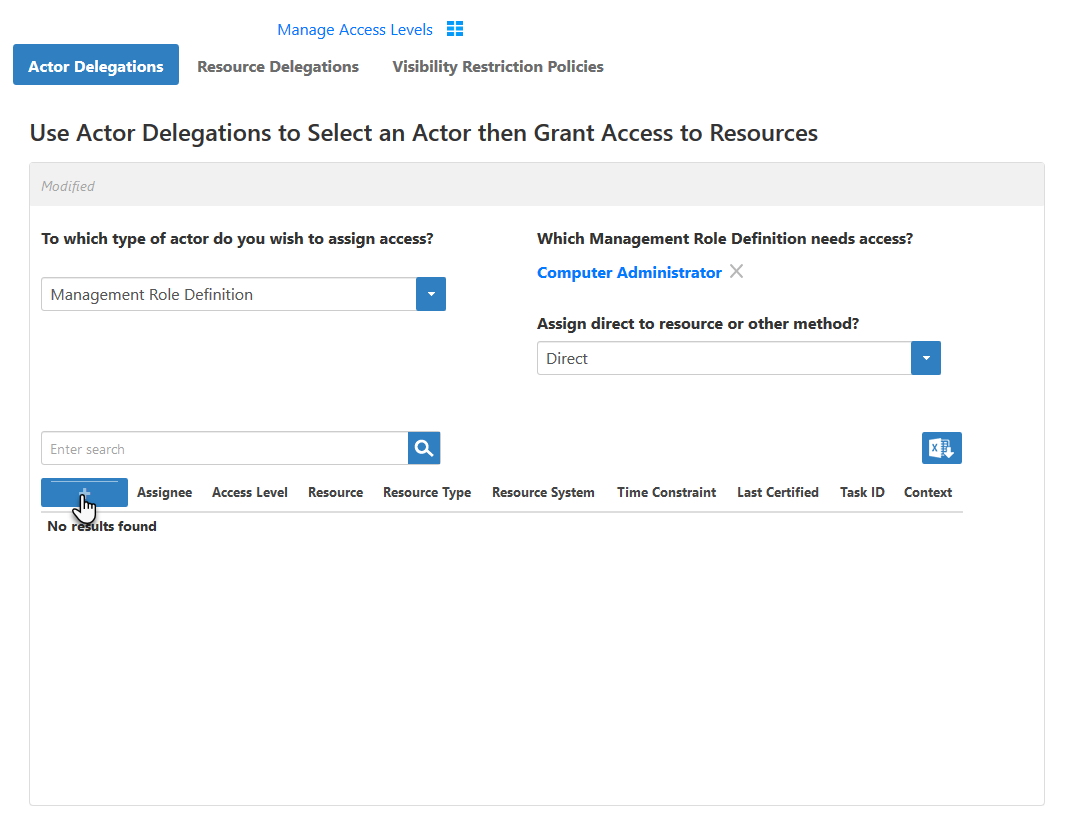
- On the Actor Delegations tab of the Delegations page that appears, click the Assignee type drop-down and select Management Role Definition.
- In the Enter a Management Role Definition Name to Search field that appears, enter the name of the Management Role Definition to which you want to delegate access and then click the tile that appears to select it.
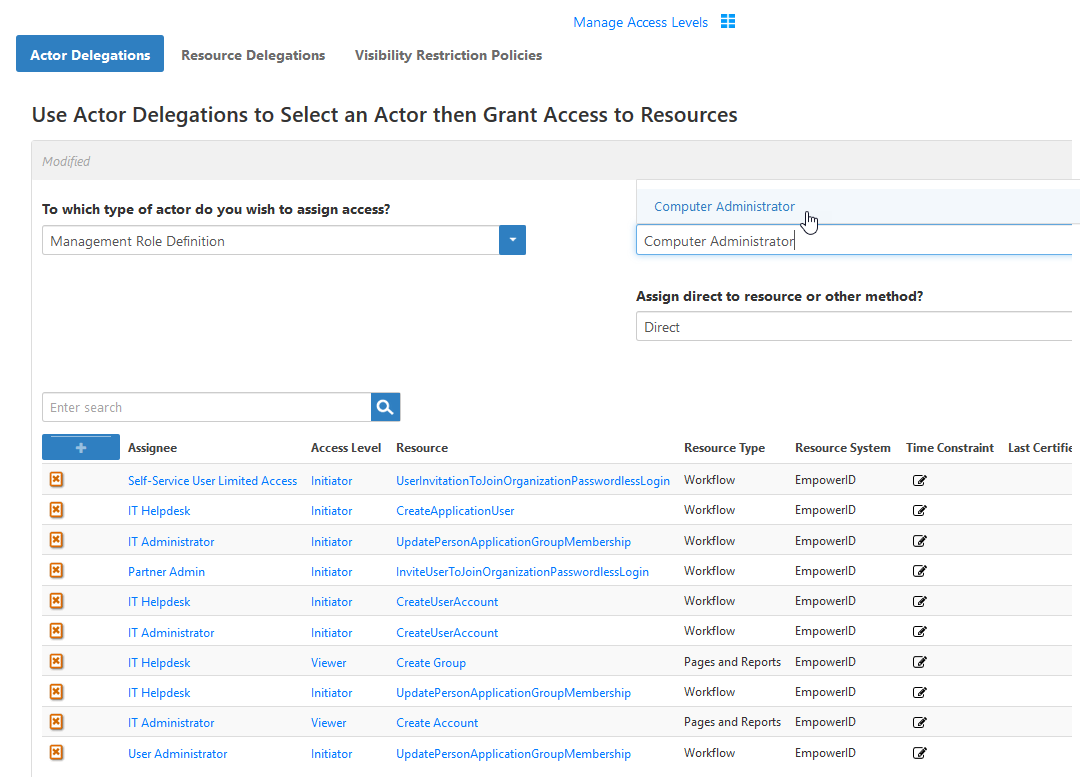
- Click the Assignment Type drop-down and select Direct.
- From the Assignments grid, click the Add Assignments (+) button.
- In the Grant Access dialog that appears, select the resource type to which to give the Management Role Definition an access level. This example uses the Workflow resource type.
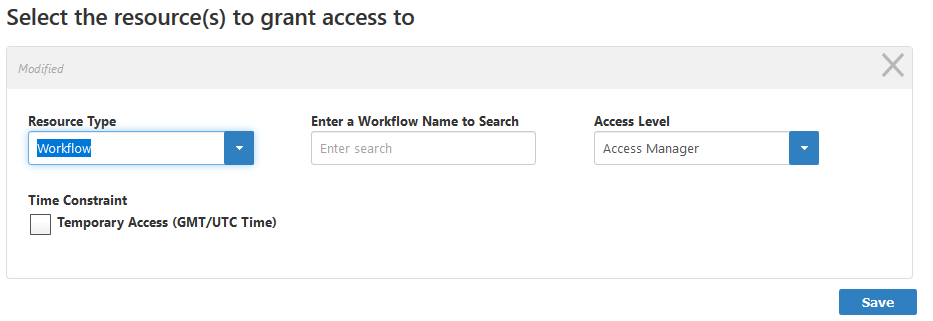
Type the name of the specific resource in the Enter a <Resource Type> Name to Search field and click the tile for that resource. This example uses the Enable Computer workflow.
The name of this field changes to reflect the selected resource type. With Workflow as the resource type, the name of the field is Enter a Workflow Name to Search.
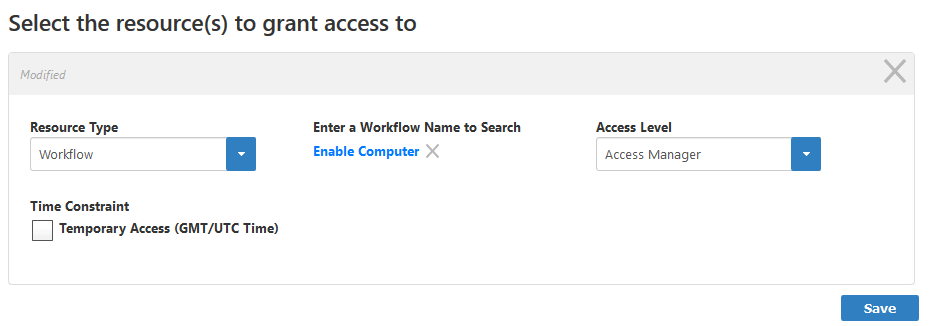
- Click the Access Level drop-down and select one. This example uses the Initiator Access Level.
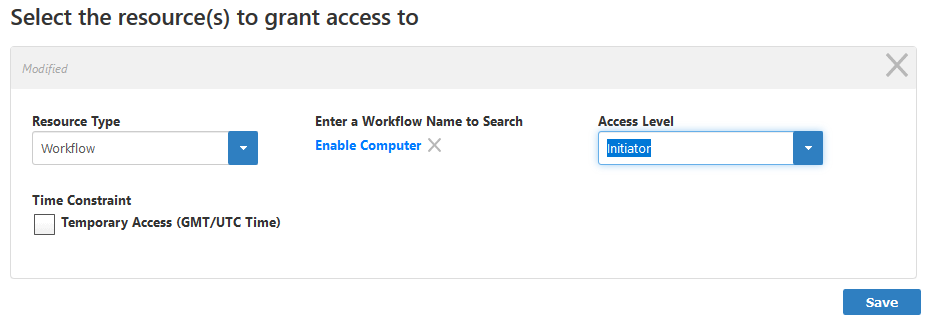
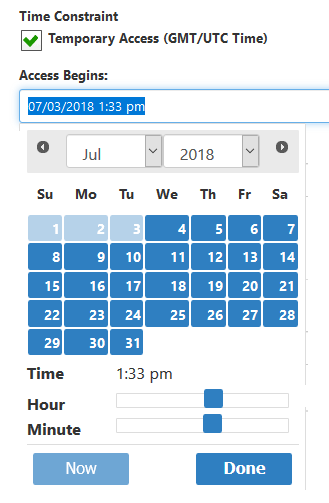
- Optionally, select Time Constraint. Click in the Access Begins and Access Ends fields and pick values from the Calendar to limit the dates and times users with the Management Role have access to the resource.
- Click Save to add the Access Level assignment to the Shopping Cart.
- Repeat for each Access Level to assign to the Management Role Definition. When you have finished adding assignments, click the Shopping Cart icon, enter a reason for the assignments in the cart dialog and then click Submit.