Configuring the Reverse Proxy for the Web Application
- Universal Importer for Confluence
- Phillip Hanegan
- Kim Landis (Unlicensed)
The EmpowerID Reverse Proxy is a dockerized NGINX module that sits in front of Web servers, assuming the name and IP addresses of those servers in order to provide authentication and authorization to users requesting the resources (in the form of URIs) provided by those servers. Incoming requests are intercepted by the Reverse Proxy and directed to the EmpowerID IdP, where users must authenticate before authorization for the requested resources can be granted.
Prerequisites
Because the EmpowerID Reverse Proxy is a dockerized NGINX module, you must install docker and then pull the Reverse Proxy image from EmpowerID's Docker repository. To pull the repo, you will need to have a login supplied by EmpowerID.
To configure the Reverse Proxy for Andy's Beans
- On the server with docker, locate and open the proxy.nginx file with any text editor (or SSL.nginx for TLS/SSL).
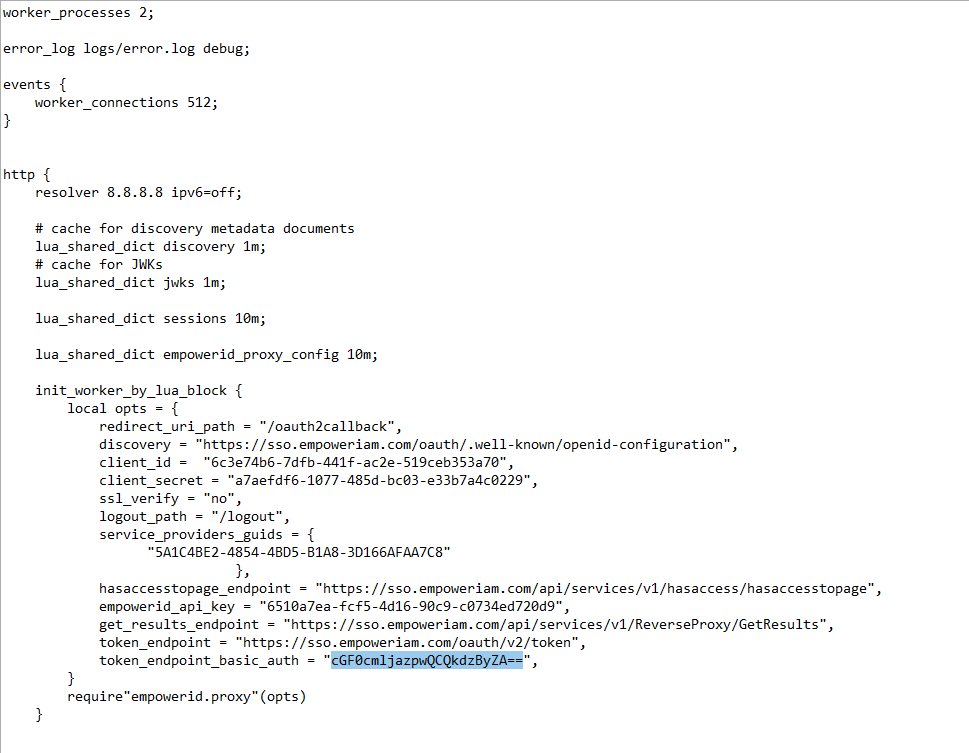
- In the proxy.nginx file (or the SSL.nginx file for TLS/SSL), locate the discovery setting and update the FQDN with that for your environment.
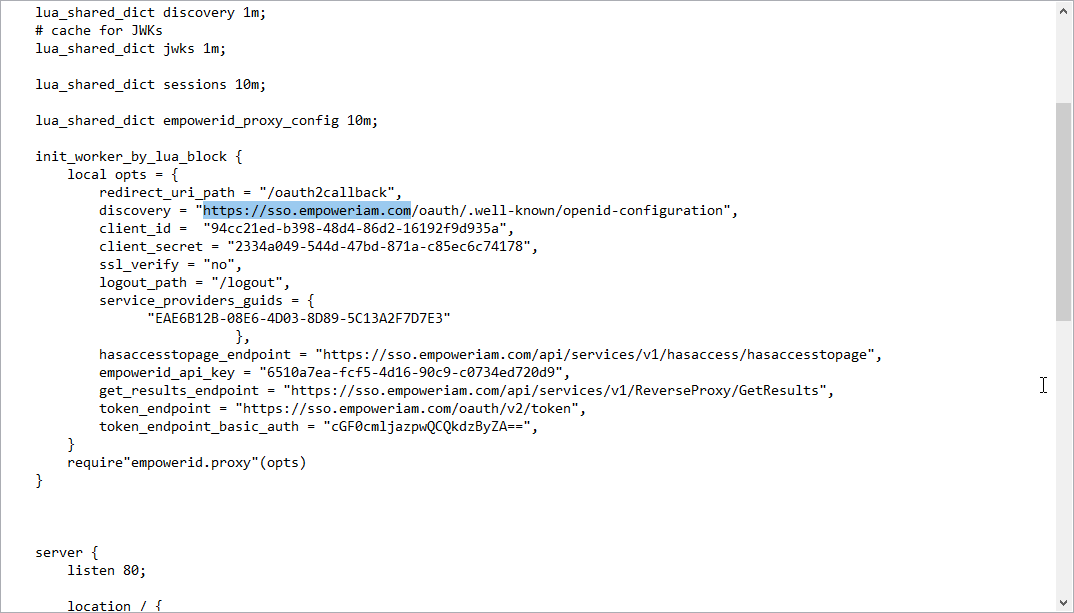
- In the proxy.nginx file (or the SSL.nginx file for TLS/SSL), locate the client_id setting and replace the default value with that of the OAuth application you created for the reverse proxy application.
- In the proxy.nginx file (or the SSL.nginx file for TLS/SSL), locate the client_secret setting and replace the default value with that of the OAuth application you created for the reverse proxy application.
In the proxy.nginx file (or the SSL.nginx file for TLS/SSL), locate the service_provider_guids setting and replace the default value with that of the Connection ID for the SSO connection you created for the reverse proxy application. You can locate this in the Web interface by doing the following:
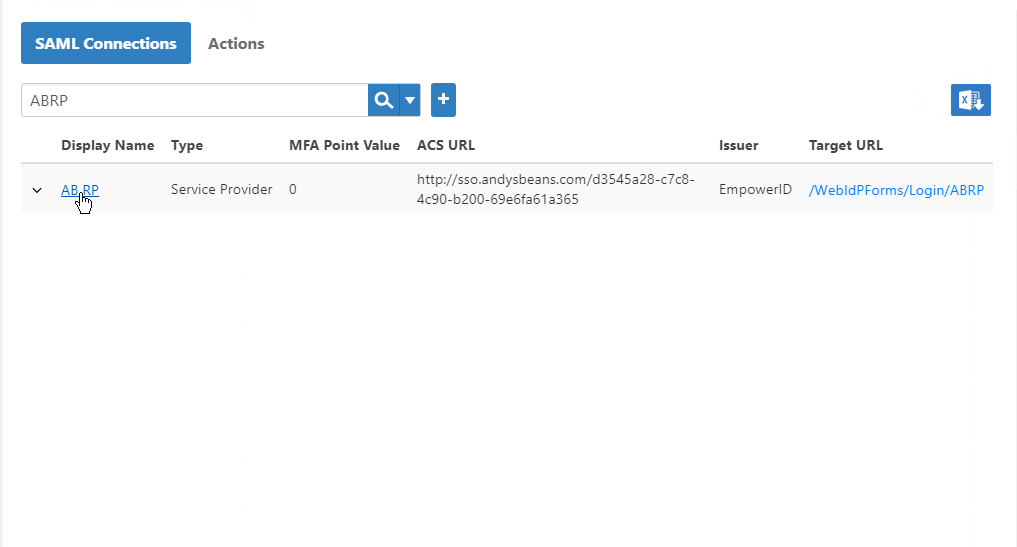
From the navigation sidebar, expand Admin > SSO Connections and click SAML.
Search for the SAML connection and the click the Display Name link for it.
From the Connection Details form that appears locate and copy the Connection ID.
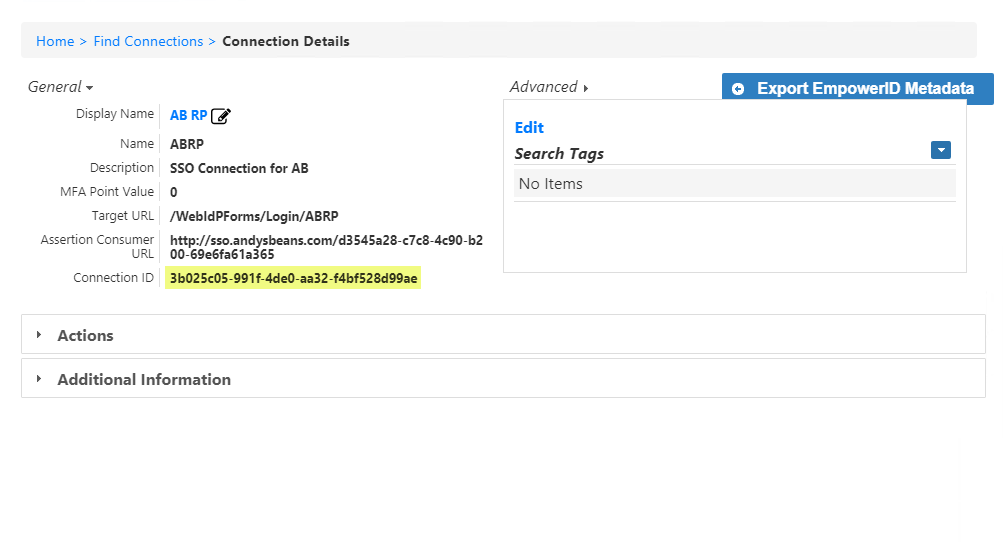
Convert the Connection ID to uppercase and then replace the default value for service_provider_guids as shown in the below image.
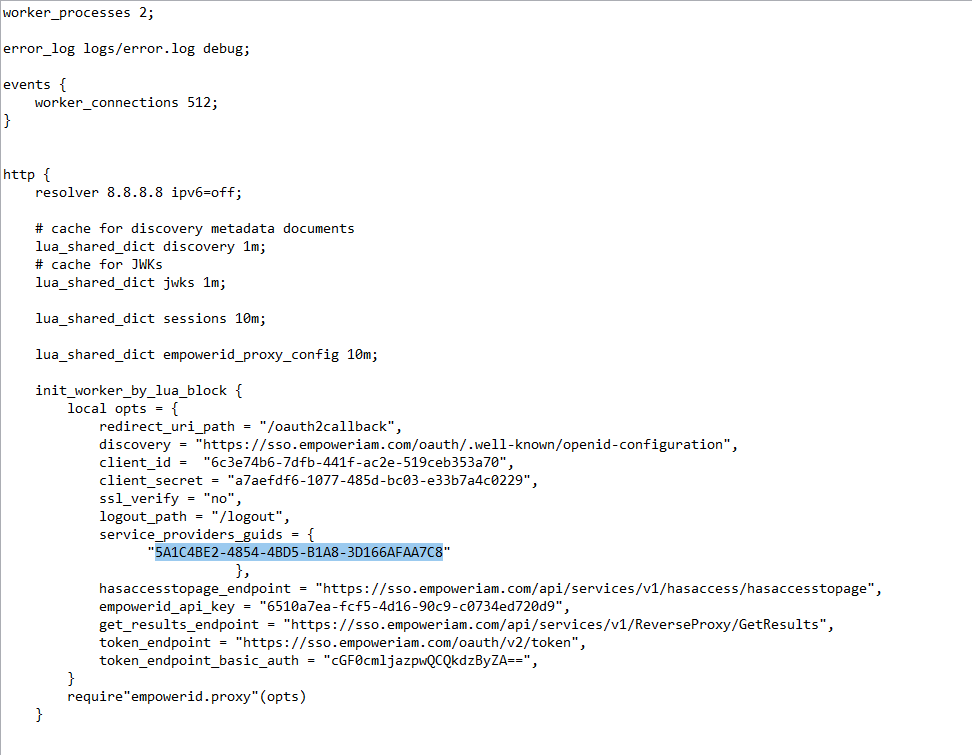
You can have up to 10 comma delineated service providers in the proxy.nginx or SSL.nginx file. GUIDs must be upper-case.
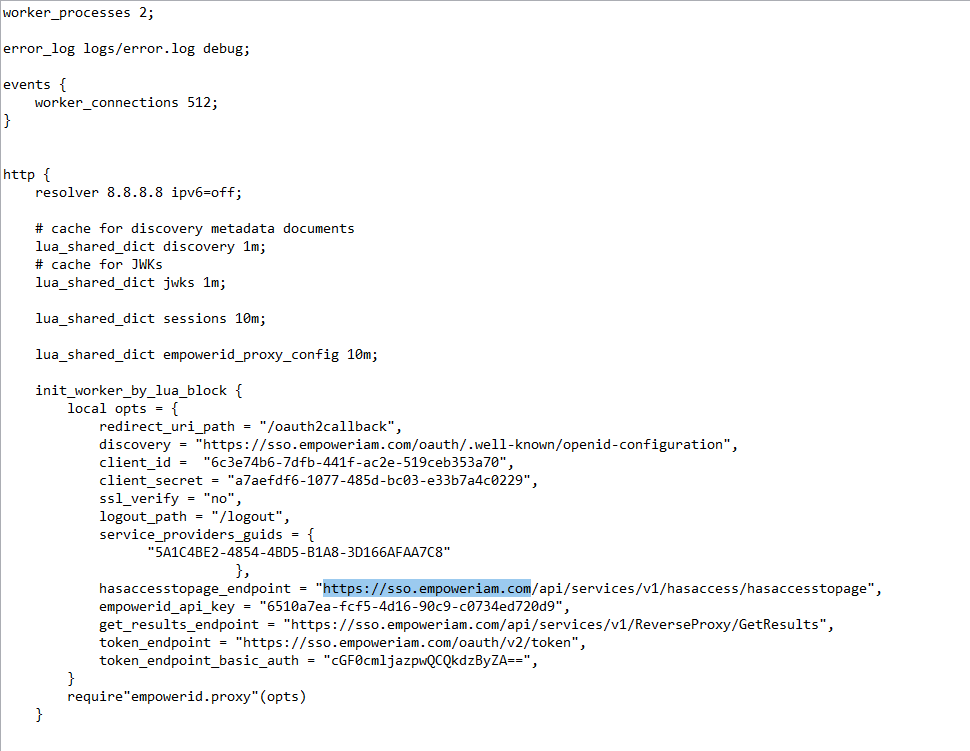
- In the proxy.nginx file (or the SSL.nginx file for TLS/SSL), locate the hasaccesstopage_endpoint setting and and update the FQDN with that for your environment.
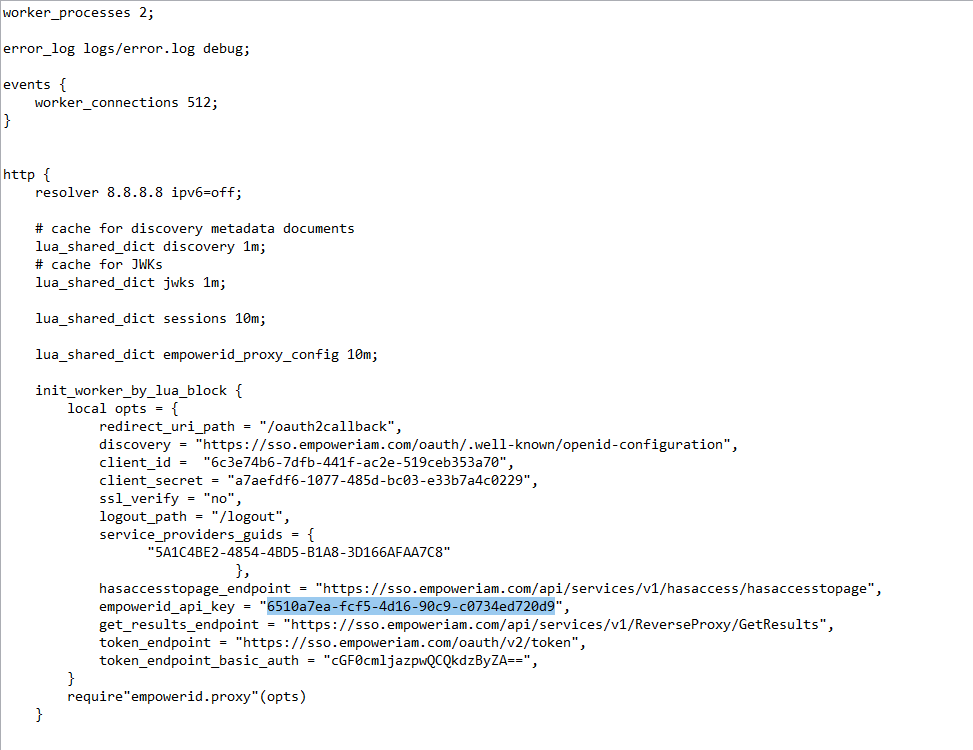
- In the proxy.nginx file (or the SSL.nginx file for TLS/SSL), locate the empowerid_api_key setting and replace the default value with that of the OAuth application you created for the reverse proxy application.
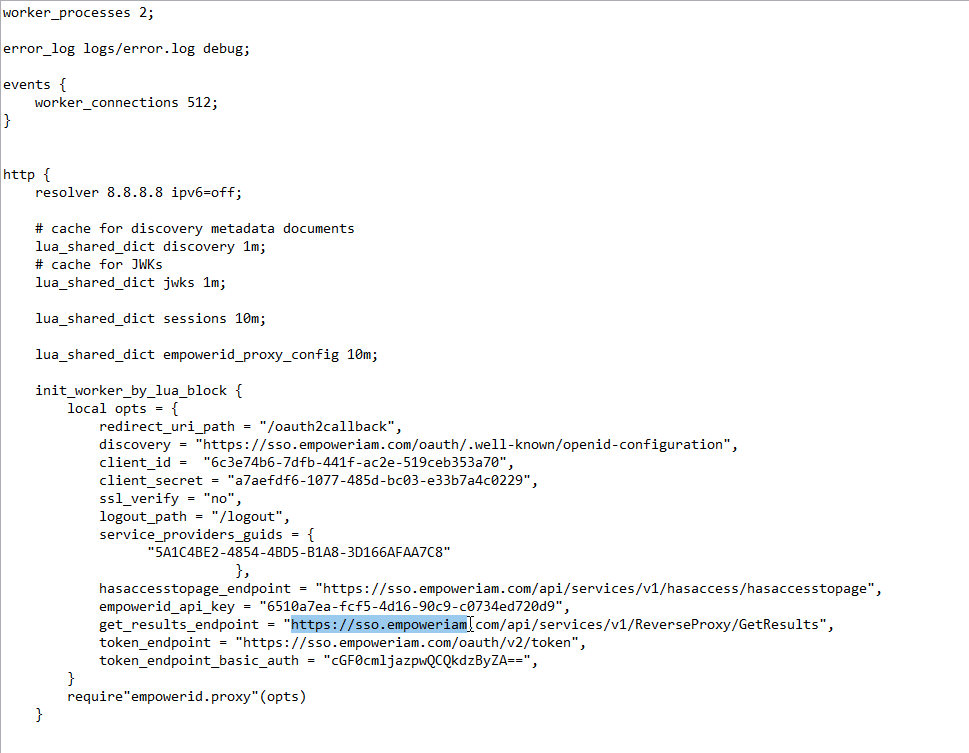
- In the proxy.nginx file (or the SSL.nginx file for TLS/SSL), locate the get_results_endpoint setting and and update the FQDN with that for your environment.
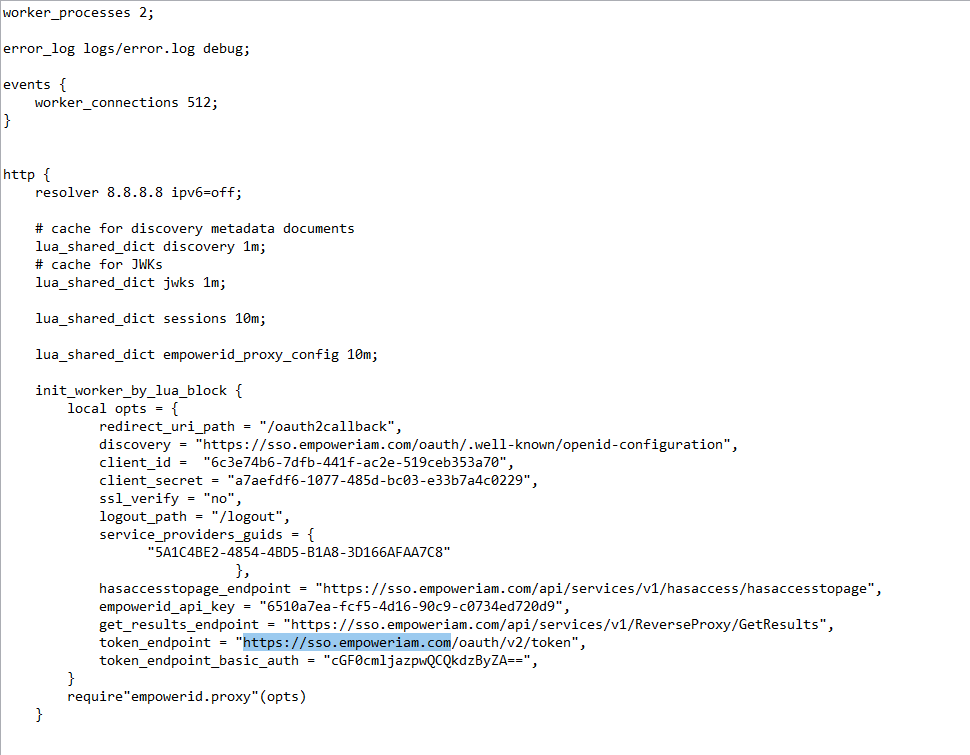
- In the proxy.nginx file (or the SSL.nginx file for TLS/SSL), locate the token_endpoint_basic_auth setting and and update the FQDN with that for your environment.
- In the proxy.nginx file (or the SSL.nginx file for TLS/SSL), locate the token_endpoint_basic_auth setting and replace the default value with the base64 encoded username and password for the person authorized to call the API endpoints for the reverse proxy.
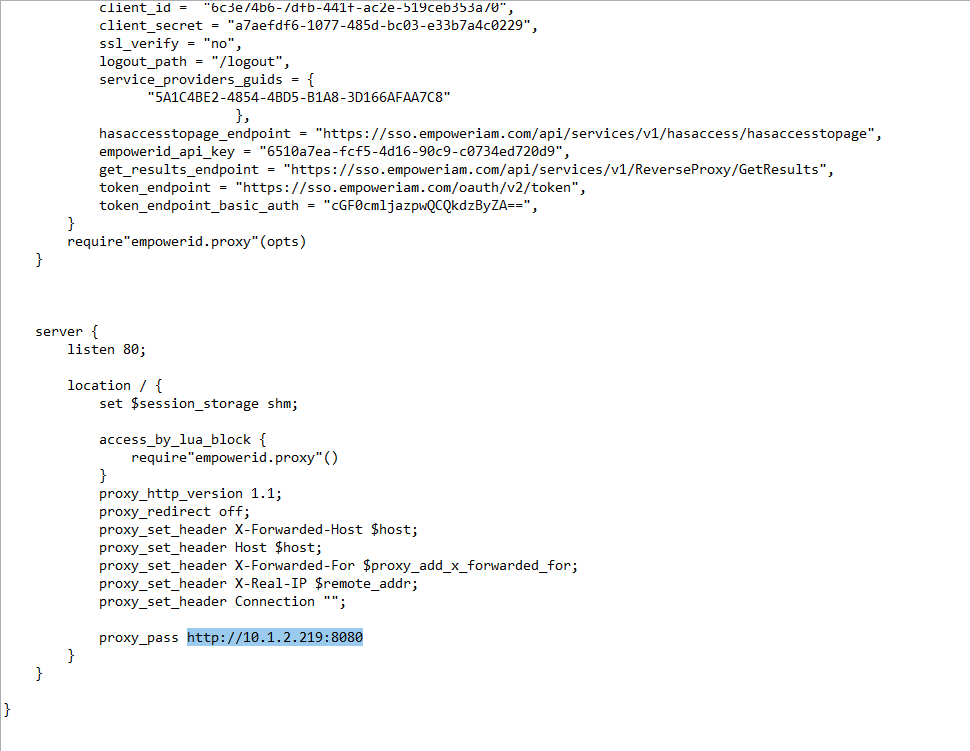
Navigate to the server section of the proxy.nginx file ( or SSL.nginx for SSL\TLS) and change the port for incoming traffic as needed.
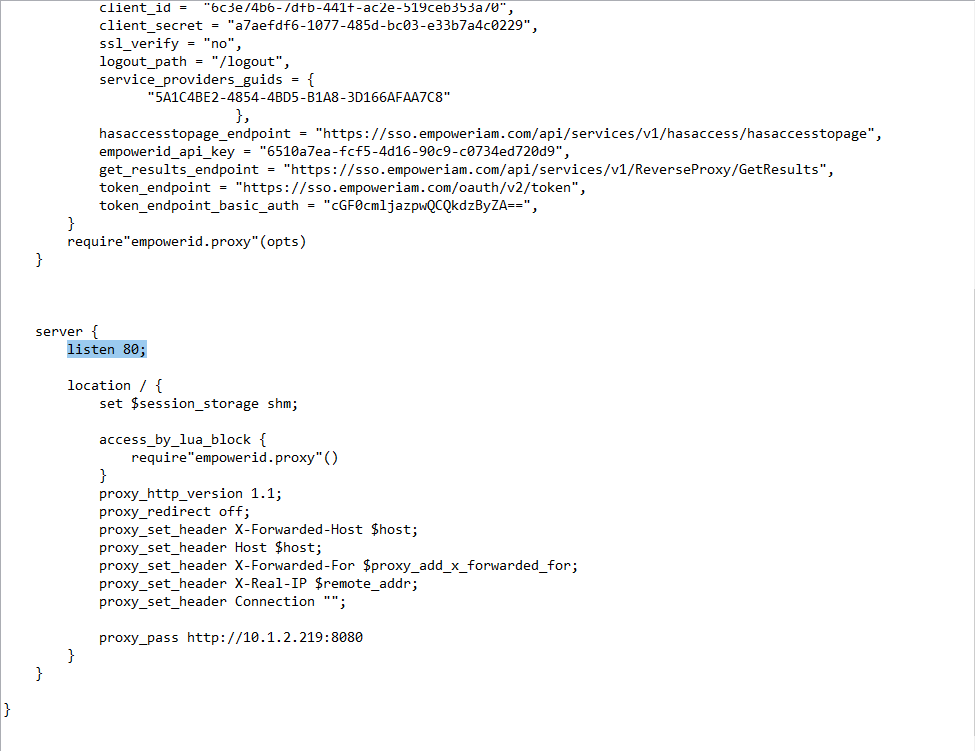
- In the server section replace the value of proxy_pass with the scheme, IP and port where the application is hosted on the server being protected by the reverse proxy.
Now that you have configured the Reverse Proxy for your environment, the next step is to configure Andy's Beans for the Reverse Proxy.