Getting an API Key
EmpowerID is an extendable Identity and Access Management (IAM), Single Sign-On and workflow development platform that uses thousands of workflow operations with real-time access checks to give organizations the security tools needed to control who can do what, where and when with their resources. Through its Web API, you the developer, can access and extend these features in your own applications. The API is built on the principles of REST and is organized around the components (resource objects, like user accounts, EmpowerID people, Exchange mailboxes, workflows, etc.,) of the EmpowerID platform. This topic is an introductory topic to using the EmpowerID API, showing the basic steps needed to successfully call it. To get started, have your organization assign you the SSO Application Developer Management Role. Among other things, this role gives you the ability to create OAuth applications in EmpowerID. Once you have the role, follow the rest of the topic to begin working with the EmpowerID API.
Prerequisites
Your organization’s resources—like its user accounts, groups and mailboxes, etc.,as well as the resources internal to EmpowerID—such as its workflows and the pages of the EmpowerID Web application—are protected application resources secured by various EmpowerID operations. These operations are protected code objects that when executed allow resources to be accessed in a way that is consistent with the operation and the type of resource being accessed. Some examples include adding users to groups, creating mailboxes, updating user attributes or even viewing the pages of the Web application. Before users can access a resource in a given way, their EmpowerID Person must have an access assignment for the operation or operations that allows them to do so. As API calls are essentially executions of EmpowerID operations via HTTP, the applications you create to call the API need to have an EmpowerID Person linked to them with the appropriate access. Otherwise, you will receive a 401: Unauthorized error. To facilitate API calls, your organization should create the requisite number of Person objects with the appropriate amount of access for the application’s intended purpose.
Getting an API Key
- From the Navigation Sidebar of the EmpowerID Web interface, expand Admin > SSO Connections and click OAuth.
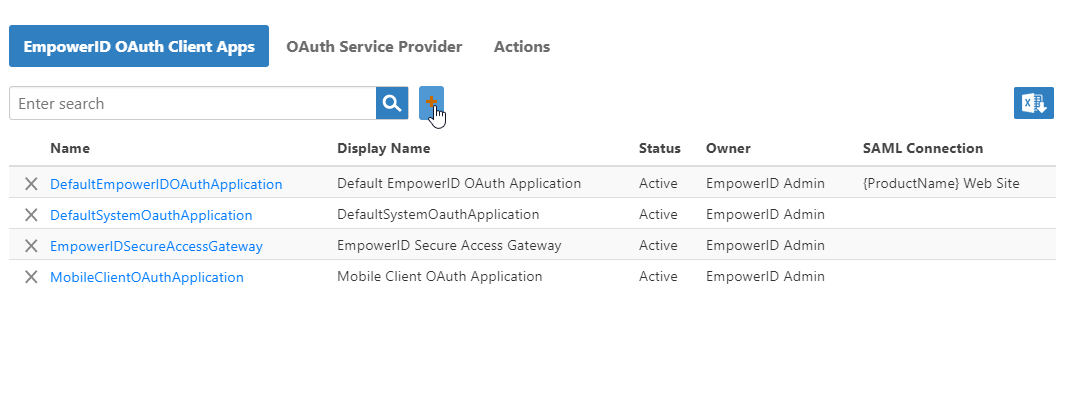
- From the EmpowerID OAuth Client Apps tab of the OAuth page, click the Add button.
- In the OAuth Provider Application Details page that appears, type a name, display name and description for the application in the Name, Display Name and Description fields, respectively.
- Select Active from Application Status.
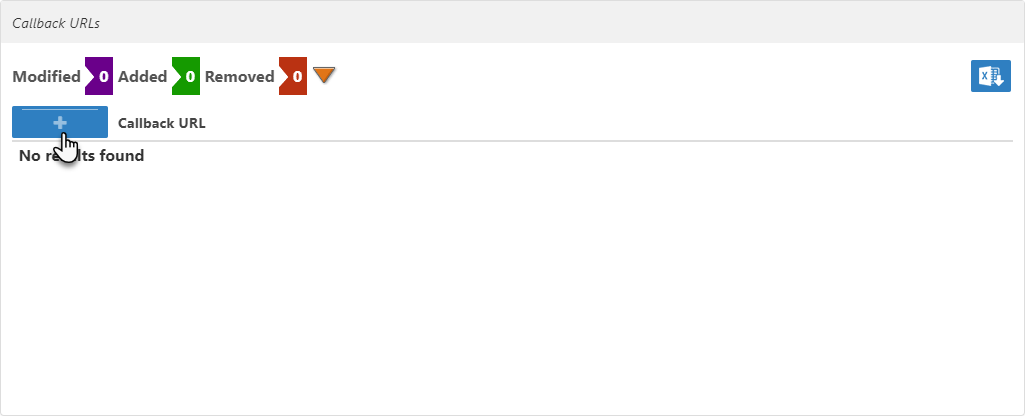
- Scroll to the Callback URLs section of the form and click the Add New button.
- In the Redirect URI field, enter https://yourserver/webidpforms/oauth/v2, replacing "yourserver" with the FQDN of your EmpowerID Web server.
- Click Save to close the Callback URLs dialog.
- Back on the main page, click Save.
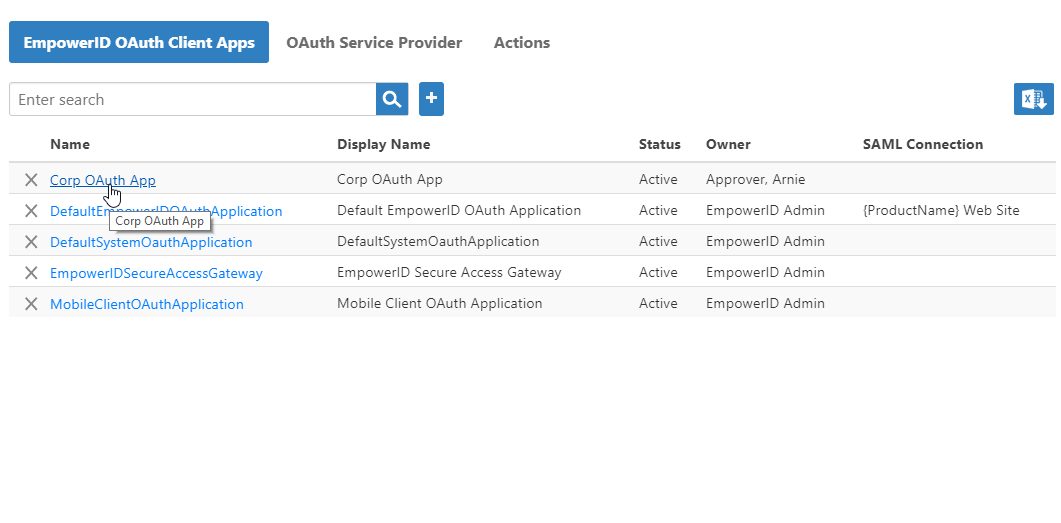
- Once the application is created, return to the EmpowerID OAuth Client Apps page and click the link for the application you just created.
- Copy the API Key, the Client ID and the Client Secret. You will need these to get an access token.


